

If you have chosen Google Slides to create a presentation, you probably already know that it is a great tool. It has many features that will help your presentation look decent. One of those features is the ability to make the image you add to your presentation transparent. You can easily do this using the image settings directly in the presentation.
You may need this if you want to put text in front of the image. Accordingly, you will need to change the transparency of the picture or photo. So, here’s how to do this in a few easy steps.
How to adjust image transparency in Google Slides
Well, if you want to change image transparency in your Google Slides presentation – follow these steps:
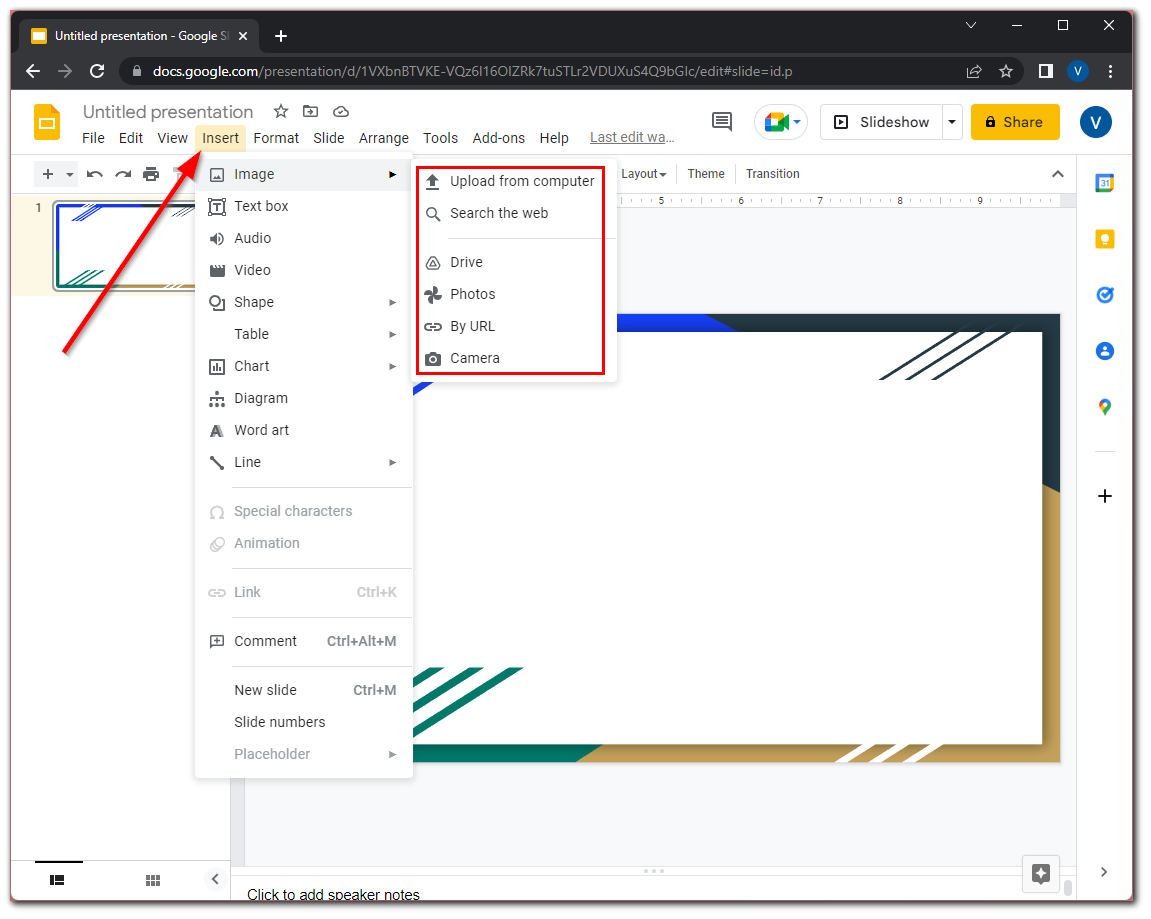
- First of all, open your presentation and add an image by clicking “Insert” and then “Image”.
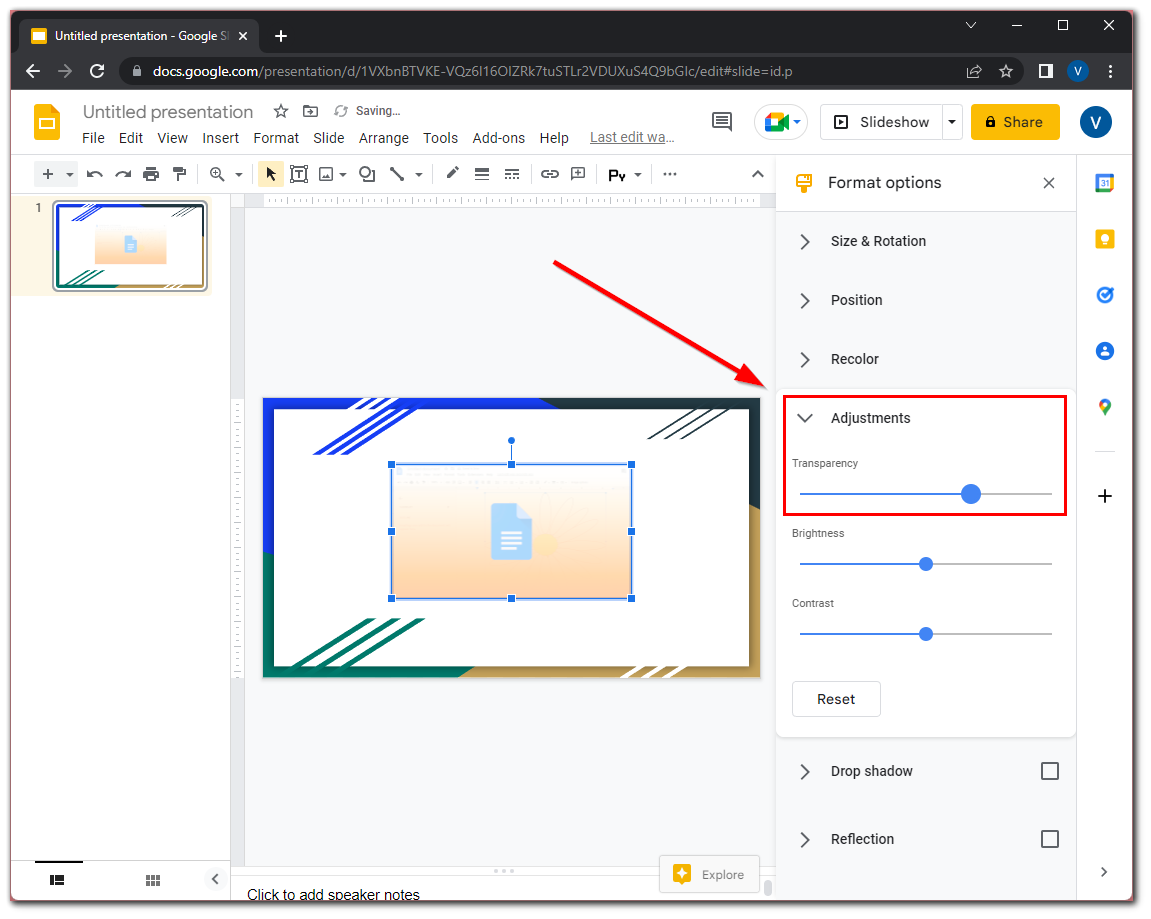
- After that, right-click on the image and select “Format options”.
- Now, go to “Adjustments” and change the “Transparency” index.
Once you have completed these steps, the image transparency will be changed in your Google Slides presentation. Using the Adjustments option you can also change the brightness and contrast of the image. If you want, there’s also a way to add animation to Google Slides.
How to change image transparency in Google Drawings
If you edit a picture or photo for your presentation in Google Drawings, you can immediately change its transparency. Just follow the further instructions:
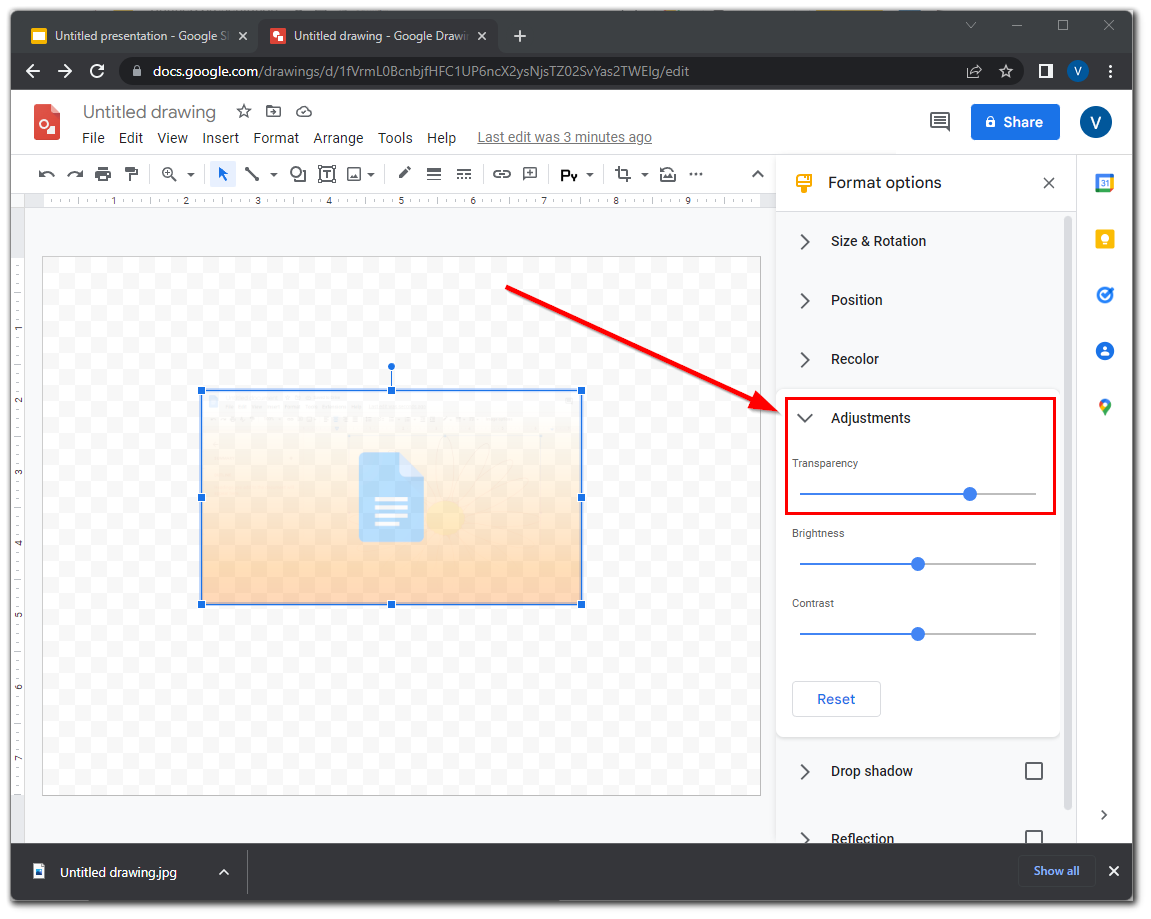
- First, open the image in Google Drawings using the “Insert” tab and select “Image”.
- After that, you can change its size and right-click on it to select “Format options”.
- Then do the same as in Google Slides. Just go to “Adjustments” and change the “Transparency” index.
After you have completed these steps, you will see that the image transparency is changed. Frankly, as for changing the transparency of the image, it is better to use the first option directly in Google Slides.
The thing is that if you save an image in Google Drawings, it will be added to Google Slide as a regular drawing on a white background. Yes, it will be transparent, but the white background will cover the text or part of the slide design.
How to delete a slide on Google Slides
Presentation formatting in Google Slides often requires adding a text box or inserting an image, but you may also need to organize the layout of the slides in your presentation. This may require you to add a new slide or delete an existing one. It is very easy to do this. Just follow these simple steps:
- Open your presentation and go to the slide you want to delete.
- Then click on the “Slide” tab and select “Delete slide”.
- You can also right-click on the slide and select “Delete”.
As you can, it is really very simple. You should know that you can adjust not only the image size but also the slide size.
Read Also:
- How to add a header or footer to Google Slides
- How to add or remove slides numbers in Google Slides
- How to start or join a Google Meet from Slides, Sheets, or Docs
How to add effects to images in Google Slides
The image formatting menu in Google Slides includes two additional effects that you can apply to your image: reflection and shadow. You can easily adjust these options:
- Open your Google Slides presentation and go to the image you want to edit.
- Then right-click on it to select “Format options”.
- Now, scroll down the options and check the “Drop shadow” and “Reflection” boxes.
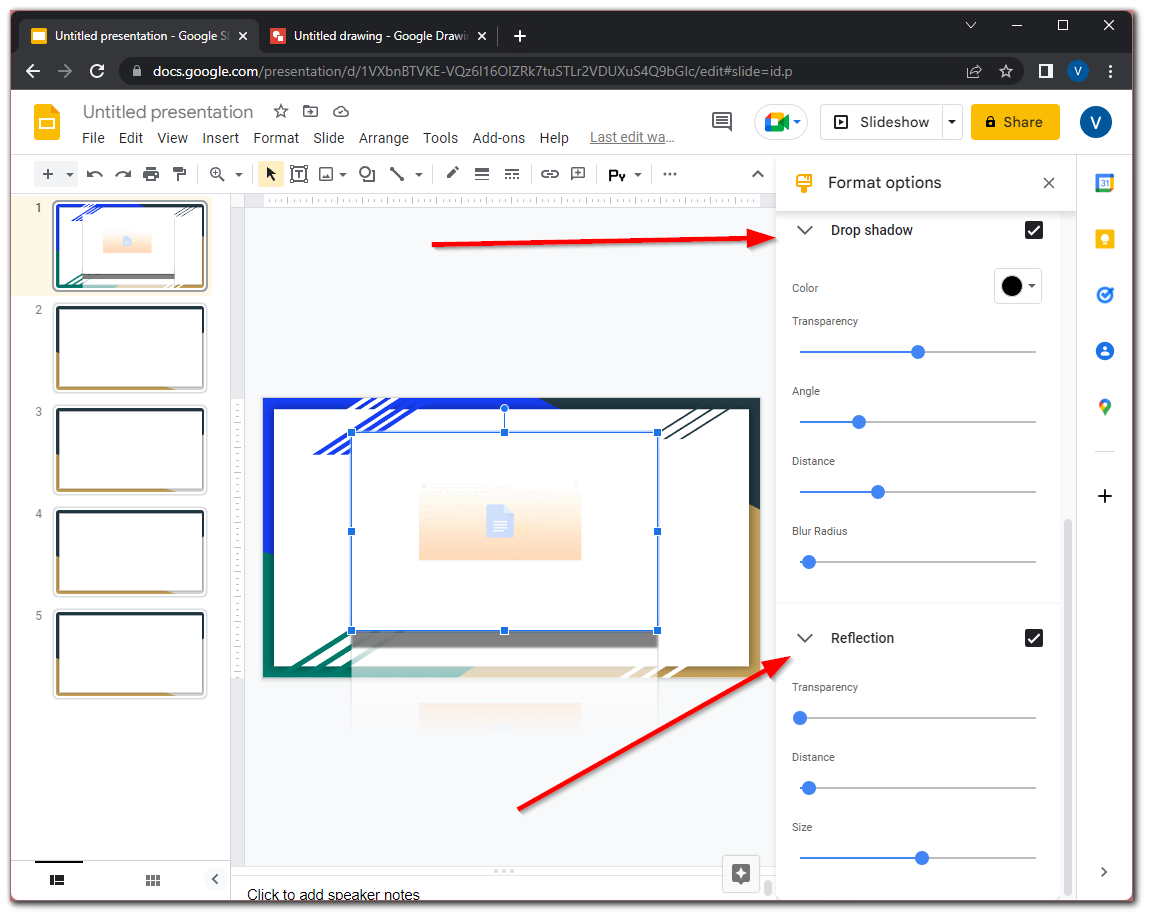
- You can then change the options and see how your image is edited.
All effects will be applied automatically. To remove the effects, just uncheck the boxes next to the subcategories’ names.


