

Google Slides is Google’s presentation app. It’s completely free – the only requirement for use is that you have a Google account.
Because Google Slides is a free Web app, it’s not as full-featured as desktop apps like Microsoft PowerPoint and Keynote. Nevertheless, it makes up for its lack of aesthetic features by boasting powerful collaboration capabilities. Some users find such features to be the best.
Anyway, one of the most exciting features of Google Slides is that you can add headers and footers to your slideshow. There are several methods to do this. You can use the text box and apply it to all slides or an individual one. Alternatively, you can also use the slide number box.
So let’s take a closer look at every method.
How to add a header or footer to Google Slides by inserting a text box
One way to add a header or footer to Google Slides is to insert a text box. The text box can then be moved to the top or bottom of the slide and formatted to your liking. So if you want to do so – follow these instructions:
- First, open the Google Slides web page and create a presentation.
- After that, select the slide where you want to add a header or footer.
- Next, click on the Text Box button in the toolbar or click Insert and choose Text Box.
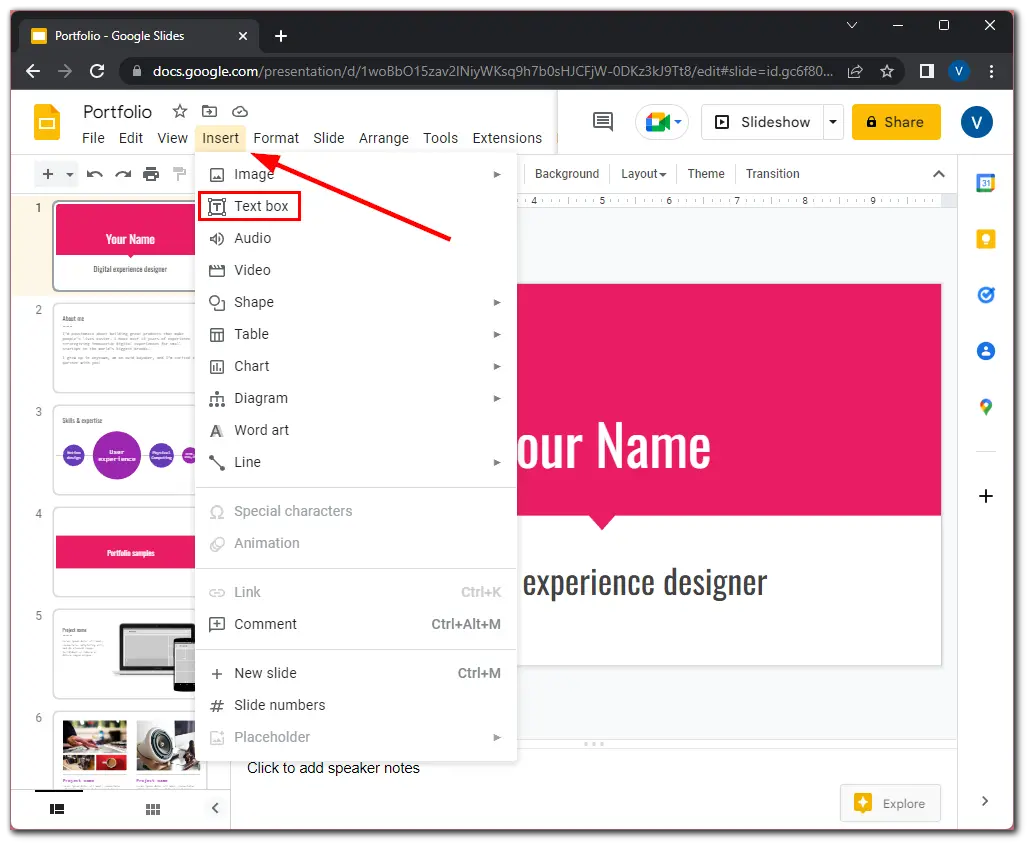
- Then drag to draw the desired text box size, or just click to place the box and enter the text.
- Finally, move the text box by dragging it to the top of the slide as a header or footer.
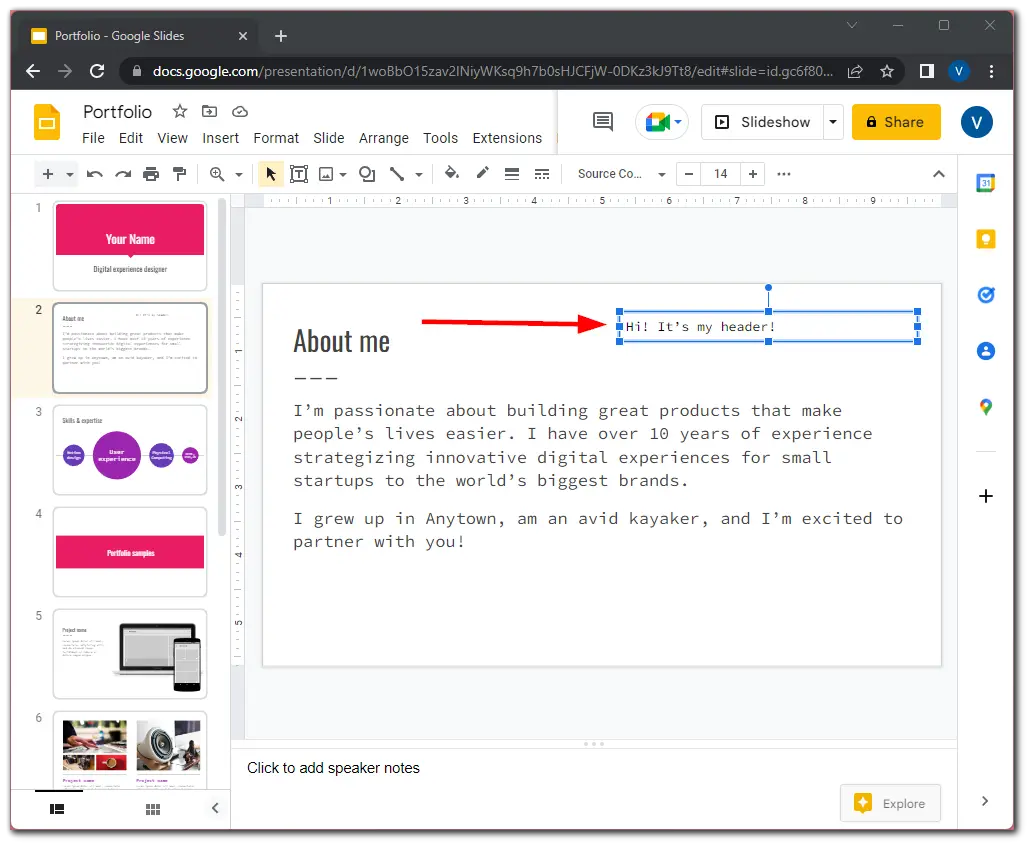
Once you have completed these steps, you will add a header or footer to your Google Slides presentation by inserting a text box. You can copy the text box and paste it to other slides. However, if you want each slide to have the same header or footer, you can edit the master slide.
How to add a header or footer in Google Slides by editing a master slide
If you want to edit a master slide in your Google Slides presentation to add headers or footers, you can follow these steps:
- Open your presentation in Google Slides.
- Then click Slide in the toolbar and select Edit theme from the list of options.
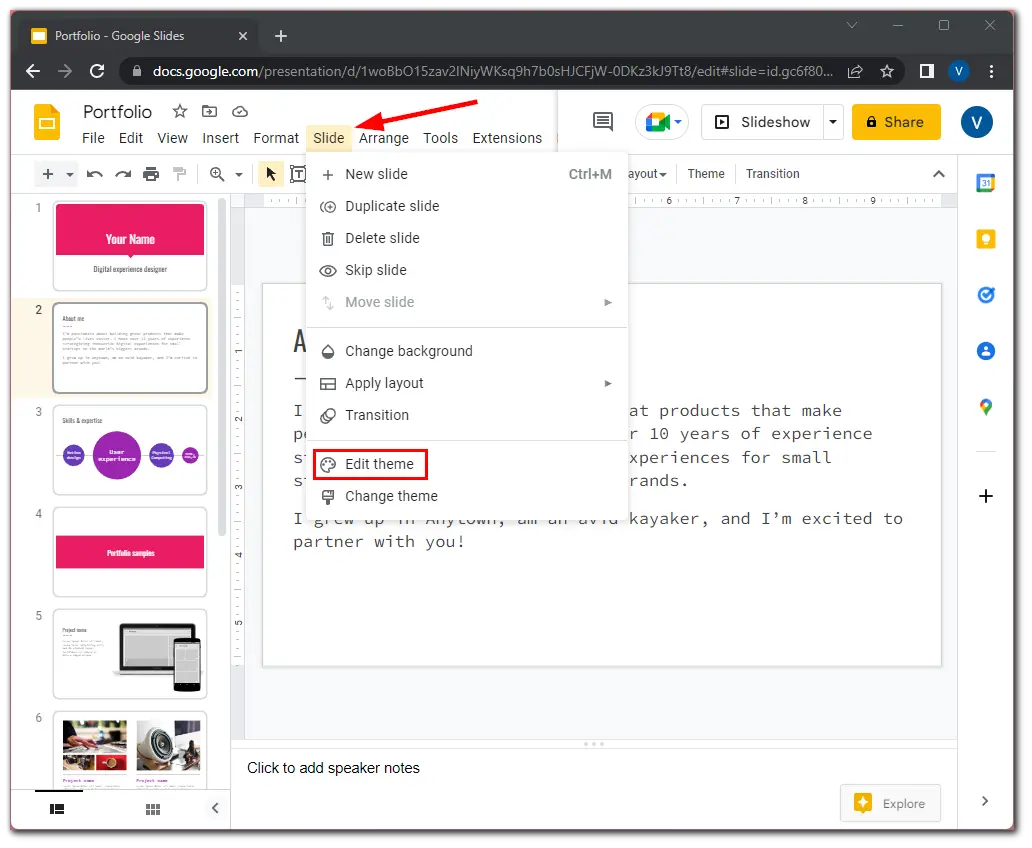
- Once the Theme Builder opens, select the slide at the top directly below the Theme and above the Layouts.
- Next, click on the Text Box button in the toolbar or click Insert and select Text Box.
- After that, drag to draw the desired text box size, or just click to place the box and type the text.

- Finally, click on the X button in the upper-right corner of the Theme Builder to close it.
As you can see on the screenshot below, there’s a header at the top left corner of each slide.
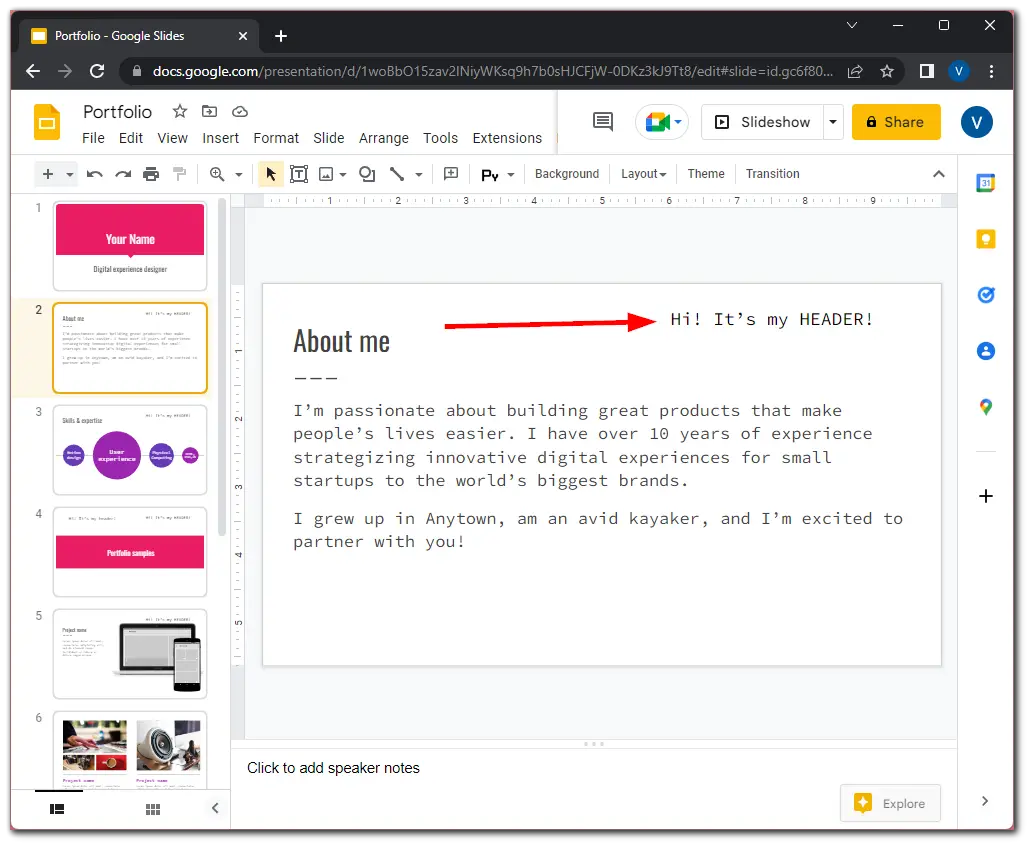
Once you have completed these steps, you will return to presentation editing mode and see the header or footer you added to each slide.
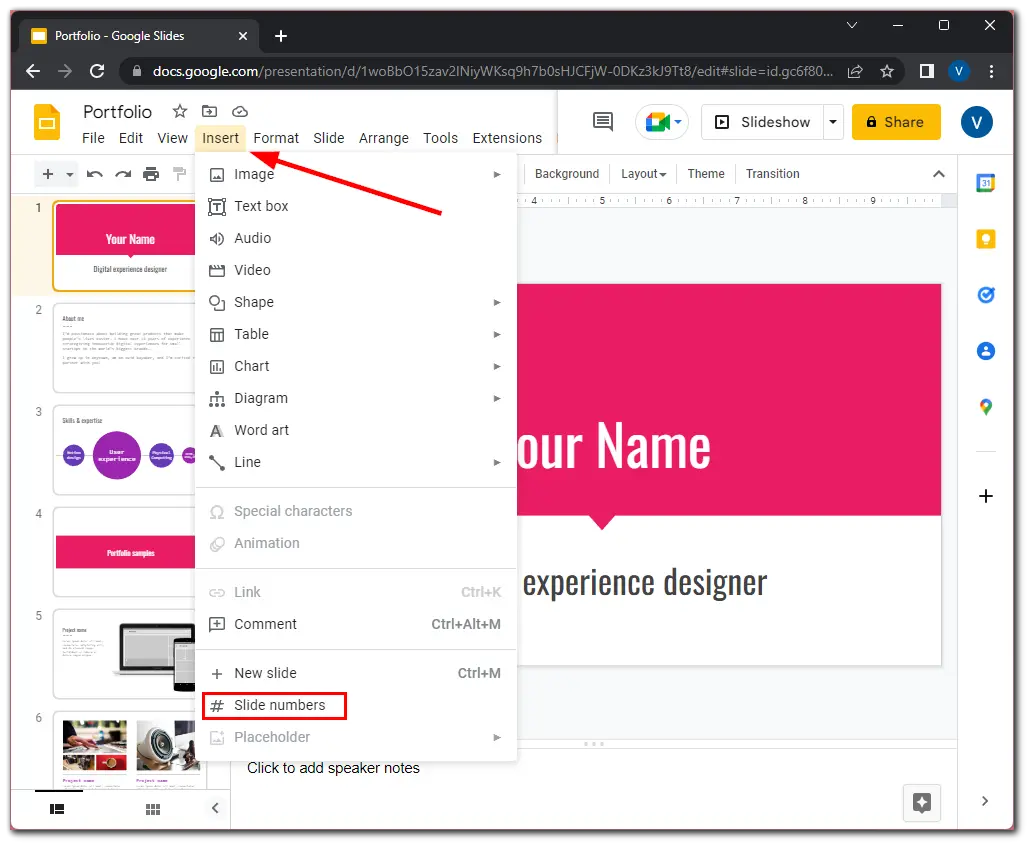
How to add a header or footer in Google Slides using the slide number box
This method is for footers only. It is a text box used for slide numbers. They are located in the lower right corner of each slide. You can also use this field to add footer text. To use it, do the following:
- Open your presentation in Google Slides.
- Then select the slide, click Insert, and select Slide numbers.
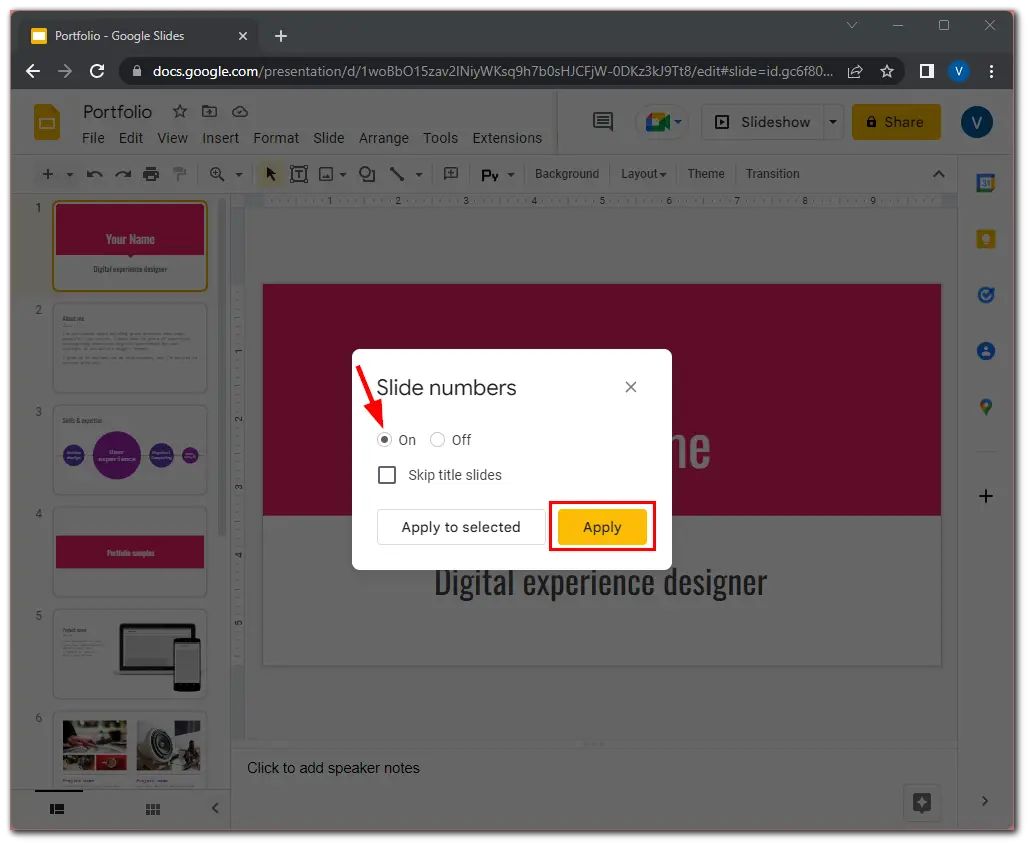
- After that, check On and click Apply.
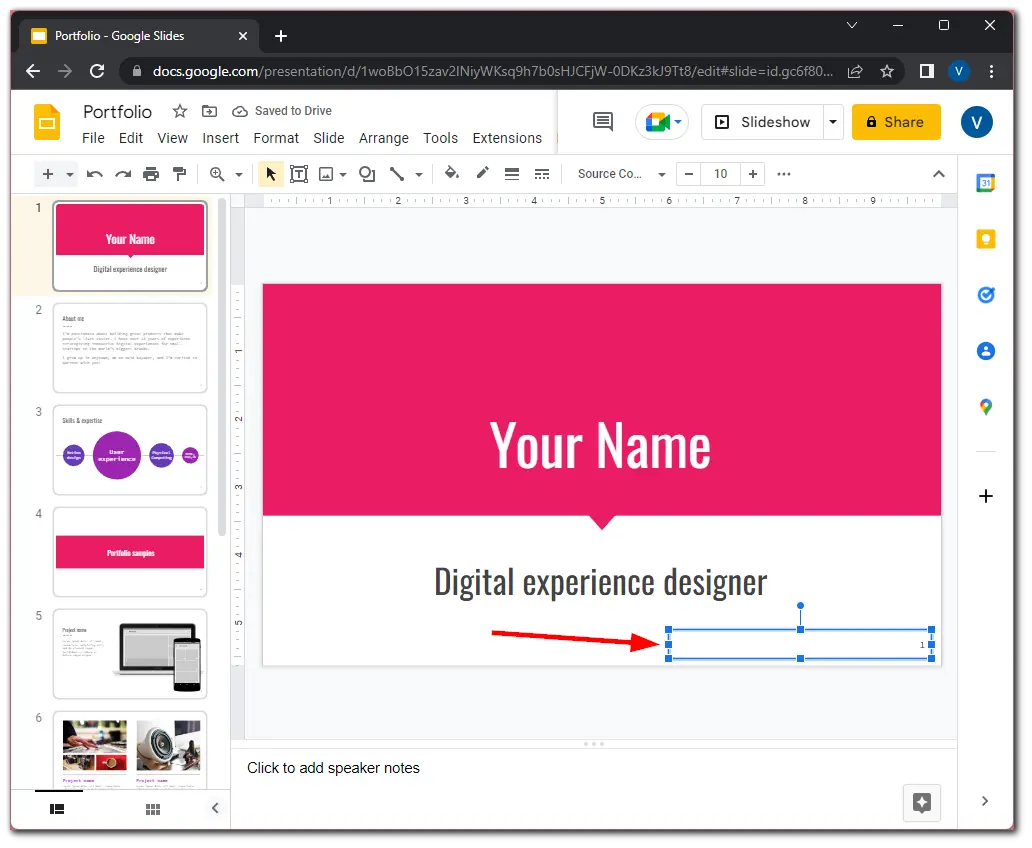
- Now, click on the number text box at the bottom right corner of the slide and drag it to the left to expand.
- Finally, double-click on this text box and enter the text.
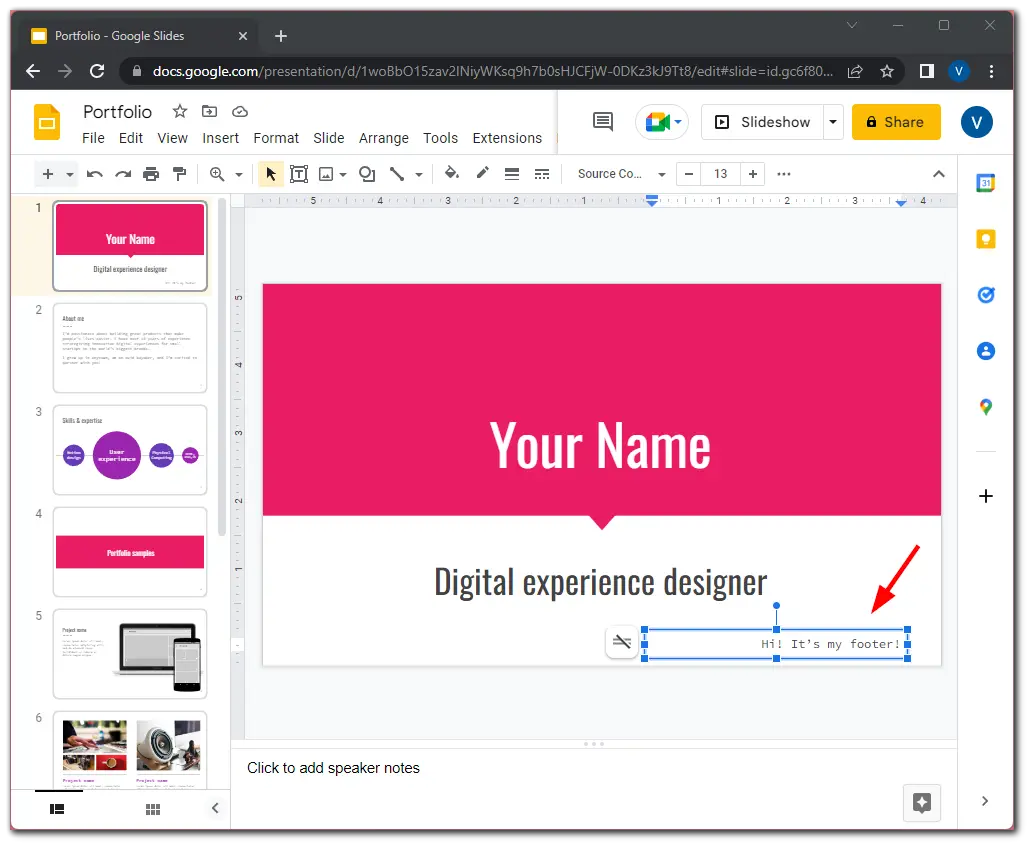
Remember that you need to perform these steps for every slide where you want to add a footer.
As you can see, there’s nothing really complicated about adding headers and footers in Google Slides. I hope this guide will bring your presentation to perfection.
What is Google Slides in more detail?
Google Slides is a tool for creating and editing presentations. With Slides, users and teams can create unique presentations and share them with others. The finished presentations can be viewed on most devices and displayed on the big screen.
You can create a presentation from scratch or use templates in Google Slides. Templates are available for topics ranging from portfolios to product presentations. There are many tools for creating presentations: changing backgrounds and fonts, inserting graphs, tables, images and videos, shapes, text boxes, and animations. You can share your presentations with colleagues or save them as PDF and PPTX files.
Since Google Slides is only available online, it assumes collaborative editing and presentation creation. This requires sharing a link to the presentation or sending an invitation to Google Mail. Once accessed, participants with access will be able to make changes to the layout and leave comments.


