

Many of you who have watched streams on Twitch or YouTube have probably seen the notifications pop up on the streamer’s screen. Often they notify the streamer that a donation has been sent to him, someone has started following his channel, or a subscription has been purchased. All of this comes in the form of alerts.
If you plan to stream with OBS, you should know how to set up these alerts. Setting up a donation in OBS is done only through third-party services that provide a service to collect the streamer’s voluntary rewards. That’s why you will need to register for such service additionally. So, let’s take a closer look at how to add alerts to OBS and set up your stream.
How to set up alerts on OBS Studio using StreamElements
The stream alerts feature isn’t built-in to OBS Studio, so you must use third-party services such as StreamElements. First of all, you need to create an account on StreamElements. Then you can start to set it up. Fortunately, there are many pre-made alert packs built into their software. So, if you don’t want to create custom alerts, you can use pre-made ones.
So, to select alerts, you can follow these steps:
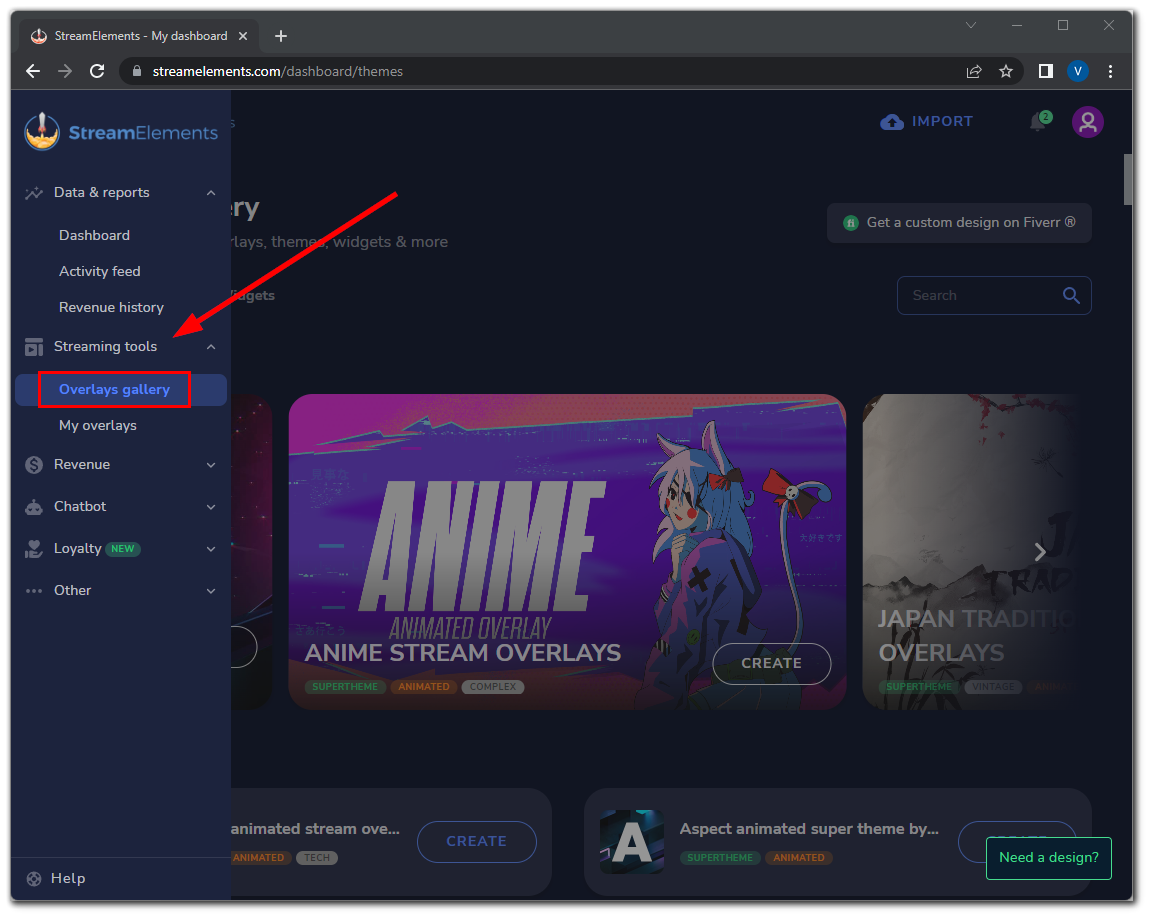
- Open the StreamElements website and click on the hamburger button at the top left corner of the page.
- Then click on the “Streaming Tools” tab and select “Overlays gallery”.
- After that, open the “Alerts” tab.
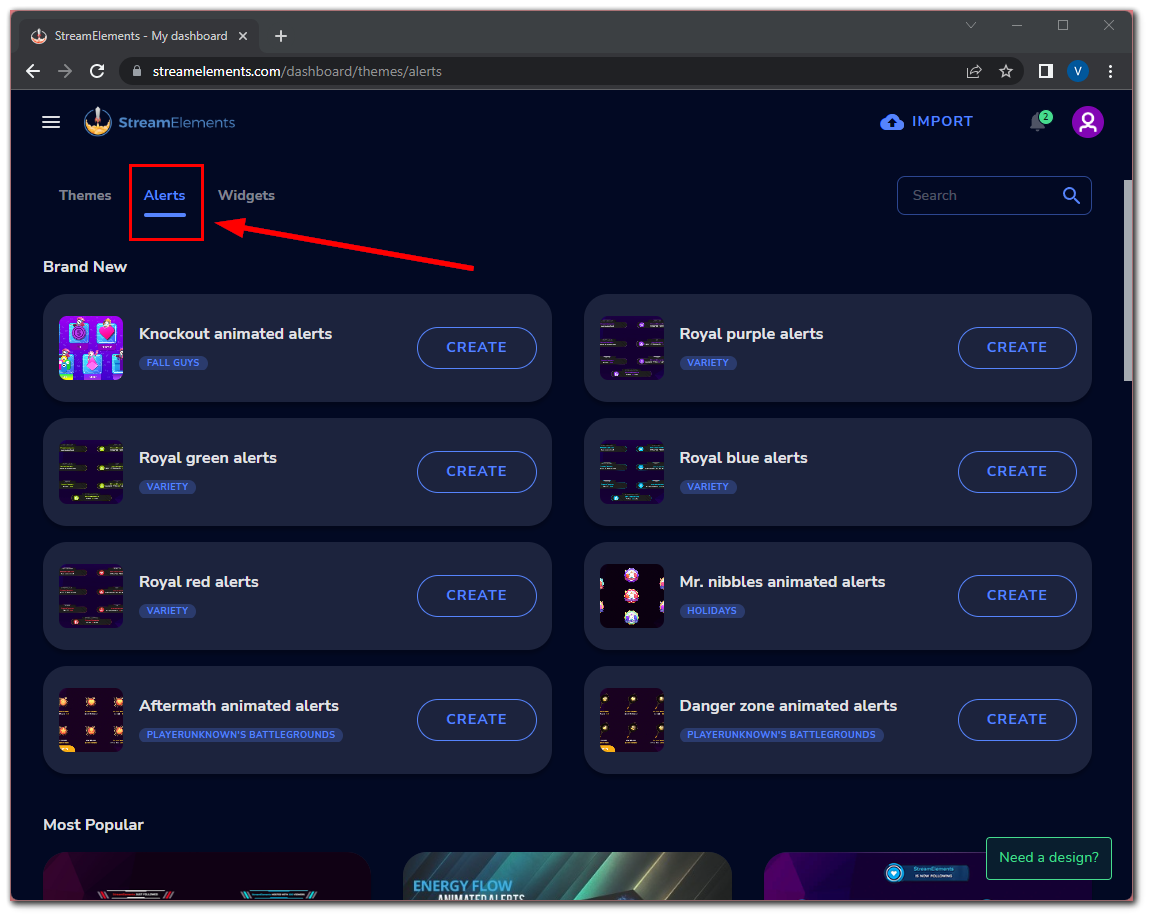
- Here you will see different alert packages. Just scroll down and choose the one you like.
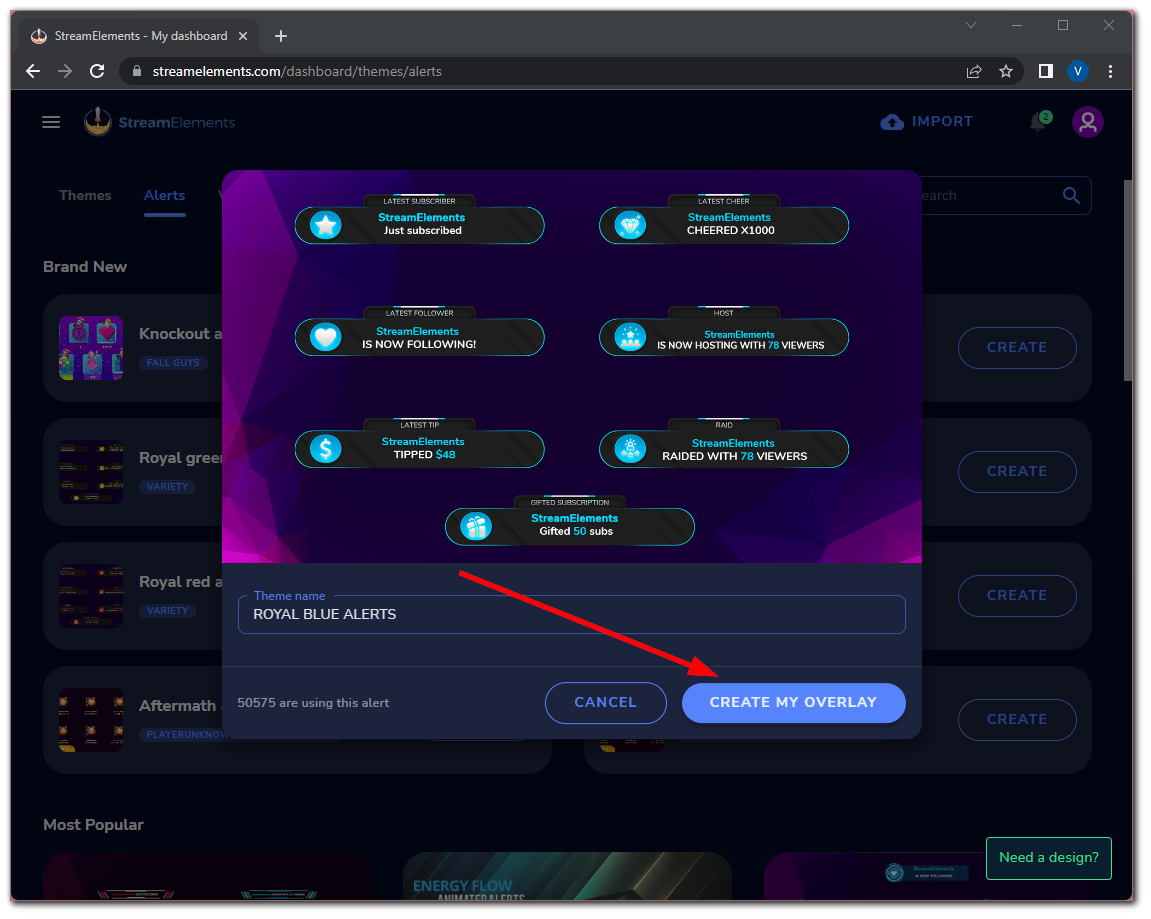
- Now, click on the “Create” button.
- In the appeared window select “Create a new overlay” and click “Continue”.
- Next, click “Create My Overlay”.
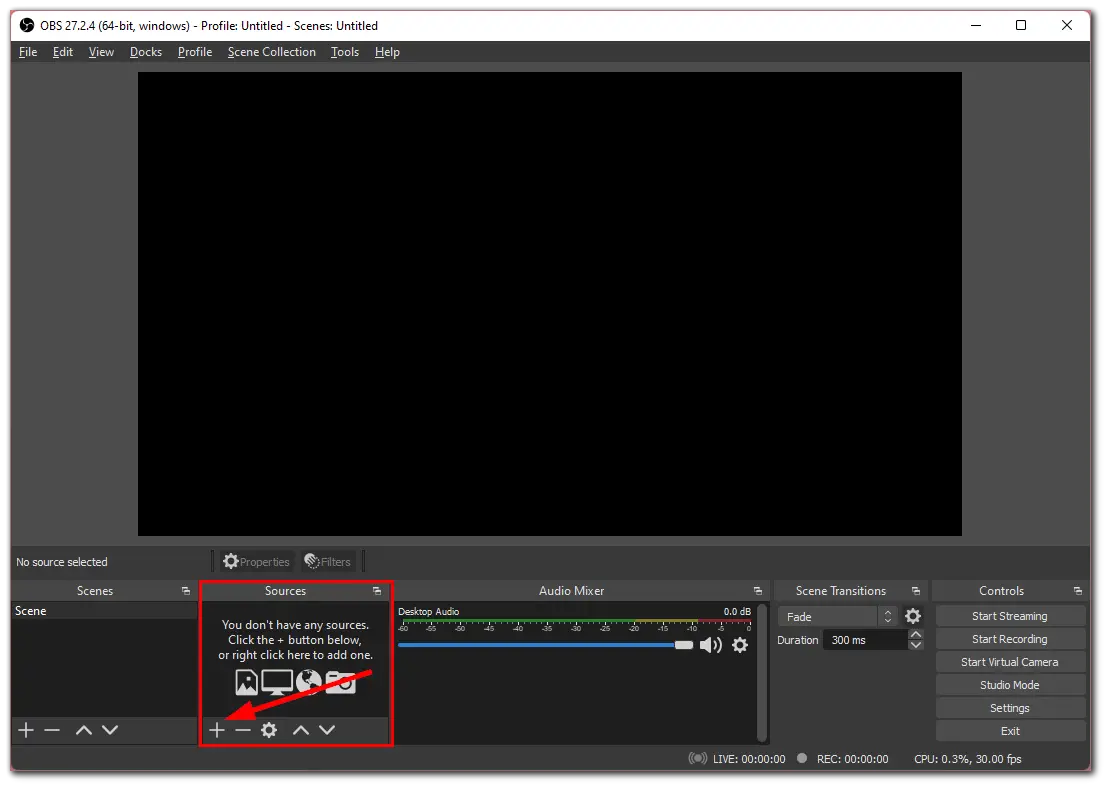
- You will now have a link that you can add to OBS Studio to demonstrate your alerts. So, open OBS Studio.
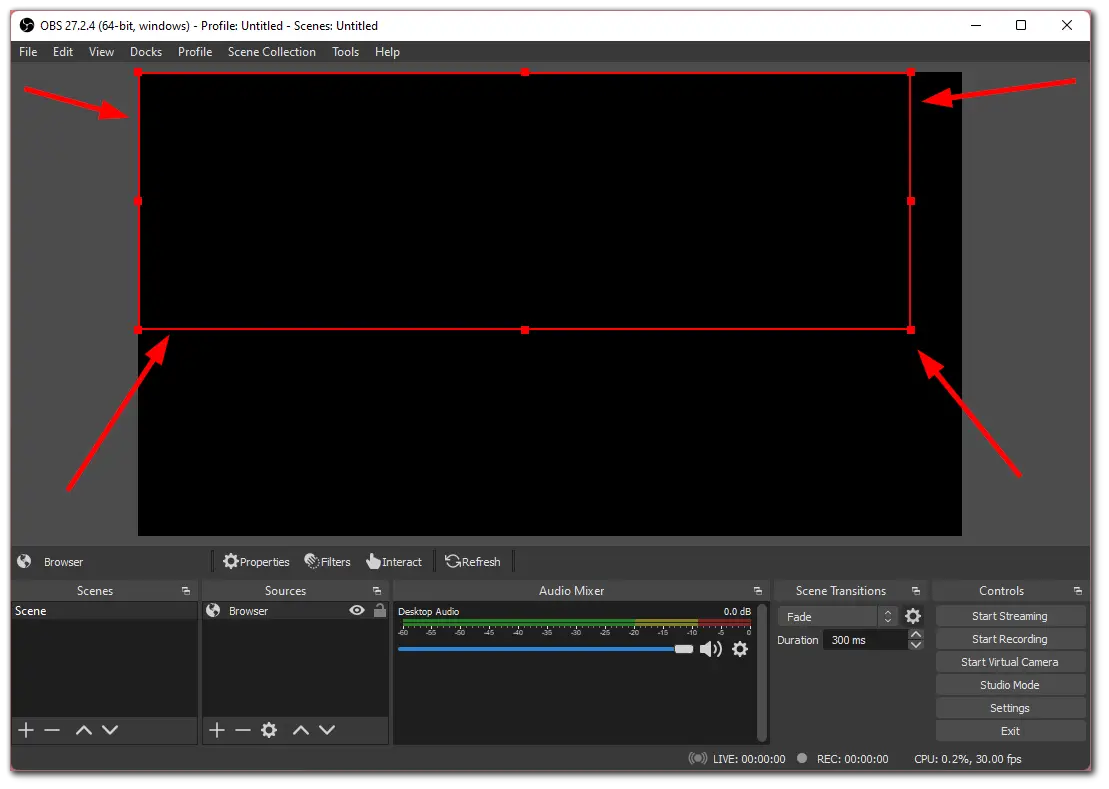
- Go to the “Sources” section and click on the “+” icon to add a new one.
- Then select “Browser” from the list of options.
- Check “Create new” and click “OK”.
- In the URL section paste the StreamElements link. You can also change the size of the box.
- Finally, click “OK” and you should see your alert box appear in your scene.
As you can see there’s nothing in the box. That’s why you should emulate your alerts before you run them to make sure that they work correctly.
How to emulate alerts in StreamElements
There’s nothing complicated about emulating alerts in StreamElements. Just follow these instructions:
- Open StreamElements and go to “Streaming Tools”.
- Then select “My overlays”.

- Go to your overlay and click “Edit”.
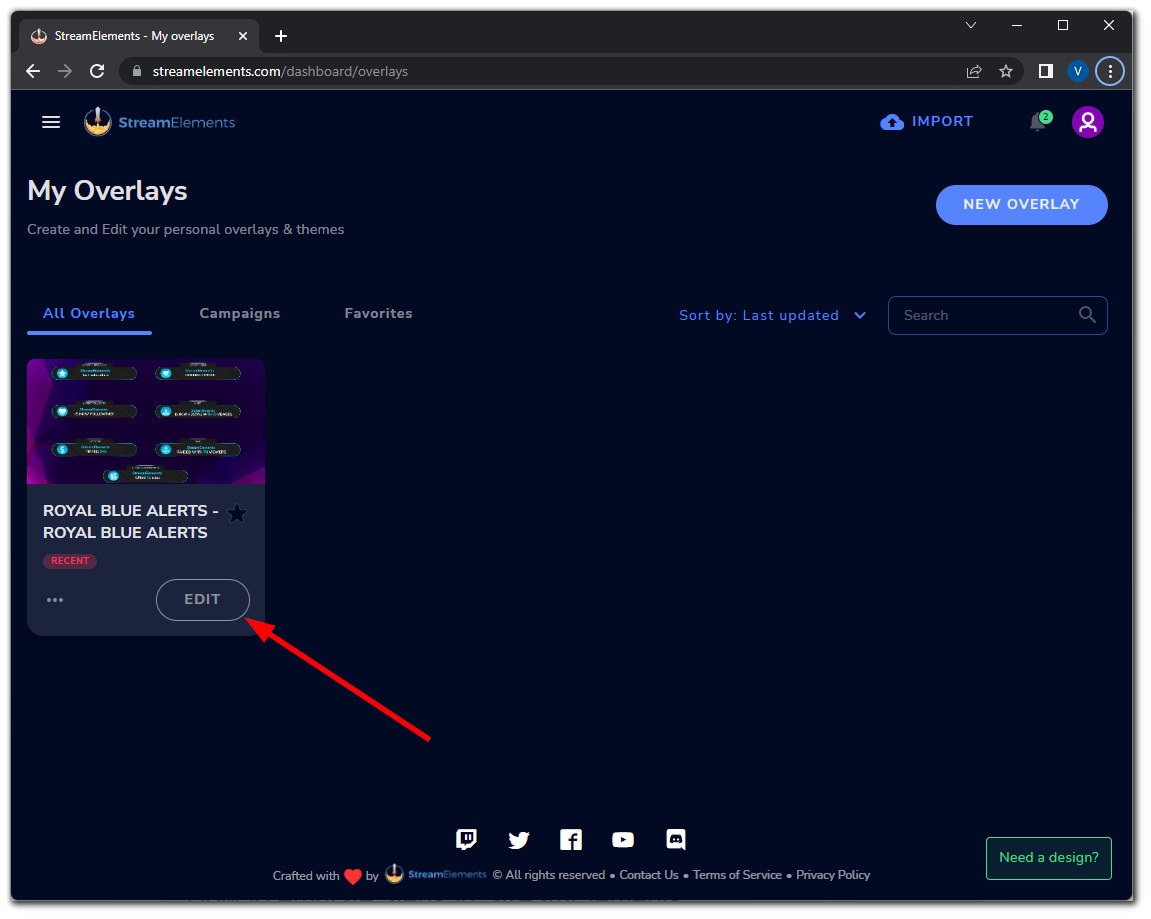
- In the new tab, the StreamElements editor will be opened.
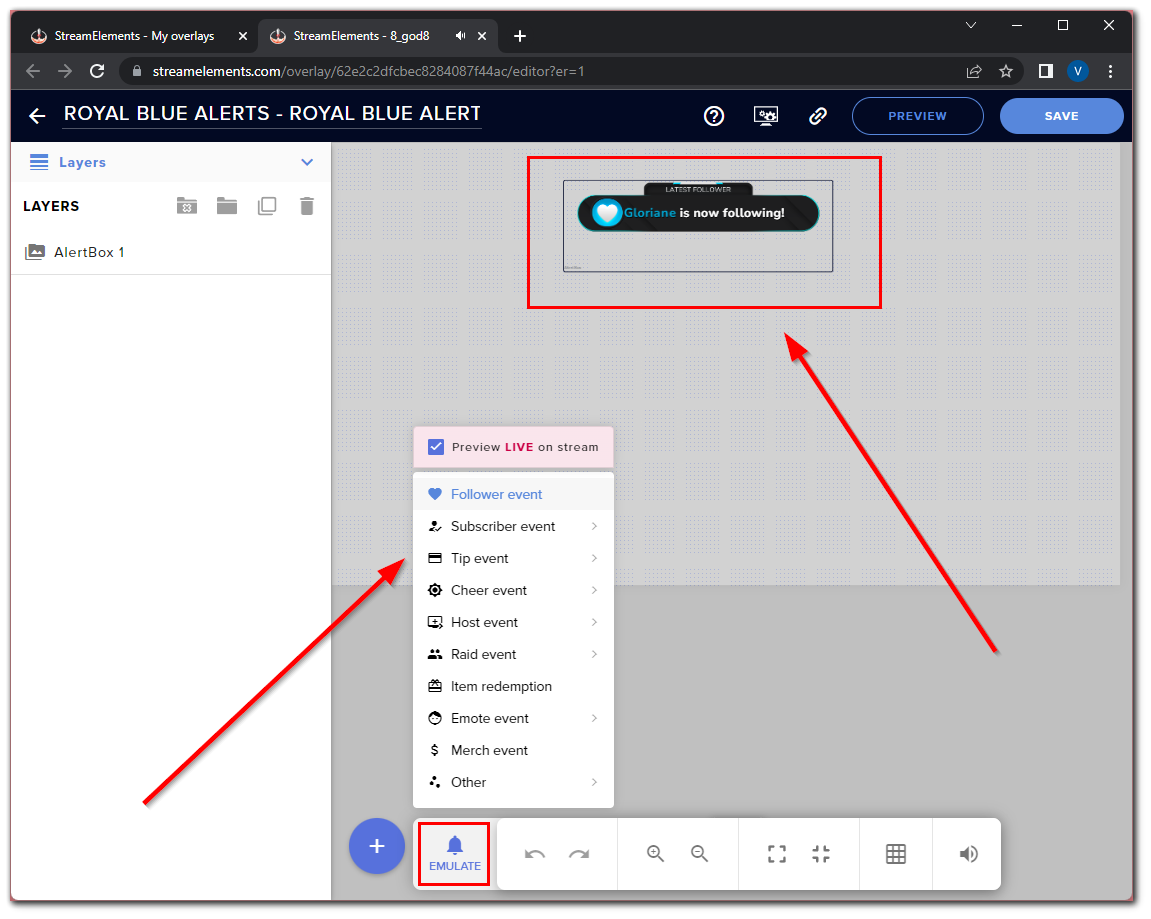
- Click on the “Emulate” button located at the bottom of the page.
- You will see all of the available events. Just click on the one you want and this will send the signal to trigger an alert.
The same alert you will see in your OBS Studio.
How to set up alerts in OBS Studio using StreamLabs
StreamLabs is another service for creating alert boxes for your stream. In order to use this service you first need to register there. After registering, log in to your dashboard. Then follow these steps:
- Click on the “Alert Box” tab on the left side of the web page.
- After that, you can select one of the free alert packages. If you want to see more you can sign up for StreamLabs Prime.
- Then on the General Settings page, you can view and select the options that you want to enable. For example, you can add a delay to moderate alerts if you allow viewers to show messages on the screen.
- To edit specific alerts, select the alert you want to modify at the top of the page.
- Next, you can edit that specific alert and add your image of the alert.
- To add a new image go down to Image and upload the file from your PC or link to it online.
- You can also change the other specific options such as sounds, delays, alert duration, etc.
- Now, copy the Alert Box URL and open your OBS Studio.
- Go to “Sources” and click on the “+” icon.
- Select “Browser” from the list of options.
- Check “Create new” and click “OK”.
- In the URL section paste the StreamLabs link. You can also change the size of the box.
- Finally, click “OK” and you should see your alert box appear in your scene.
The process of emulating alerts in StreamLabs is as simple as in StreamElements. You need to go to your alerts box on StreamLabs and click “Test Follow” or on the specific alert, you want to test.
That’s all you have to do. Your stream should now have a notification block ready to show new followers, subscribers, and donations.
Read Also:
- How to capture only game audio in OBS
- How to watch YouTube on Apple TV
- How to fix the Split Screen isn’t working on your iPad
How are the OBS alerts shown?
It is possible to set up custom widgets for OBS alerts that will be displayed on your Twitch stream in the following locations:
- Alerts Box.
- People are used to seeing on-screen alerts activate when a viewer interacts with you. You can use customizable graphics and sounds and even set multiple versions for different types of Twitch alerts.
- Event List.
- Many streamers place an event list on the screen that displays a few recent actions. These are usually placed in the bottom corner.
- Panels.
- There are some Twitch extensions that allow you to show leaderboards or recent activity so people know where they rank on your channel.
- Stream Labels.
- If you use Google Chrome, you can use stream labels to show your alerts.
Moreover, if you are streaming on Twitch you can also use alerts to display different activities on your channel. You can also set different types of notifications to appear randomly. This can help you stand out and make your content more unique.

 on at the same time")

