

Do Not Disturb is one of the most important and necessary features for iPhone users who like to enjoy peace and quiet. However, because it mutes all sounds, alerts, and notifications on the iPhone, it is possible to miss a really important call or message. This is where the “Emergency Bypass” feature comes to the rescue.
Emergency Bypass can be set separately for each contact to allow the selected contact to reach you while you are in DND mode. You can easily enable this feature by going into Contacts on your iPhone. So here’s how to do it in a few easy steps.
How to enable Emergency Bypass on iPhone for calls
If you want to allow someone to call you through the iPhone’s DND mode, you can follow these steps:
- First of all, go to the Contacts app on your iPhone and open the contact you want to edit.
- Then tap “Edit” at the top right corner of the screen.
- After that, tap on the “Ringtone” option.
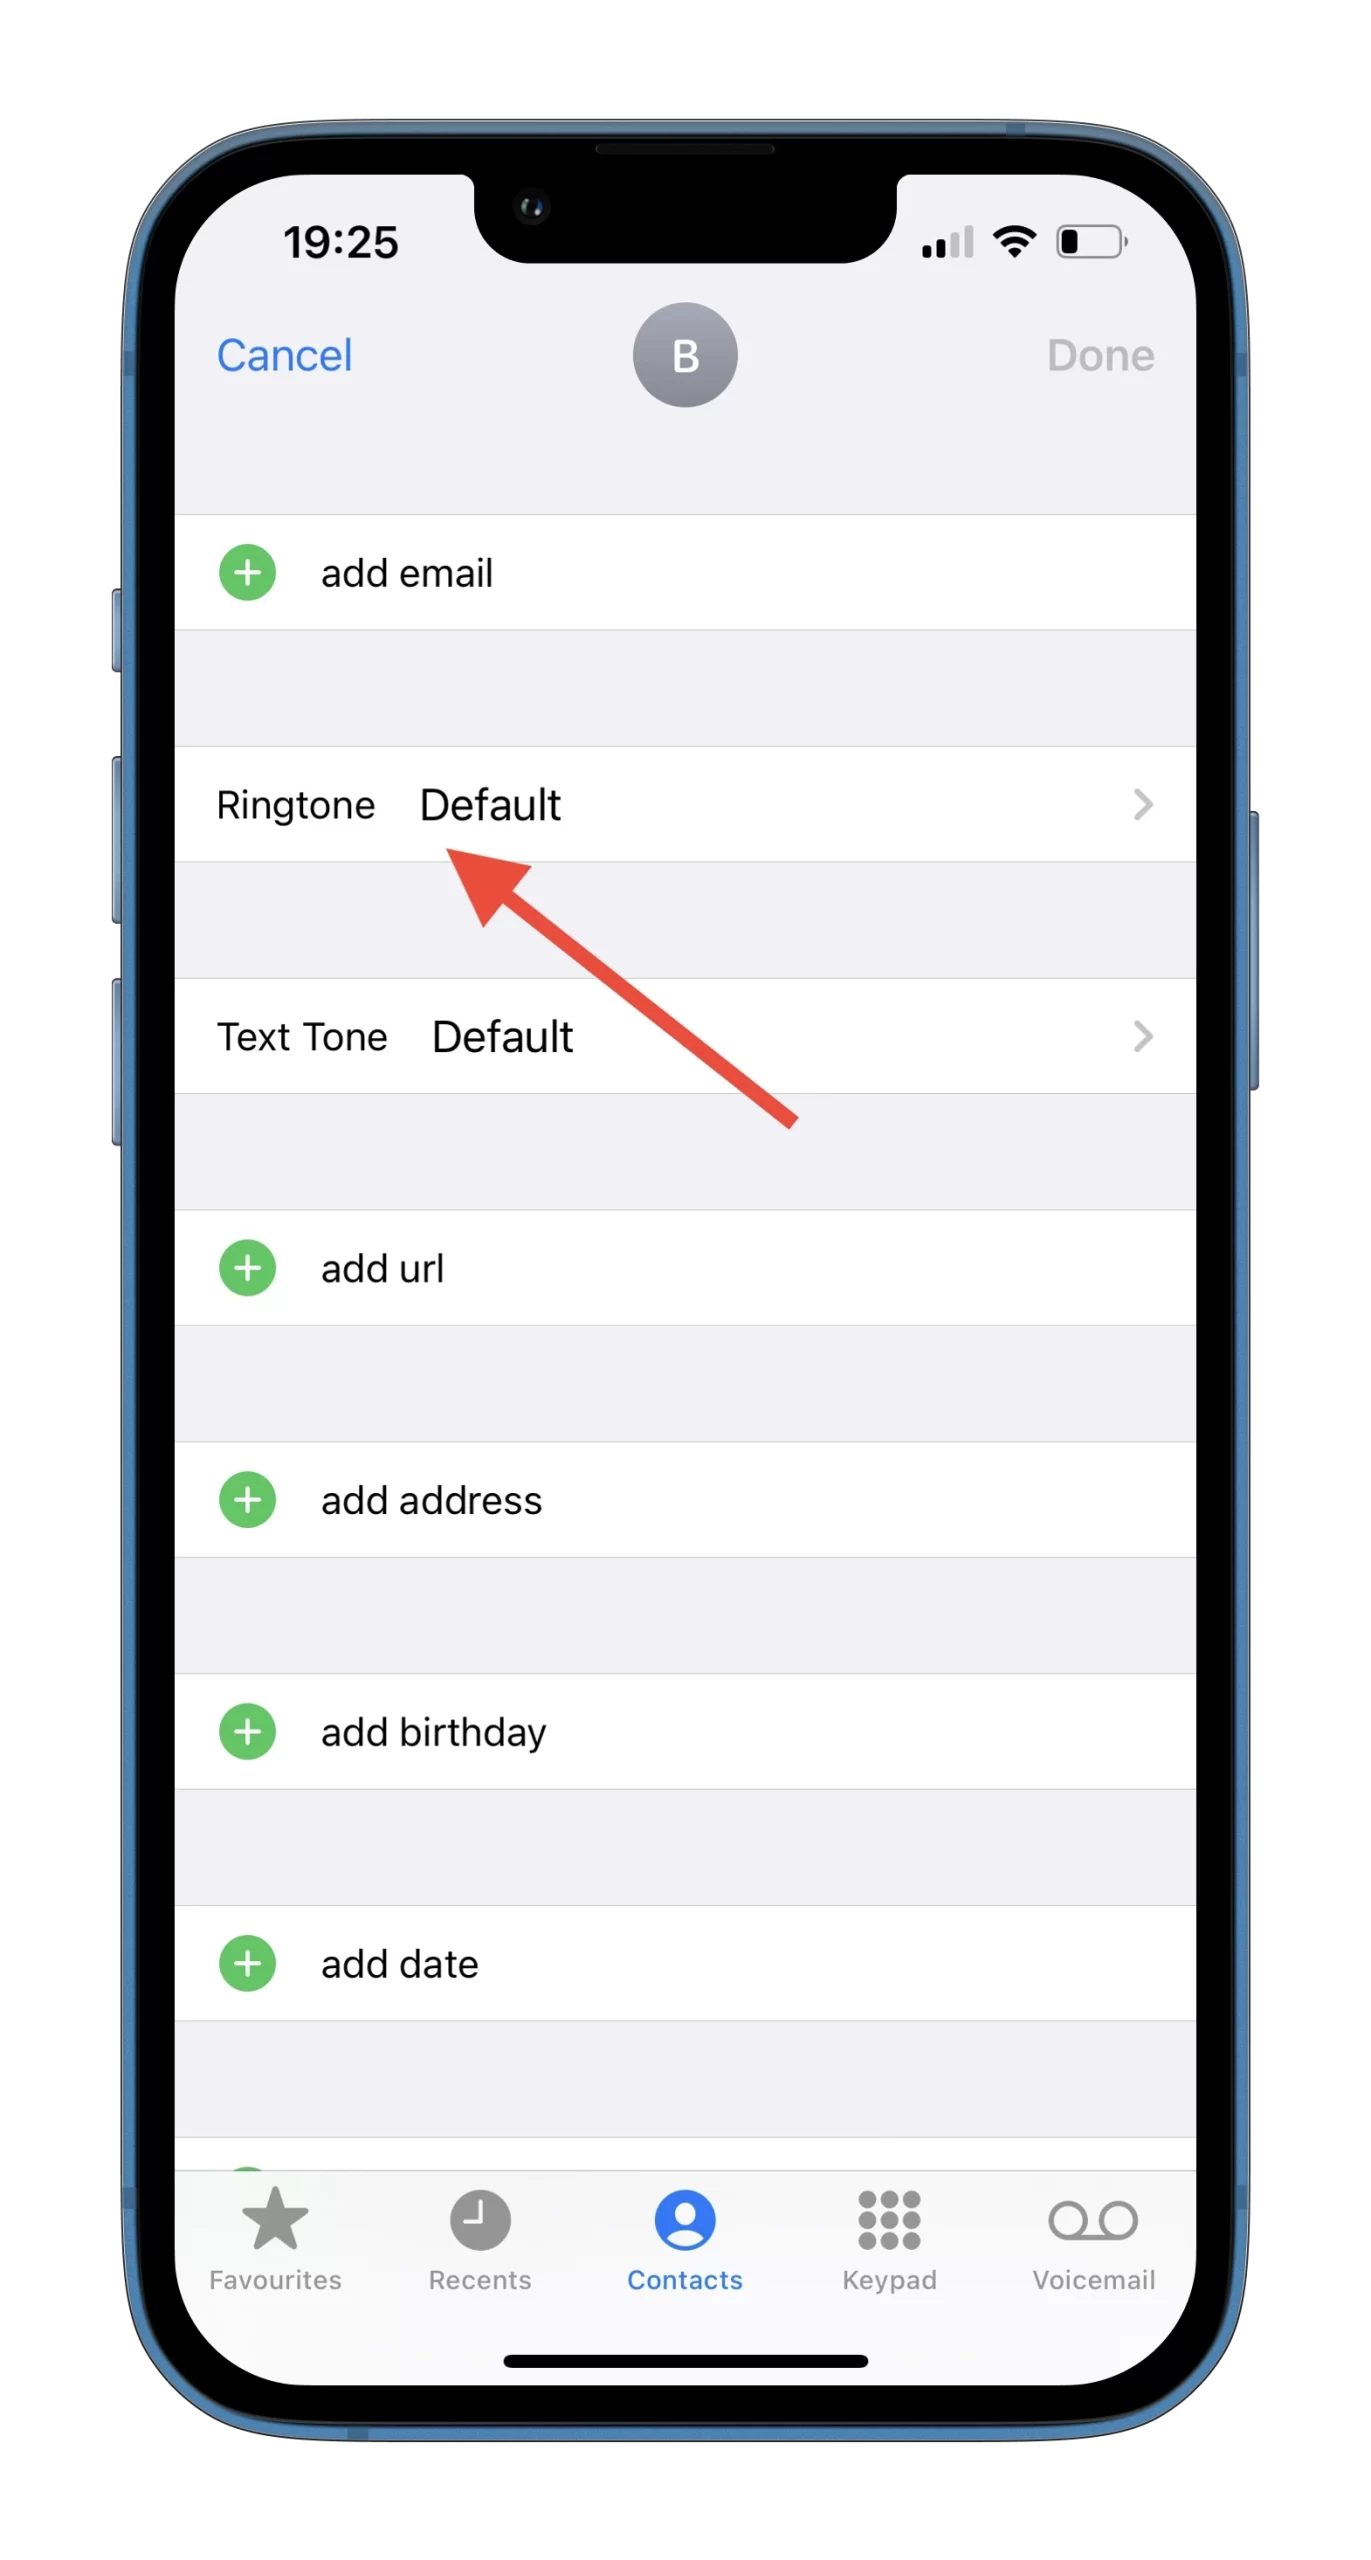
- Turn on the “Emergency Bypass” feature and tap “Done”.
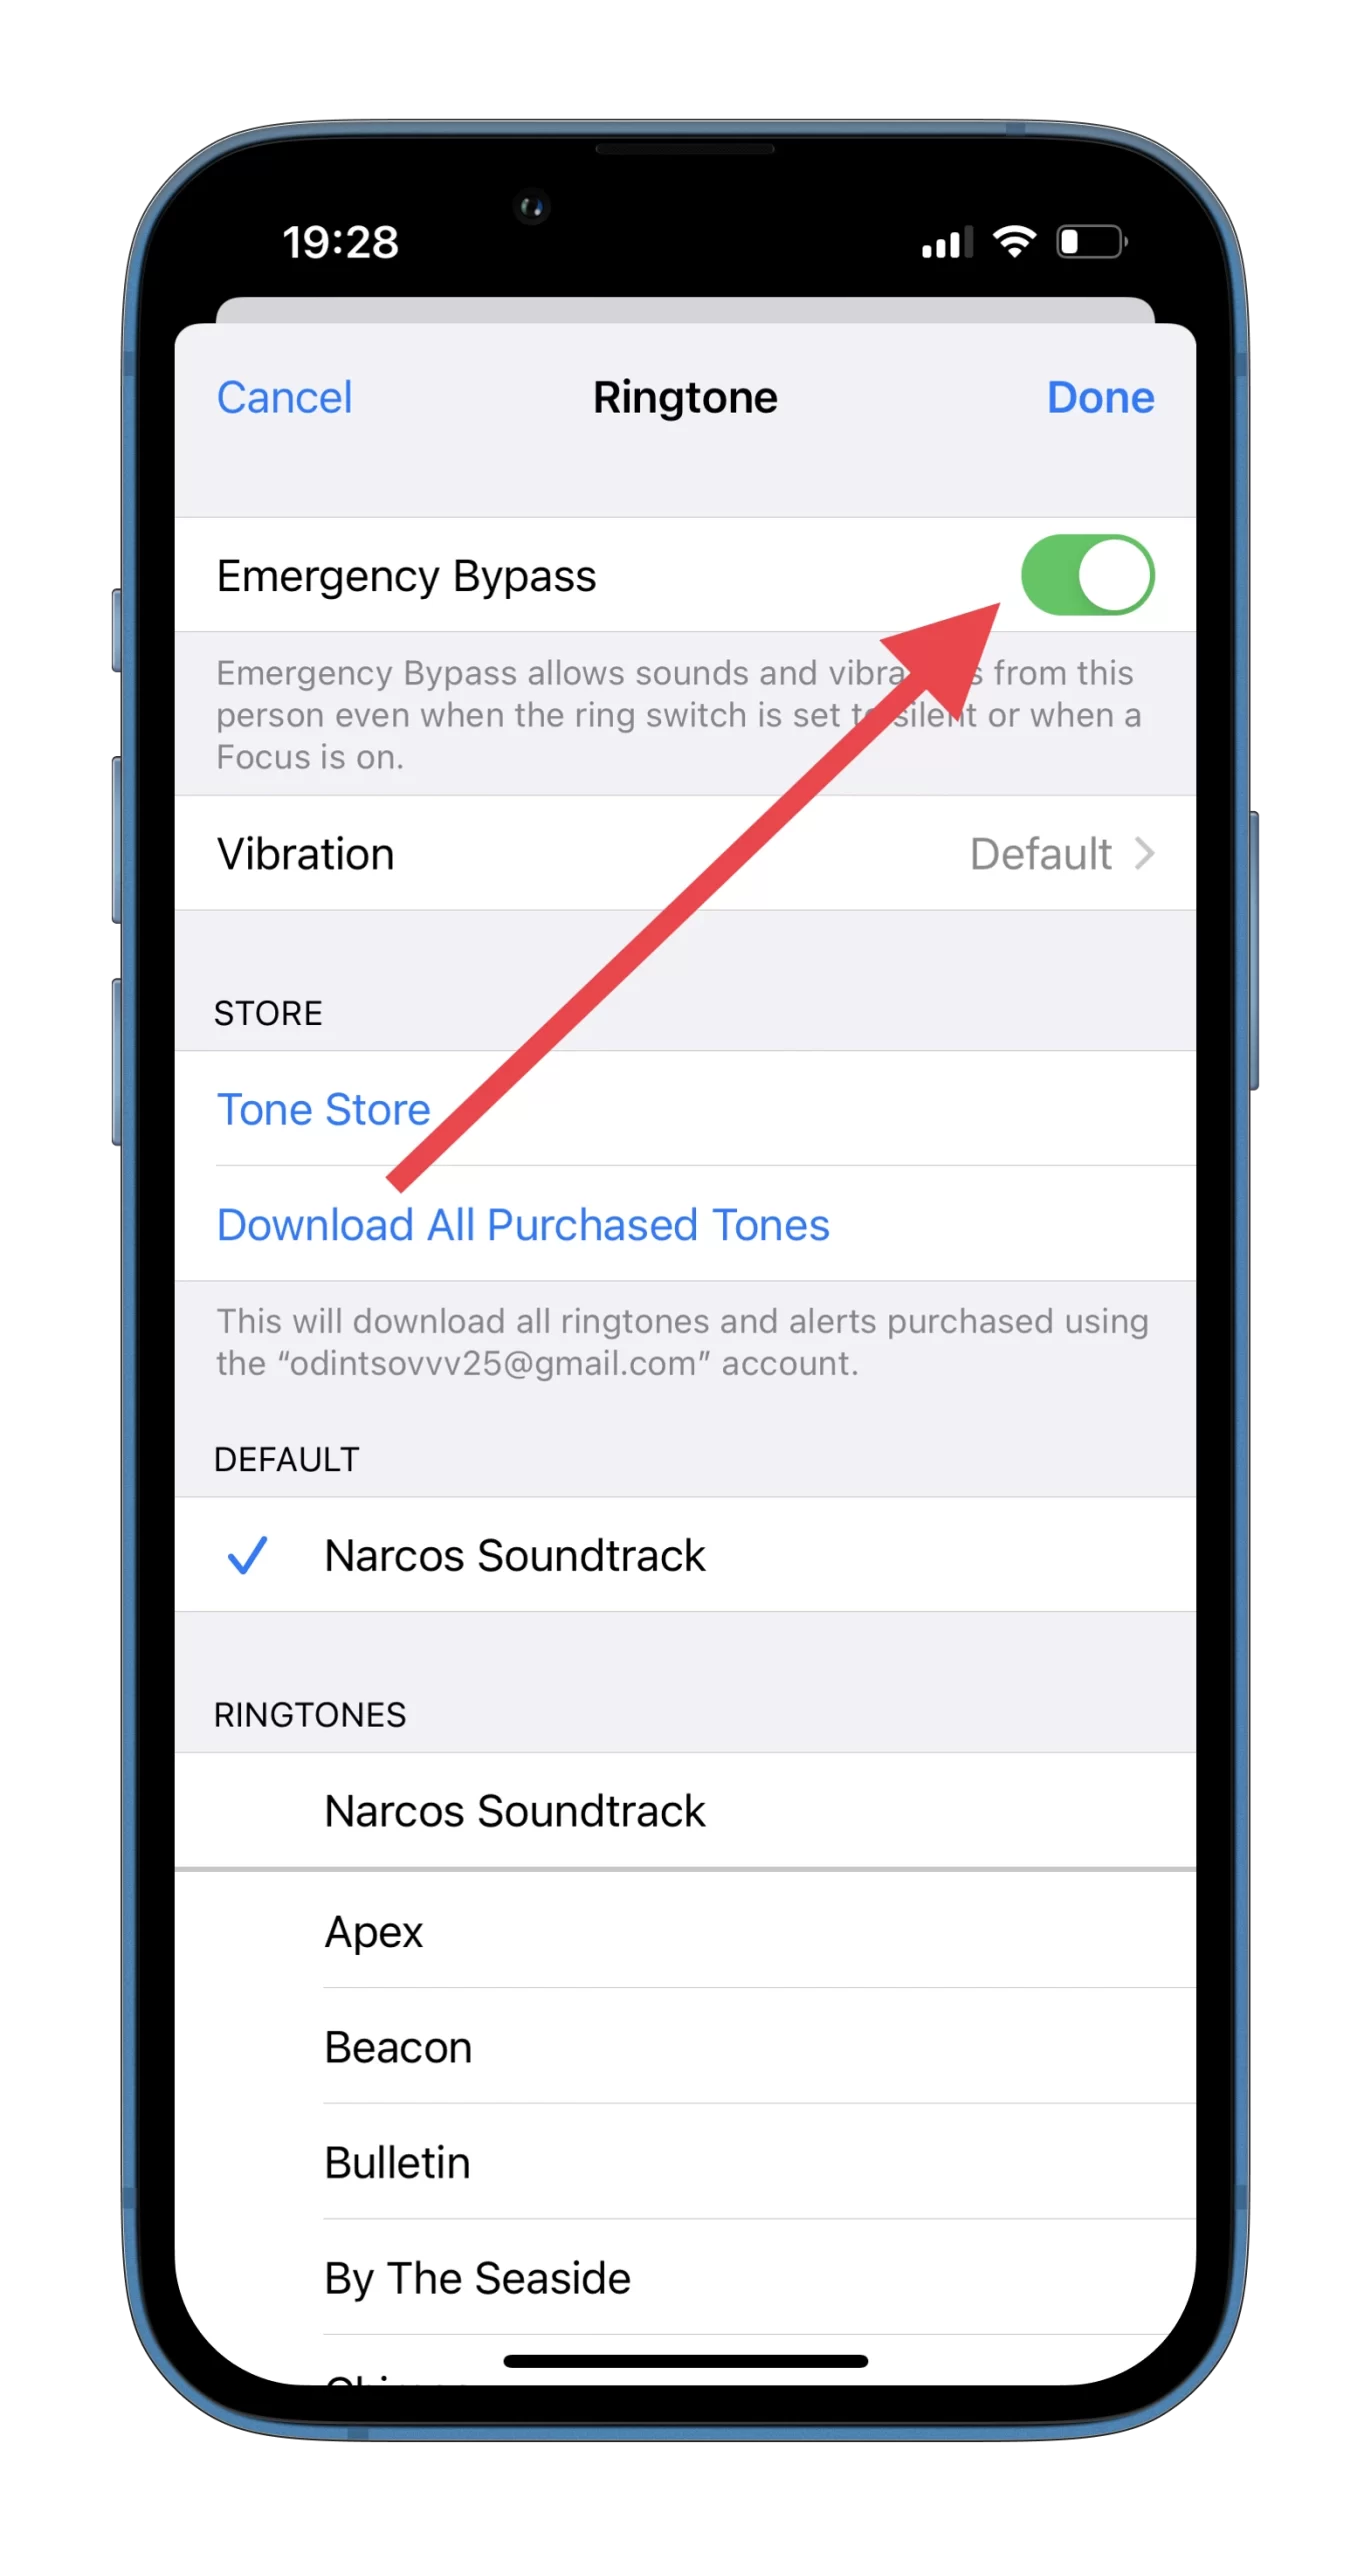
- Finally, tap “Done” again to confirm and save changes.
Once you have completed these steps, your selected people will be able to call you even if you enabled DND mode on your iPhone.
How to turn on Emergency Bypass on iPhone for text messages
If you want to activate the Emergency Bypass feature on your iPhone for text messages, just do the following:
- Navigate to the Contacts app on your iPhone and open the contact you want to edit.
- Then tap “Edit” at the top right corner of the screen.
- After that, tap on the “Text Tone” option.
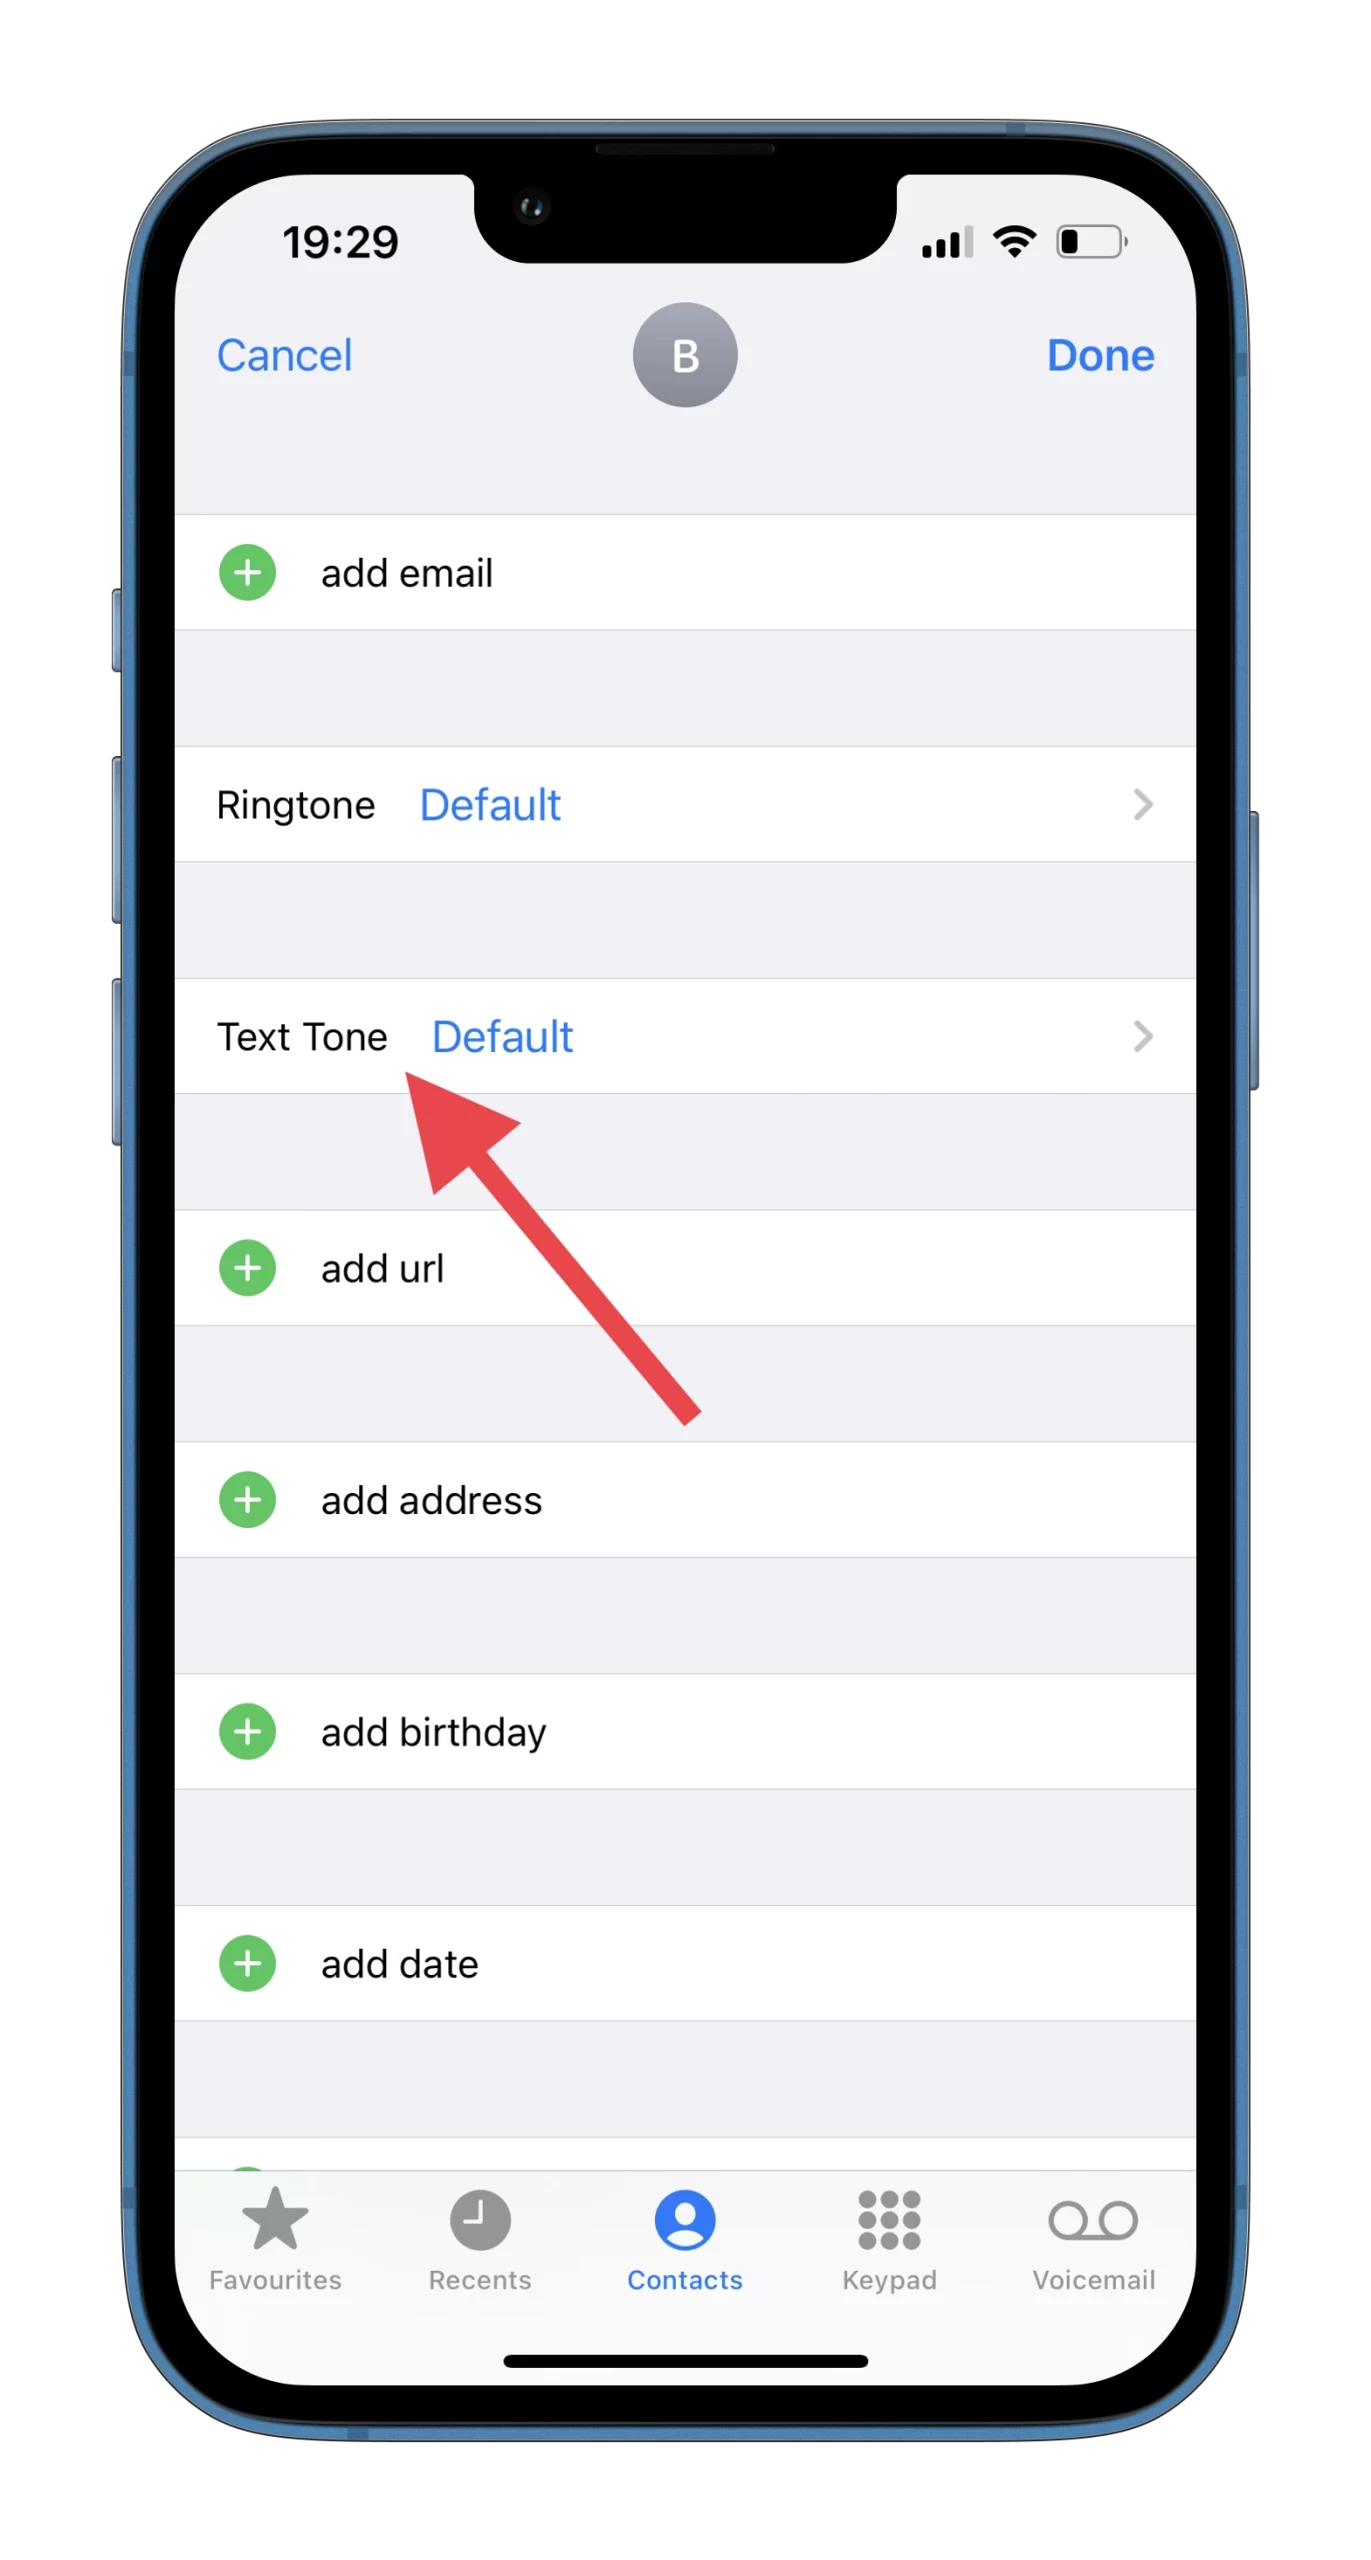
- Turn on the “Emergency Bypass” feature and tap “Done”.
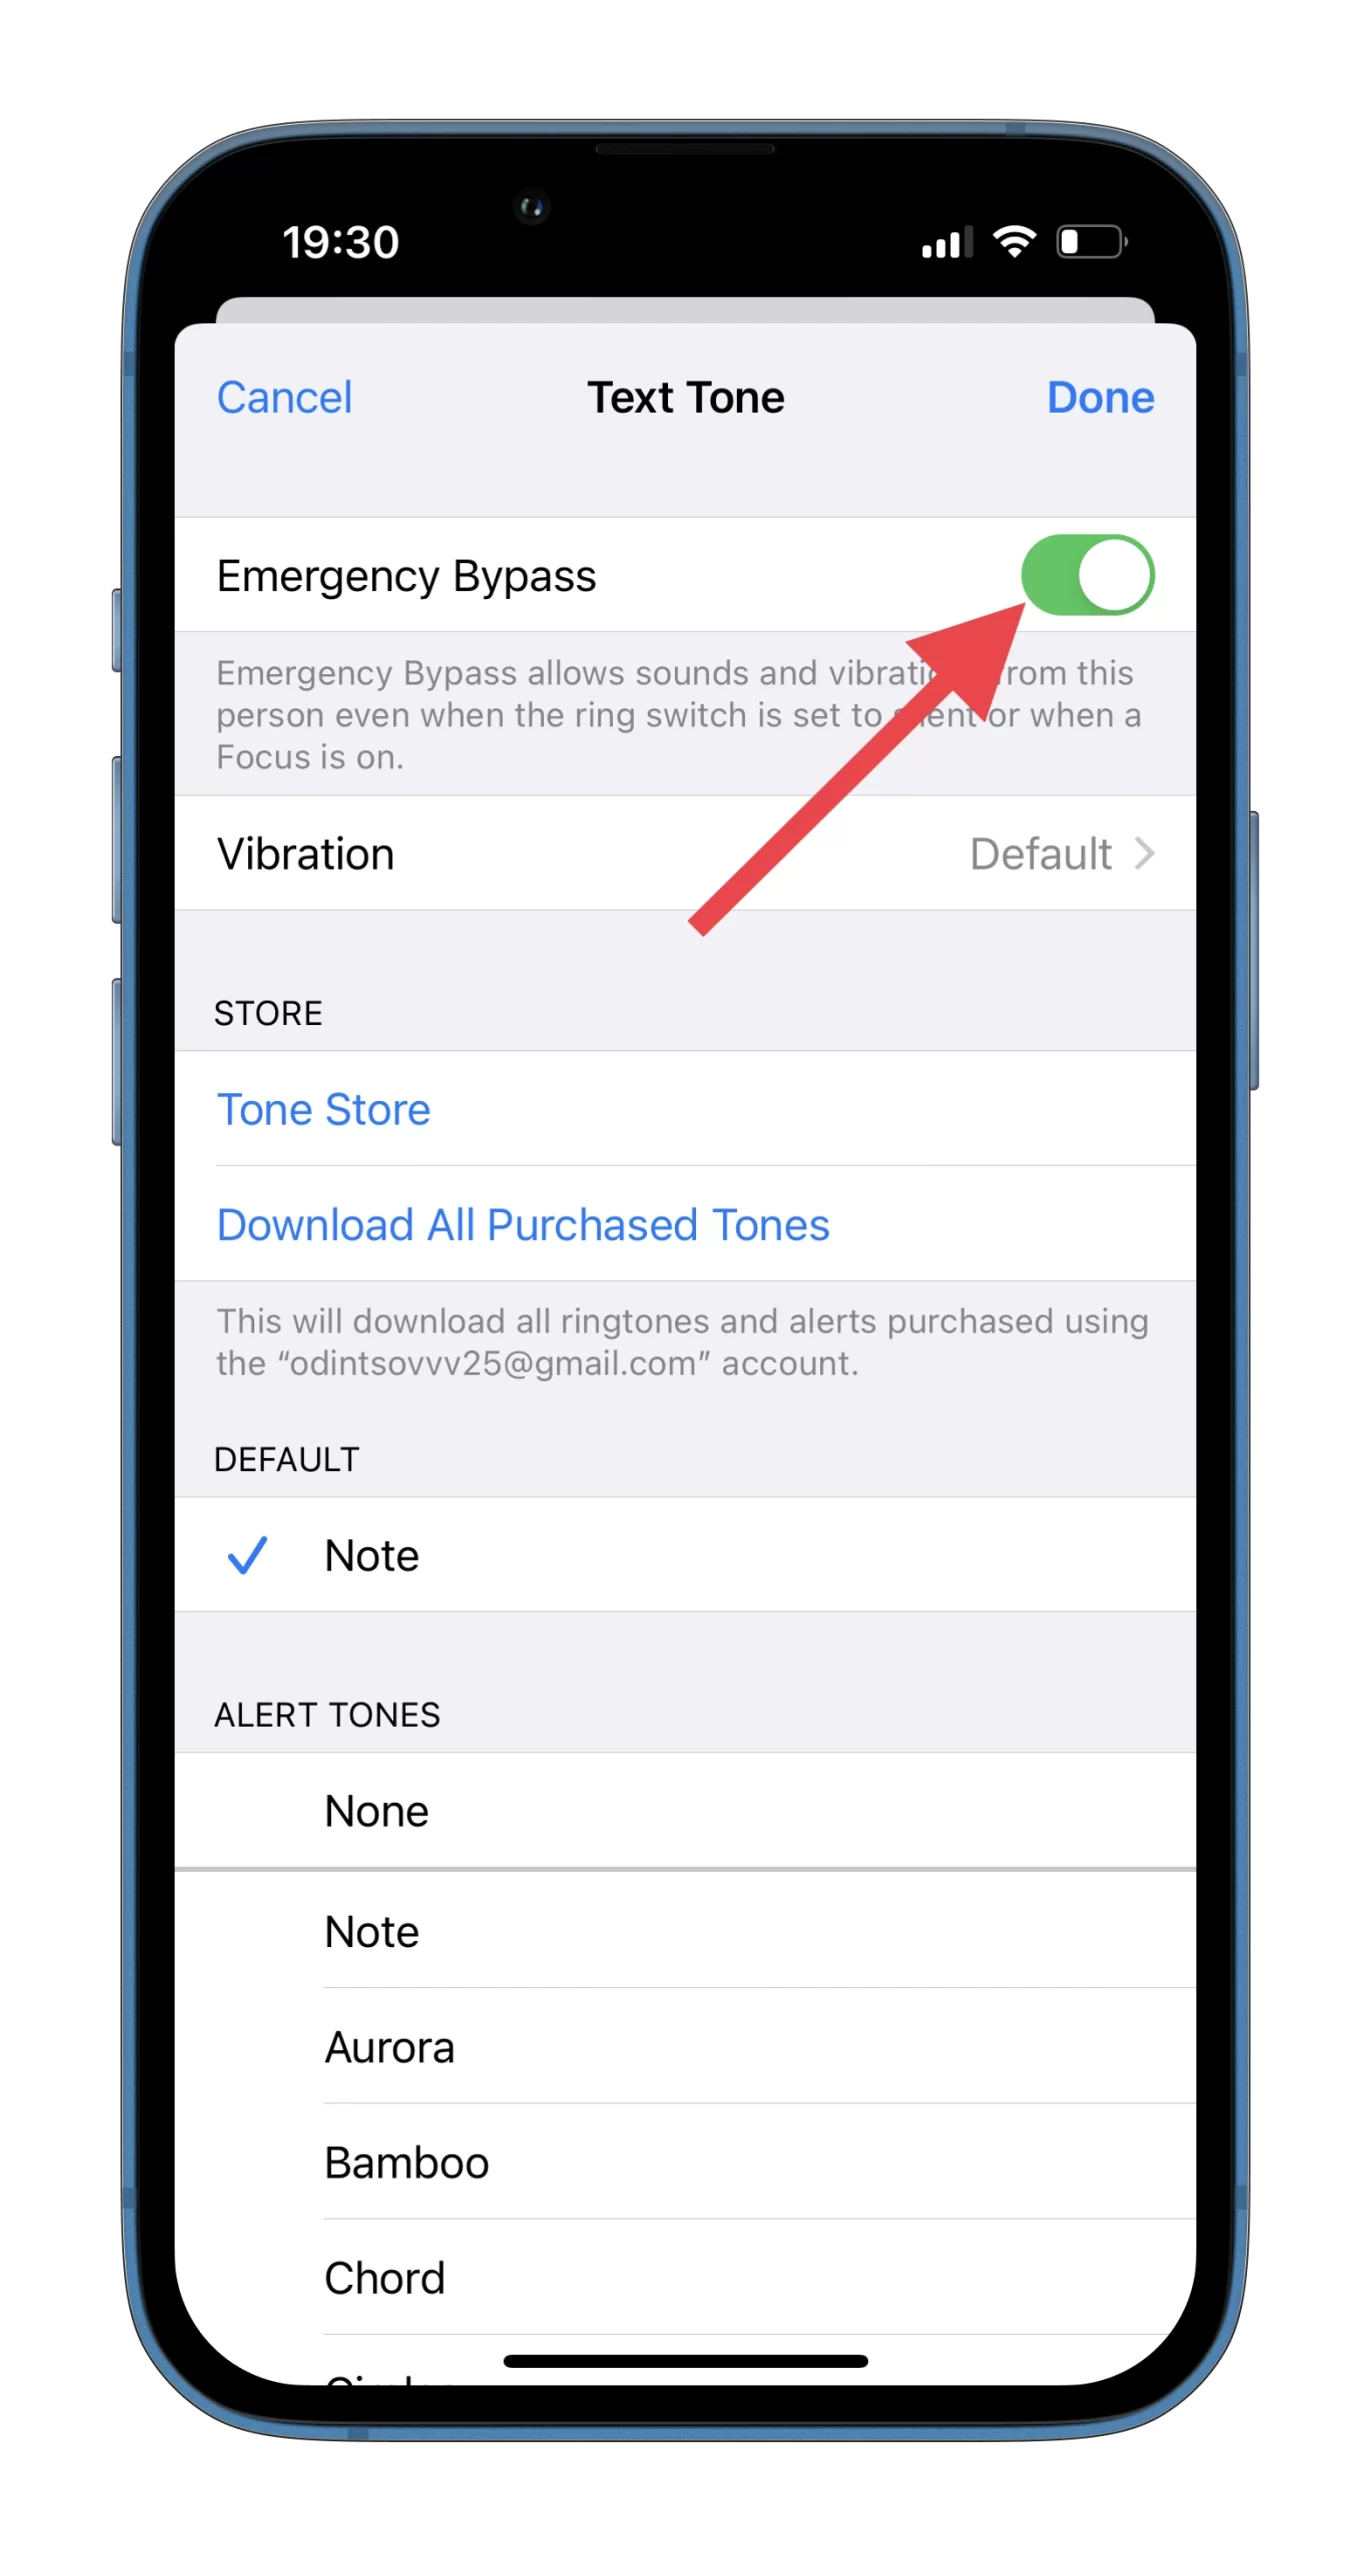
- Finally, tap “Done” again to confirm and save changes.
Once you have completed these steps, your selected people will be able to send messages to you and you will hear the notification sound even if the DND mode is enabled on your iPhone.
To disable this feature, you need to follow exactly the same steps. However, this will need to be done separately for each contact.
This is useful for many obvious emergency reasons. It is also very easy to accidentally turn on Do Not Disturb mode, which causes the iPhone to not ring or make sounds. And with Emergency Bypass, you’ll always be in touch with your important contacts.
Speaking of emergencies, another great feature of the iPhone is setting up a Medical ID. And it’s also good to remember that Siri can contact 911 or emergency services for you upon request. We hope you never need these emergency features, but it’s definitely worth knowing that they exist just in case.
Read Also:
- How to turn off notifications on iPhone on connected Bluetooth devices
- Is the iPhone 13 waterproof?
- How to add a signature to a text message on iPhone explained
How to disable DND mode on an iPhone
If you want to disable the Do Not Disturb mode on your iPhone, you need to know that it’s simple to do. Just follow these instructions:
- Swipe the curtain on your iPhone screen on the right side and tap on the “Focus” icon.
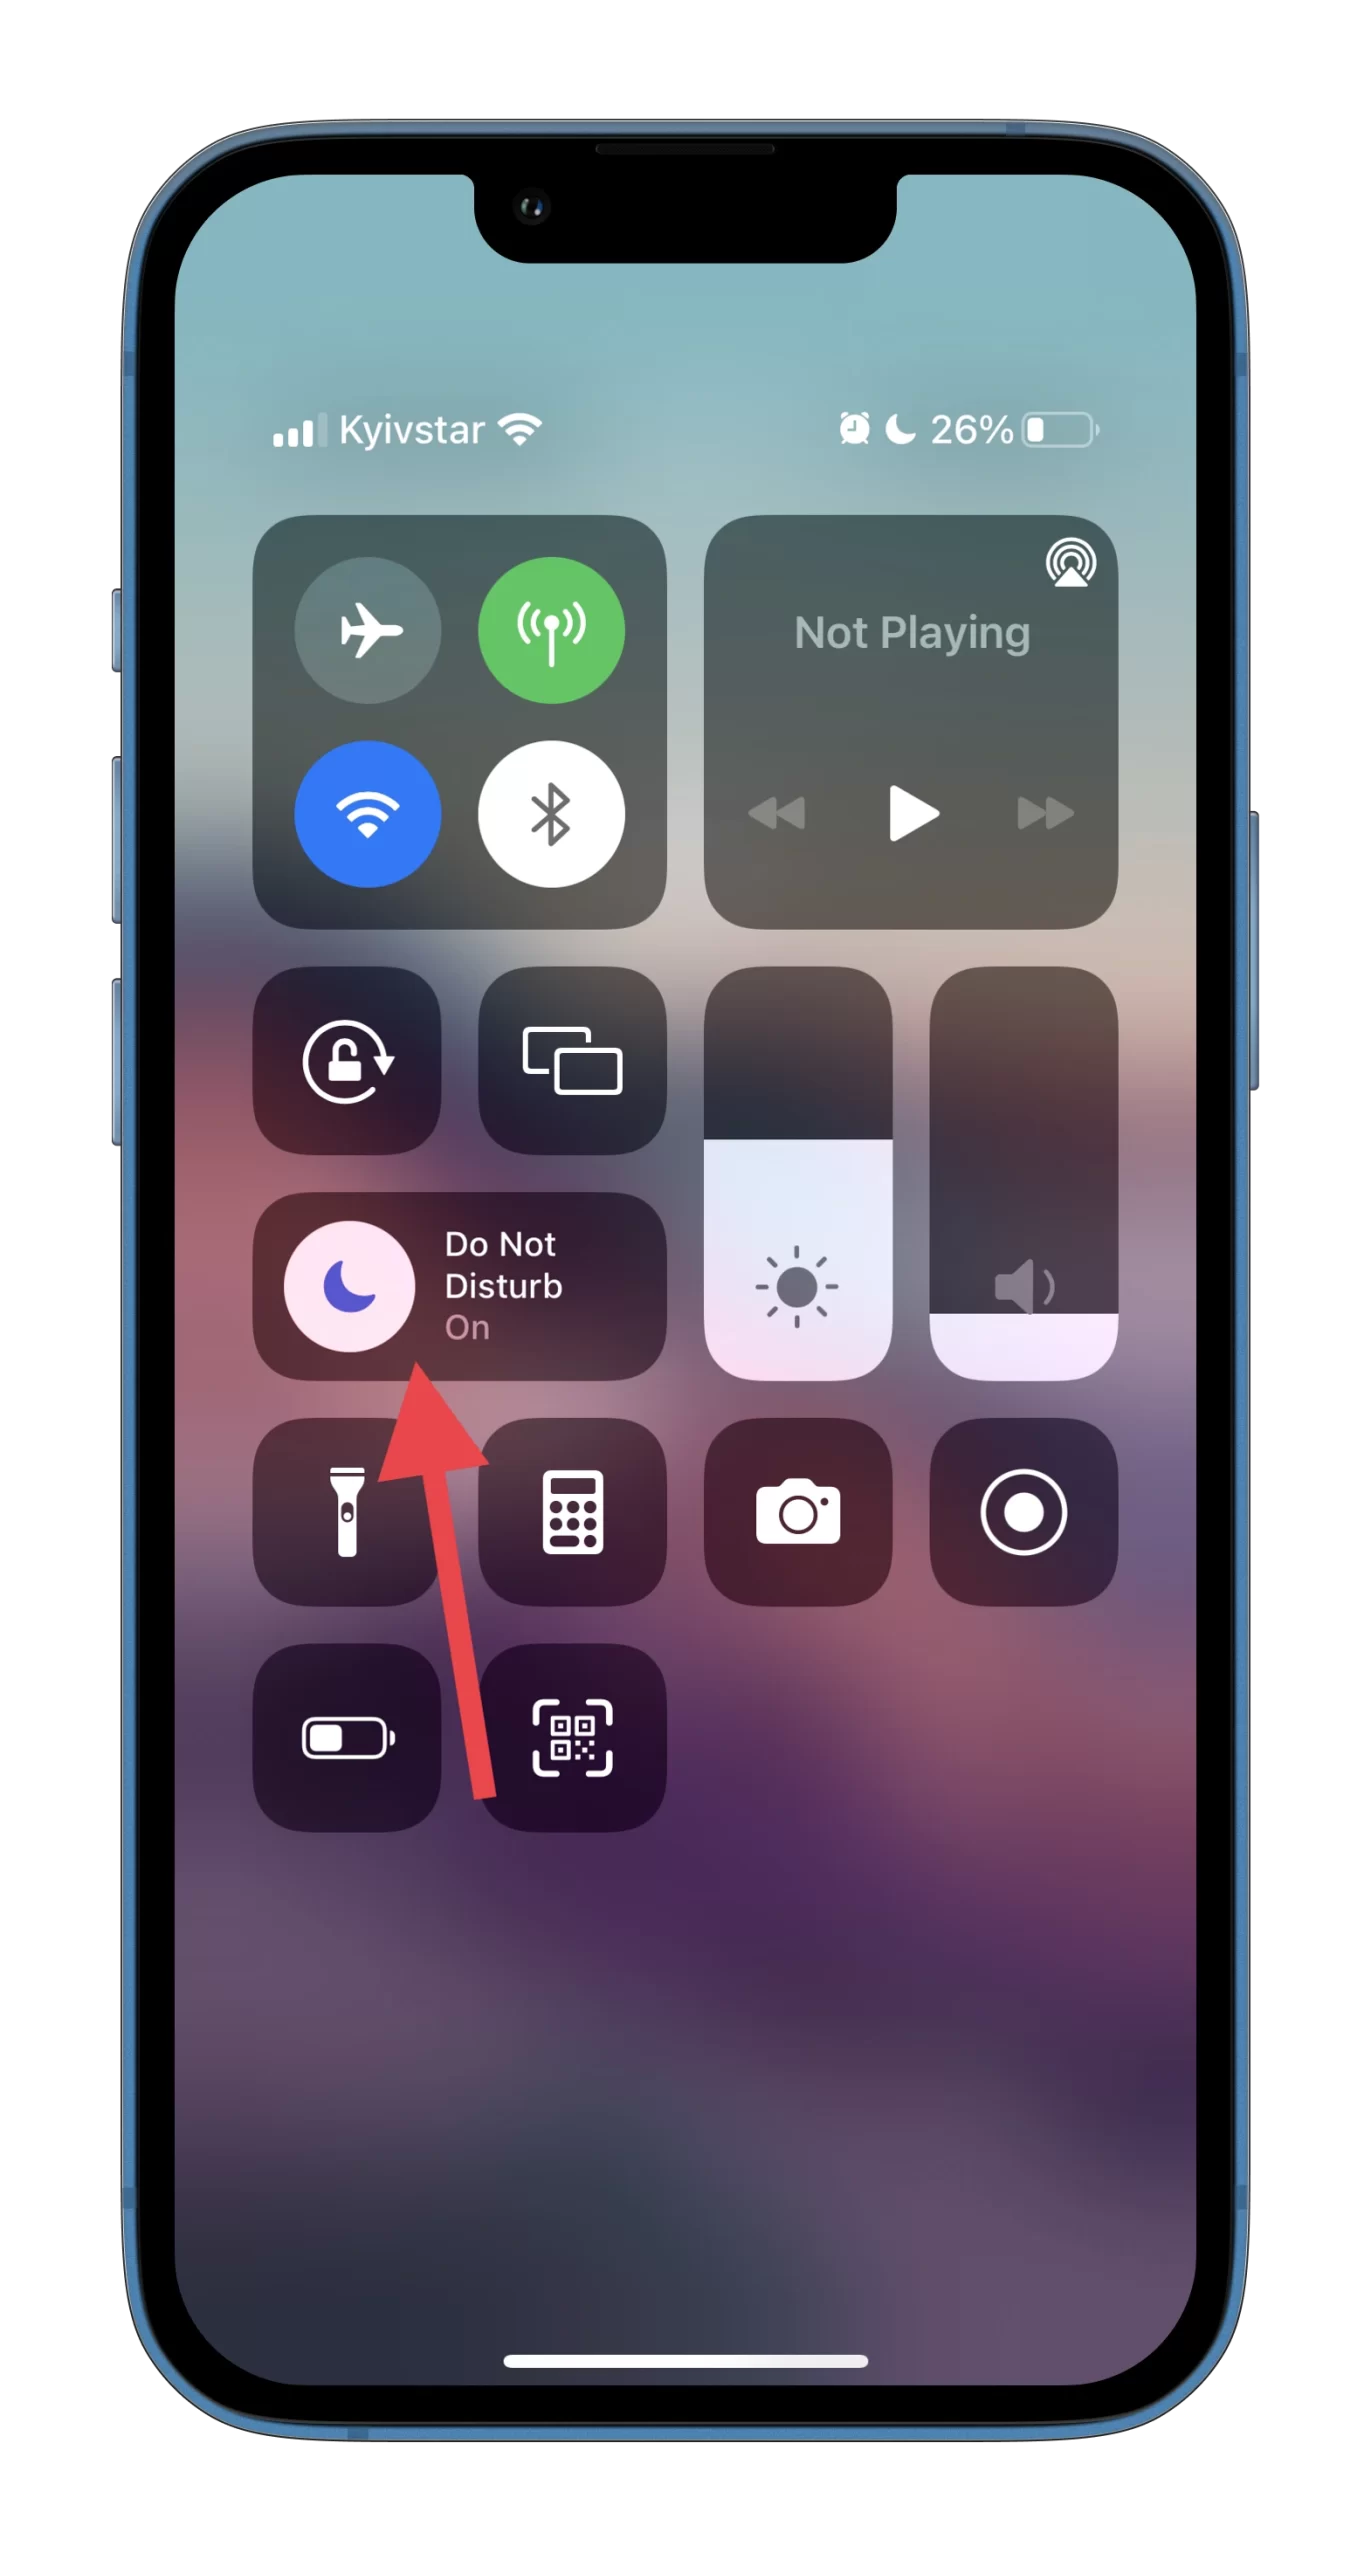
- Then just tap on the “Do Not Disturb” button to disable this mode.
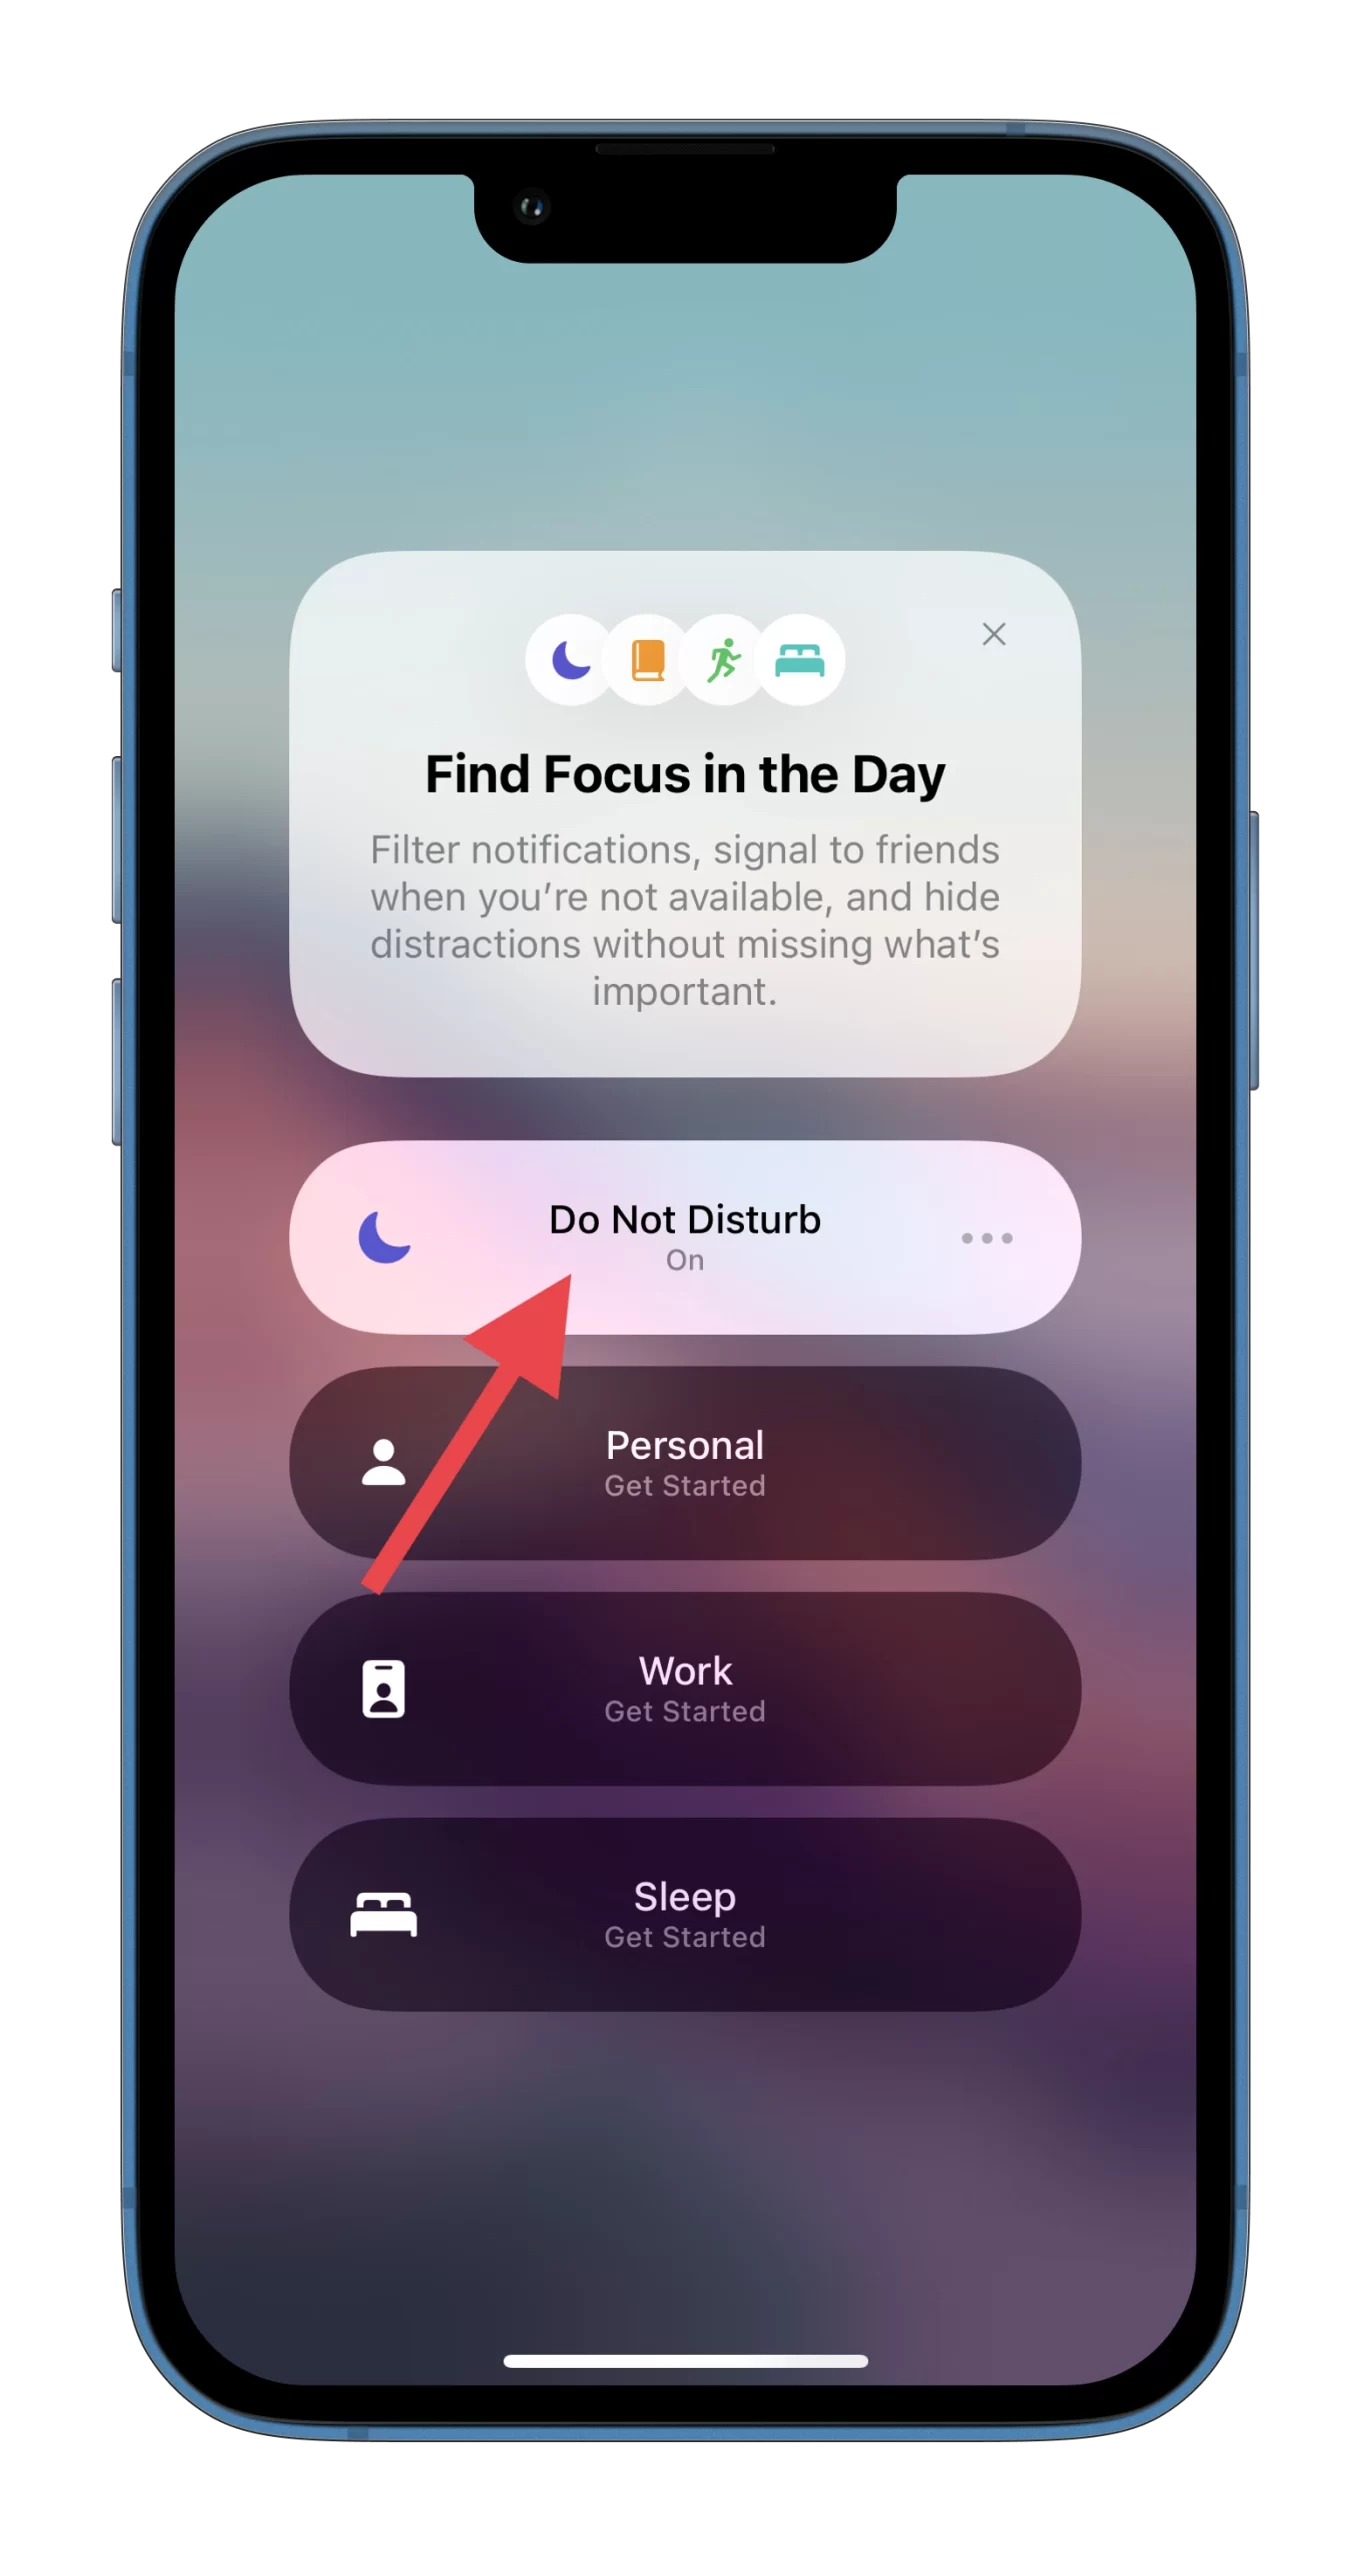
Moreover, you can turn it on again using the same steps. By tapping on the three dots icon you open the additional menu where you can choose for how long you want to enable DND.
You can also tap “Settings” to get more options for setting up DND mode. There’s a possibility to allow notifications for appropriate apps or people while DND is enabled. You can also add a schedule or automation. This means that DND will be automatically enabled in the period you choose.
Frankly, I think this is really great feature that helps to distinguish work from rest, and also helps to just be at peace without paying attention to annoying notifications from different apps or people.


