

Excel is the most popular office application. You can find an office job if you know how to use Excel. In the beginning, you should learn more about The Fill Handle Excel feature.
This function allows you to automatically fill a column or row using a formula or value from the previous column. To keep it simple, if we take “1” and “2” in the first two cells, if you use the Fill Handle and continue this row, you will have numbers 3, 4, 5, and so on.
What is fill handle in Excel, and how it works
You can say that the Fill Handle function is a kind of analog of the autofill function for Excel. It is needed to automatically apply a specific function or fill several cells simultaneously according to a particular algorithm.
It works, for example, if you are making a table where all cells must perform the same function but with different header coordinates. To start, you must fill one cell and write the data or procedure you want there. Then click on the square at the bottom left of the cell and drag it to the area where you want to apply the Fill Handle. You can remove it only vertically or horizontally. Also, when you double-click, autofill can apply to the entire column.
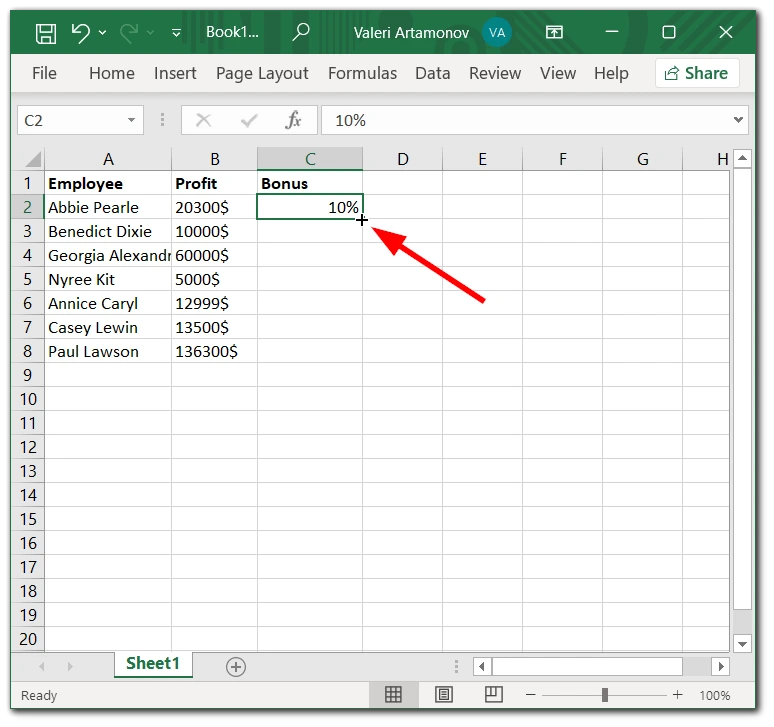
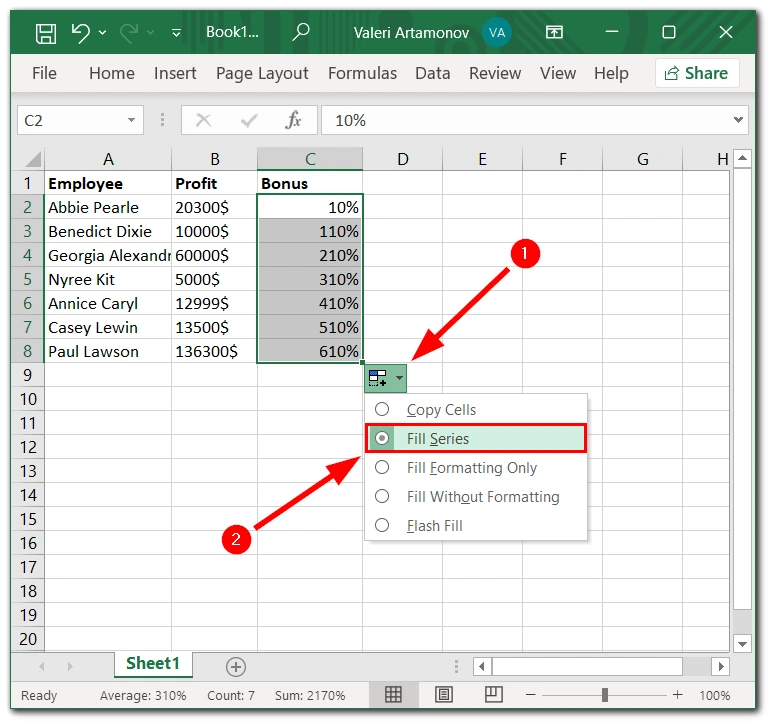
After that, Excel will automatically apply the function to all cells in this area. Also, if you enter numbers or dates, then Excel will find a pattern and will continue to fill the row or column with the specified values automatically. It doesn’t seem very clear, but I advise you to try it yourself once, and then you’ll see the point.
How to set up fill handle
In addition, you can set up different autofill options. For example, you can make it so that only the function that is present in the cell is auto-filled. Or, on the contrary, you can set autofill only numbers.
Also, remember that autofill options may differ depending on the input data. For example, if you enter a date and want to autofill, you can set whether to add days, months, or years.
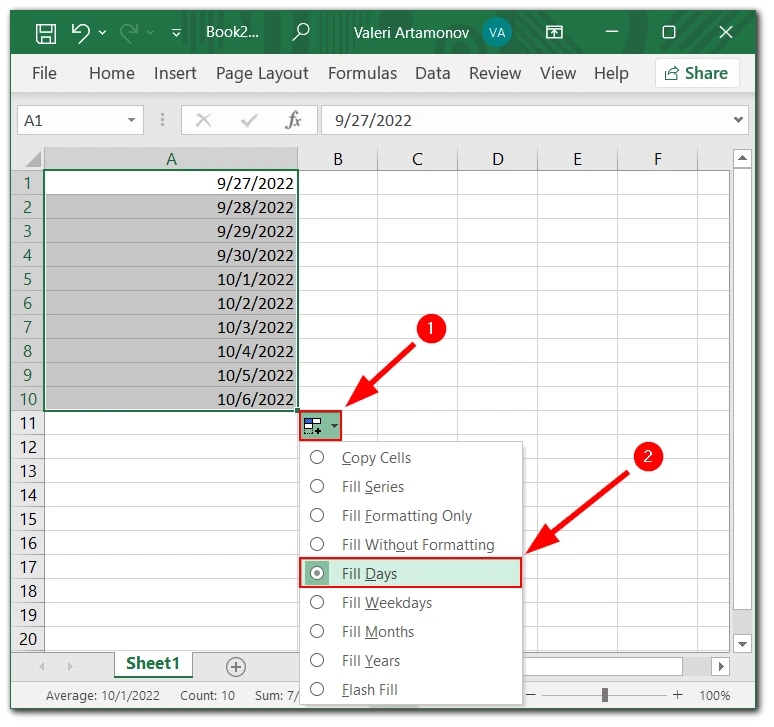
You can apply different autofill options not only to dates or numbers. For example, you can start entering abbreviations or names of months and days of the week, and Excel will automatically continue the sequence. In addition, with the right mouse button, you can flexibly customize the autofill to fill exponentially, for example.
How to create a fill handle custom list in Excel
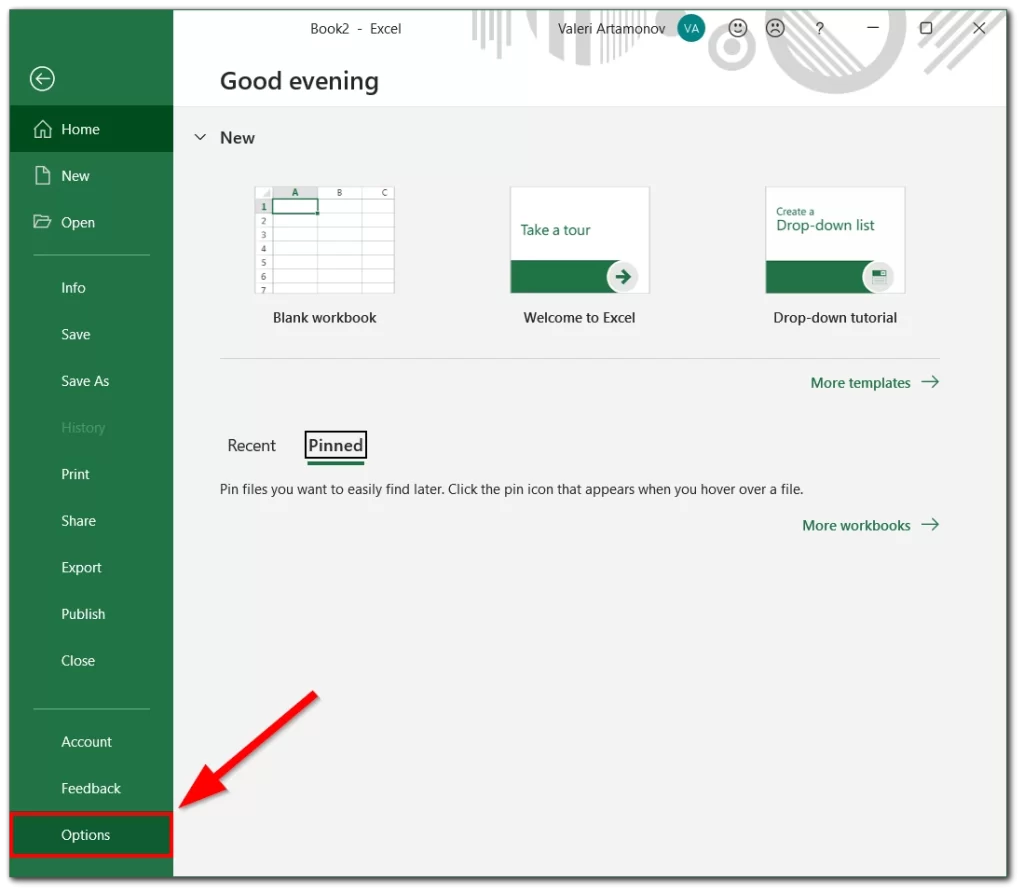
Also, in Excel, you can create your custom autofill list using the FILL HANDLE function. This is relatively easy, but you will need the Desktop version of Microsoft Excel to do this. The online Excel service will not work. After that:
- Click on File on the Tools menu and the Options tab.
- Select Advanced.
- Then scroll down until you see the Edit Custom Lists button.
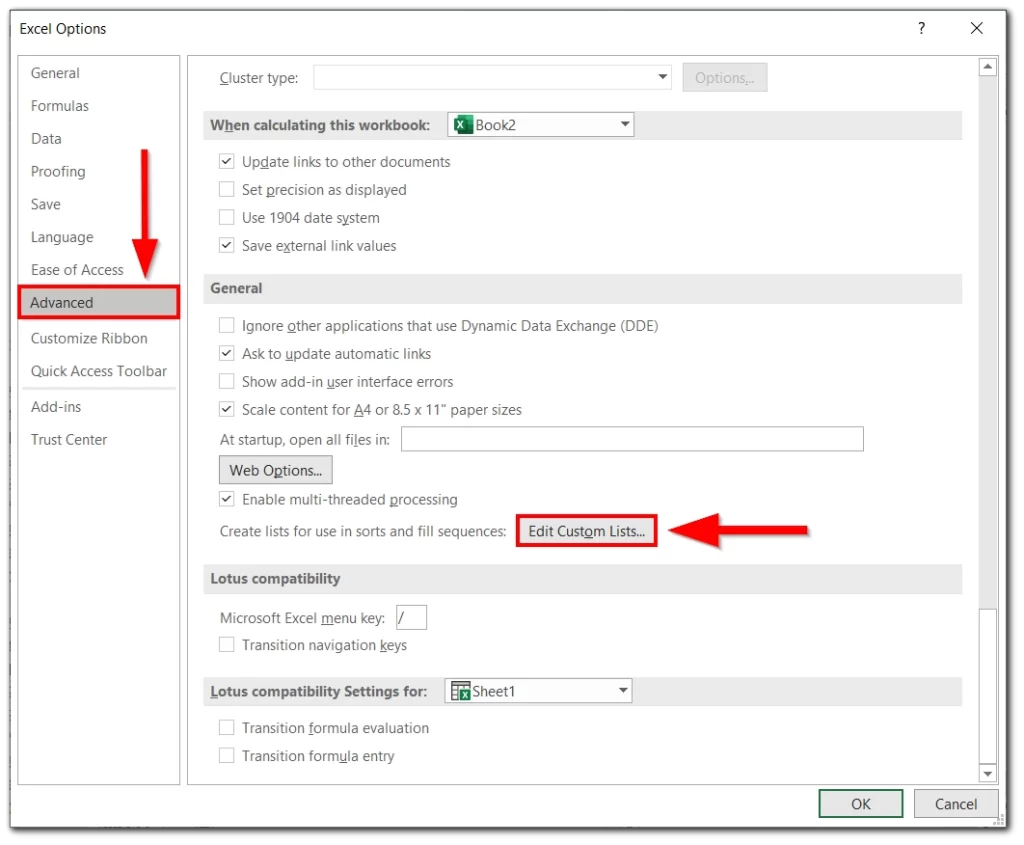
- You will see a pop-up menu where you must create a custom list of any items. Note that you can import it from an existing list in your Excel document.
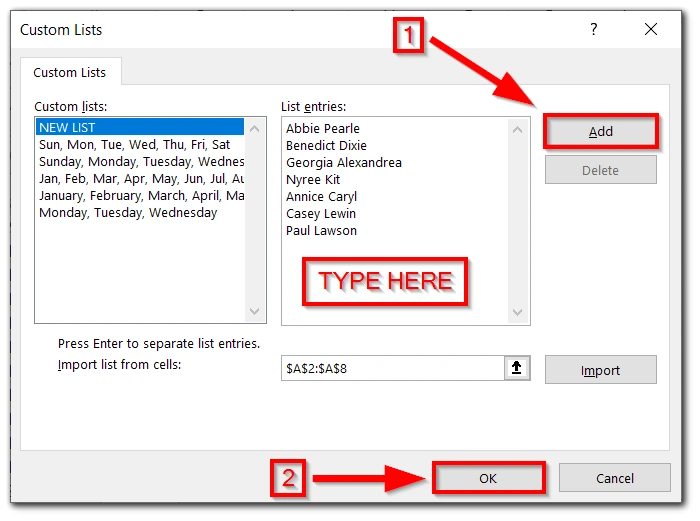
After you create a list, you have to put one of its items in a cell and then drag it down. Excel would autofill the selected field with items from that list in the exact order you specified when you created the list.
Read also:
- How to create a bookmark in an Excel
- How to freeze rows and columns in Excel
- How to use the IMAGE() function in Excel
How to disable the fill handle function
If you often miss clicking or don’t use this function, you can quickly turn it off. This way, you eliminate unnecessary visual garbage in your work interface. To do this, you need to:
- Go to File and then Options.
- Select Advanced.
- Under the Editing Options tab, disable Enable fill handle and cell drag-and-drop checkbox.
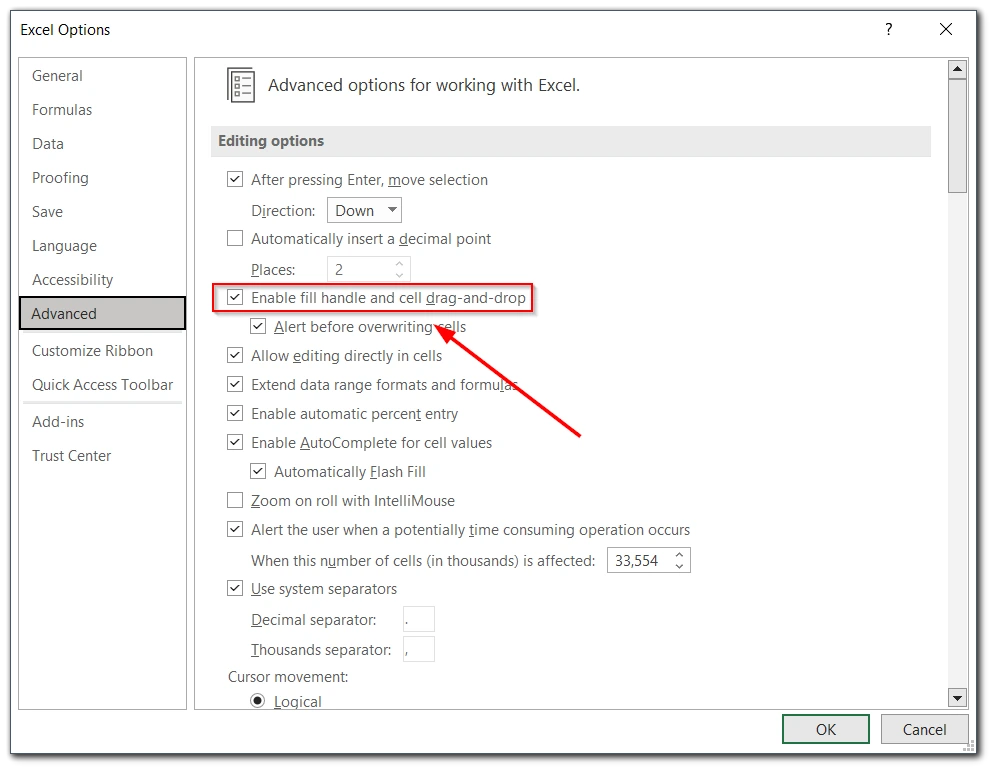
Then the square in the corner of the cell will disappear. The fill handles feature will be disabled. To enable it again, you just need to check the box. There is no limit to this.


