

With the release of the new version of iOS 16, Apple brought quite a few changes. In addition to updating the system as a whole, they also added a lot of features to their standard applications. One of them is the ability to cancel emails in their standard Mail app on iPhone.
Apple has come up with a very interesting feature. Basically, if you turn on the ability to cancel emails, you turn on a few seconds delay before the emails are sent, during which you can cancel the emails. This means that if you’ve finished the email, but then you see an error, you can quickly cancel the email.
How to undo sent emails using iPhone’s Mail app
This is not the first undo feature added to iOS 16, but Apple has also added the ability to delete messages in iMessage. However, they work a little differently, in the case of Email, you will have a delay before you send it, in this time window you will have the option to cancel sending your email. To do this, you will need to:
- Write your Email and send it.
- After that, you will exit to any other menu. At the bottom of the screen, you will see the Undo Sent option. Click this button and the email will not be sent.
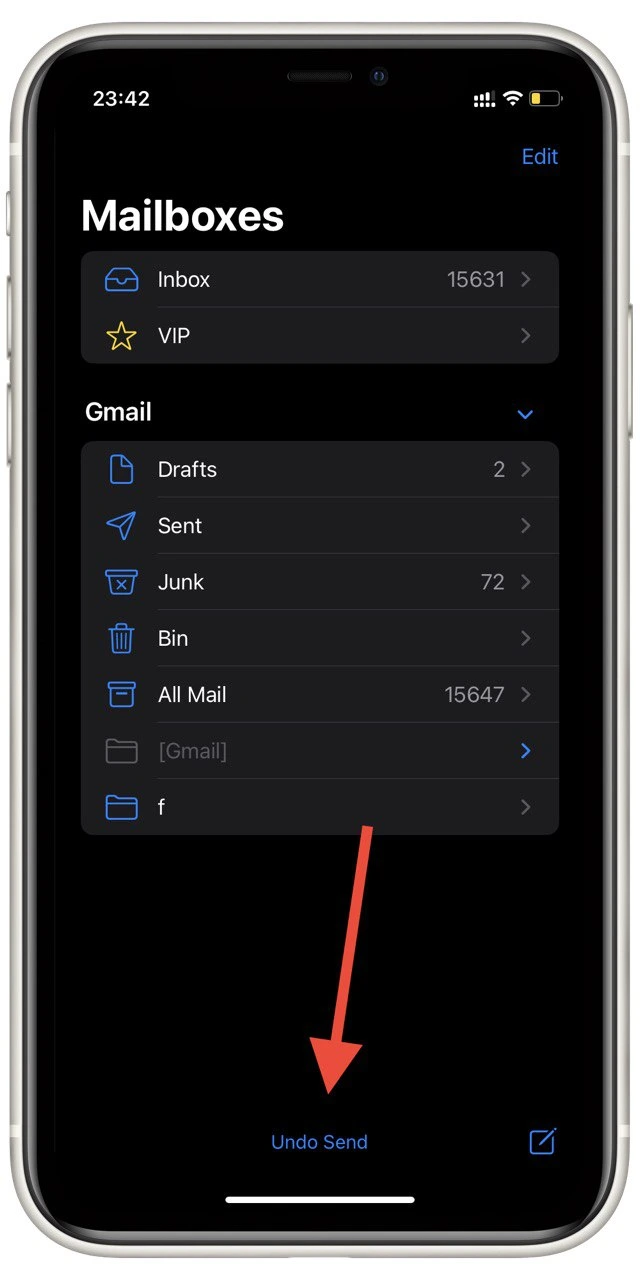
You should understand that this is not a full cancellation of your email. As long as the time delay has not passed the email will not actually be sent. So if you need to send emails quickly and at the same second, you might want to turn this off.
How to change undo sent delay in the Mail app
As I wrote above, canceling sending emails is a feature that delays the sending of your email. Of course, you can modify it or disable it altogether. To do this, you need to use the Settings on your iPhone:
- In Settings, go to Mail.
- Scroll to the bottom to Undo Send Delay.
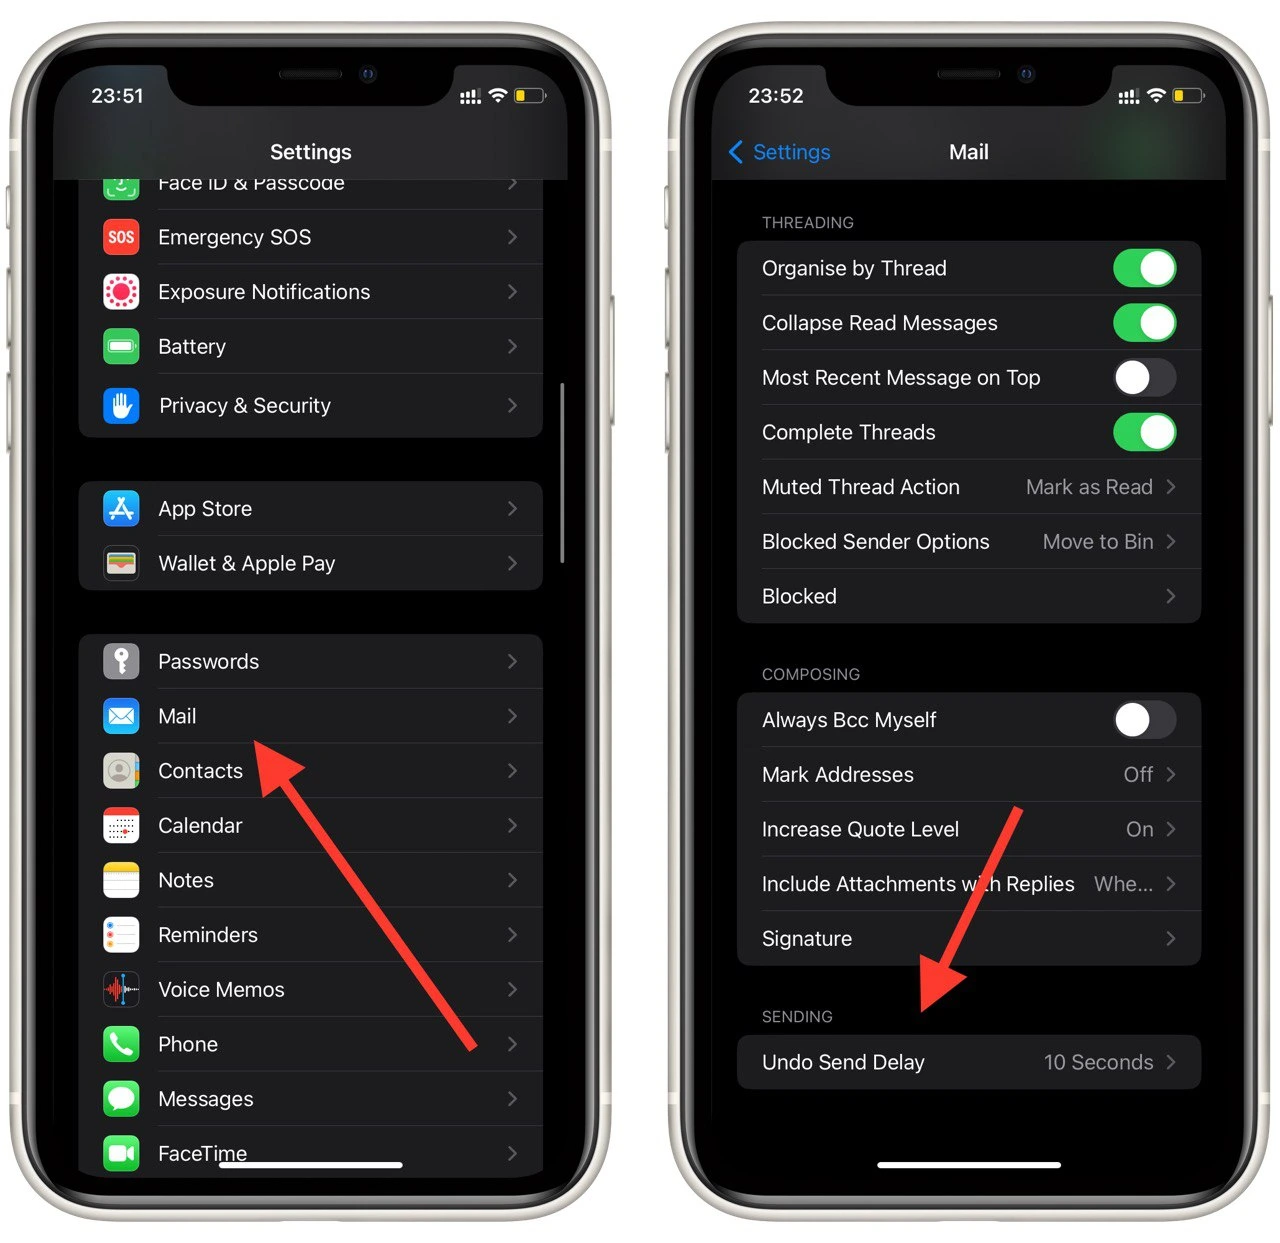
- In the next menu, you can choose to delay or disable this feature.
You have several options for delaying the sending of your email. You can set it to 10 seconds, 20 seconds, or 30 seconds. You can also turn it off altogether. Also, there is now a scheduled Emails feature available, if you need to delay your emails even longer.
How to schedule emails using iPhone’s Mail app
Among the many new features in iOS 16 is another improvement for sending your emails. If the default delay is too short for you and you want to send an email after an hour or at a specific time, you can now do this directly from the Mail app. To do so:
- Create a new email and fill it out.
- As soon as you are ready to send it, press and hold down the send button (the blue button with the up arrow) at the top of the screen.
- You will see a pop-up menu where you can choose how long to send the email or even specify the exact date or time.
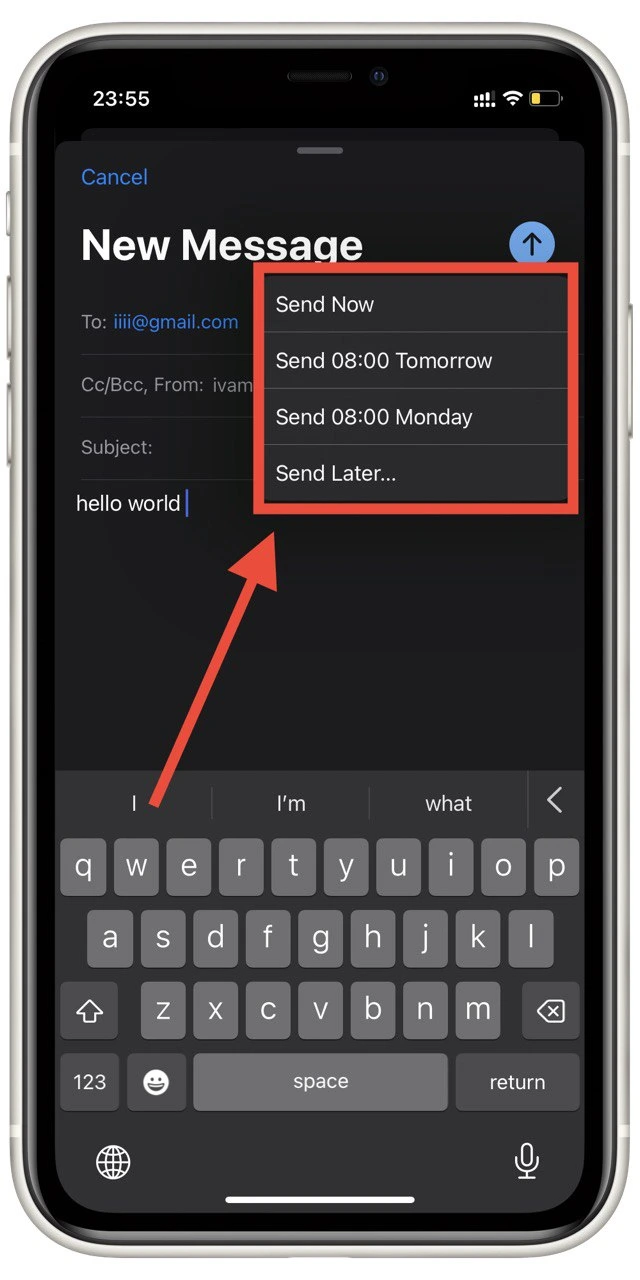
There are no restrictions on sending emails this way. You can do this at any time and with any type of email. This can come in handy if you’re not sure what you’ve written and want to reread it later. You can access “pending” emails in the Send Later tab.
Read also:
- 7 things Apple hasn’t unveiled on the latest Far Out event
- How to use widgets on the lock screen in iOS 16
- How to remove the ‘Sent From My iPhone’ signature on iPhone
How to add an account to the Mail app
If you become interested in these features, you can add any of your email accounts to the Mail app on your iPhone. You can do this the first time you open the app or through the settings after you first turn it on. To do this, you need to:
- Open Settings.
- Then go to Mail.
- Tap Accounts.
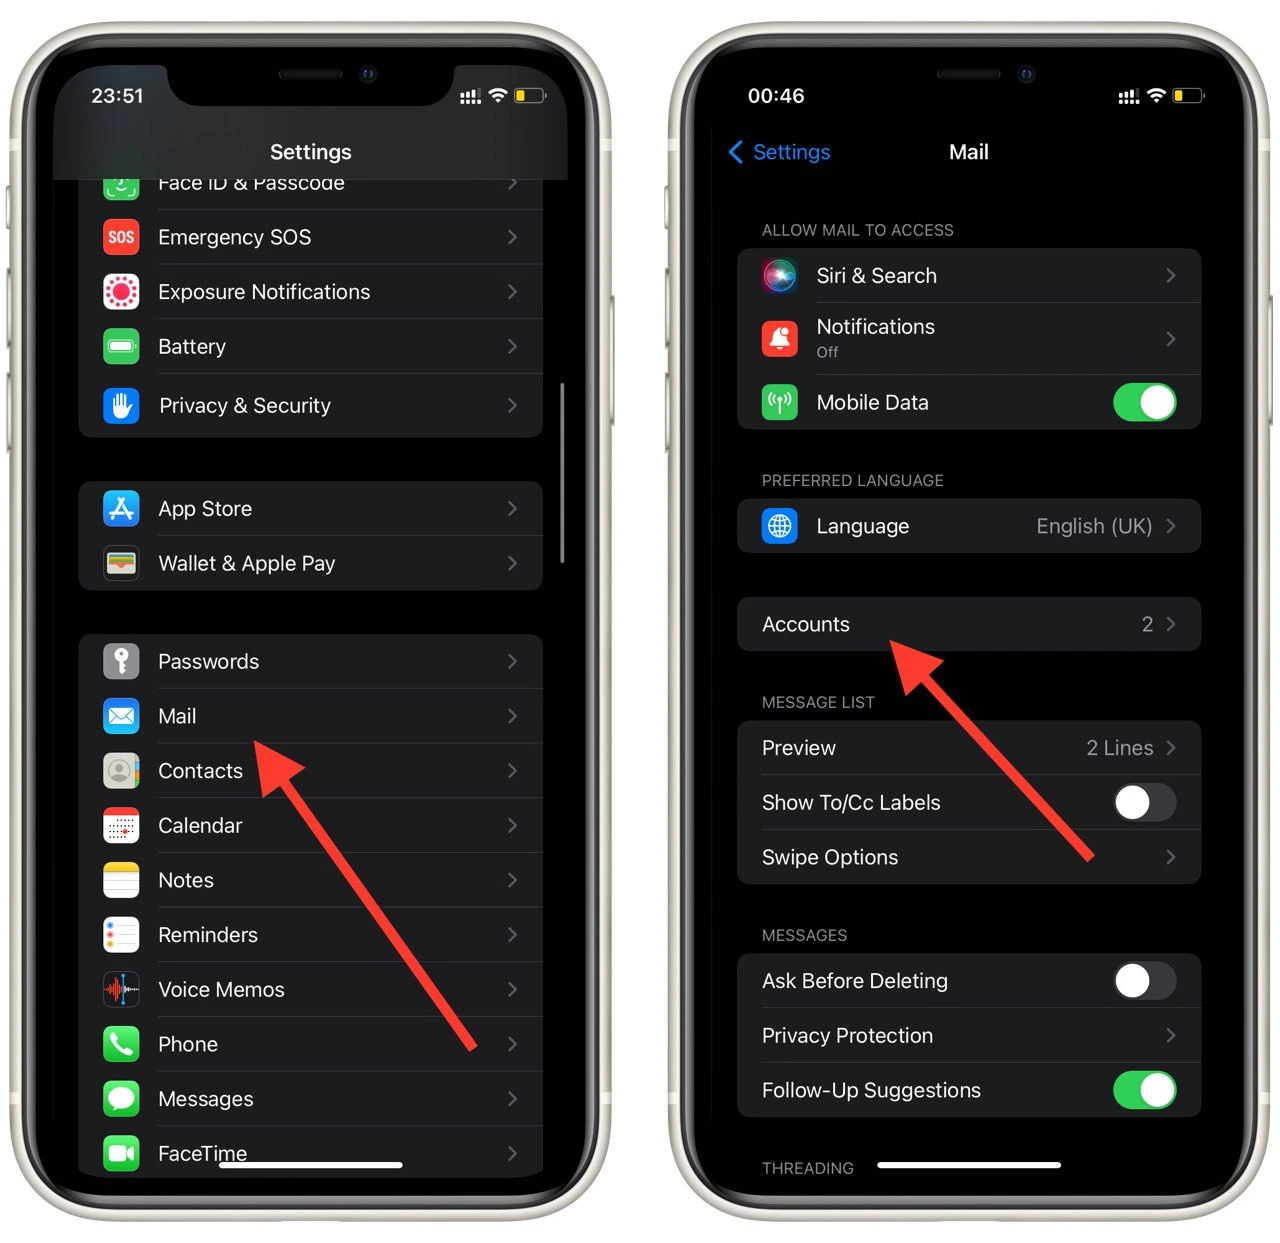
- Select Add Account.
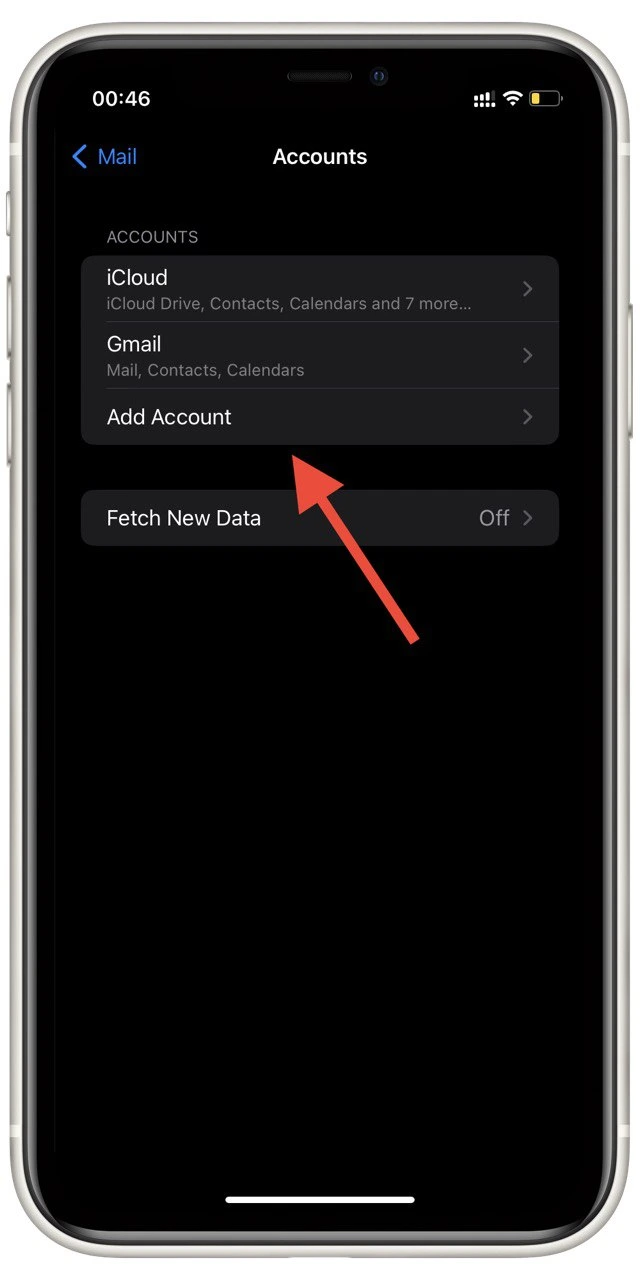
As with the first opening, you will see a list of the most popular email services in front of you. Here you can select the service you want or specify any other service. After that, you’ll be asked to enter your account information and all your emails will be duplicated in the Mail app.


