

First things first, I would like to say that this problem with the Internet connection is quite common, but easily solved. I’ll describe a detailed troubleshooting guide below, but for now, let’s take a quick look at what you can do.
To begin with, you need to ensure that you can’t connect to the Internet only on your Switch. If you can connect to Wi-Fi from your smartphone or laptop, the problem is not the router but the console.
So, in that case, you should focus on Switch. It’s a good idea first to restart it. If it doesn’t help, you should check your console network settings.
If you can’t connect to Wi-Fi from all devices, restart your router. If the Internet doesn’t appear after that, resetting the router to its factory defaults won’t be a mistake.
Generally, if none of the above help, the problem is on your ISP’s side. So it will be better to contact them for help.
Step 1: Check your Internet connection
Before delving into the Switch’s settings, ensure your internet connection works correctly. Test your connection by connecting other devices, such as smartphones or laptops, to the same network. If those devices can connect without issues, move on to the next step.
Step 2: Power cycle your Switch
Sometimes, a simple power cycle can solve connectivity problems. To turn off your Nintendo Switch entirely, follow these steps:
- Hold the Power button for a few seconds and select Power Options.
- Click Turn Off.
- After the device has powered down, wait 30 seconds and turn it back on.
Attempt to reconnect to the Internet and see if the issue is resolved.
Step 3: Forget and reconnect to the Wi-Fi network
If the Nintendo Switch is still not connecting, try removing the saved Wi-Fi network from the console’s settings and reconnecting to it. To do this, do the following:
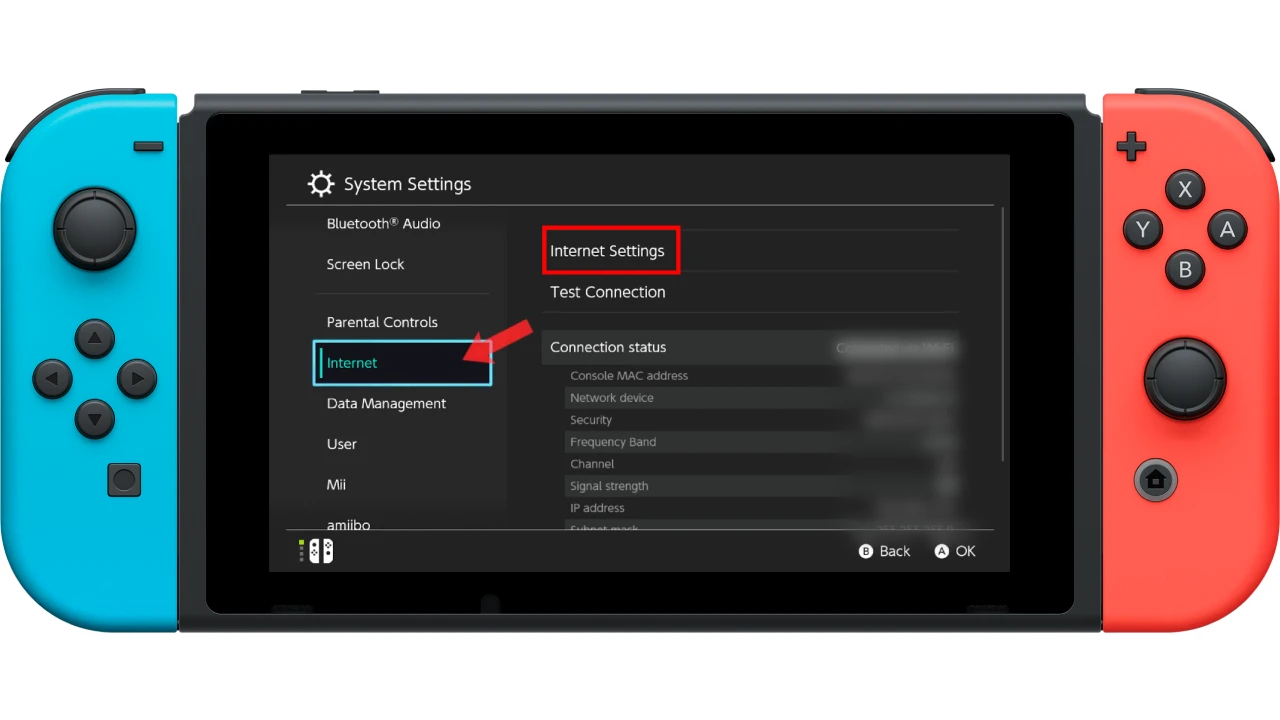
- Go to System Settings on your Switch.
- Select Internet and open Internet Settings.
- Locate your Wi-Fi network from the list and select it.
- After that, click Delete Settings.
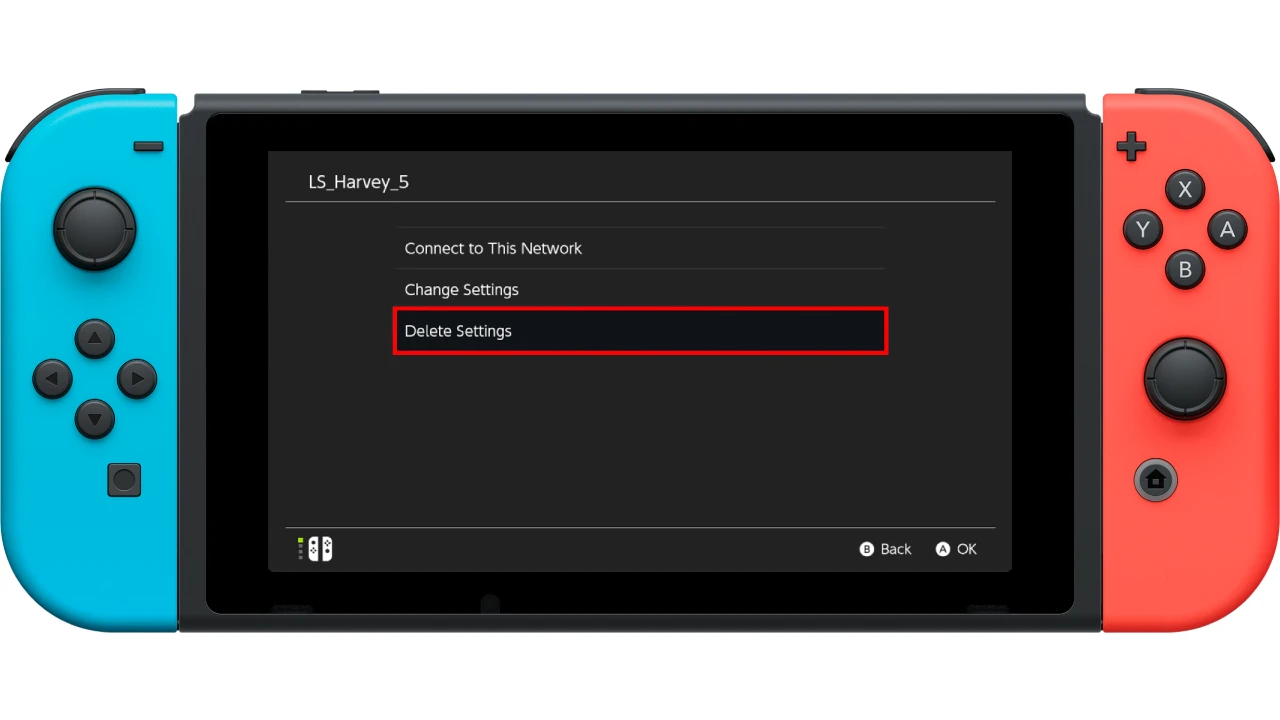
- Finally, confirm by clicking Delete.
Once removed, reconnect to the network by selecting it again, entering the required password, and testing the connection.
Step 4: Change network settings on Switch
Changing network settings on your Nintendo Switch can be another good step in troubleshooting connectivity issues.
- Access the System Settings.
- Go to the Internet tab and open Internet Settings.
- Then locate and select the Wi-Fi network you want to connect to.
- Select Change Settings to modify the network settings.
- Configure DNS settings:
- You will find an option to configure the DNS settings. By default, the Switch uses automatic DNS settings provided by your router or ISP. However, you can try changing it to a public DNS server, such as Google DNS or OpenDNS, to see if it improves the connection.
- Select DNS Settings, choose Manual, and click Primary DNS.
- Enter 1.1.1.1 or 8.8.8.8.
- Go to Secondary DNS and enter 1.0.0.1 or 8.8.8.4
- After making the necessary changes to the network settings, click Save.
Once you have completed these steps, try to connect to your Wi-Fi network and test it. Also, ensure that Flight Mode is disabled.
Step 5: Reboot the router
If the steps above do not help, the problem may be with your router. Power off your router by unplugging it from the power source, wait for 30 seconds and then plug it back in.
Allow the router to reboot fully, and once the Wi-Fi signal is stable, attempt to connect your Nintendo Switch to the Internet again.
Step 6: Reset the router
Here’s a general guide on how to reset a router:
- Locate the Reset button: Look for a small Reset button on your router. It is usually recessed and may require a pin or paper clip to press.
- Press and hold the Reset button: Press and hold the Reset button on the router using a pin or paper clip. You may need to apply continuous pressure for about 10-15 seconds or follow the instructions provided by the router manufacturer.
- Wait for the router to reboot: Allow the router to reboot completely. This process may take a few minutes, so be patient. The router’s lights will indicate when it has finished booting up.
- Reconfigure the router: Once it has restarted, you will need to reconfigure its settings. This typically involves connecting to the router’s web interface through a web browser and setting up the network name (SSID), password, and other desired settings.
Note: Resetting the router will erase all customized settings and configurations, including Wi-Fi network names, passwords, and port forwarding settings. Make sure you have the necessary information and access credentials before performing a reset.
If none of the above steps work, there may be an issue with your internet service provider. Reach out to your ISP’s customer support and describe the problem you’re experiencing. They can help troubleshoot and determine if any network-related issues may affect your Nintendo Switch’s connectivity.


