

Google Docs is a full-featured text editor that is not much inferior even to competitors such as Microsoft Word. And most importantly, it’s all in the cloud, so you don’t need to upload your document anywhere or connect third-party services to work on it with your colleagues. Among the wide range of tools, users are often interested in such a feature as the dotted line.
The dotted line can be an essential element in your document. Google Docs has several ways to add a dotted line to your text. And you can add horizontal lines as well as vertical lines, but you’ll need to take a slightly non-obvious route to do so.
Why you might need a dotted line in Google Docs
Let’s start by figuring out why you need dotted lines in Google Docs in the first place. There can be visual and specific reasons that help you make your document the way you want it.
You can use the Dot Line to divide your document into several blocks if we discuss visual reasons. For example, if you have finished talking about one element, you can put a dotted line and then start talking about another element, and so on.
If we talk about more practical uses, I immediately think of documents you will cut on the dotted line. This can be useful if you design some forms or bus tickets, for example.
What is the easiest way to add a dotted line in Google Docs?
When it comes to the “easiest” way to put a dotted line, the first thing that comes to mind is making a simple line of dots. And in fact, this is a very working method if you need one such line. Hold the dot button down and wait for the characters to print to the edge of the page. Afterward, I’d recommend centering your “line” in the center of the page.
However, I would like to tell you about a more straightforward and elegant method. Google Docs allows you to insert a line in the middle of the text, and you can choose the style for the line, for example, make it dotted. To do this, you have to:
- Click on Format above the toolbar.
- From the drop-down list, select Paragraph Styles.
- Next, you need to select Borders and shading.
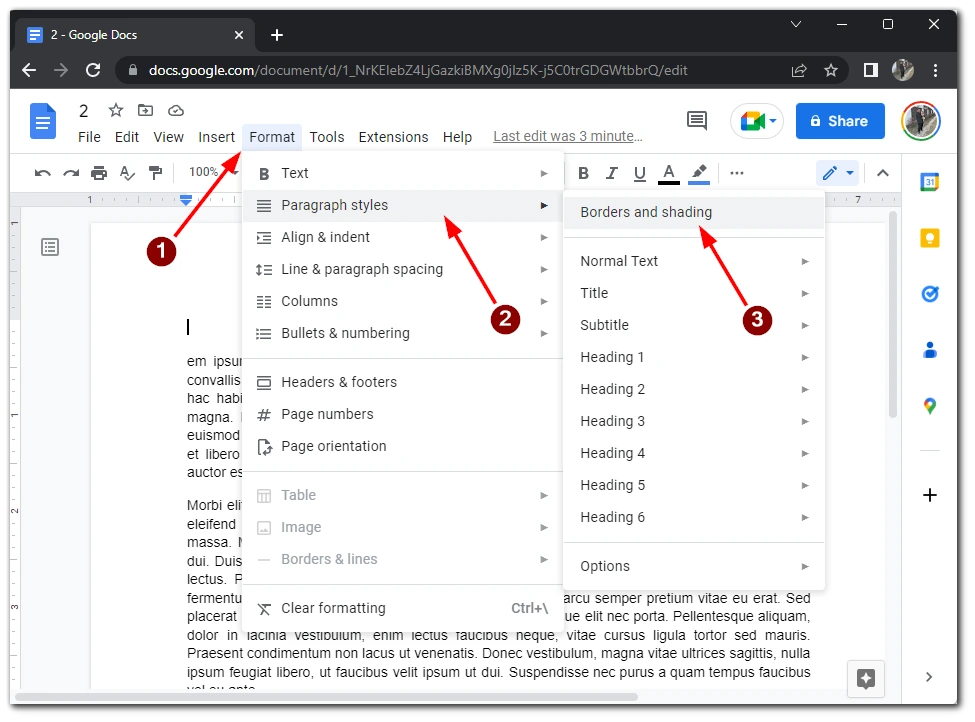
- In the drop-down box, you must choose the border style. In the Border dash tab, select the dotted line.
- You can also adjust the size and color of the line. In the end, click Apply.
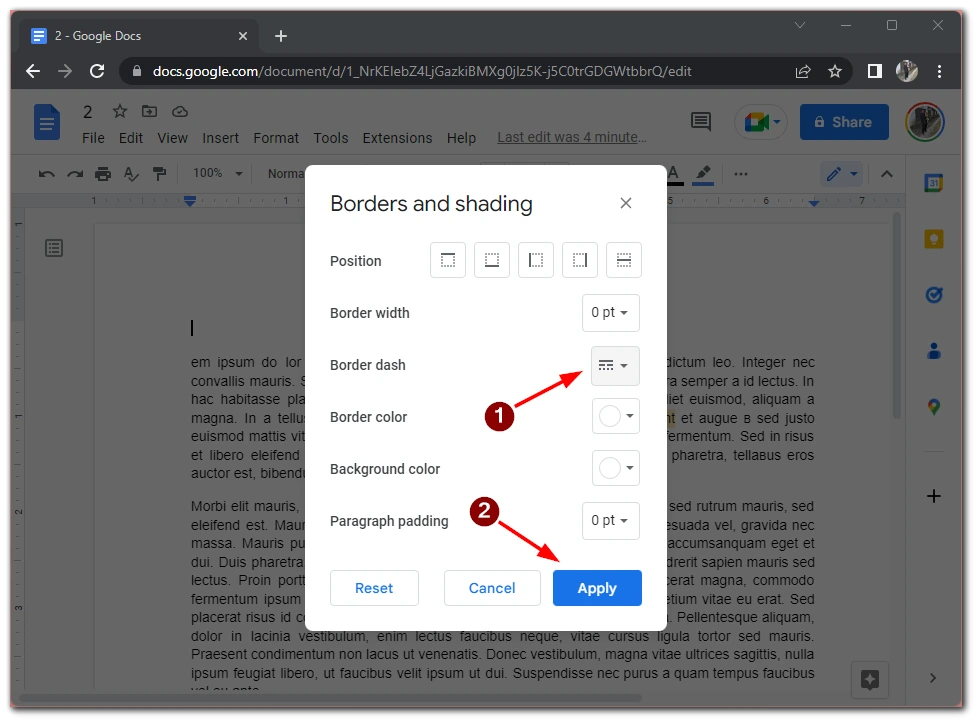
Note that you can add borders on the sides and at the top or bottom of the paragraph. Also, if you hold the cursor in the middle of the text, the line will automatically divide the text into two different paragraphs. From Google Docs’ point of view, it will be one whole object, which means you can delete it with one click on Backspace.
How to add drawing a dotted line in Google Docs
Another easy way to add a dotted line to your document is with the Draw function. It allows you to add different drawings or shapes as a “sticker” to your text. To do this, you need to:
- Click on Insert and choose Drawing from the drop-down box.
- Then create a New Drawing.
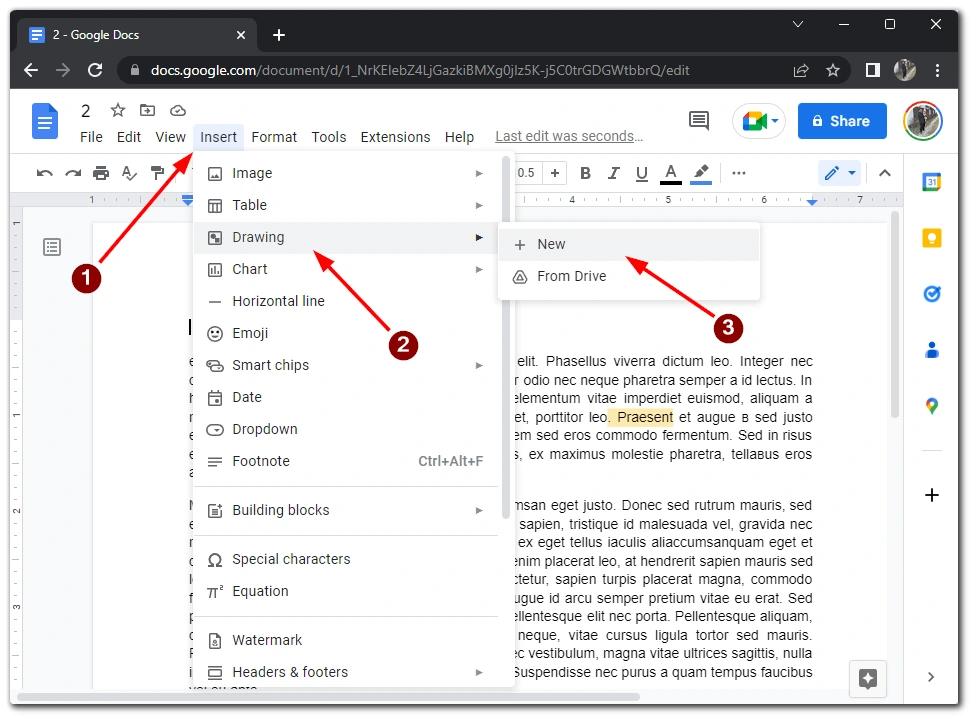
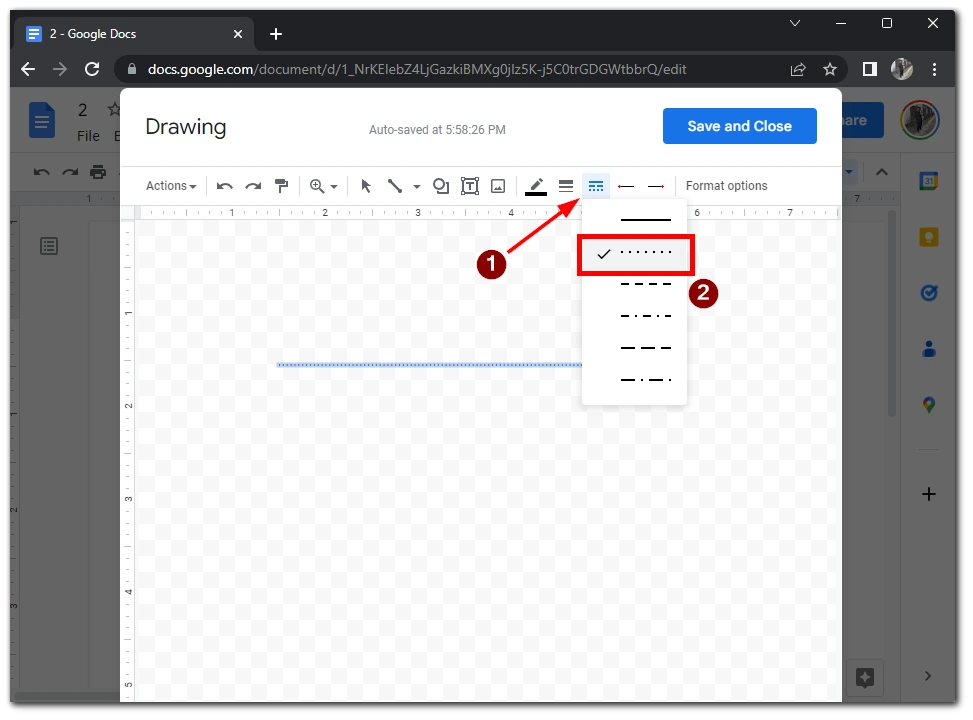
- In the Drawing editor, select a line and place it in the drawing box.
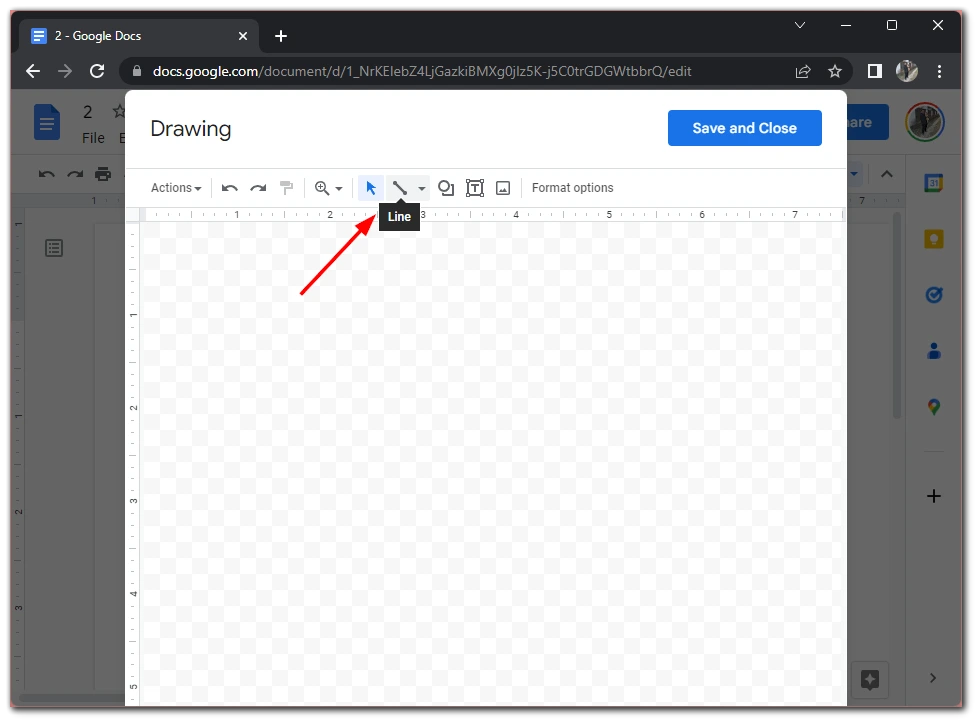
- Then click on it, and select the Line Dash tool in the toolbar.
- From the drop-down list, choose a dotted line.
- When you’re ready, click Save at the top of the screen.
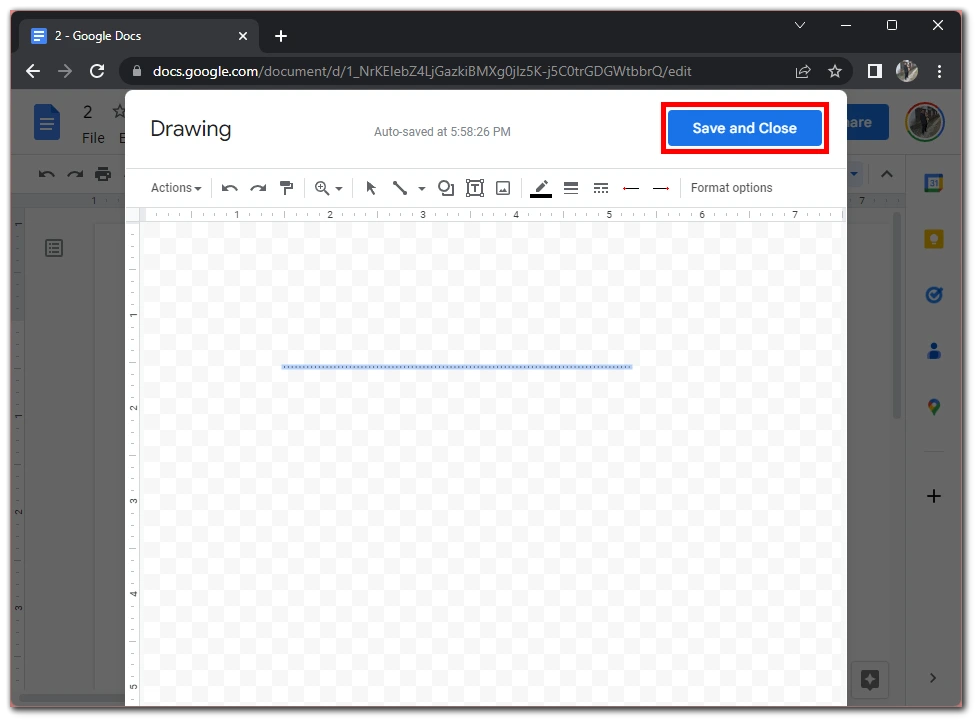
Remember that if you add other elements to the Drawing, they will also be added to the document as a single image with the same proportions. So it would be best to keep this in mind when creating a drawing. You can also position your line as you wish. You can set it vertically, horizontally, or at whatever angle you want.
How to add a dotted line in Google Docs on mobile devices
Unfortunately, the mobile version of Google Docs is a simplified version of the text editor and lacks some of its features. You won’t be able to add a dotted line to your document from your phone. It is only possible to add a solid, unbroken line. To do this, you need to:
- Navigate to the part of the text where you want to leave the line.
- Then click on the Plus at the top of the screen.
- From the drop-down menu, select the Horizontal line.
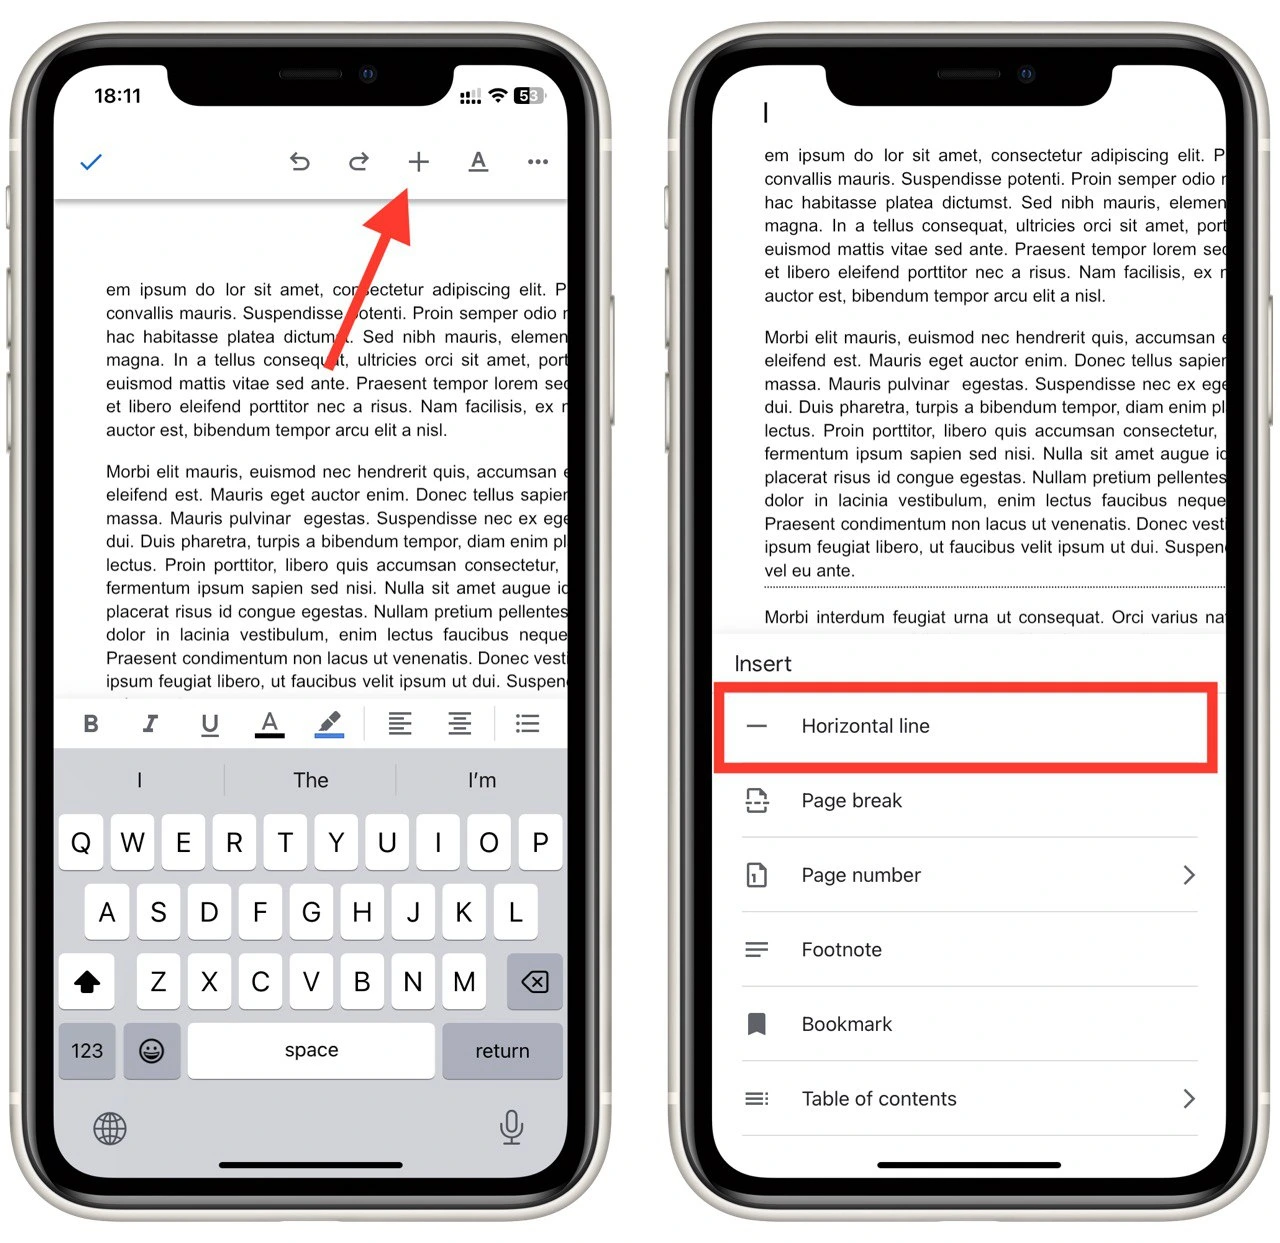
After that, the line will be automatically added to the text. If you insert it in the middle of a paragraph, it will be split into two paragraphs. It has the same functions as the line from the first instruction in this guide. However, to select the appropriate formatting, you must open the document from the desktop version using your computer or the browser on your mobile device.


