

High-Efficiency Image Format (HEIF) emerged as the default image format introduced by Apple with the advent of iOS 11. Notably, any photograph captured on an iPhone is inherently formatted as HEIC unless manually altered. The Camera settings offer users a choice between two formats: High Efficiency (HEIC) and Most Compatible (JPEG).
HEIC stands out due to its capacity to deliver superior image quality while concurrently minimizing file sizes, a notable advantage over JPEG. Apple’s early adoption of this technology underscores its commitment to optimizing user experience on its devices.
HEIC format history
HEIC (High-Efficiency Image Coding), or High-Efficiency Image Format HEIF , was more than just a creation of Apple, despite their early and widespread format integration. Instead, it originated from the Moving Picture Experts Group (MPEG), renowned for crafting audio and video compression standards, including MP3 and MP4.
MPEG conceived HEIC as a successor to the JPEG format, leveraging advancements in image coding for enhanced efficiency. Apple, commencing with iOS 11 and macOS High Sierra, embraced HEIC as the default image format across its devices. The primary impetus for this adoption stemmed from HEIC’s capability to deliver high-quality images while significantly reducing file sizes, a pivotal factor in optimizing storage space on Apple devices.
HEIC files typically bear the HEIF “.heif” file extension, varying according to the platform or device. The equivalent format for videos is HEVC (High-Efficiency Video Coding).
While the official standard does not explicitly denote the abbreviation HEIC as High-Efficiency Image Codec, it has gained recognition and usage as a de facto brand name. Consequently, HEIC serves as a colloquial, yet commonly accepted, reference to the High Efficiency Image Format within the industry and user communities.
What are the advantages of HEIC?
HEIC, with its superior performance, offers several advantages over traditional formats such as JPEG. Among these advantages is the ability to provide improved image quality while reducing file size by integrating sophisticated compression algorithms.
In addition to improving image quality, HEIC provides advanced features. In particular, it can encapsulate multiple images, forming sequences of images in a single file.
HEIC’s versatility extends to transparency support, allowing you to include alpha channels. This feature proves valuable for tasks such as image superimposition and compositing, expanding creative possibilities.
Another advantage of HEIC is its comprehensive support for various image metadata. It does an excellent job storing complex details such as camera model, aperture, exposure, and location. With such a large amount of metadata, HEIC is preferred for professionals and enthusiasts who value detailed image information.
How to change the image format on iPhone
As I said before, you can choose the format in which the photos will be saved on your iPhone. Here’s a quick guide to changing the format of the image when saving to your iPhone:
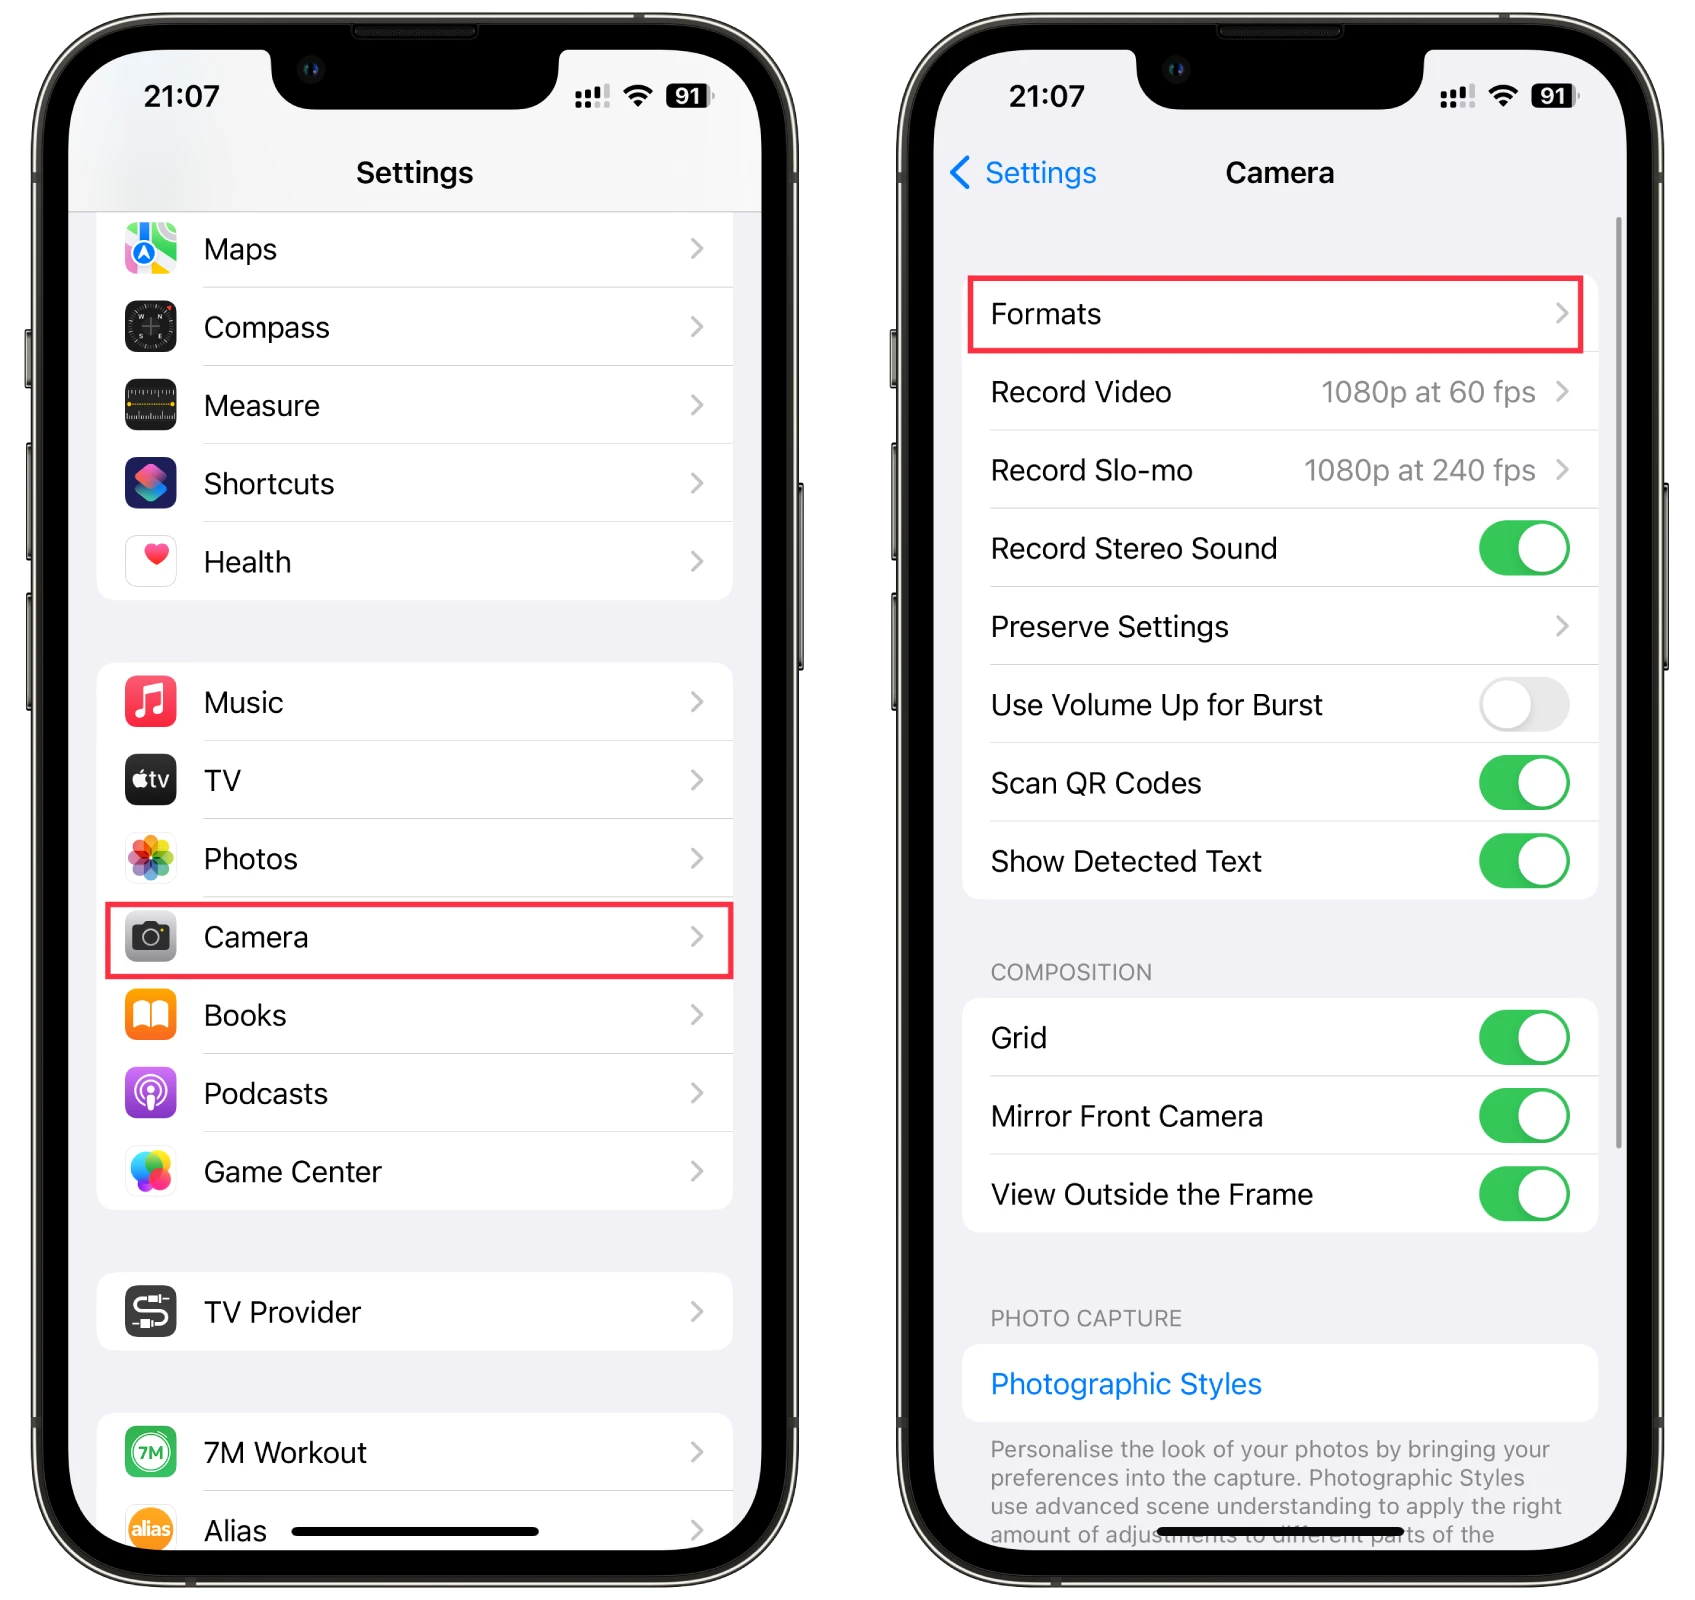
- Open Settings: Go to the Settings app on your iPhone. A gear icon on the home screen usually represents it.
- Scroll down the screen and select “Camera.” Scroll down and find “Camera”. Tap on it to go to the camera settings.
- Select formats: In the camera settings, find and select “Formats.”
- Select “High Efficiency” or “Most Compatible“: In the Formats section, you will see two options, “High Efficiency” and “Most Compatible”.
- Select “High Efficiency” to use the HEIF format, which provides better quality with a smaller file size.
- Select “Most Compatible” to use the JPEG format, which is widely compatible with various devices and platforms.
- Exit Settings: Once you’ve selected, exit the Settings app. Your iPhone will now use the selected format to store your photos.
Following these steps, you can easily switch between High Efficiency (HEIF) and Most Compatible (JPEG) formats depending on your preferences and requirements. Next, you can see the complete guide on how to set up a camera format on an iPhone.
- Open Settings and navigate to Camera.
- Under the Camera settings, select Formats.
- You will see two options: High Efficiency and Most Compatible.
- High Efficiency (HEIF): This option saves photos in the HEIC format, which offers higher quality and smaller file sizes.
- Most Compatible (JPEG): This option saves photos in the widely supported JPEG format.
- Choose the desired format by tapping on it. A checkmark will appear next to your selected format.
- Finally, exit the settings, and your iPhone will now save photos in the chosen format.
It’s important to note that changing the image format will affect all new photos taken with the iPhone’s camera. Existing photos will not be converted automatically. They will remain in the format they were originally captured.
How to check the format of the photo on iPhone
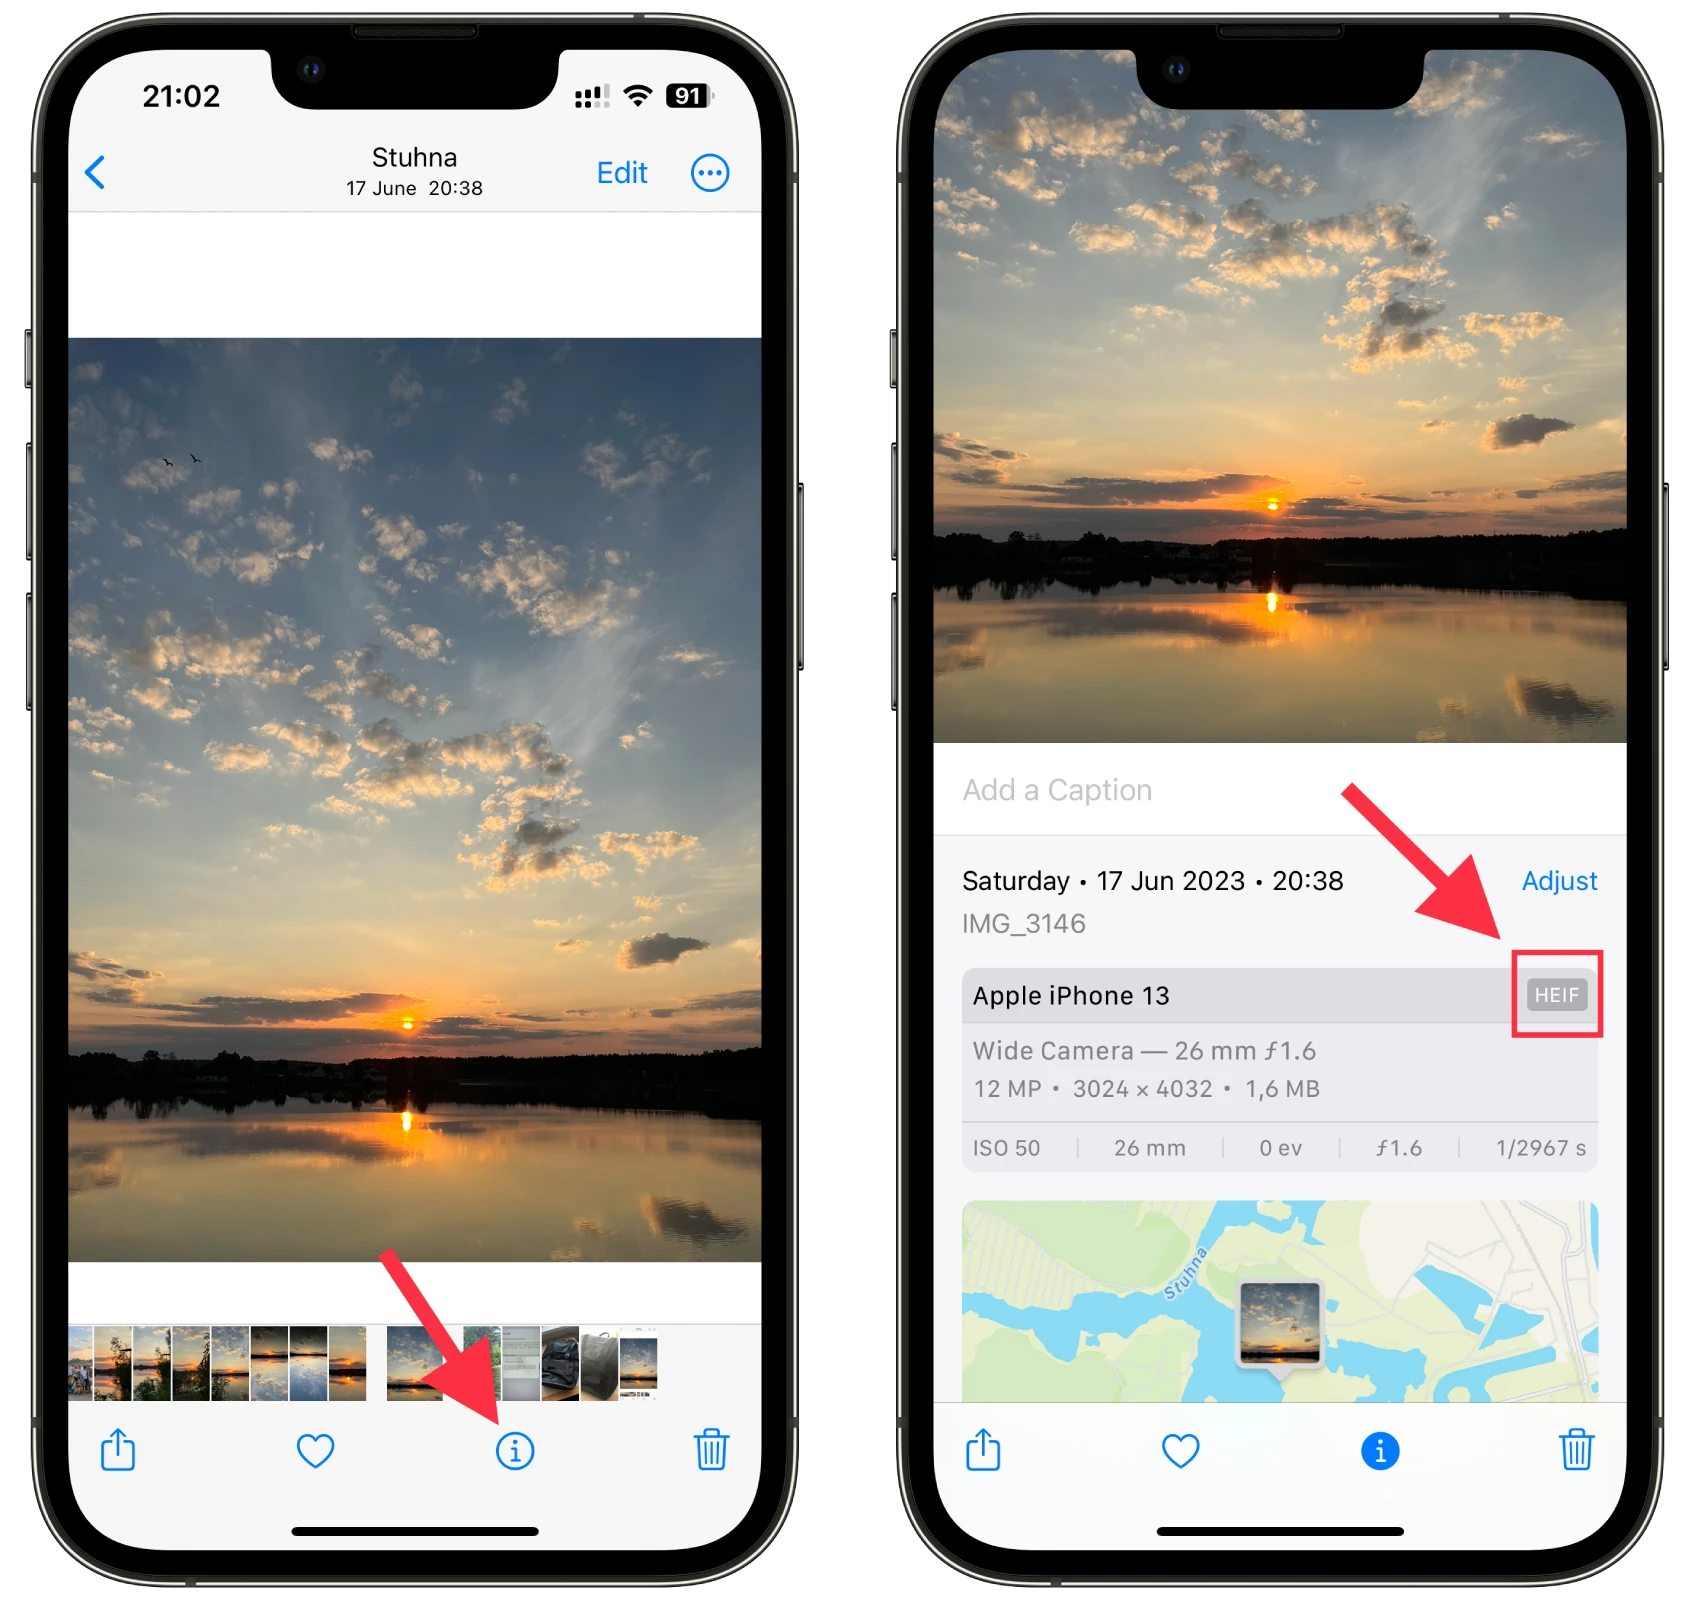
To ensure you’re now taking new photos in another format, do the following:
- Take a photo of anything and go to Photos.
- Find this picture and tap the (i) icon at the bottom.
- On the right side, you should see the format name.
How to open HEIC format on Windows
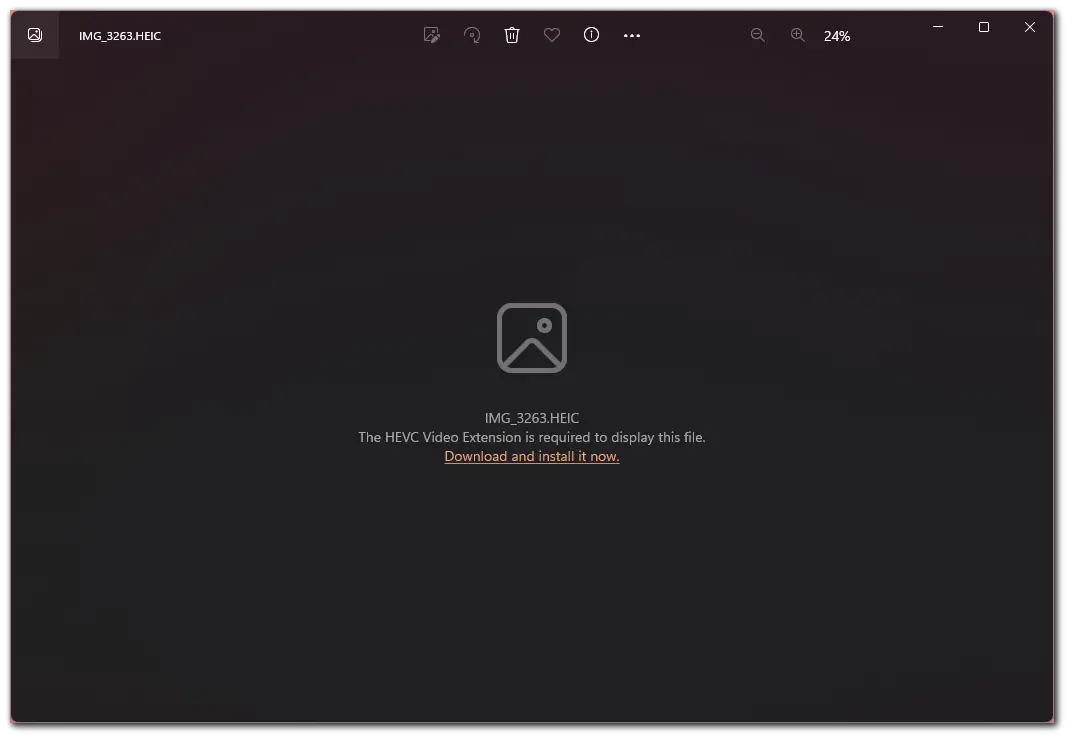
Compatibility issues arise with HEIC (HEIF) files on platforms and older devices that do not offer native support for this format, necessitating conversion to a more universally accepted format such as JPEG. Among these platforms, Windows lacks native HEIC support, and attempting to open HEIC images prompts a notification to install the HEVC Video Extension.
Regrettably, acquiring the HEVC Video Extension from the Microsoft Store incurs a cost, albeit a nominal one, amounting to less than $1. Despite this, an alternative approach involves converting HEIC photos to JPEG or another preferred format through online tools, an option discussed later.
The following steps can be followed for those inclined to enable seamless HEIC file access on a Windows computer.
- Once you open your image, click Download and install it now.
- Click Yes to be redirected to the Microsoft Store.
- After that, click on the button with price or Get.
- Enter your PIN to verify it’s you and make a payment.
- Finally, install the extension.
Now you can open any HEIC image on your Windows PC.
How to convert HEIC to another format
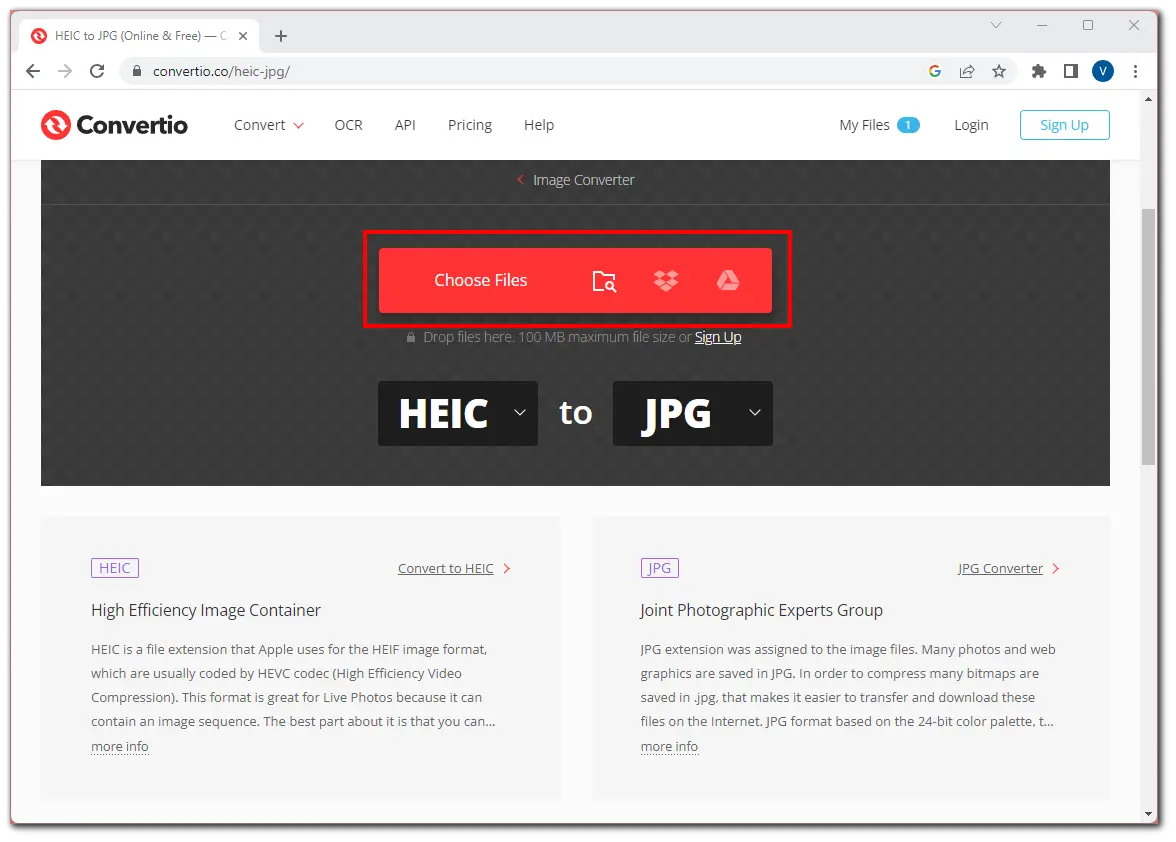
In fact, you can just google “HEIC to JPG converter,” for example, and you will get a bunch of sites where you can do it. I will use Convertio as an example:
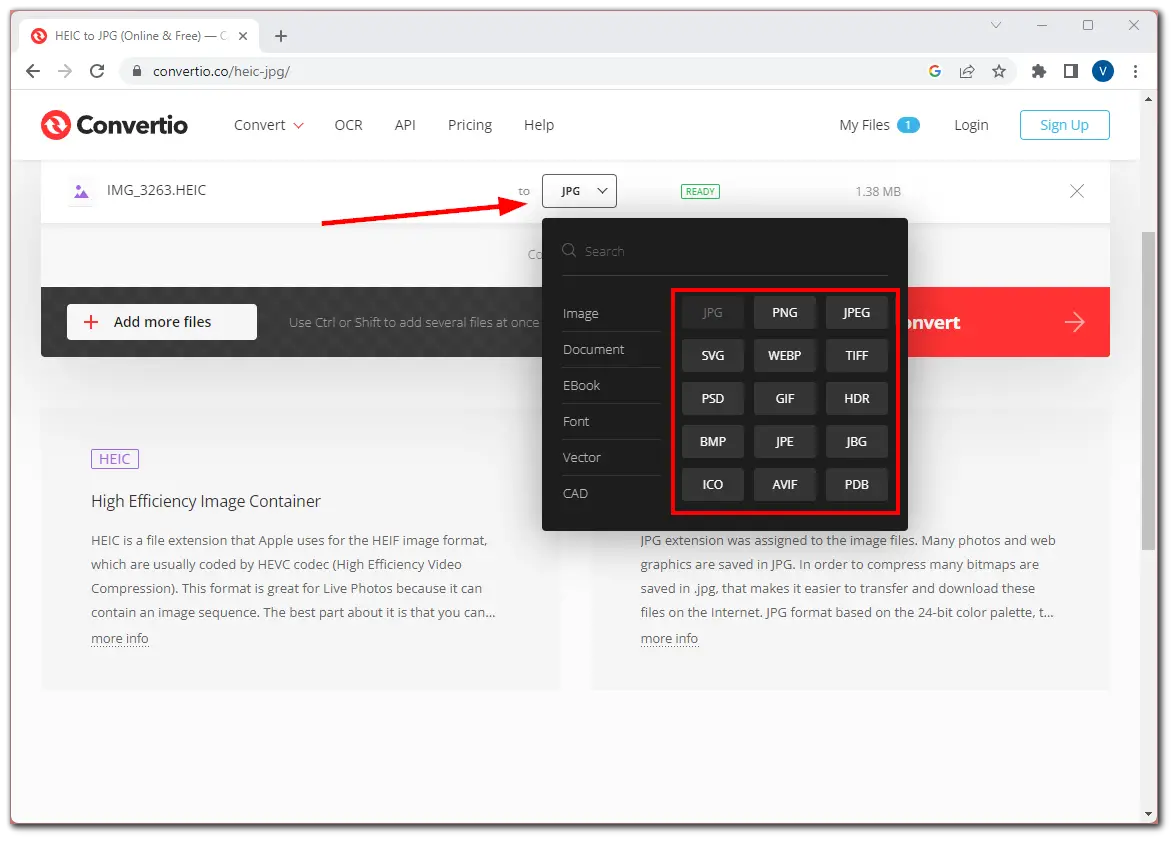
- So visit Convertio and upload the photo you want to convert by clicking Choose Files.
- After that, select the JPG or another format and click Convert.
- Wait for the process to complete and click Download.
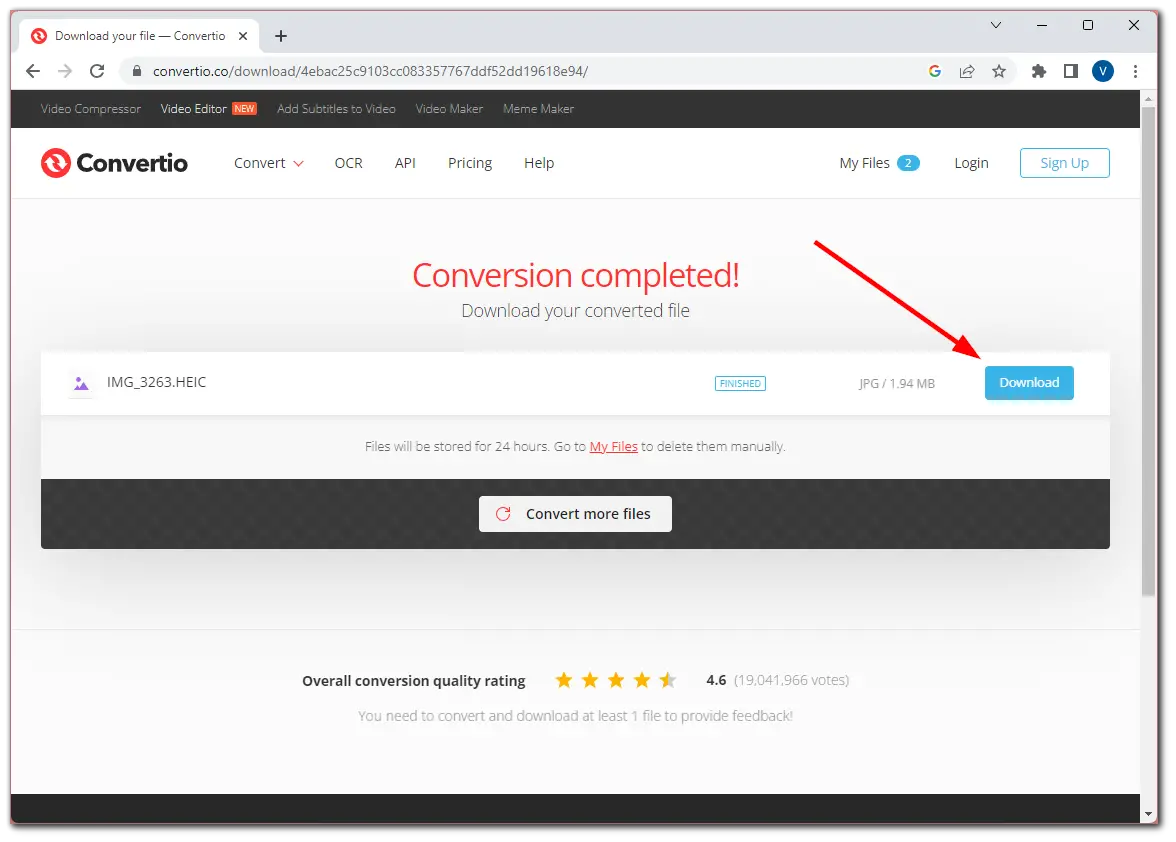
Once you have completed these steps, you can save the image wherever you want on your computer. Don’t forget to open the converted photo to check if everything is good with it before sending it to someone.
Why did Apple switch to HEIC?
Apple switched to the High-Efficiency Image Format (HEIC/HEIF) primarily because of its advantages and technological advances. Adopting HEIC as the default image format on Apple devices started with iOS 11 and macOS High Sierra. All new formats, even if they are super efficient, need help to make their way into the future. And that’s a big deal when a major company adopts a new format. Apple is the kind of company that can afford to introduce a new format into its ecosystem. Consider, for example, the WebP photo extension: despite its benefits, site owners didn’t adopt it en masse because there was no browser support. It became famous when support for this format in browsers was included.


