

Most of us know how easy it is to insert an image into a document. However, not everyone knows how to make the text and the image look balanced. In other words, to ensure that everything is in its perfect place. Fortunately, Google Docs took the trouble to add a text-wrapping feature to Google Docs, making things easier for users.
If you want to put the image where you want it and make the text wrap around it, you can change the text wrap settings and how it behaves when it collides with text. By default, Google Docs sets the text wrapping to Inline. With this setup, the web app handles the image the same way it handles other text in the file. But you can change this setting.
What is text wrapping in Google Docs?
Text wrapping in Google Docs refers to how text behaves when encountering an image or other object placed within a document. It determines how text flows around the object, whether it should continue on the same line as the object or be moved to a new line. There are several different options for text wrapping in Google Docs:
- Wrap text: This is the default option and allows text to wrap around an object on both sides. Text will continue on the same line as the object until it reaches the edge of the object, at which point it will move to a new line.
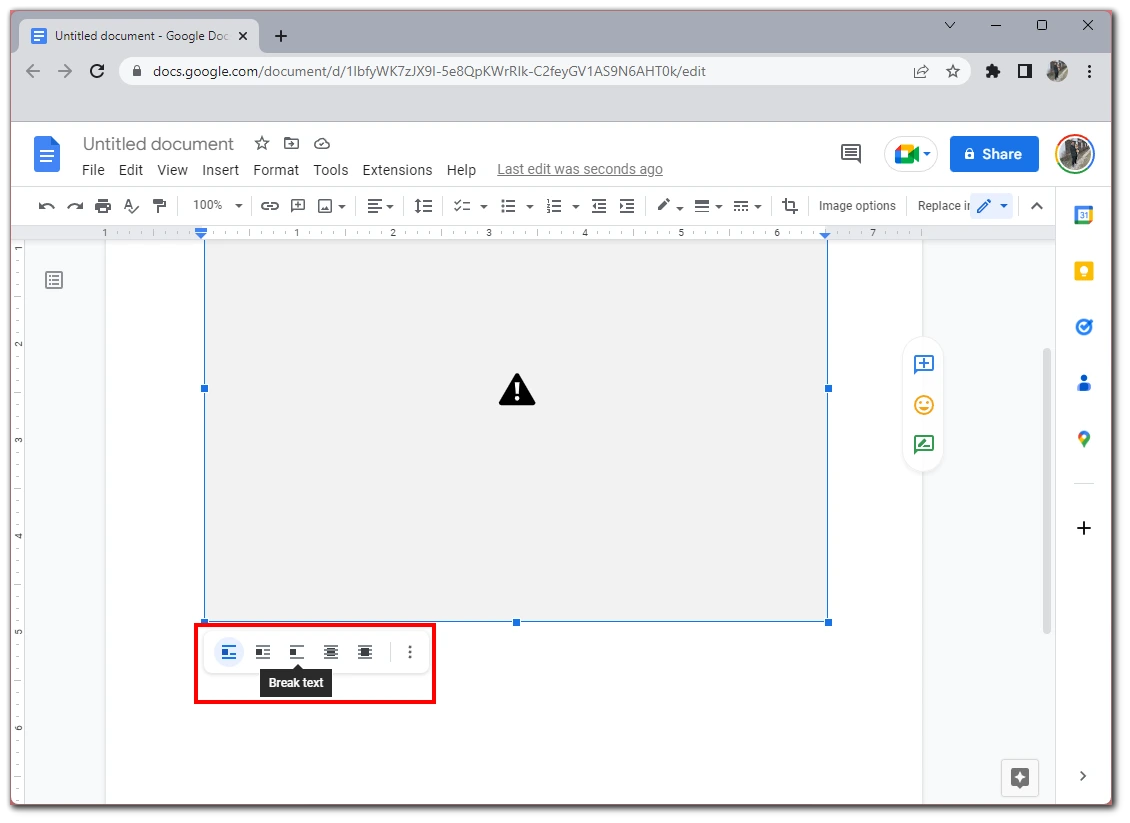
- Break text: This option forces the text to move to a new line when it encounters an object rather than continuing on the same line. This can be useful to create a clear visual break between the text and the object.
- Wrap behind the text: This option allows an object to appear in front of the text, with the text wrapping around the edges of the object. This can be useful for creating a more complex layout, with images or other objects overlapping the text.
- In-line: This option places an object in the middle of a line of text, with the text wrapping around the edges of the object. This is useful for creating more integrated designs, where images or other objects are part of the text rather than a separate element.
To change the text wrapping options for an object in Google Docs, select the object and then click on the “Wrap text” icon in the toolbar at the top of the screen. You can then choose the option that best suits your needs. Let’s take a closer look at how it works.
How to wrap text around a picture in Google Docs
If you want to wrap text around the image in Google Docs, you can follow these steps:
- First, open the Google Docs document you wish to edit.
- Then add a photo to your document.
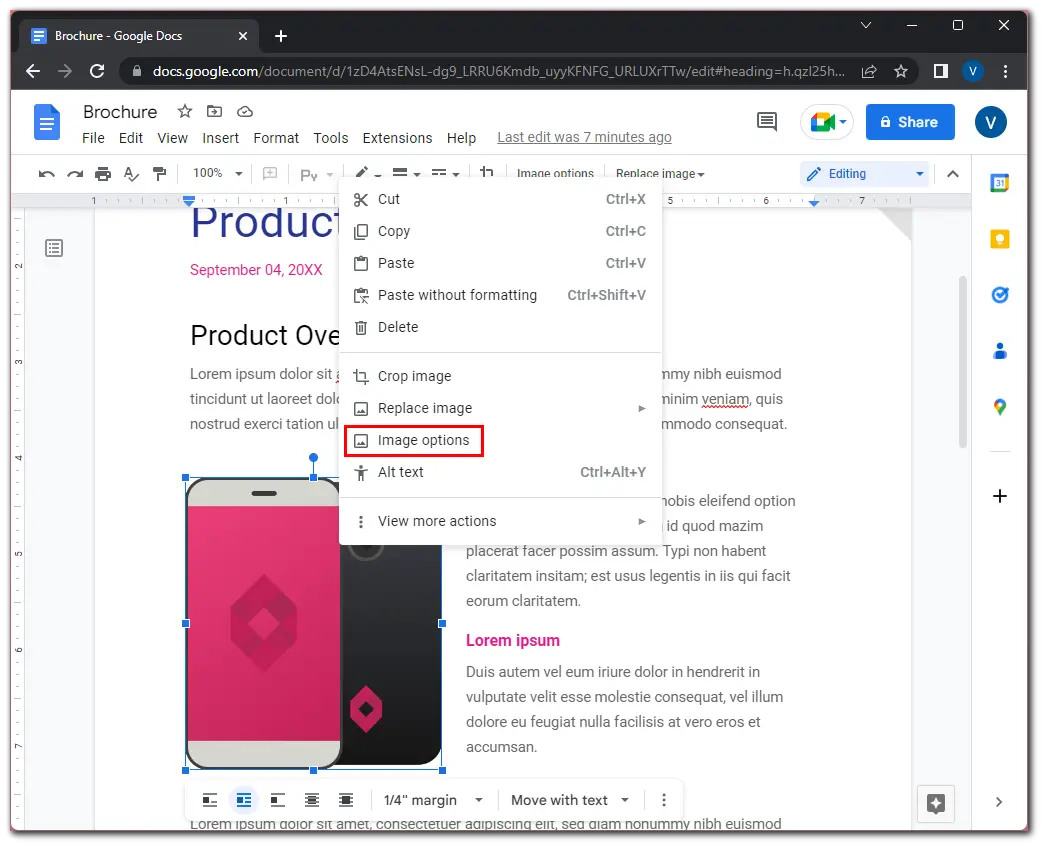
- After that, right-click on the image and select Image options.
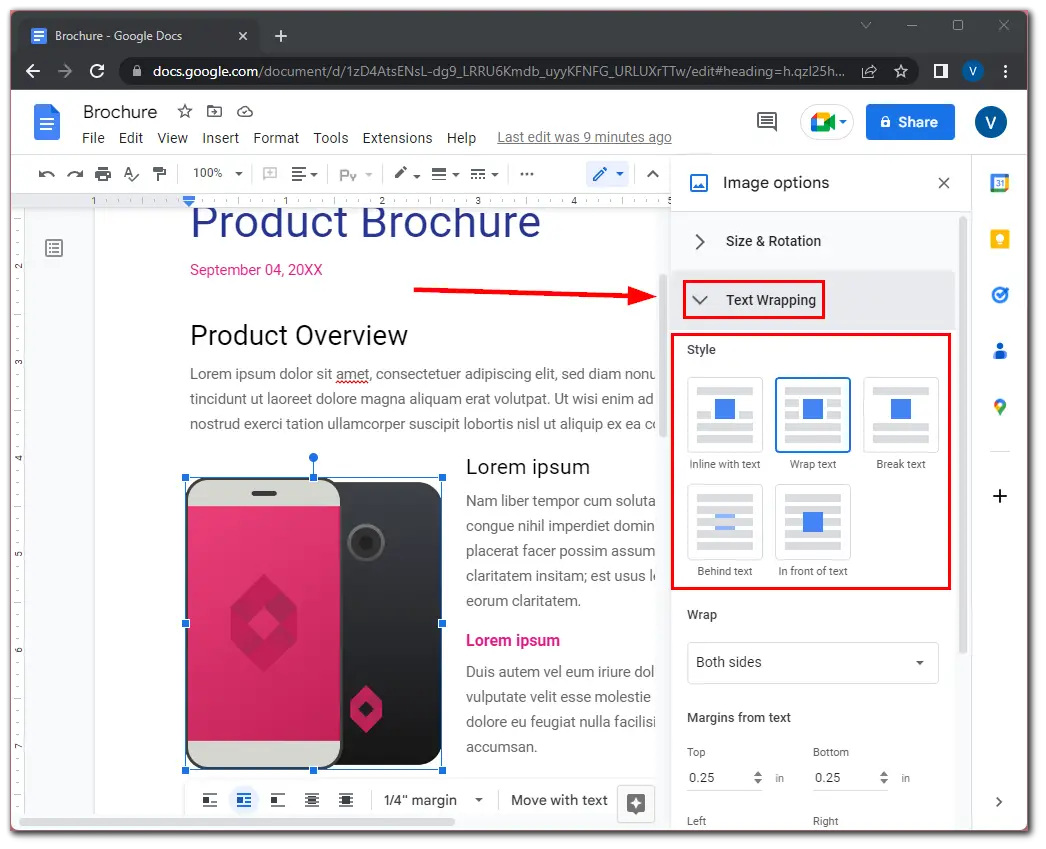
- Expand the Text Wrapping section and choose the Wrap text style.
- Now you need to select the image, hold it down, and move it to where you want.
You can show it at the beginning, middle of a paragraph, or wherever you want. After that, resize the image to suit your needs and the appearance of your document. Hover your mouse over the corner after selecting the image and use the double-sided arrow icon.
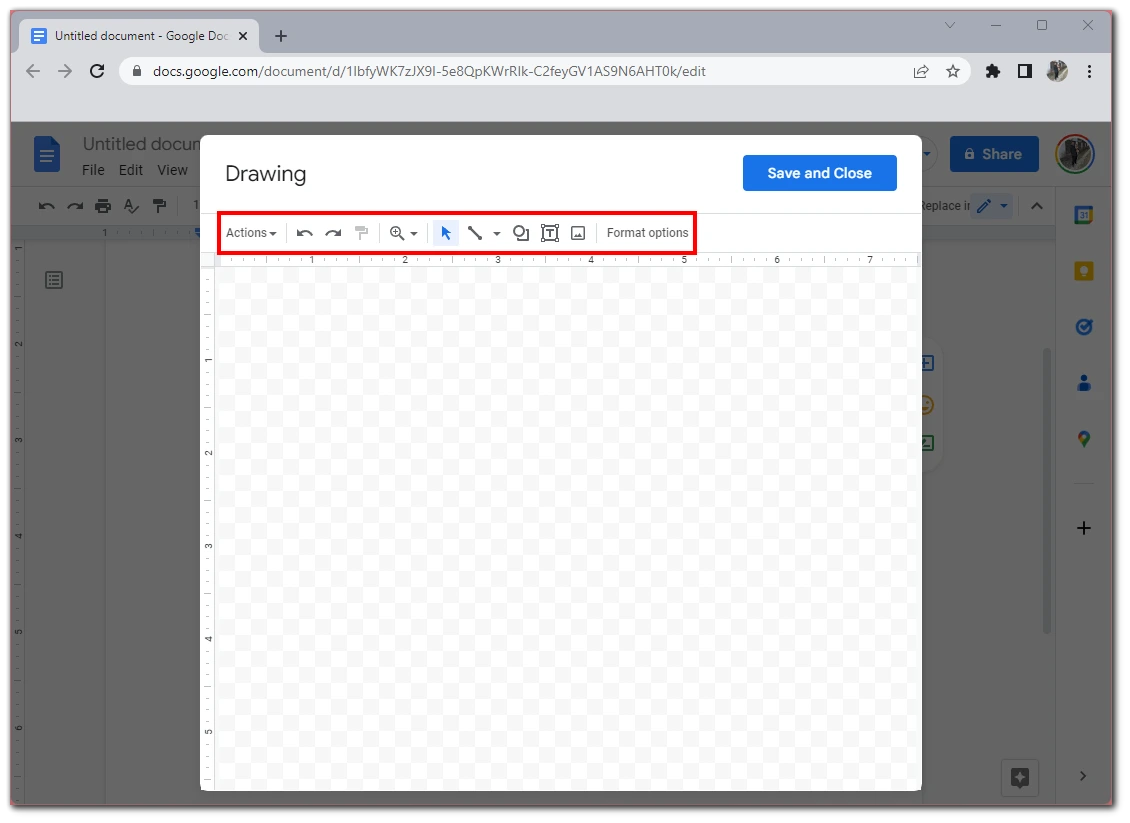
How to work add Drawings in Google Docs
Drawing is a tool that can be used to create clear diagrams and explanatory mind maps and add captions and arrows to images. It’s a minor graphical editor inside Google Docs.
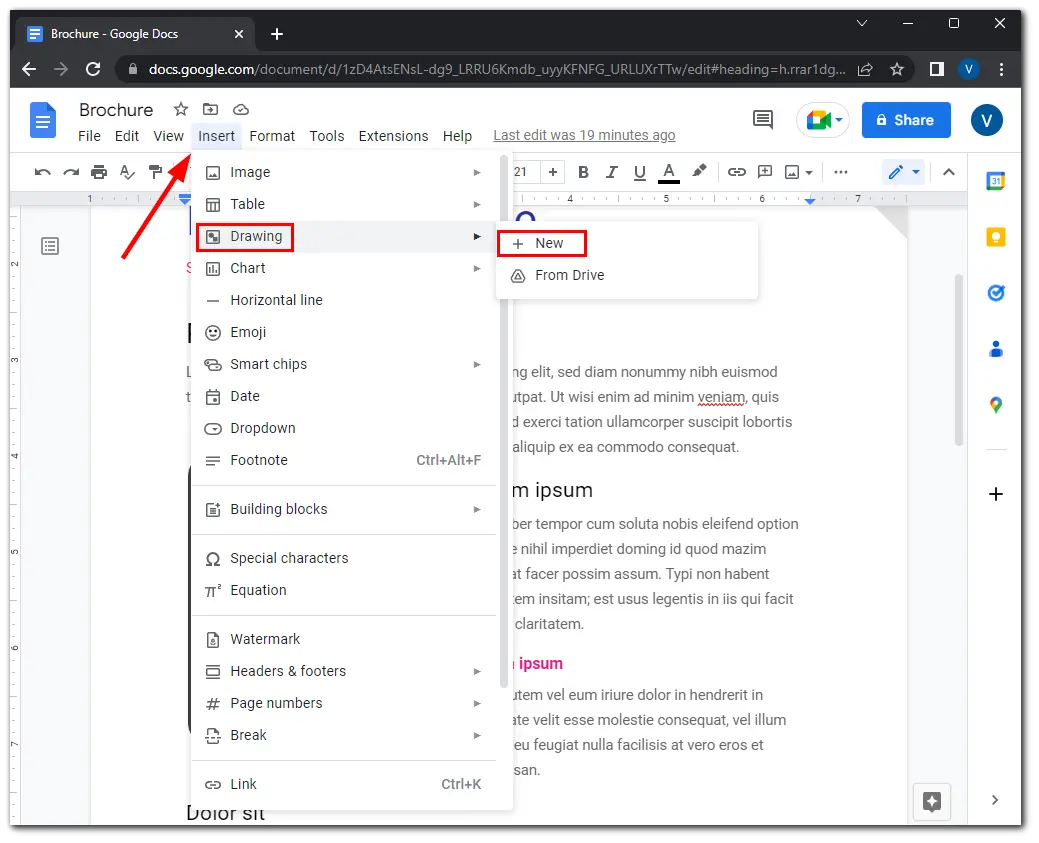
- To create a new object, open the Insert tab and select Drawing.
- Then click New.
- In the window that opens, you can draw shapes, write text and add images.
There are some functions you need to know to use this feature:
- Select. It allows you to select objects to move, edit, and delete them.
- Line. It draws straight and curved lines, arrows, and dividers.
- If you choose an already drawn line, you can change its thickness, color, and style (solid, dashed) and add marks at the ends (e.g., arrows).
- Shape. Draws geometric shapes, arrows, callouts, and mathematical symbols. There are a lot of blanks.
- Text box. Creates an area in which you can write text.
- The text parameters are set in the Advanced tab.
- Image. Uploads a picture to the editor. You can use images from your PC or Google Drive, take a picture from a webcam, specify a URL, or use the search engine.
- Actions. A tab with valuable tools: grouping, aligning, rotating, and saving.
There’s also the WordArt tool, which creates text with fill and outlines. By the way, Google Docs is set to Impact font. That means you can create memes in a couple of clicks to liven up boring content. Upload a picture, add WordArt text, and save. It’s very convenient.
- If you want to save the drawing on your local disk, open Actions, click Download and select the desired format.
- If you need the picture in the document itself, click the Save and Close button in the upper right corner.
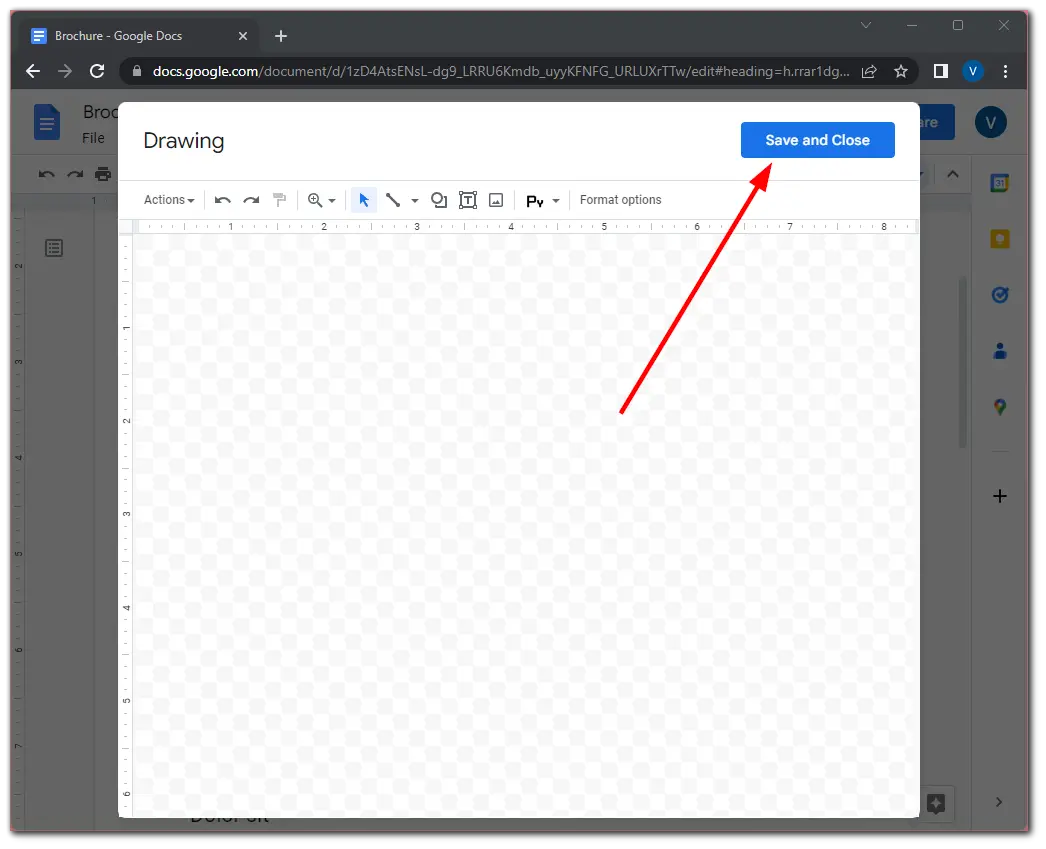
- To edit a picture you’ve already created, select it and click Edit.
You can use this tool instead of pictures in your Google Docs and then save them between your text. It’s a quick and easy way to underline something in your picture, create a little meme, or just add a twist to your text.


