

When Do Not Disturb mode is turned on, notifications from apps and other sources are turned off and do not appear on the screen. This includes alerts, banners, and sounds for incoming emails, messages, and other notifications. The user can still access these notifications and for this open the Notification Center.
Users can customize the Do Not Disturb mode to suit their needs. They can allow calls from certain people or groups, enable redialing, or schedule Do Not Disturb mode to automatically turn on at certain times. For example, users can enable Do Not Disturb during meetings or when they need to focus on a specific task.
How to activate ‘Do Not Disturb’ on your Mac?
To activate ‘Do Not Disturb’ mode on your Mac, follow these simple steps:
- Click on the Notification Center icon in the top-right corner of your screen.
- Then click on the Focus section.
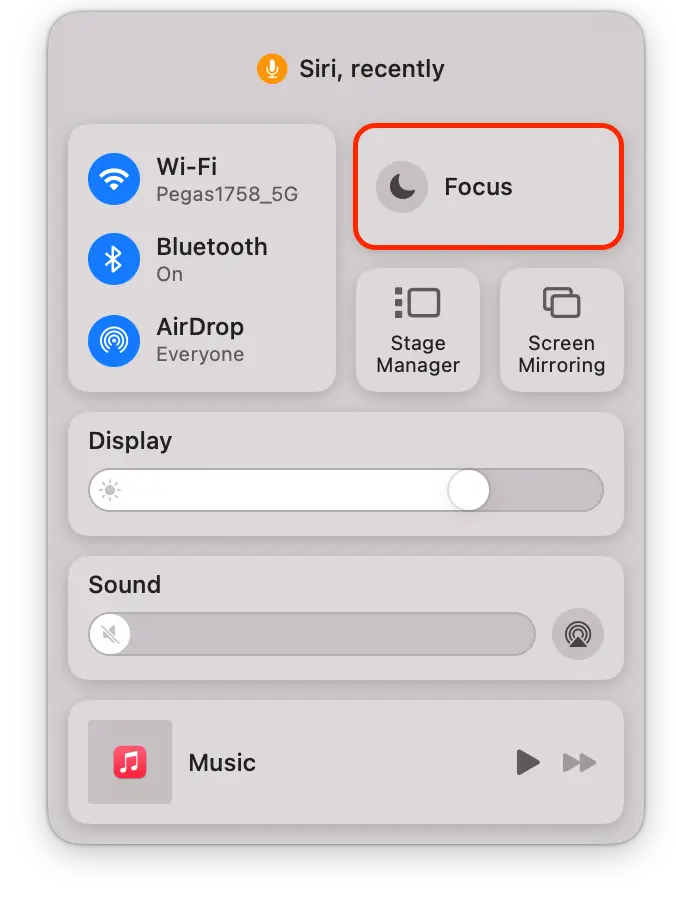
- Next, click on the ‘Do Not Disturb’ option.
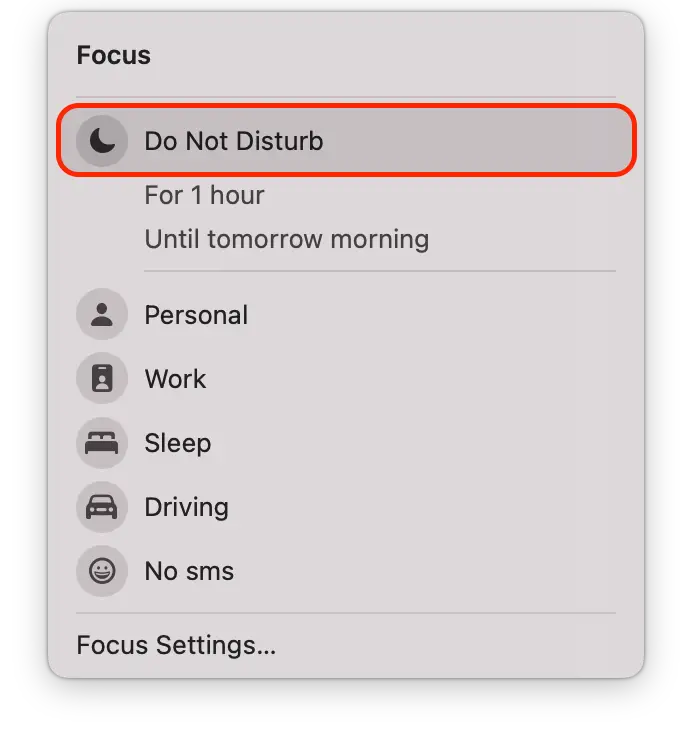
Alternatively, you can activate ‘Do Not Disturb’ mode on your Mac using Siri. If Siri is enabled on your Mac, simply say “Hey Siri, turn on ‘Do Not Disturb'” to activate this mode. To turn off ‘Do Not Disturb’ using Siri, say “Hey Siri, turn off ‘Do Not Disturb’.”
How to customize ‘Do Not Disturb’ on your Mac?
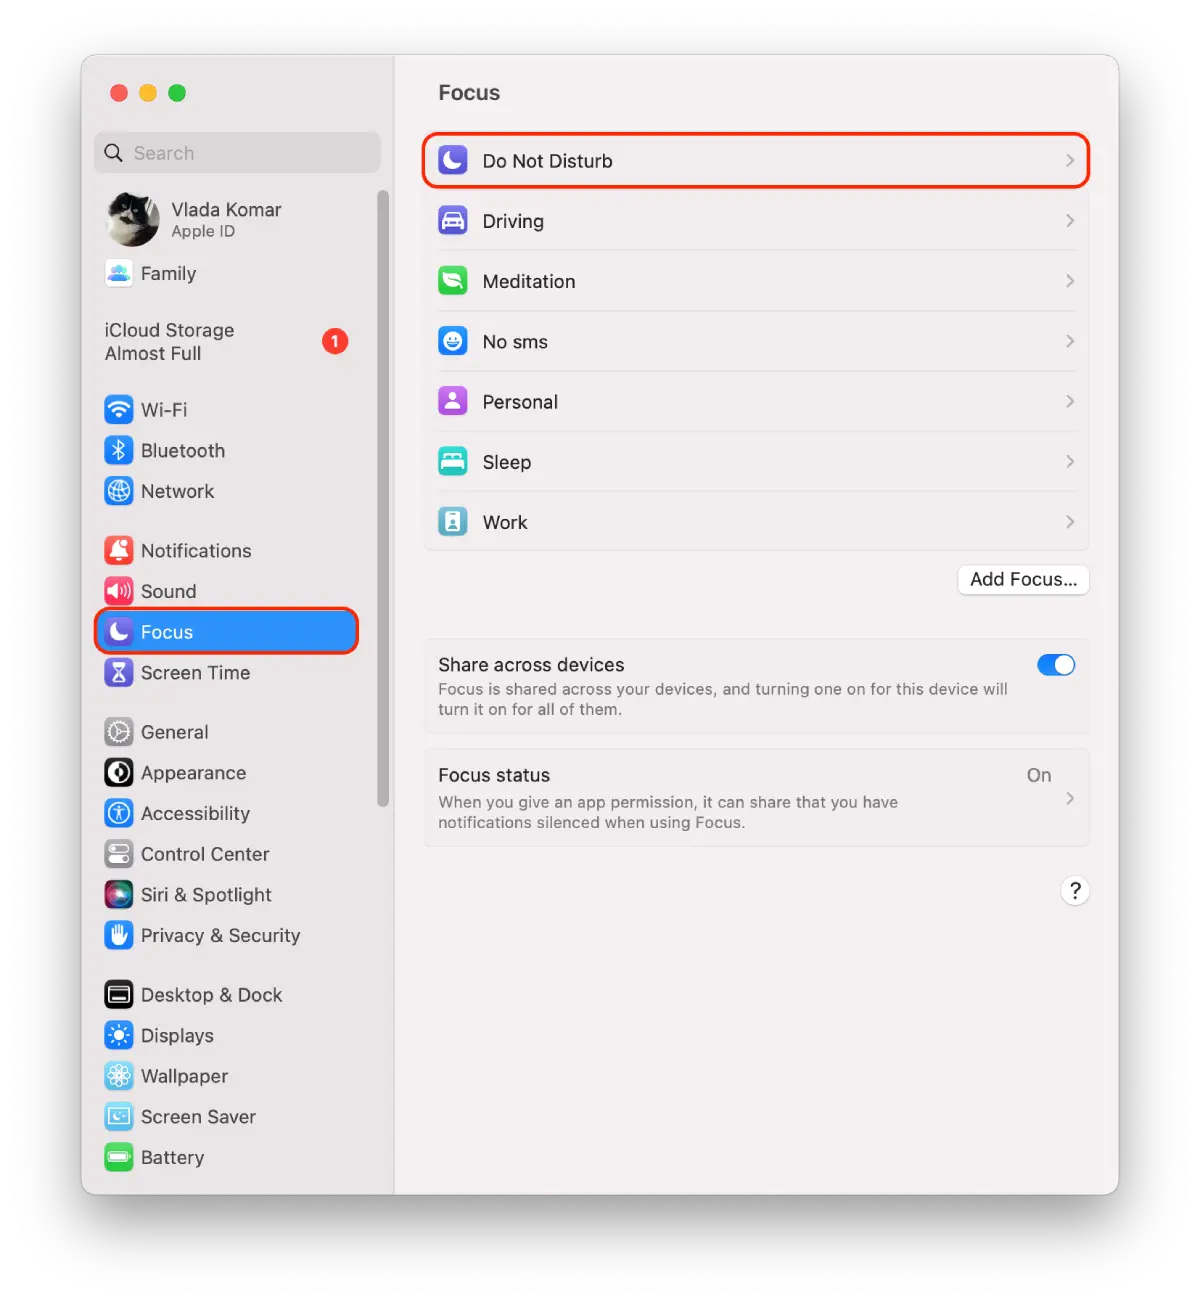
You can adjust the ‘Do Not Disturb’ mode using the Focus mode. Focus mode allows users to customize their notifications and applications based on what they are doing. When Focus mode is enabled, users can choose from several predefined modes such as ‘Personal’, ‘Work’, ‘Do Not Disturb’, ‘Sleep’, or create their own mode. They can then choose which apps and notifications they want to see while the mode is on.
When Focus Mode is enabled, users can choose from several predefined modes, such as Personal, Work, Do Not Disturb, Sleep, or create their own mode. They can then choose which apps and notifications they want to see while the mode is on. For example, in “Work” mode, users can choose to receive notifications only from work-related apps, such as e-mail or messaging, and block notifications from social media or entertainment apps.
Focus mode also allows users to set automatic triggers for certain modes based on time, location, or use of a particular app. For example, users can set “Do Not Disturb” mode to automatically turn on during a scheduled meeting or when using certain apps, such as a meditation or exercise app.
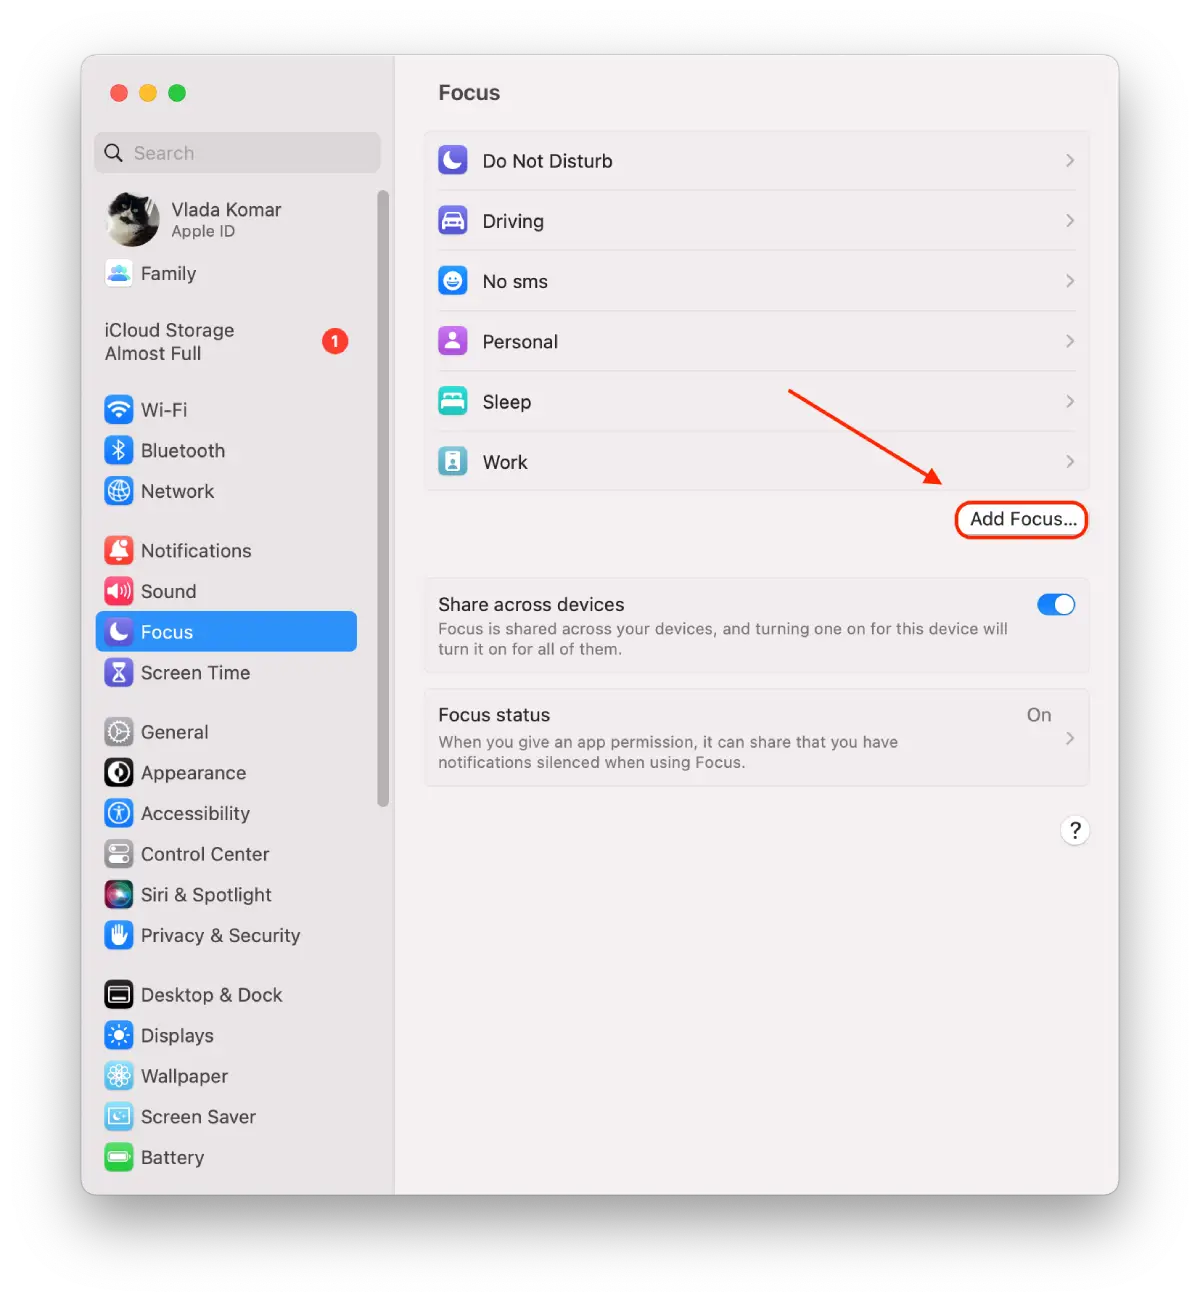
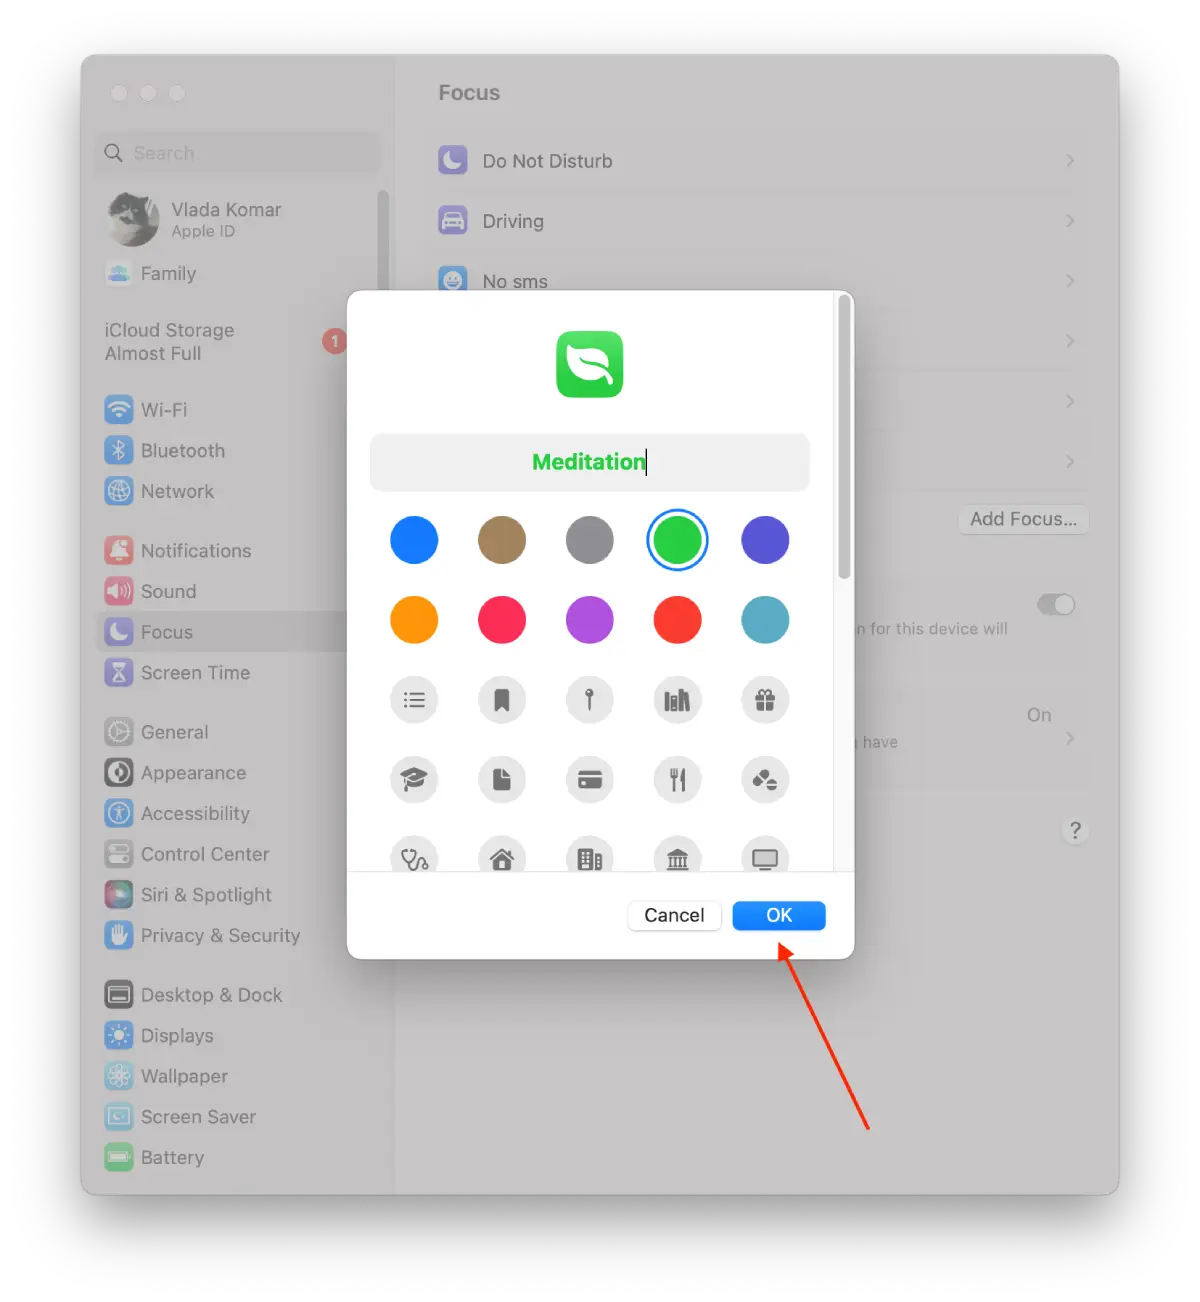
To create your own Focus mode you need to follow these steps:
- Click on the Apple menu in the top-left corner of your screen.
- Select “System Settings” from the drop-down menu.
- Click on “Focus”.
- Then click the “Add focus” button.
- You can choose from the suggested options or click on “Custom” to create your own.
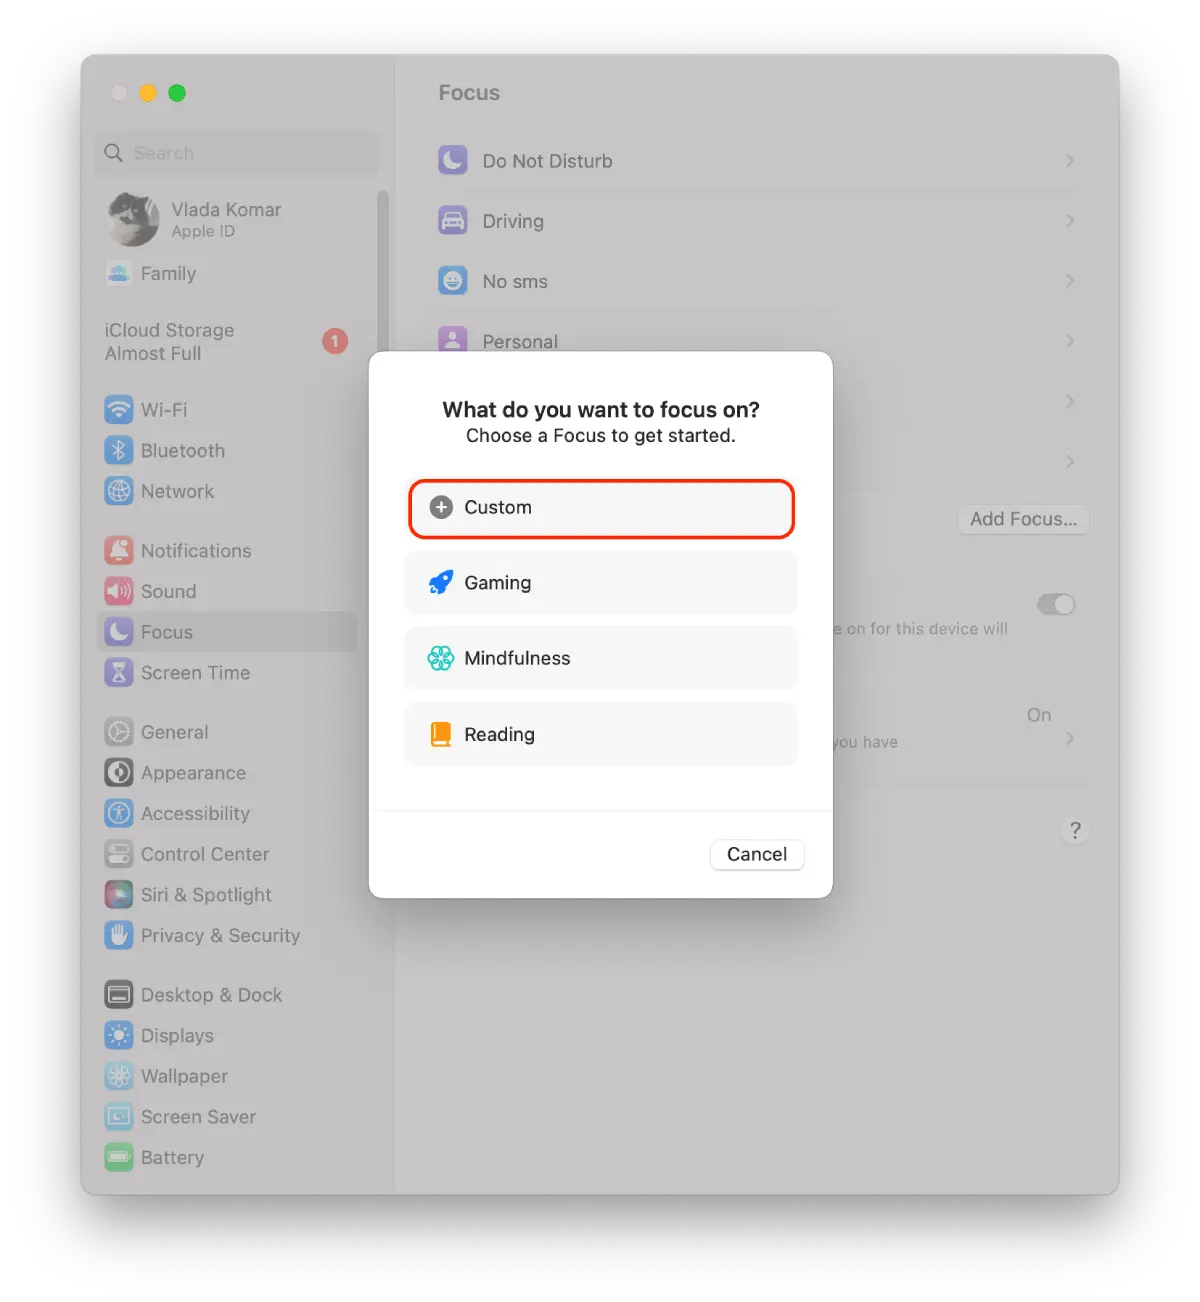
- Give your new focus mode a name and click on OK.
- Then choose which apps and people you want to allow notifications for, and select the “Allowed people” and “Allowed apps” options.
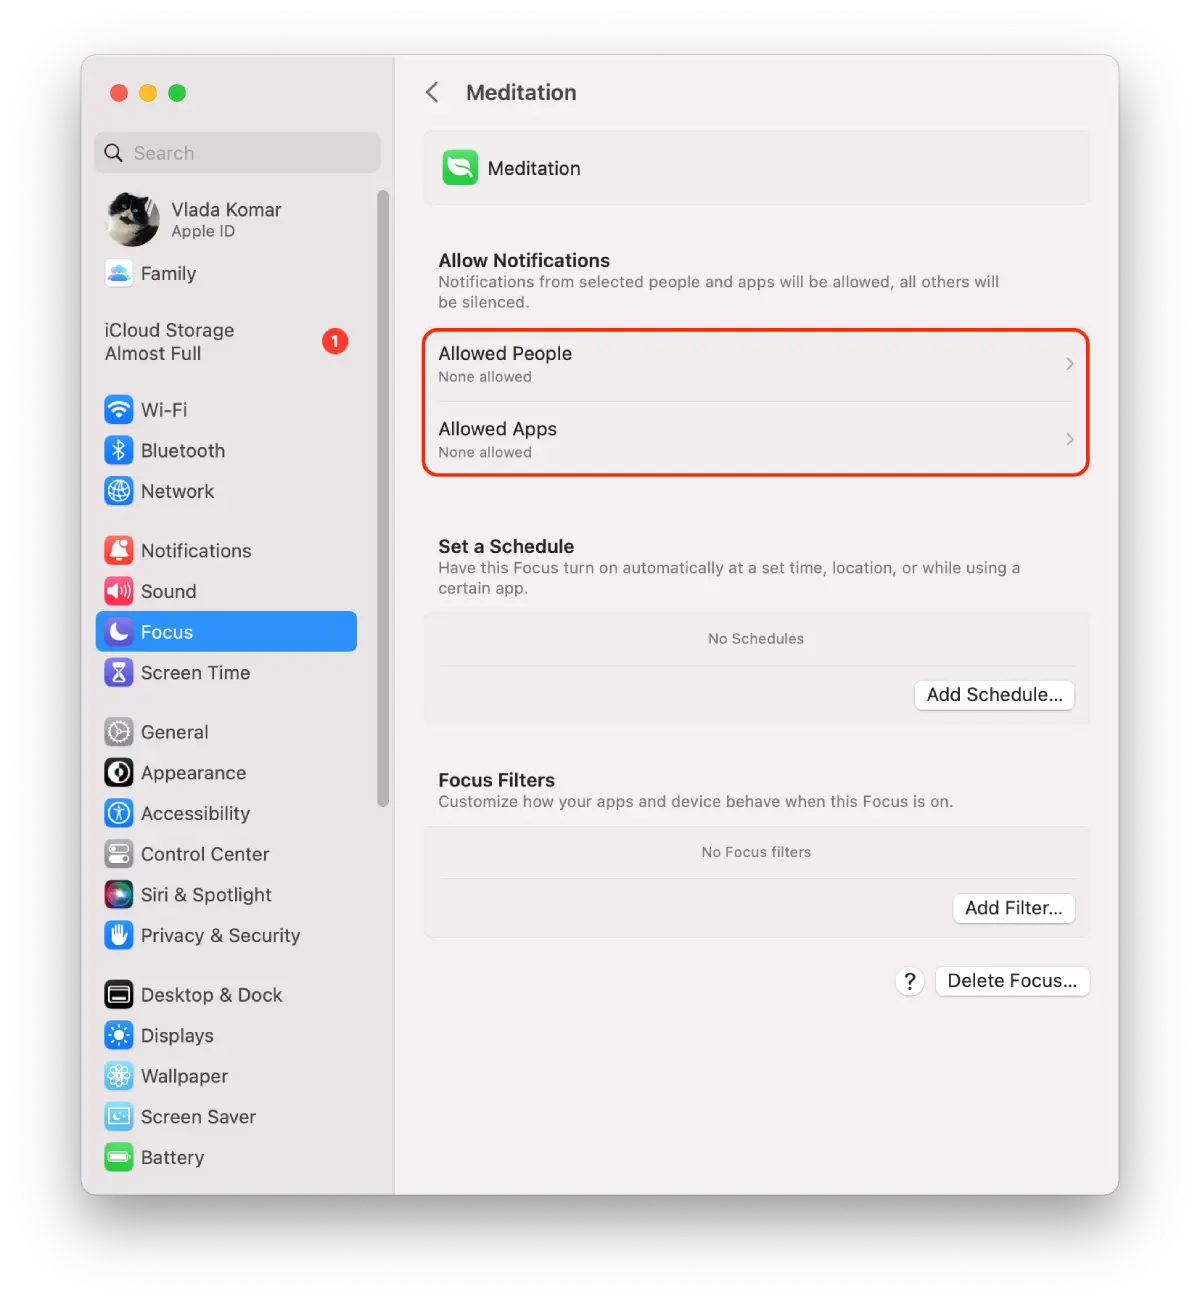
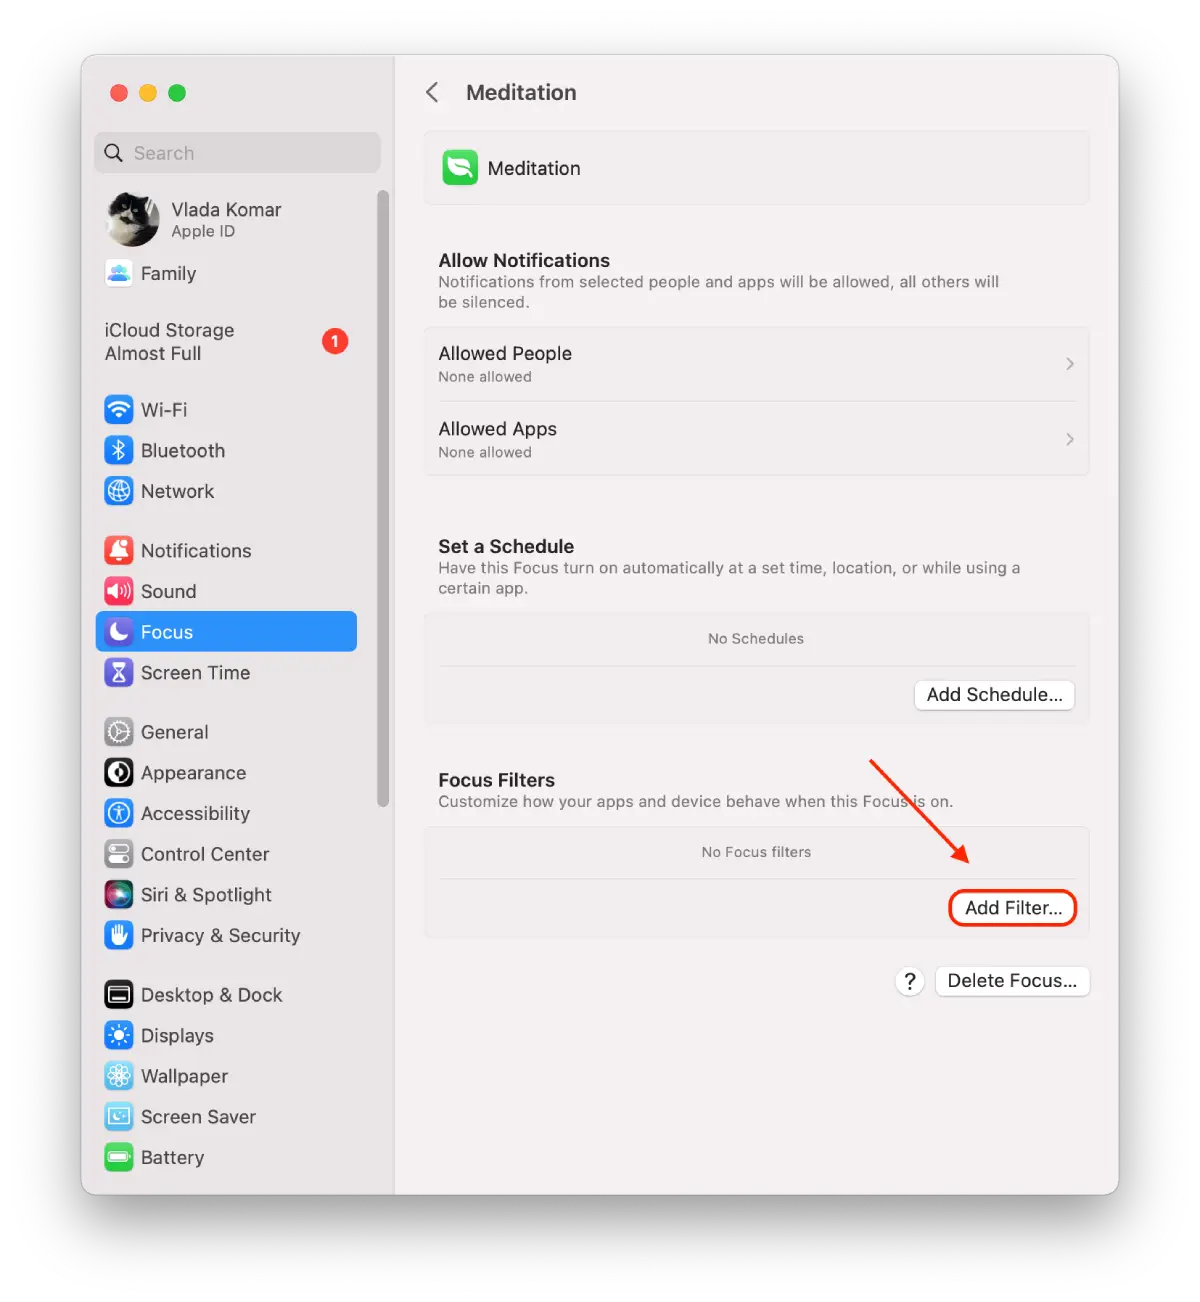
- You can also set Focus filters, this will give you customized apps during Focus. Selected apps will be notified when this Focus turns on or off.
Overall, customizing ‘Do Not Disturb’ on your Mac is a great way to tailor this feature to your needs. Whether you want to allow calls from specific people, schedule ‘Do Not Disturb’ mode to turn on automatically or customize how notifications appear, you can easily configure ‘Do Not Disturb’ to work best for you.
How to enable ‘Do Not Disturb’ using a keyboard shortcut?
Enabling ‘Do Not Disturb’ on your Mac using a keyboard shortcut is a quick and easy way to silence notifications without having to navigate through the menus.
To enable ‘Do Not Disturb’ using a keyboard shortcut on your Mac, you can follow these steps:
- Open the System Settings app on your Mac.
- Click on the “Keyboard” option.
- Select the “Keyboard Shortcuts”.
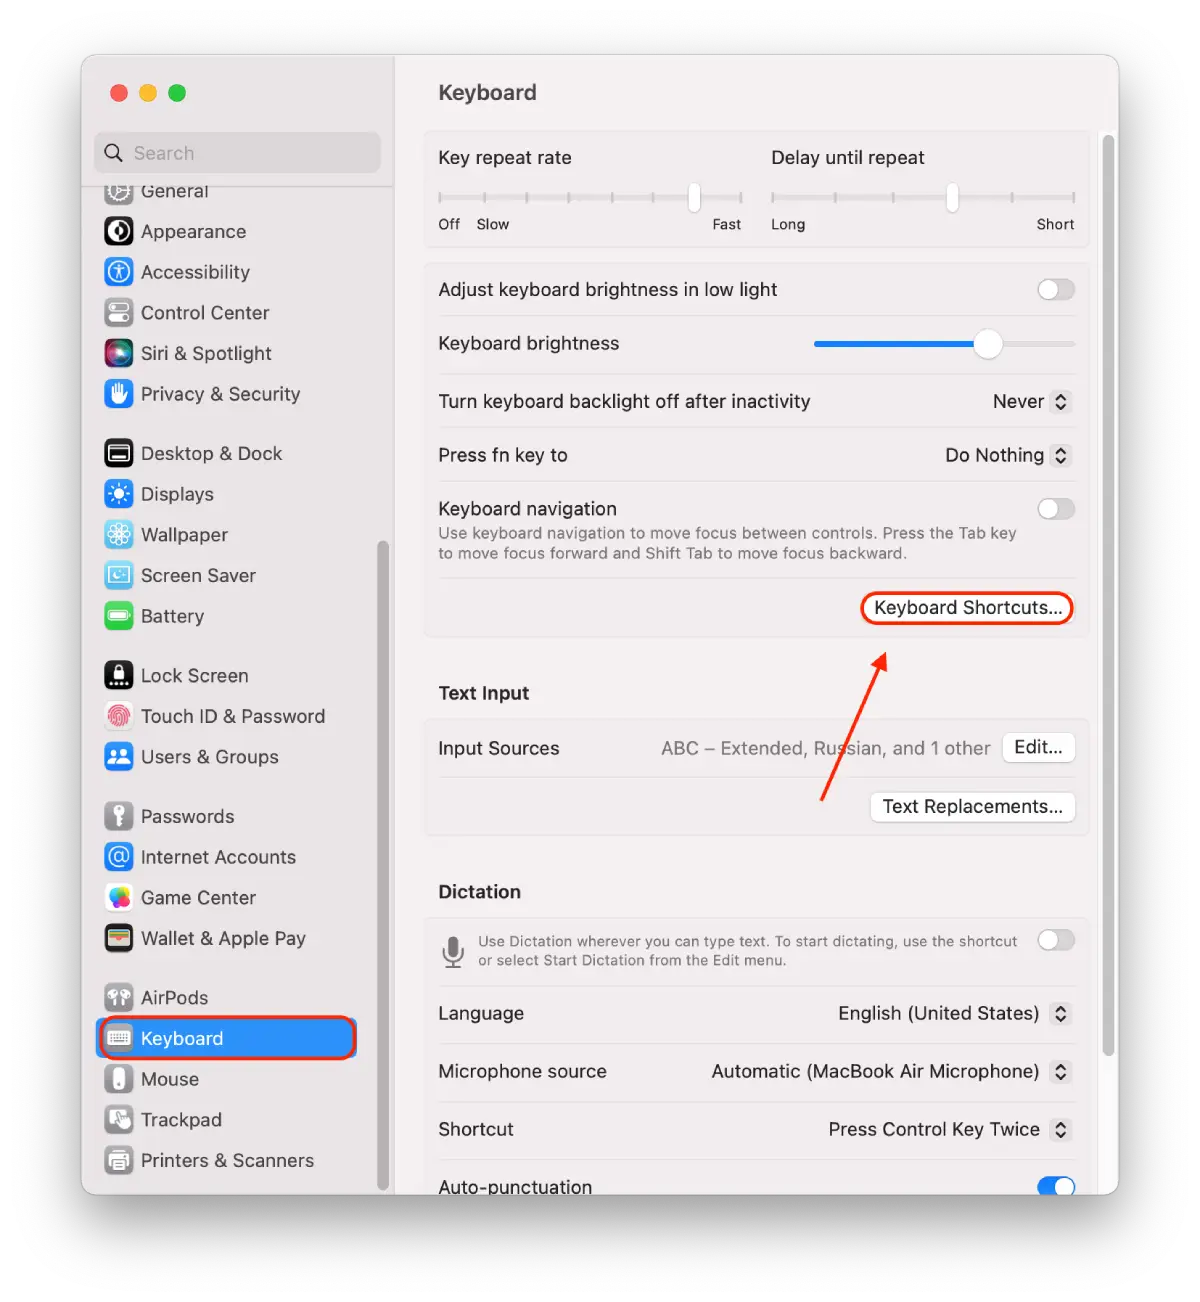
- Find the “Turn Do Not Disturb On/Off” option and check the box next to it.
- Double-click on None or the key next to that box.
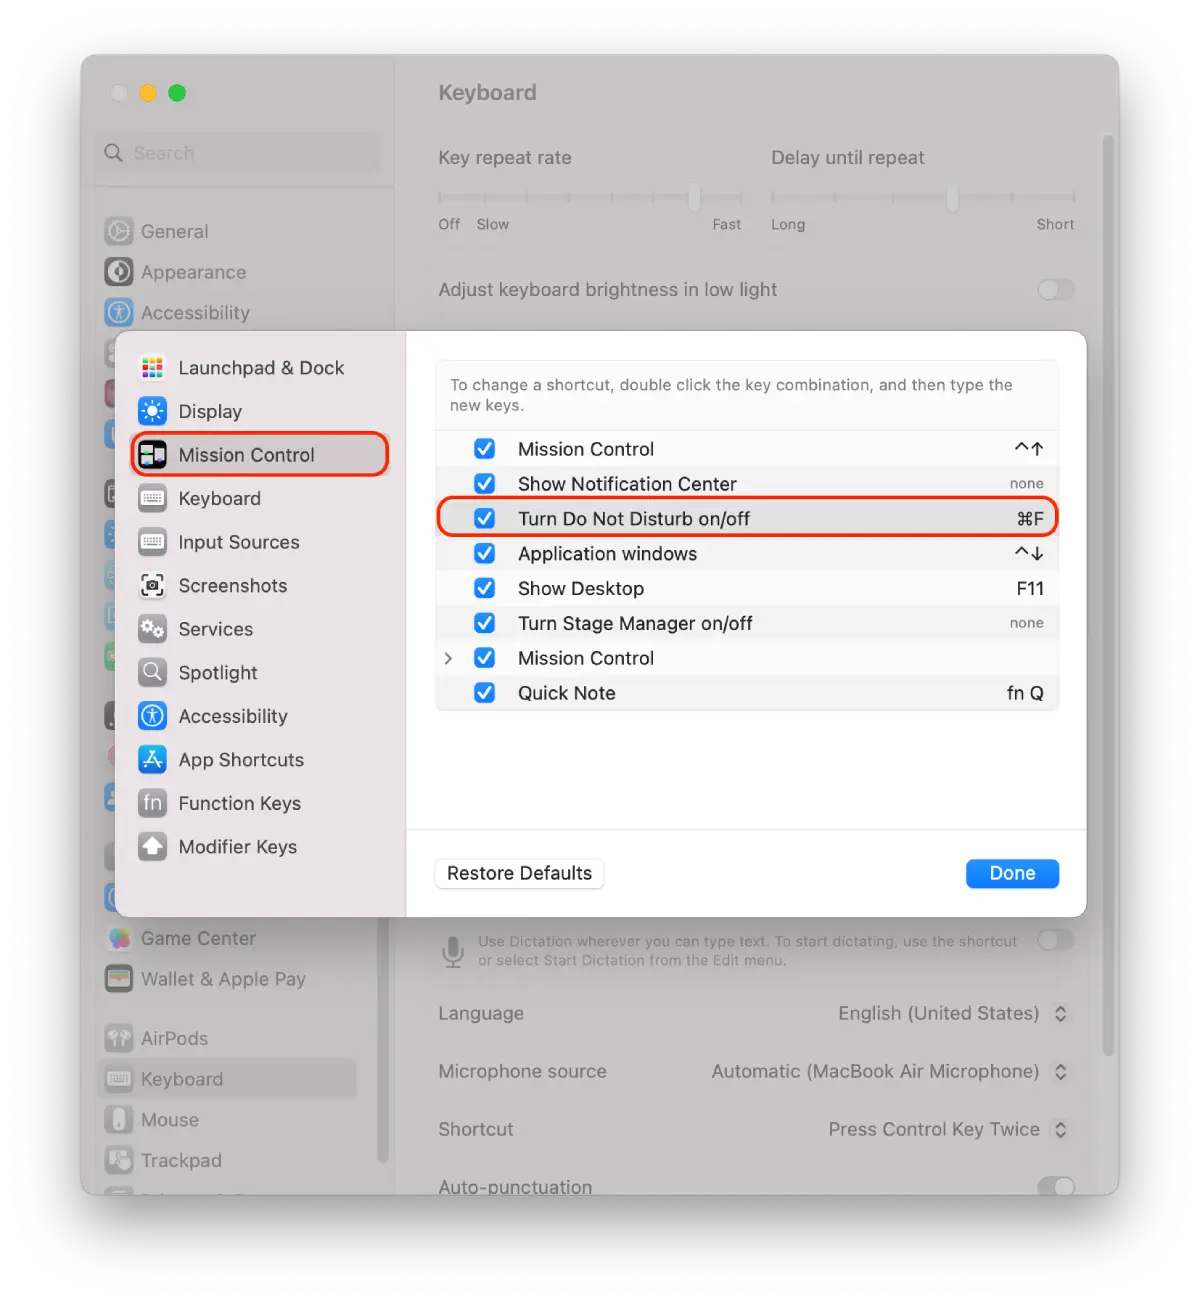
- Write the key combination in the field. I chose Command + F.
You can now enable Do Not Disturb mode if you press the keyboard shortcut you have configured. This can be a useful way to quickly turn off notifications without interrupting your workflow or navigating through menus.
How to schedule ‘Do Not Disturb’ on Mac?
You can schedule ‘Do Not Disturb’ on your Mac to automatically turn on and off at specific times or during specific events, such as meetings or presentations. Here’s how you can do it:
- Click on the Apple menu in the top-left corner of your screen.
- Select “System Settings” from the drop-down menu.
- Click on “Focus”.
- Then you have to choose the Focus you want. The On/Off schedule will be applied to this Focus.
- Next, click on “Add schedule”.
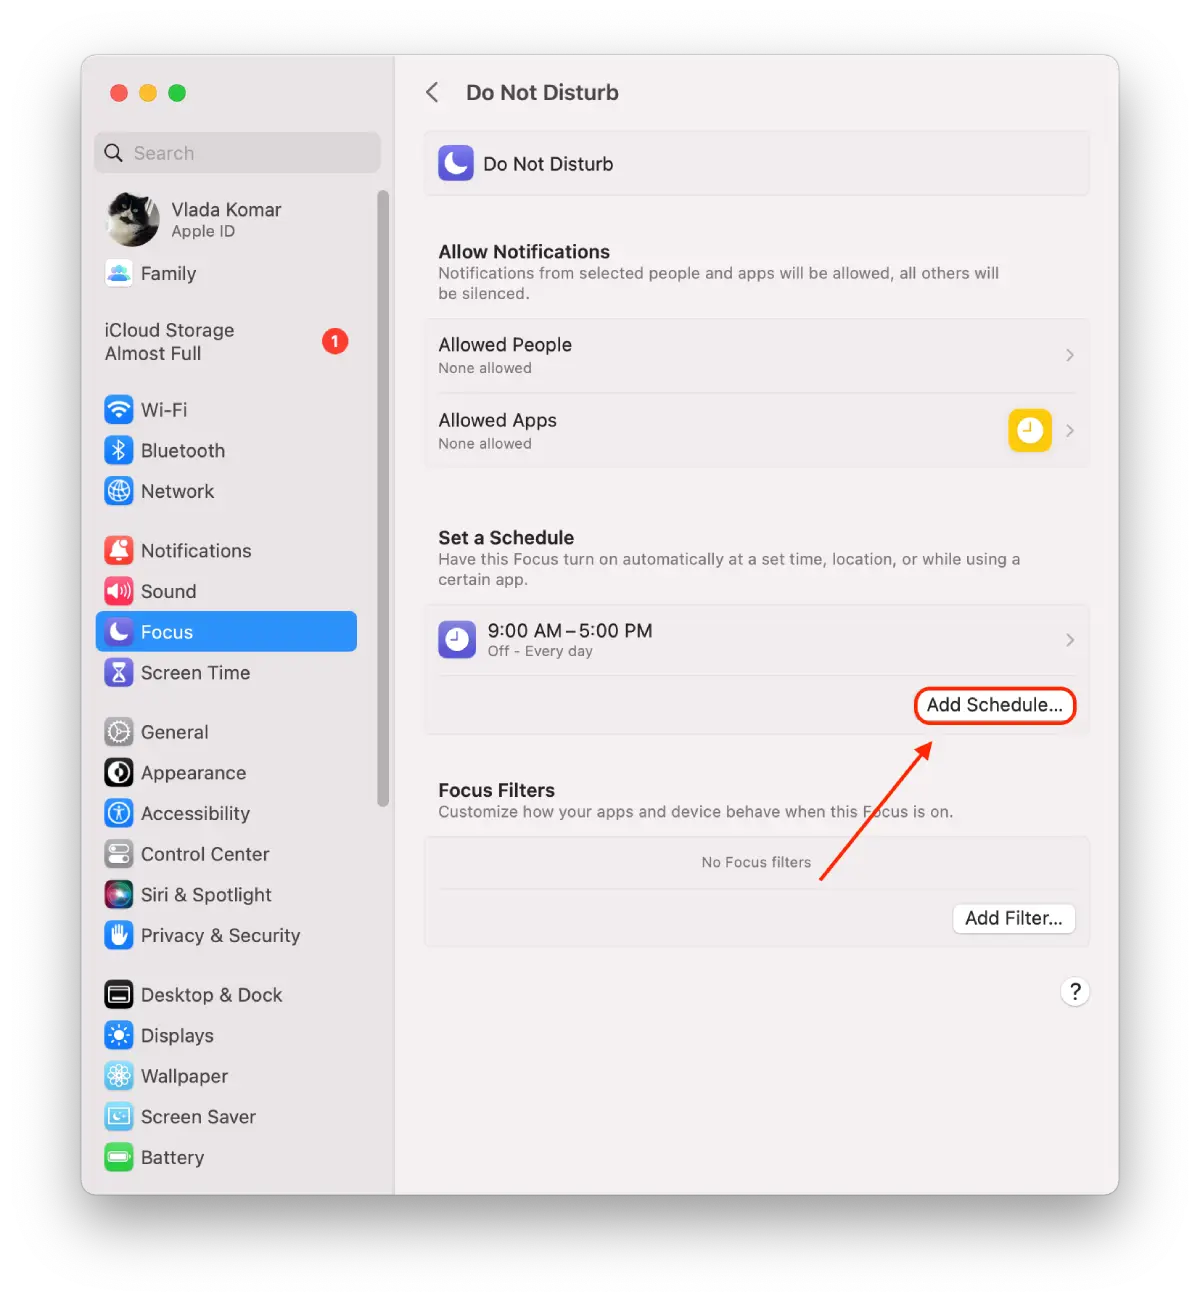
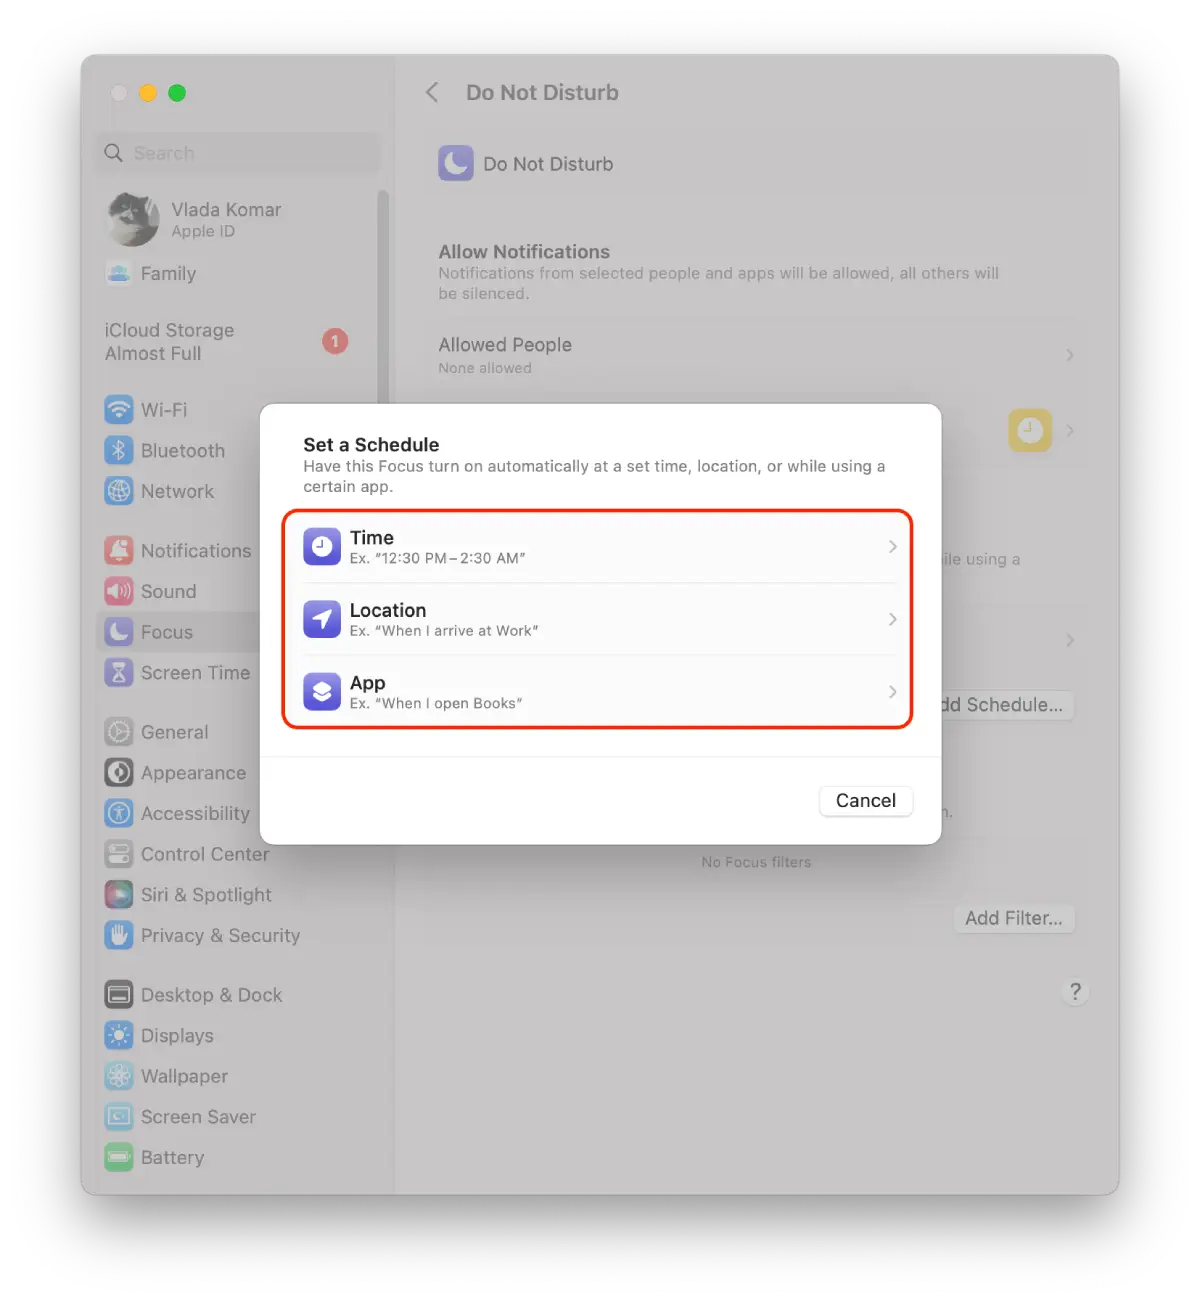
- Then you need to specify the time, location, and app.
Once you have customized your ‘Do Not Disturb’ schedule, close the window. Now ‘Do Not Disturb’ will be automatically enabled and disabled according to the schedule you have set up.


