

Auto-brightness is a feature that automatically adjusts the display’s brightness based on the ambient light in the environment. While this feature can be helpful in some situations, it can also be annoying if you prefer to control the brightness yourself. Fortunately, turning off auto-brightness in Windows 11 is a simple process. You can do this in Windows 11 directly from Settings, but as an alternative, you can use Control Panel in the case of Windows 10 or if the Settings method doesn’t work for you.
How to disable auto-brightness on Windows 11
In Windows 11, disabling Auto-Brightness on your computer is very simple. You can do this directly from your System Settings using the display settings. To do this, you need to:
- Open the Windows Settings app. To open the Windows Settings app, click the Start and then Settings icons. Alternatively, you can press the Windows key + I on your keyboard to open the Settings app.
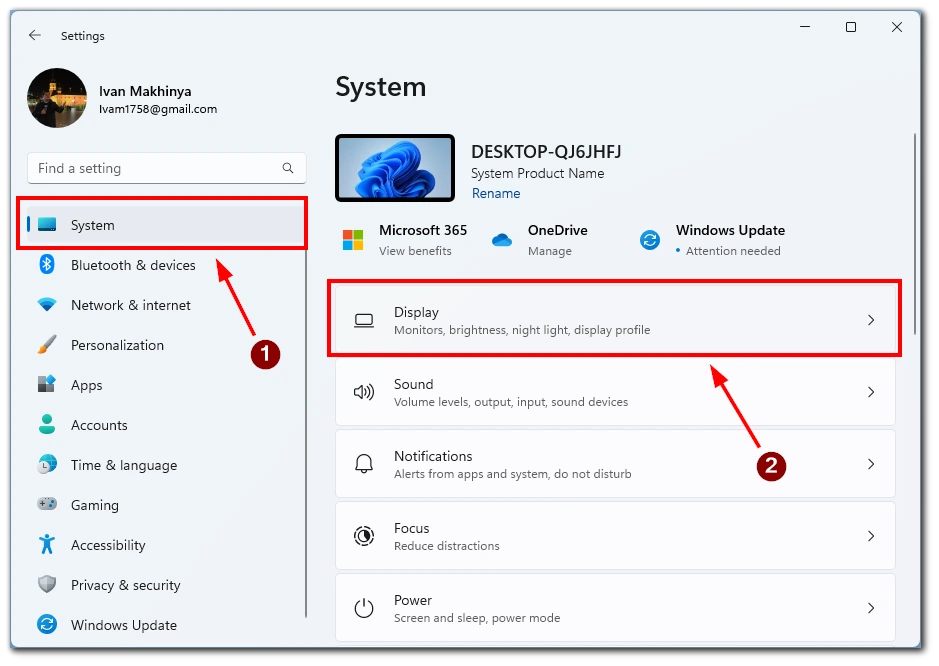
- In the Settings app, click on the System option.
- In the System settings, click the Display option on the left-hand side of the window.
- Under the Display settings, scroll down to the “Brightness” section. Then, toggle off the “Help improve battery by optimizing the content shown and brightness.” option to turn off auto-brightness on your Windows 11 device.
- After that, go to System settings and select Power & Battery.

- Here you will need to find and select Battery Saver.
- In the next window, toggle the switch next to “Lower screen brightness when using battery saver“.
Once you have completed these steps, auto-brightness will be disabled on your Windows 11 device, and you can manually adjust the brightness of your display as needed. If you do not see the “Help improve battery by optimizing the content shown and brightness.” option in the Display settings, it could be because your device does not support auto-brightness. Also, this function does not work if you use an external monitor; it only works on computers with built-in monitors, such as laptops.
How to turn off auto-brightness on Windows 11/10 using Control Panel
The Control Panel is a classic feature of Windows that allows users to customize various settings on their devices. Here are the steps to turn off auto-brightness using Control Panel on Windows 11 or 10:
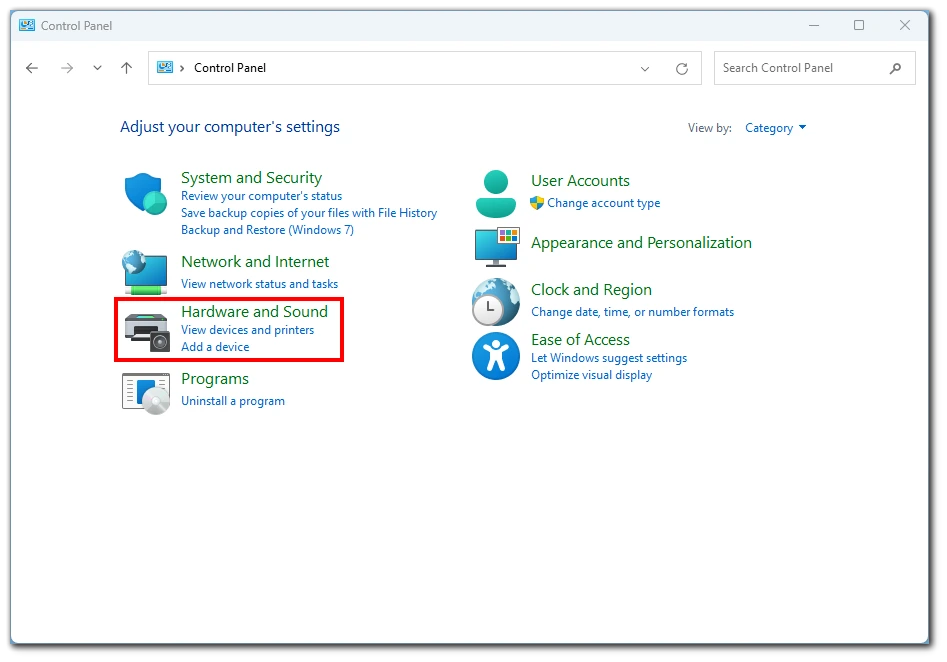
- To open the Control Panel, click the Start button and search for “Control Panel.” Alternatively, you can press the Windows key + X on your keyboard and select “Control Panel” from the list of options.
- Go to the “Hardware and Sound” section in the Control Panel.
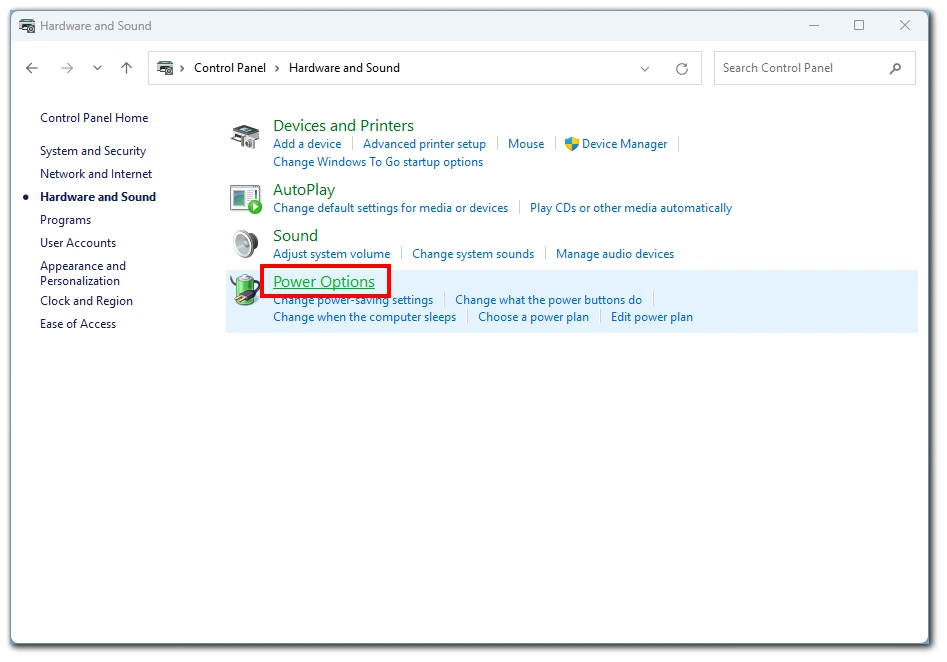
- After that, click on the “Power Options” icon to access the power settings for your device.
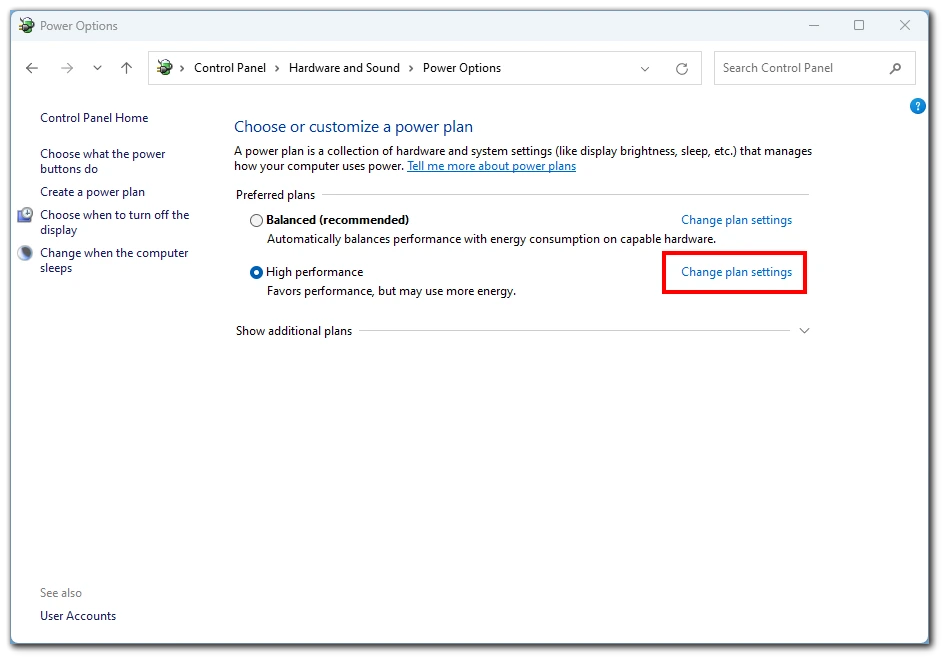
- Next, click on the “Change plan settings” link for the power plan that is currently selected on your device. By default, the “Balanced” power plan is usually selected.
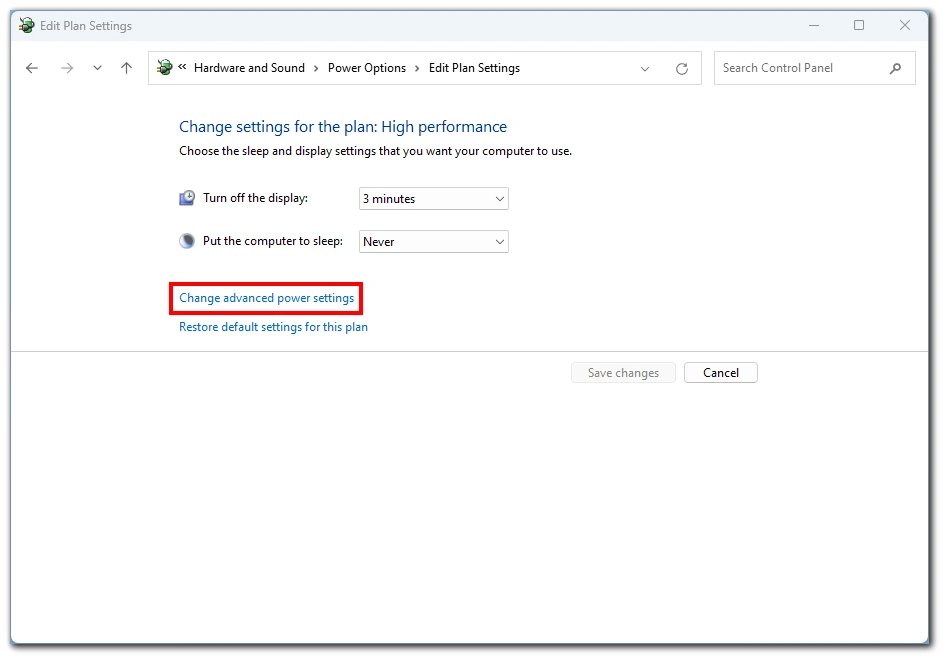
- In the next window, click on the “Change advanced power settings” link to access the advanced power settings for your device.
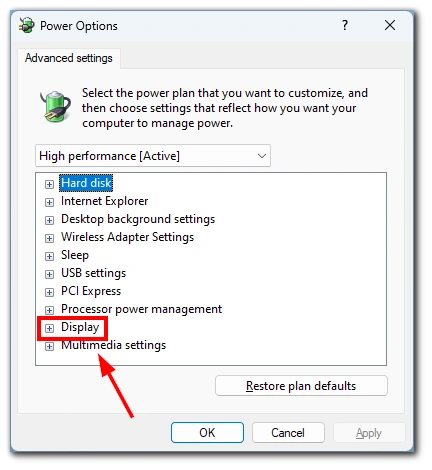
- Under the “Display” category, locate the “Enable adaptive brightness” option and expand it. Then, set the “On battery” and “Plugged in” settings to “Off” to disable auto-brightness on your device.
Once you have disabled auto-brightness, click on the “Apply” button and then the “OK” button to save the changes you have made to the power settings. After following these steps, auto-brightness should be disabled on your Windows 11 or 10 device, and you can manually adjust the brightness of your display as needed.
Why you can’t see the auto-brightness toggle on Windows 11
Adaptive brightness is a feature that allows your Windows device to automatically adjust the screen brightness based on the ambient lighting conditions in your environment. This feature is available on many laptops, tablets, and all-in-one desktop PCs with built-in light sensors. The light sensor measures the ambient light around your device and adjusts the screen brightness accordingly. For example, if you’re using your laptop in a dimly lit room, the screen brightness will automatically reduce to make it easier on your eyes.
However, it’s important to note that not all devices support adaptive brightness. If your device does not have a built-in light sensor, you won’t be able to use this feature. Additionally, using an external monitor with your device won’t see controls for adaptive brightness in Windows settings.
Content adaptive brightness control (CABC) is another feature that some Windows devices support. CABC adjusts the screen brightness depending on the content you’re viewing on your screen. For example, if viewing a dark image, CABC will reduce the screen brightness to save battery life. On the other hand, if you’re viewing a bright image or video, CABC will increase the screen brightness to make it easier to see.
Why you should turn off auto-brightness on Windows 11
There are a few reasons why you might want to turn off auto-brightness on Windows 11. Here are some details on why it might be a good idea:
- Inconsistent brightness: If you’re working on a laptop or tablet with auto-brightness enabled, you may notice that the screen brightness changes frequently and inconsistently, which can be distracting and make it harder to focus. The device’s light sensor may pick up small ambient lighting changes and adjust the brightness accordingly. By turning off auto-brightness, you can ensure a more consistent viewing experience.
- Battery life: While auto-brightness can help save battery life by adjusting the screen brightness to the ambient lighting conditions, it’s not always perfect. Sometimes the brightness adjustments can be too drastic or unnecessary, which can actually use more battery than a consistent brightness level. You can extend your device’s battery life by manually adjusting the brightness to a comfortable level and disabling auto-brightness.
- Color accuracy: Auto-brightness can sometimes affect the color accuracy of your display. The light sensor’s adjustments can alter the screen’s color temperature. By turning off auto-brightness and manually adjusting the brightness and color temperature settings, you can ensure your display shows colors as accurately as possible.
- External monitors: As mentioned earlier, auto-brightness only applies to devices with built-in screens. Using an external monitor with your Windows 11 device won’t see controls for adaptive brightness in Settings. This means that your external monitor may not have the same brightness level as your built-in display, which can be distracting and make it harder to work effectively. By turning off auto-brightness, you can manually adjust the brightness levels on both displays to match each other more closely.
In summary, turning off auto-brightness on Windows 11 can help ensure a more consistent viewing experience, potentially extend your device’s battery life, improve color accuracy, and make it easier to use external monitors. While auto-brightness can be useful in some situations, it’s not always perfect and may not be necessary for everyone.


