

Today I want to show you some useful tips on how to stop screen recording on your Mac. I once recorded a video tutorial and ran into the same problem. Because the toolbar window is hidden after you start recording. Users might expect the stop button to be available in the toolbar, but they don’t see it.
You may be in the middle of a screen recording right now, so hurry up and read the answer to your question. And next you can read how to trim a video to remove your search attempts to stop it.
How to turn off screen recording on Mac?
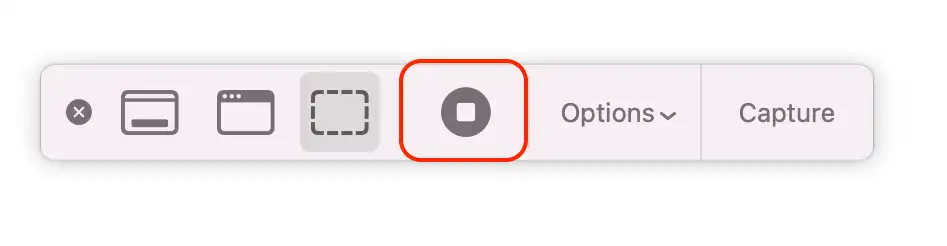
Once you start recording, you may be confused about how to stop it because the screenshot utility window will not be visible in front of you. You have two ways to stop screen recording.
The first method
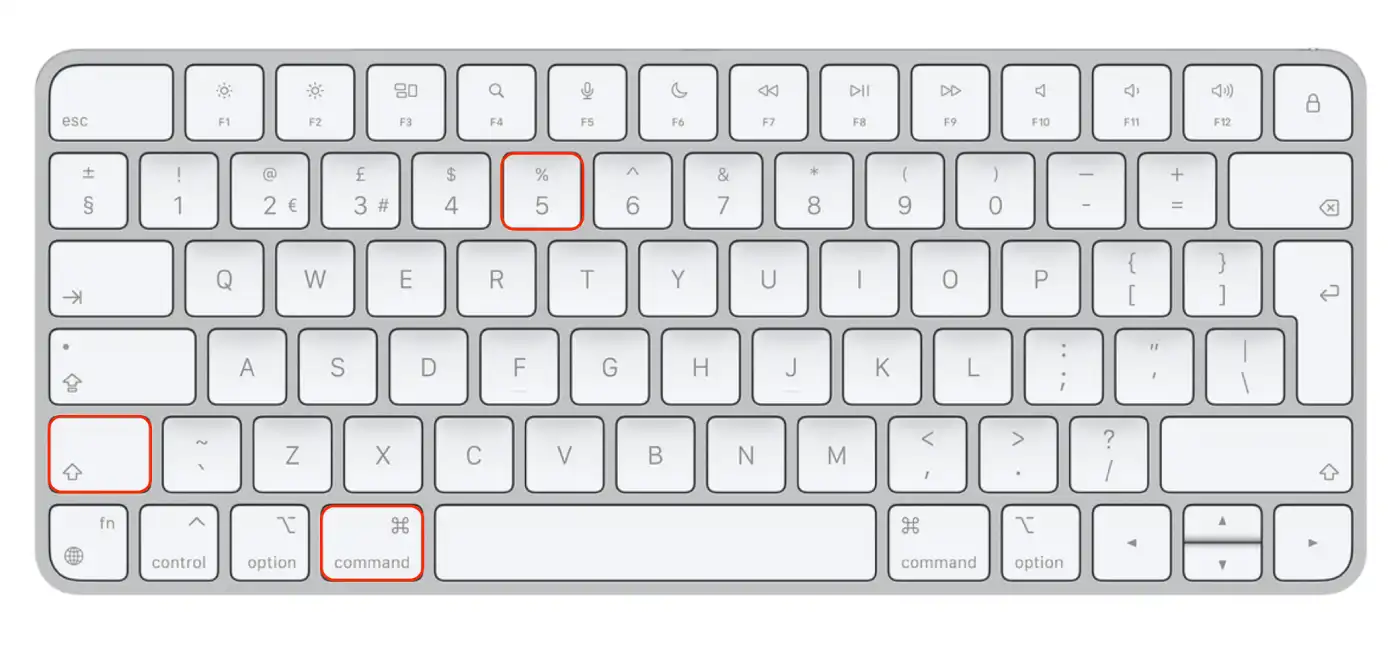
- Use the “Command + Shift + 5“.

- Then click on “Stop recording”.
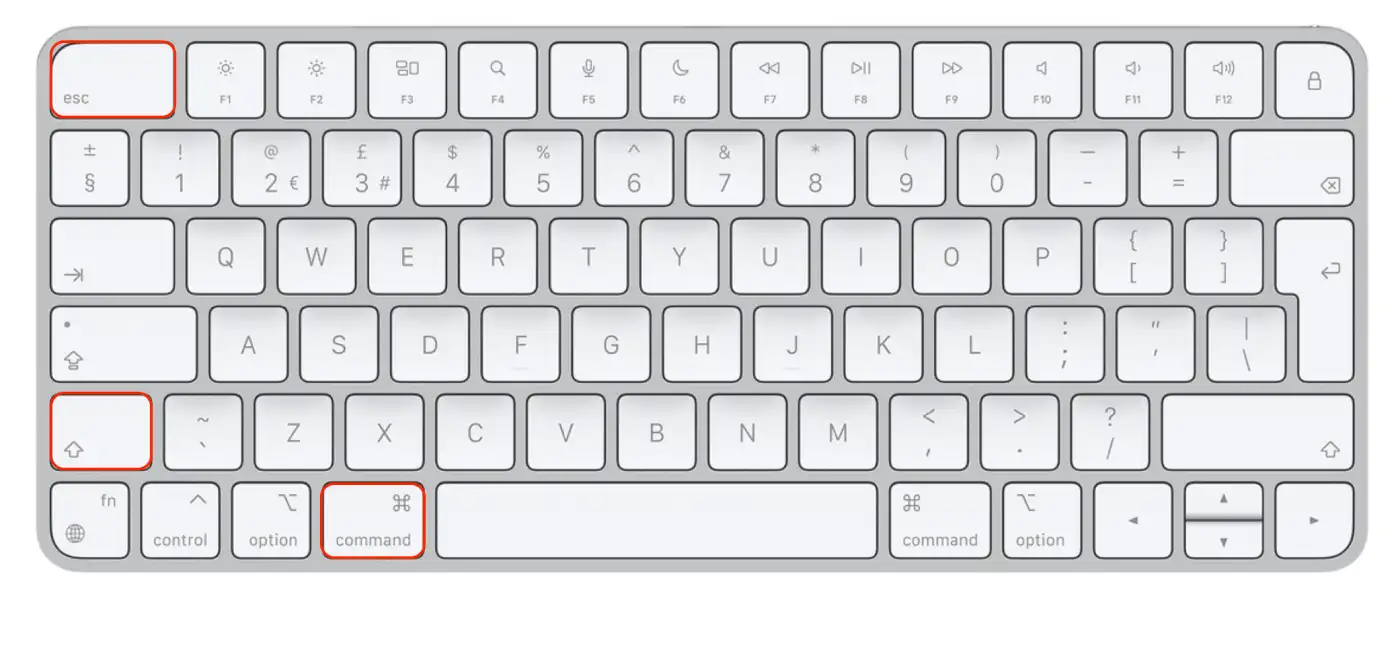
Second method
- You need to press “Command + Control + Esc”.
After that, the video screen recording will automatically be saved to your selected folder.
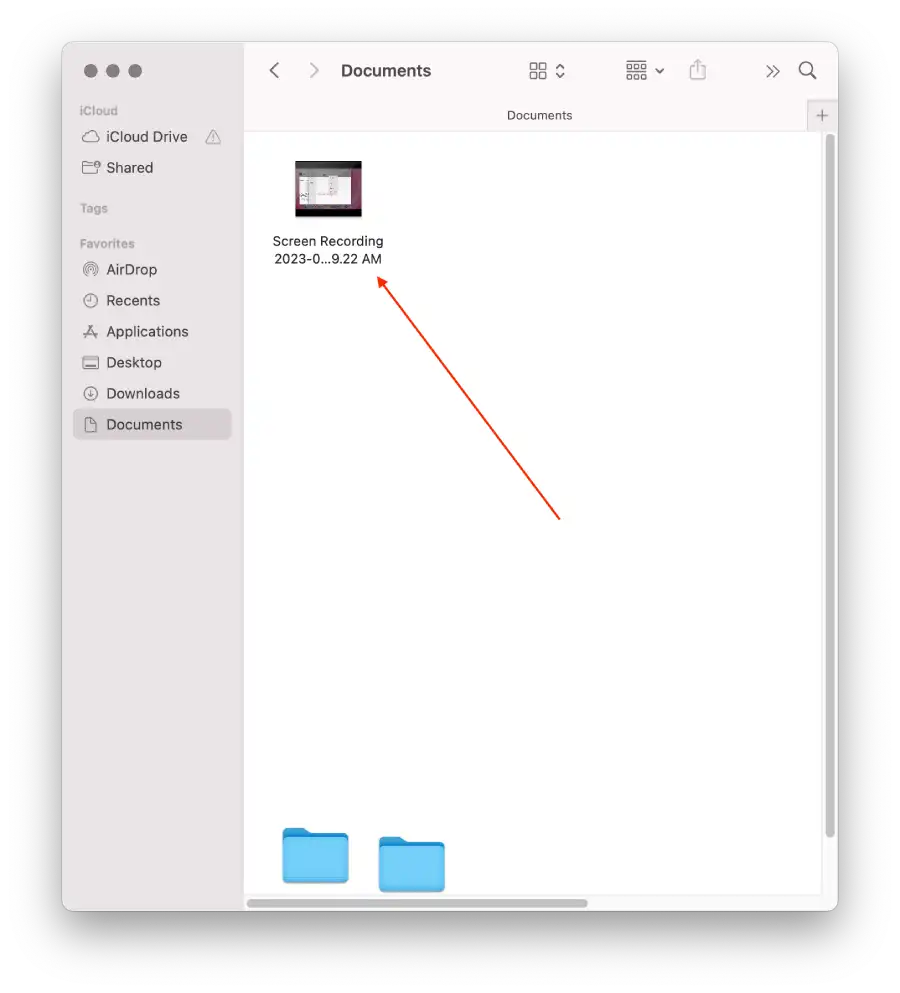
If you didn’t set up and choose in which folder the video and screenshots will be saved, the recording would be automatically saved to the Desktop. You will see its preview in the lower right corner of the screen. If you click on this preview, you can view the entire recording and trim it if necessary.
How to start screen recording on Mac?
If you want to start recording a new video so you don’t have to trim the part where you’re looking for how to stop, then you need to follow these steps:
- First, you must open the toolbar, so press “Command + Shift + 5”.
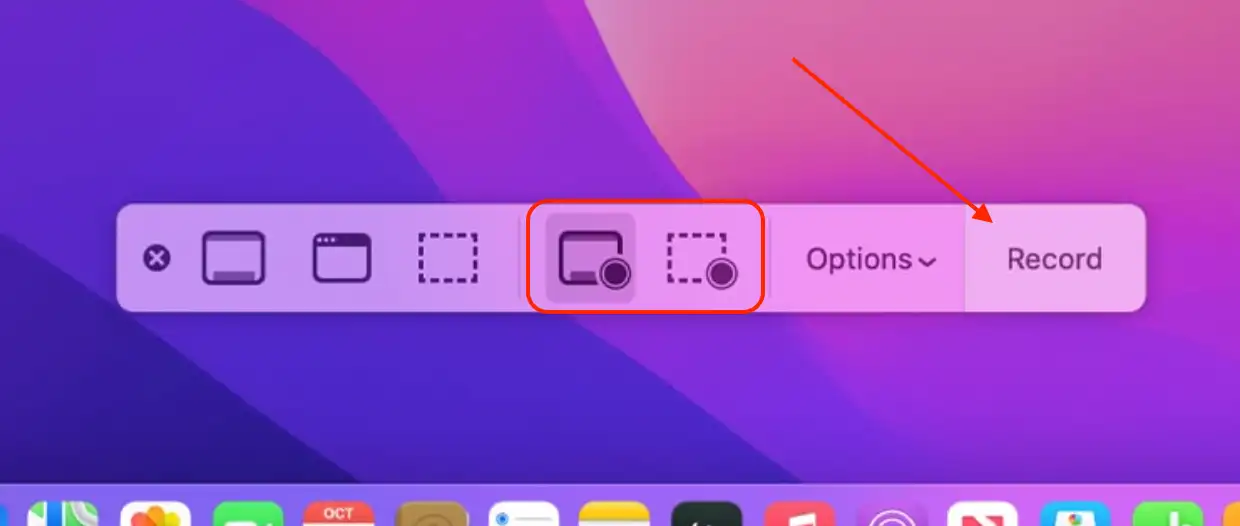
- Click on the “Record” button to start the recording.
Once you have completed these steps, you will start the screen recording on your Mac.
How to choose a folder to save screen recording videos on the Mac?
To choose the folder where your screen recordings will be saved on a Mac, you can follow these steps:
- Press Command + Shift + 5 to bring up the screen recording controls.

- Click on the “Options” button to access the recording options.

- Scroll down to the “Save To” option.
- Click on the “Save To” option to choose a different location.

- Select a folder from the list of available folders. You can also create a new folder by clicking the “Other Location” button.
The screen recording will be saved in the selected folder once the recording is stopped. By default, the recordings are saved to the Desktop. By changing the “Save To” option, you can choose a different location that is more convenient or better suited to your needs.
Note that you must have permission to record to the selected folder to save the screen recording. If you don’t have permission, you will need to select a different folder or change the permissions for the selected folder.
How do you trim a video on Mac?
You can quickly and easily trim your video so you don’t have to waste time re-shooting a new one. Since you needed to find the answer to how to stop recording, there are probably steps in your video to do this. So just trim the video rather than reshooting a new one. To do this, you need to follow these steps:
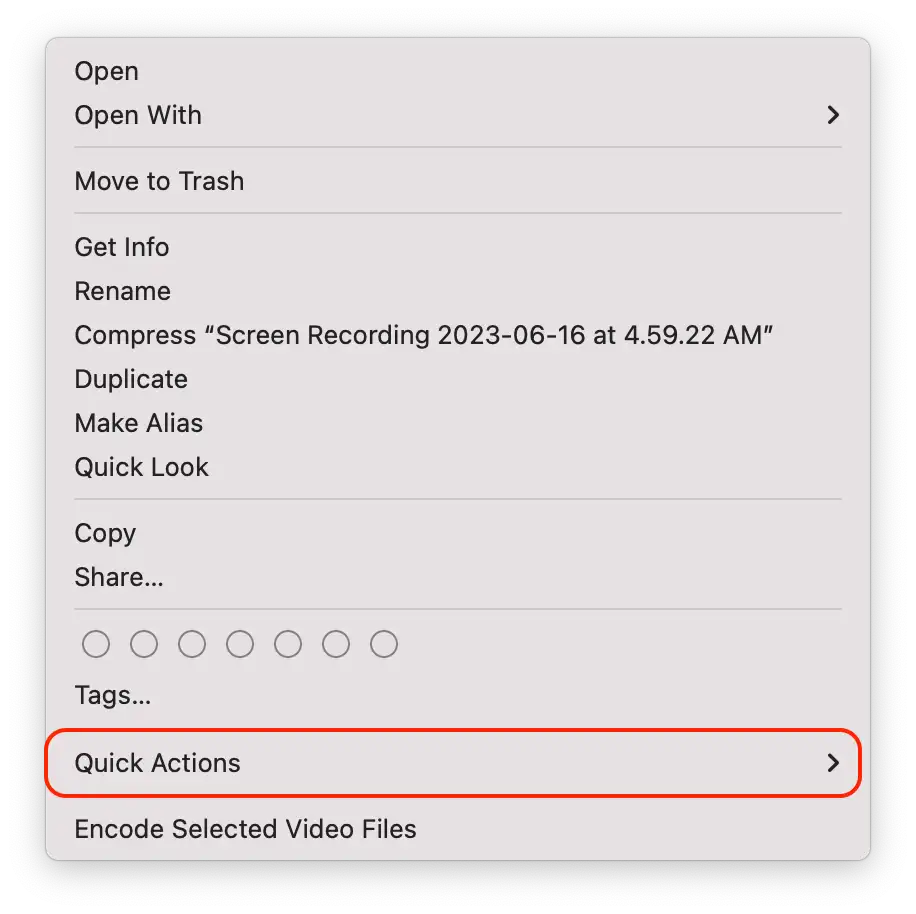
- Open the Finder and find the video you want.
- Then right-click on it.
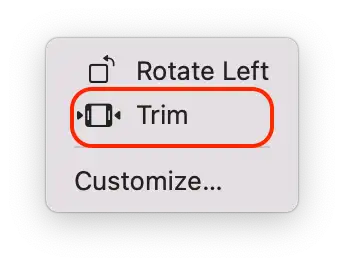
- From the drop-down list select “Quick action“.
- Then click on “Trim“.
- Use the bottom panel to trim what you don’t need.
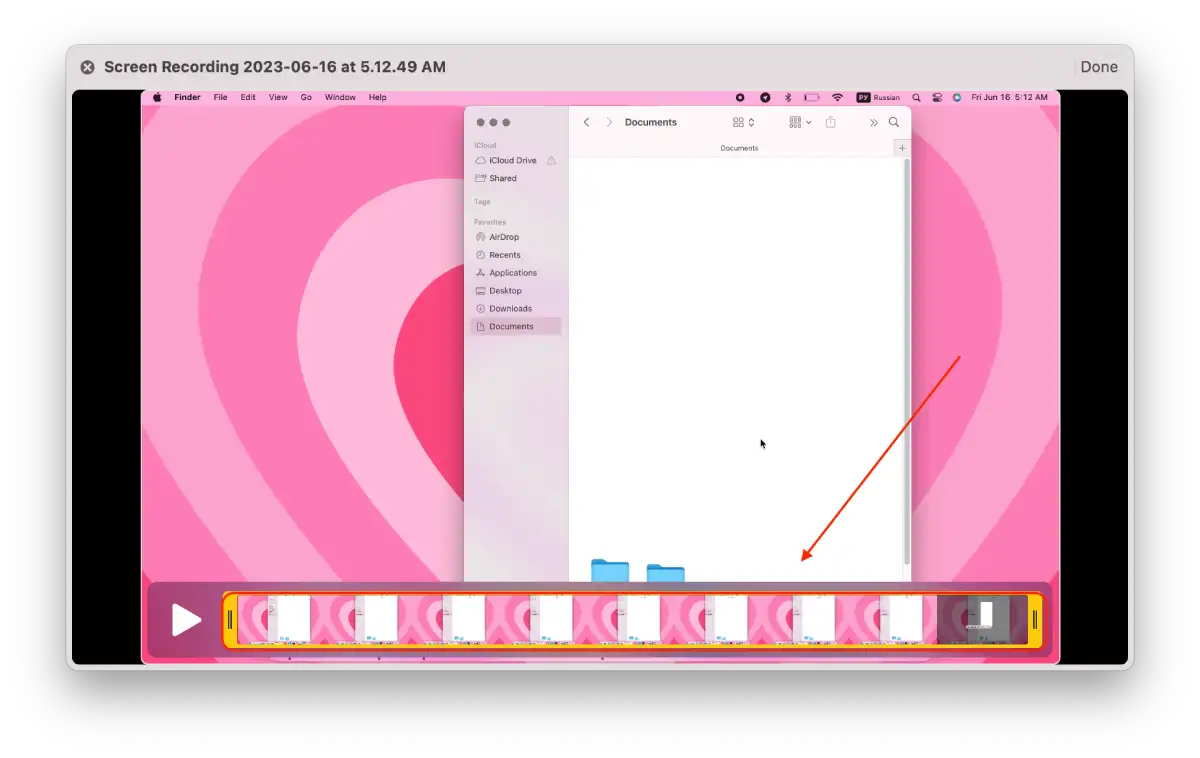
- Then choose to save it as a new video or edit the existing one.
You can trim the video and select “Save as new” so that 2 videos are displayed in your folder. There will be the old video and the new one that you modified. You can also select “Replace Video” so that the new video replaces the old one in the folder.
What do the buttons on the screen record toolbar mean?
After any user uses “Command + Shift + 5”, the buttons on the screen record toolbar will be displayed.
Capture Entire Screen
The “Capture Entire Screen” button in macOS allows you to record the entire screen of your Mac, including all open windows, desktop icons, and the menu bar. Used for screenshots.
Capture Selected Window
The “Capture Selected Window” button in MacOS is a feature that allows you to record only a specific window on your screen rather than recording the entire screen. When you select this option, you will be prompted to select the window you want to record—used for screenshots.
Capture Selected Portion
The “Capture Selected Portion” button in macOS allows you to record only a specific area of your screen rather than recording the entire screen or a selected window. When you select this option, you will be prompted to select the area of the screen you want to record by using your mouse to drag a rectangle around it. You can record a specific area of your screen, such as a particular portion of an application or window, or capture any other specific activity you want to show on your screen. It is used for screenshots.
Record Entire Screen
The “Record Entire Screen” button in macOS allows you to record everything happening on your screen, including all open windows and applications. It is used to record the screen.
Record Selected Portion
The “Record Selected Portion” button in macOS allows you to record only a specific area of your screen rather than recording the entire screen or a selected window. When you select this option, you will be prompted to select the area of the screen you want to record by using your mouse to drag a rectangle around it—used to record the screen.
Options
The “Options” button in MacOS provides access to additional recording options, allowing you to customize your screen recording in various ways.
Record
The “Record” button in MacOS starts the screen recording process when you press it. When you have selected either “Record Entire Screen,” “Record Selected Window,” or “Record Selected Portion,” you can begin recording by clicking the “Record” button.
How to use QuickTime Player to record macOS screens?
To begin, you will need to launch the QuickTime Player. Use the Spotlight search or find the program in the Finder. Next, follow the steps below to start recording your Mac screen:
- First of all, you should head to the top menu bar, and then you should click on “File” and tap on “New Screen Recording”.
- There will be a Mac Screen Recorder dialog box opened. It doesn’t offer any special settings to the user. Still, by clicking on the small arrow next to the record button, you can enable microphone audio recording and the display of mouse clicks in the screen recording.
- After that, you should click on the red round recording button. A prompt will appear, prompting you to either click it and record the entire screen or use the mouse or trackpad to select the screen area you want to record.
- To complete the process, when finished recording, you should click on the “Stop” button, which will be displayed in the process in the macOS notification bar.
Once you have completed these steps, your Mac screen will be recorded.
Can DRM stop screen recording?
Using an appropriate multi-DRM set-up precludes screen recording. Many gadgets and services allow you to configure FairPlay, PlayReady, and Widevine so that the gadget and service automatically stop screen recording tools.


