

There are cases when you can’t just take a screenshot to capture your screen. And screen recording can help you. There are built-in Screenshot toolbar and QuickTime Player on Mac, and you can use both to capture your screen.
I prefer to use the Screenshot toolbar, but I would show how to capture Mac’s screen with both methods.
Only Macs with macOS Mojave or later can use the screenshot toolbar, but QuickTime Player is available even on older macOS versions.
How to record screen with Screenshot Toolbar on Mac
Once you’re ready to record the screen, you need to open the Screenshot Toolbar and use it:
- Press Cmd+Shift+5, that’s will open the Screenshot Toolbar.
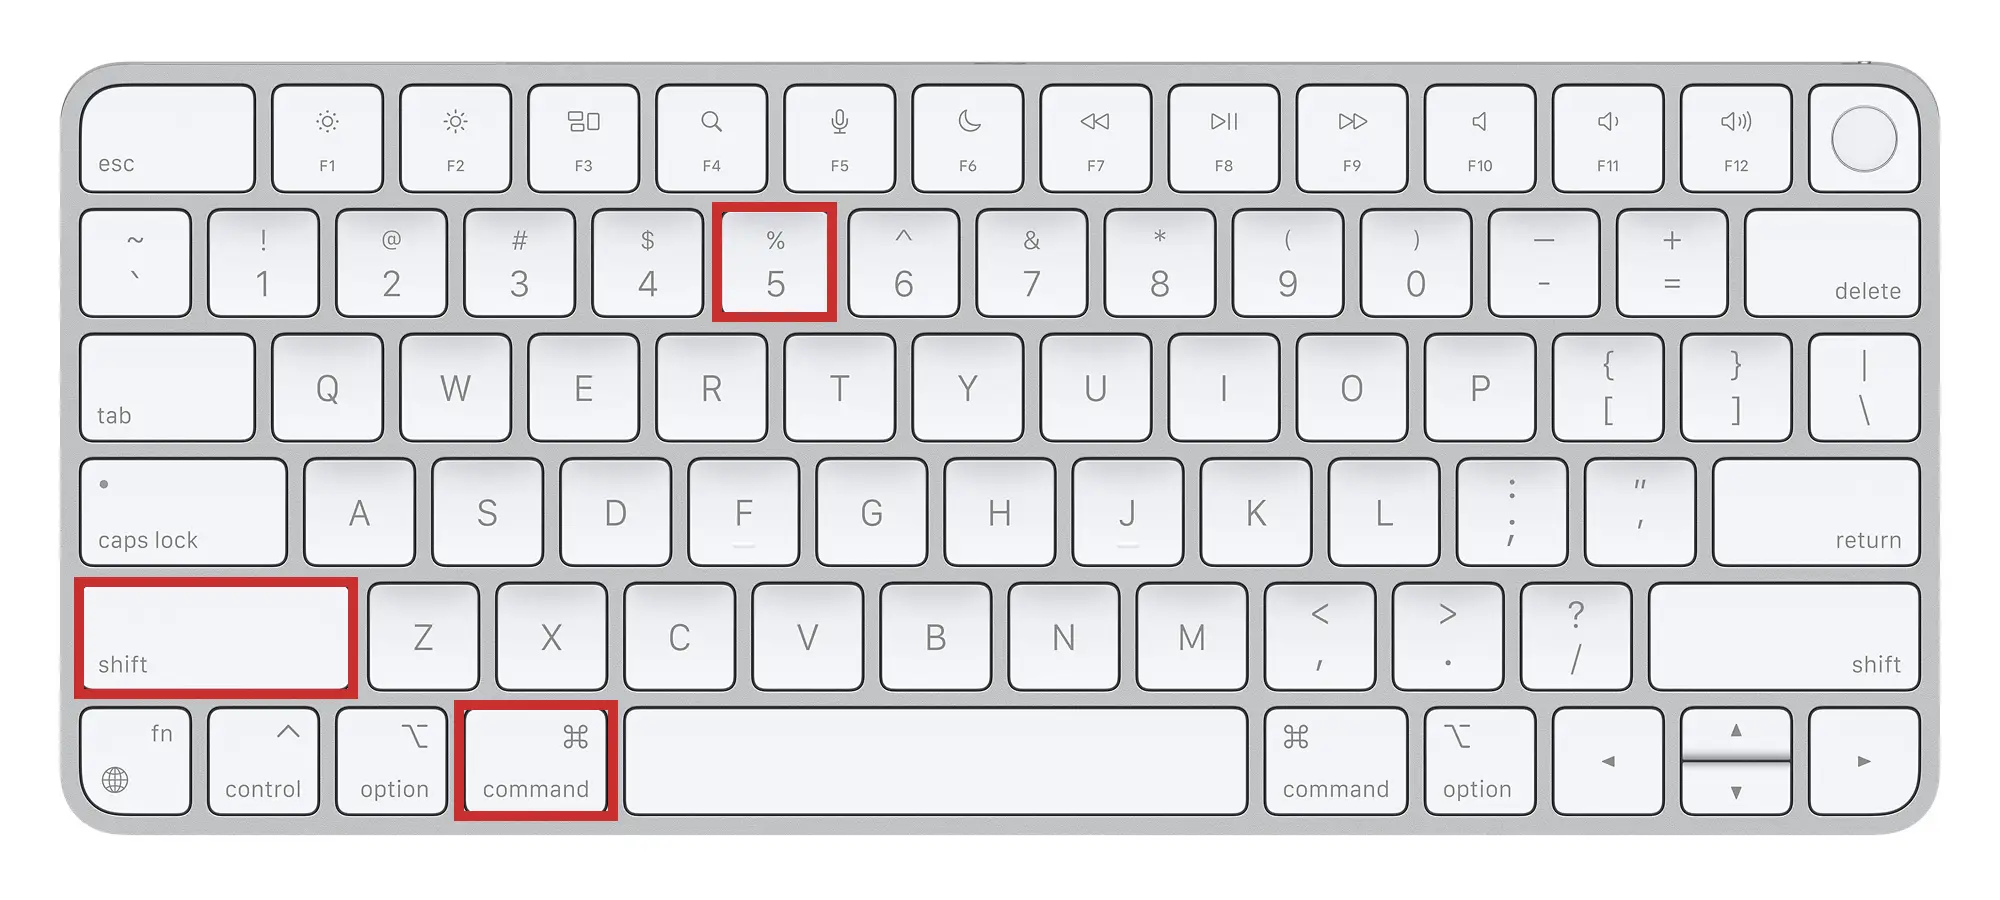
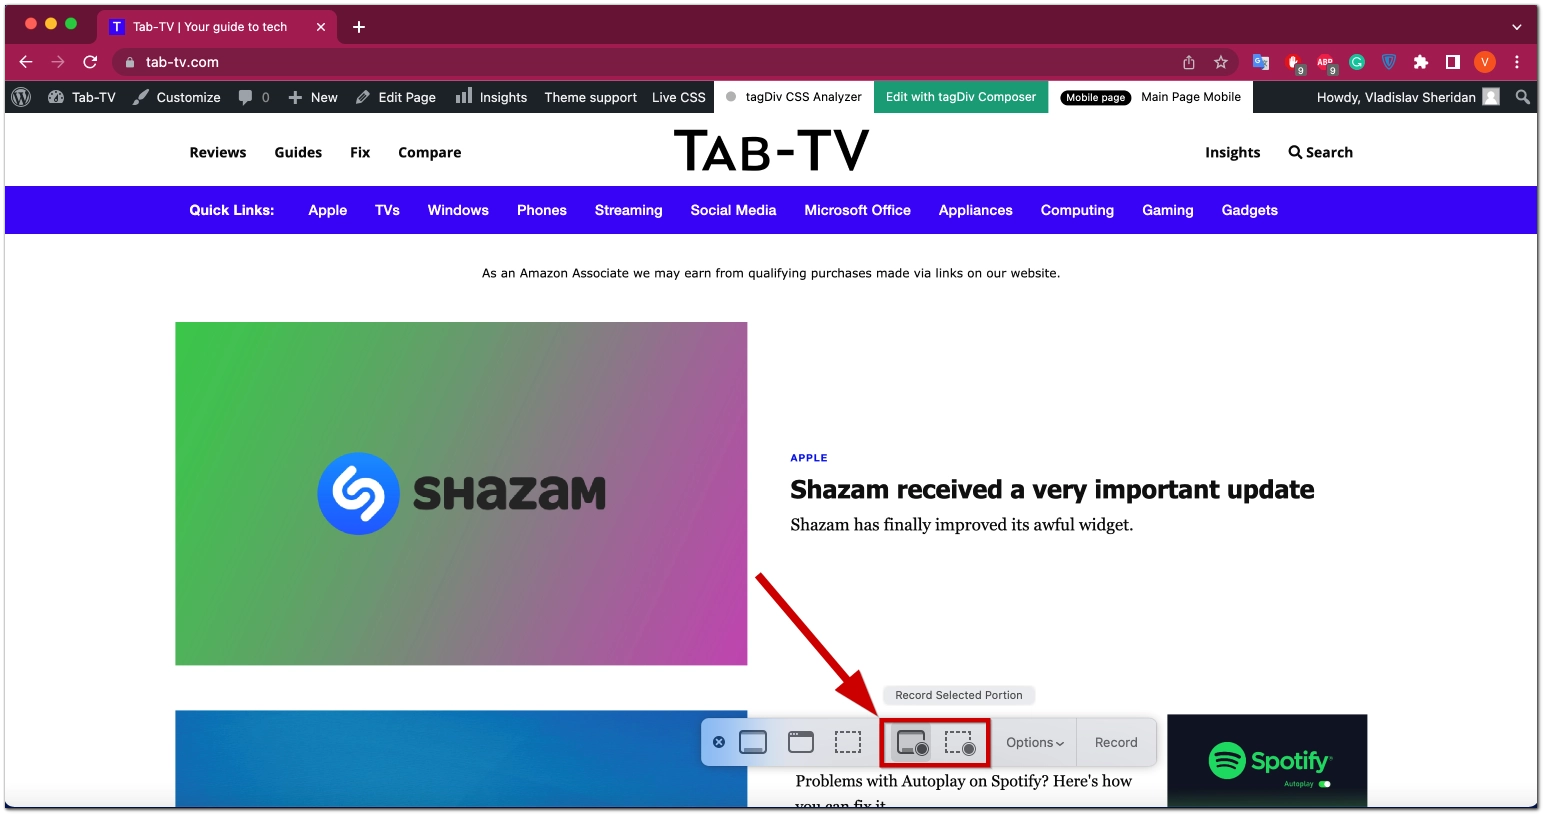
That will open a toolbar with various screenshots and screen record options. You can record the entire screen (the left icon) or the selected part of the screen (the right icon).
- Depending on your screen recording option, your Mac will record the entire screen, or you will need to highlight the screen part to be recorded.
If you want to record the entire screen, your pointer will be transformed into a camera icon after you click the proper icon. Just click with it at any part of the screen to start recording.
To record a selected screen part, highlight it and click on Record on the right end of the toolbar.
- The screen recording will start once you click the Record or click the screen with the camera pointer.
Screen recording would record the selected part (or the entire screen, depending on your choice) and any audio playing.
- Once you want to stop screen recording – open the Screenshot Toolbar (with Cmd+Shift+5) and click the stop icon (it will replace screen recording icons).
Your recording will be saved in the .mov format. By default, they’re saved to the Desktop. However, you can change the destination by clicking on the Options tab. Here you can choose among default options or select your location.
You can also show mouse clicks on your recording in the Options drop-down menu. That’s useful when recording a video to show some actions (and mouse clicks would enhance your video with some clarity).
You can also set Timer (via the Options menu); that way, the recording will start after 5 or 10 seconds.
There are also 2 additional valuable features: Show Floating Thumbnails and Remember Last Selection.
- Show Floating Thumbnails will show the preview of the saved recording in the bottom-right corner of your screen, so you can easily access it.
- Remember Last Selection will keep the recording area selection to be the same size and in the same place. It’s useful when you’re recording only a part of the screen and want all recordings to be the same size.
Can you record a microphone voice with screen recording on Mac?
Yes, in the Options drop-down menu, you can choose your Mac to record a microphone. You can choose Mac built-in micro, any connected device, or even voice recording in apps like Microsoft Teams or Zoom.
How to record the screen on Mac with QuickTime player
In my opinion, the method above can satisfy 100% of people. However, if your macOS version is older than Mojave, you will need to use a built-in QuickTime Player to record the screen:
- Open QuickTime Player on your Mac. You can find it in the Launchpad.
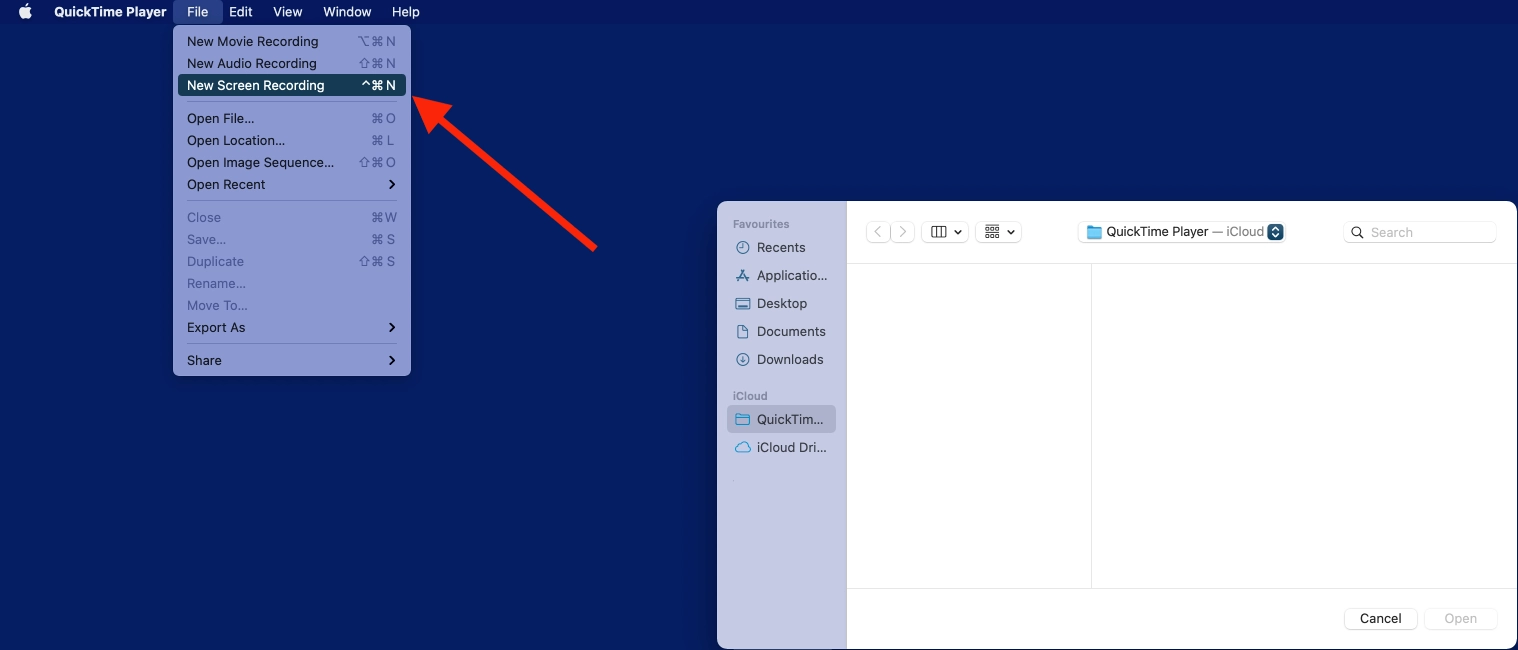
- When the Player is opened, click on File at the left-top of the screen.
- Click on New Screen Recording (you also use the Control+Command+N shortcut).
If QuickTime asks for permission, you need to grant QuickTime Player permission to record the screen. The instructions will be displayed on your screen; just follow them.
- Now, click the red recording button and click anywhere on the screen to start recording the entire screen.
You can also select a specific part of your screen to record.
- You can also record your voice.
You need to click on the white arrow near the red button and, in the drop-down, choose the microphone.
- In the same way, you can also enable showing mouse clicks on the screen.
- To stop recording, click on the red square. The recorded video will open in QuickTime.
What third-party apps can you use to record screen on Mac?
In case you want extended features, there are a lot of third-party apps that can help you to record your Mac screen. The built-in features are enough for me, but if you’re looking for more advanced ones, here are some.
CleanShot X
This app is quite advanced; I like that you can customize your clicks (that’s useful when you want to highlight the actions). It also allows you to record GIFs, so you don’t need to convert your video to make it a GIF. There’s also cloud storage, so videos wouldn’t take place on your Mac, as you can store them in the cloud.
In other options, the app is quite flexible and allows customization, making your recording look the way you want. I don’t want to write a long review, so you can read this review on MacWorld to understand a little about the app.
However, the disadvantage is the price. You must pay $29 with a one-time payment or $96 a year/$10 a month. The app is also available on Setapp with Setapp’s subscription for $10 a month.
OBS Studio
That’s a famous tool for streaming and screen recording. And it’s free to use, so that’s an advantage. However, I think the app is highly hardcore if you want to record a screen to make a video or presentation. And in the same time, it offers almost no additional features.
Here’s the OBS Studio review on PCWorld.
Loom
This app also has valuable features, like editing videos and cutting segments. And the app also offers cloud storage, so you can store your videos outside the Mac and share them via the link.
What’s also great is that’s app is free in case you want to shoot videos shorter than 5 minutes (but the videos, as I understand, are public if you’re using the free version). But if you want longer records, you will need to pay $8 a month.
You can read the Loom review on PCWorld.


