

Picture this: you’re sitting at your desk, sipping your morning coffee, and suddenly remember an important email you must send later in the day. But wait, you don’t want to risk forgetting or sending it too early. That’s where scheduling emails in Outlook comes to the rescue.
Whether you’re an Outlook user on Windows, Mac, web, or mobile app, we’ve covered you. We understand each platform may have a unique interface and features, so we’ll walk you through step-by-step instructions tailored to your device.
How to delay an email in Outlook on Windows
Outlook on Windows offers a convenient feature that allows you to delay the delivery of an email. This can be particularly helpful if you want to compose an email at one time but send it at a later, more appropriate time. Here’s how you can do it:
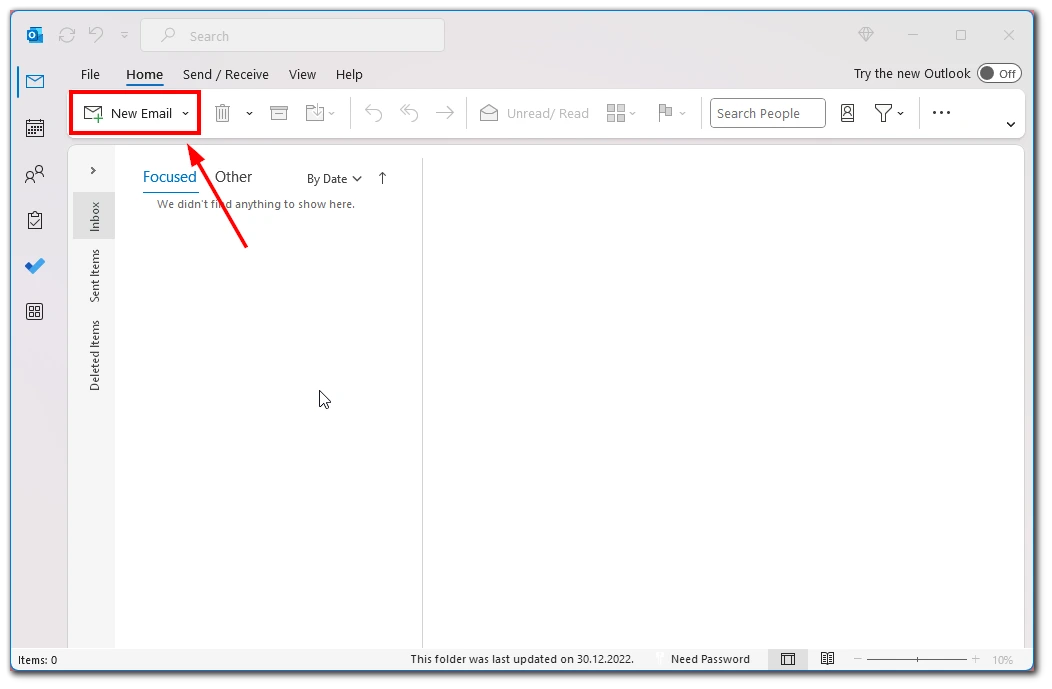
- Open Outlook on your Windows computer and click the “New Email” button to compose a new message.
- Write the email as you normally would, including the recipient’s email address, subject, and body.
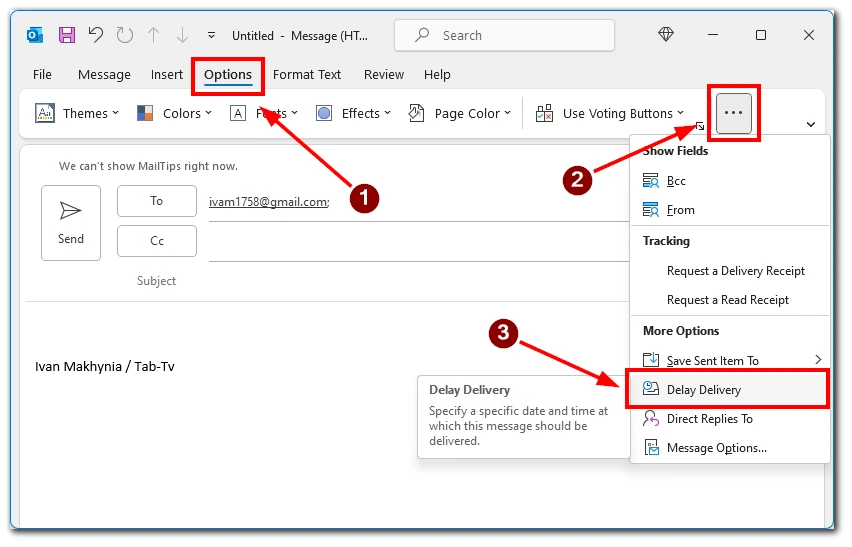
- Once you’ve finished composing the email, click on the “Options” tab in the ribbon at the top.
- Click on the three-dot button to open the “More Options” group.
- In the “More Options” group, click the “Delay Delivery” button.
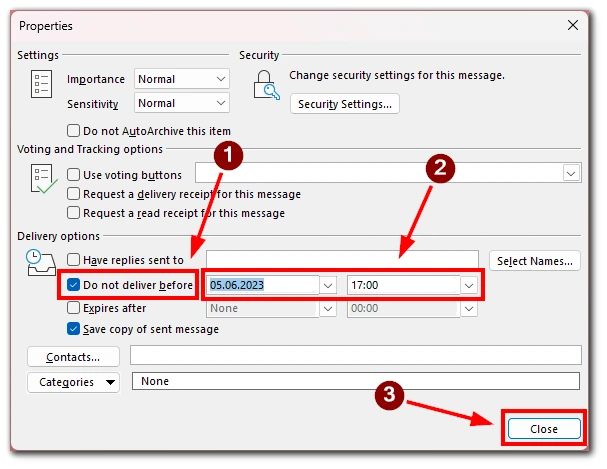
- In the “Properties” dialog box, check the box next to “Do not deliver before” and select the desired date and time.
- Click “Close” to save the settings.
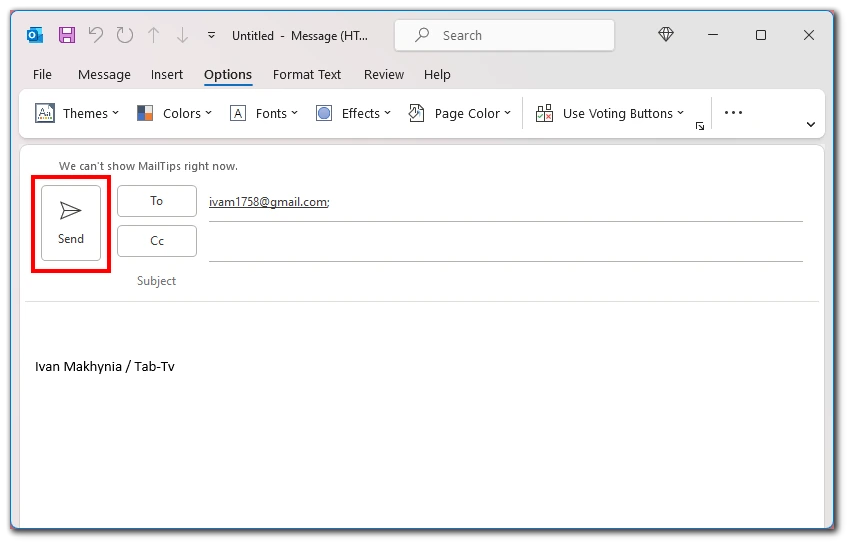
- Finally, click the “Send” button to schedule the email for delivery at the specified time.
By following these steps, you can easily delay the delivery of an email in Outlook on Windows, ensuring that your messages reach the recipients at the most suitable time.
How to schedule an email in Outlook on Mac
Scheduling emails on your Mac using Outlook, whether using the classic or new application version, is a breeze. In just a few simple steps, you can schedule your emails to be sent at a later, more convenient time. Let’s dive into the process:
- Launch Outlook on your Mac and click the “New email” or “New message” button, depending on your version.
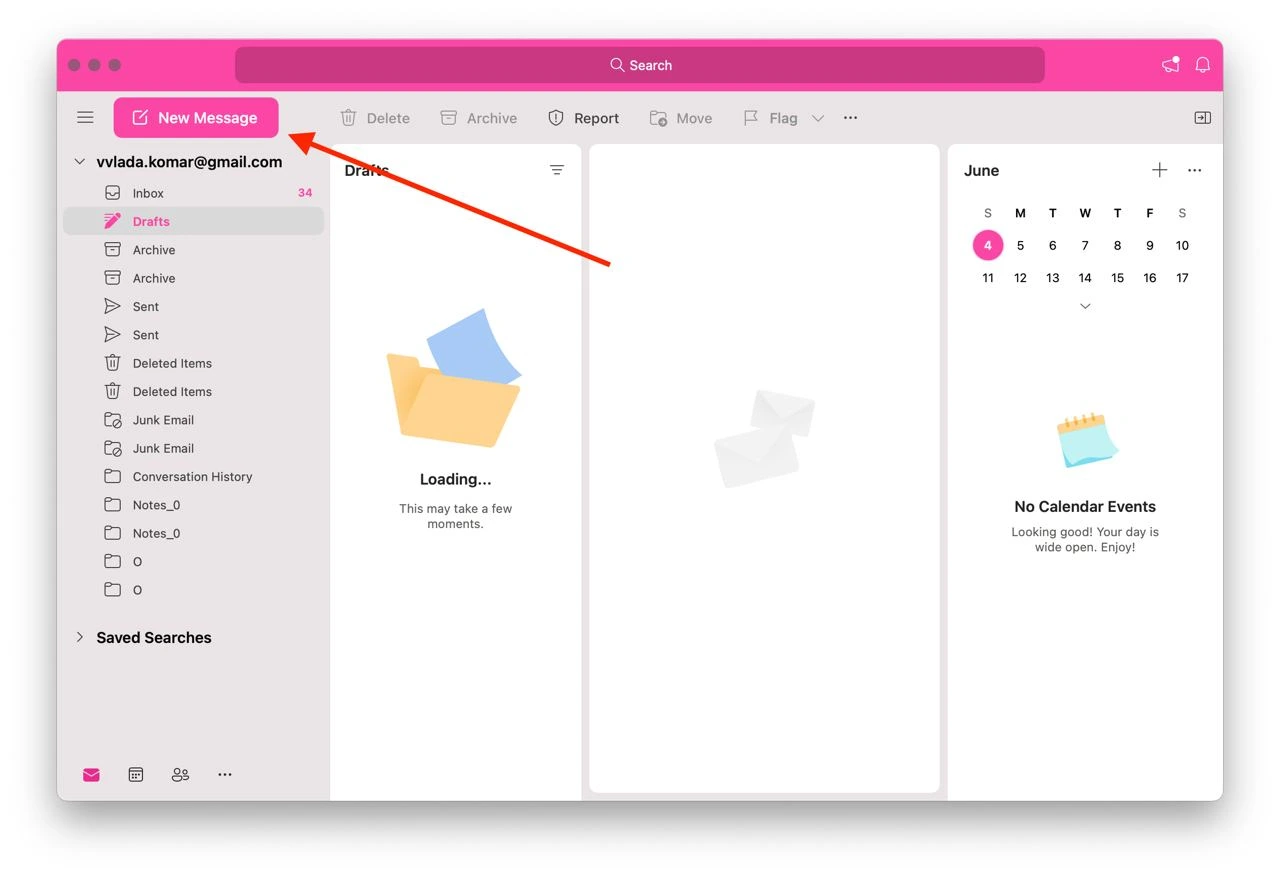
- Compose your email as you normally would by adding the recipient’s email address and entering the subject line.
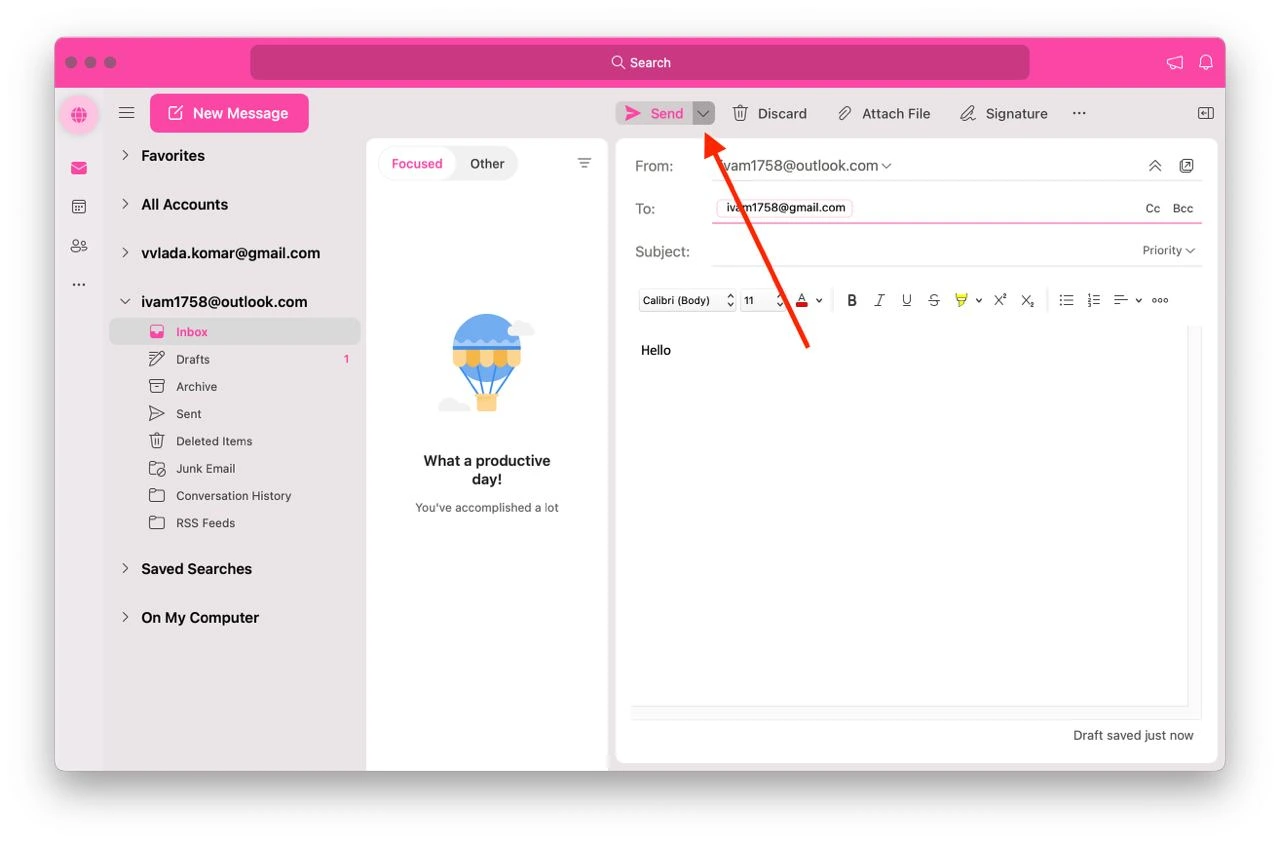
- When you’re ready to schedule the email for later delivery, look at the top of the email composition window. You’ll notice an arrow icon located to the right of the “Send” button. Click on this arrow to reveal a drop-down menu, and select the “Schedule Send” option.
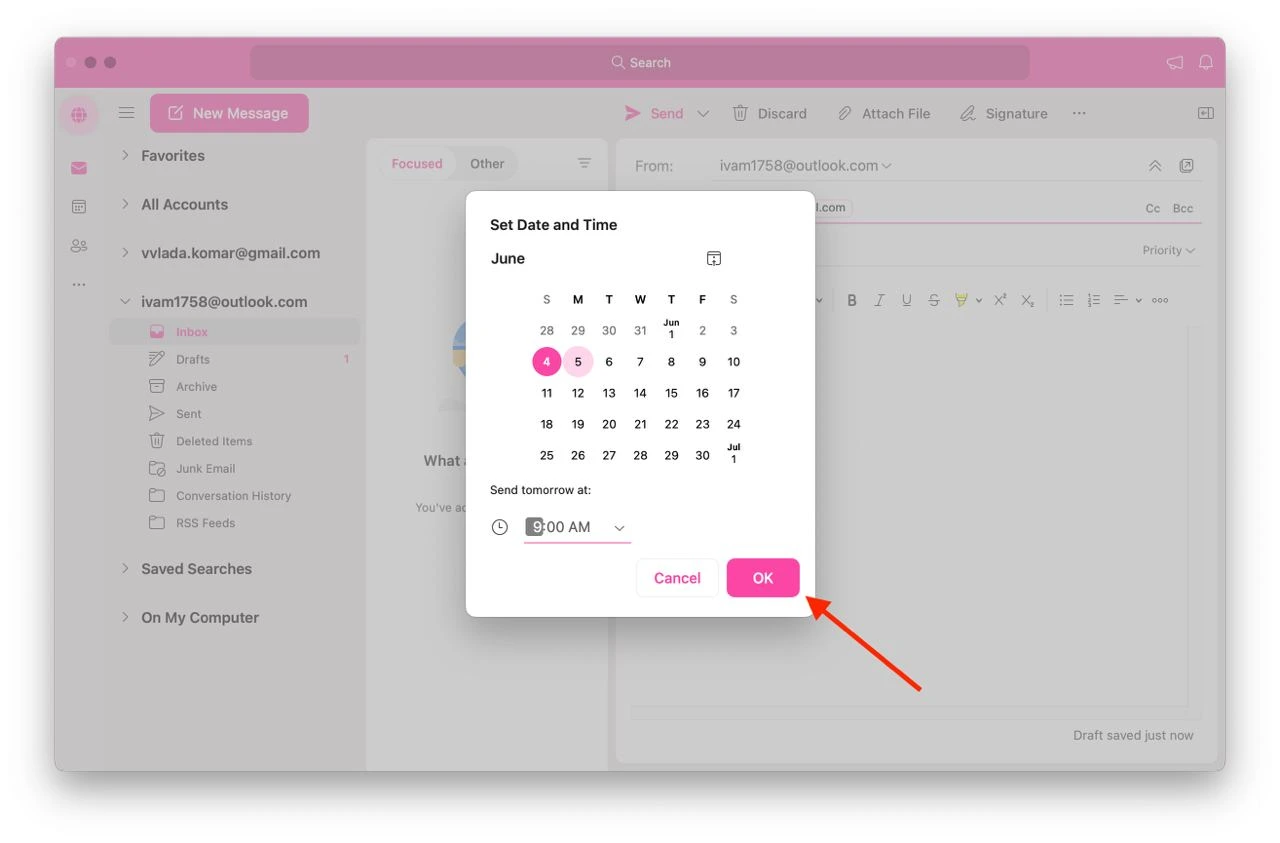
- A dialog box will appear, allowing you to choose the desired date and time for the email to be sent. Select the appropriate date and time and click the “OK” button.
It’s worth noting that while the overall process for scheduling emails remains the same across different versions of Outlook on Mac, there might be slight differences in the user interface and options between the classic and new versions. These differences are usually minor and cosmetic, ensuring a consistent experience across different platforms.
It is also worth mentioning that sending scheduled messages on the Mac is only possible when using an Outlook account. If you are logged into the application using another email account, the scheduled message feature will not be available.
How to schedule an email in Outlook on Web
One of the great advantages of Outlook is its accessibility across different platforms, including the web. Regardless of your operating system or browser, Outlook on the Web provides a consistent experience for scheduling emails. Whether you’re accessing it on Windows, Mac, or even a mobile device, the steps to schedule an email remain the same.
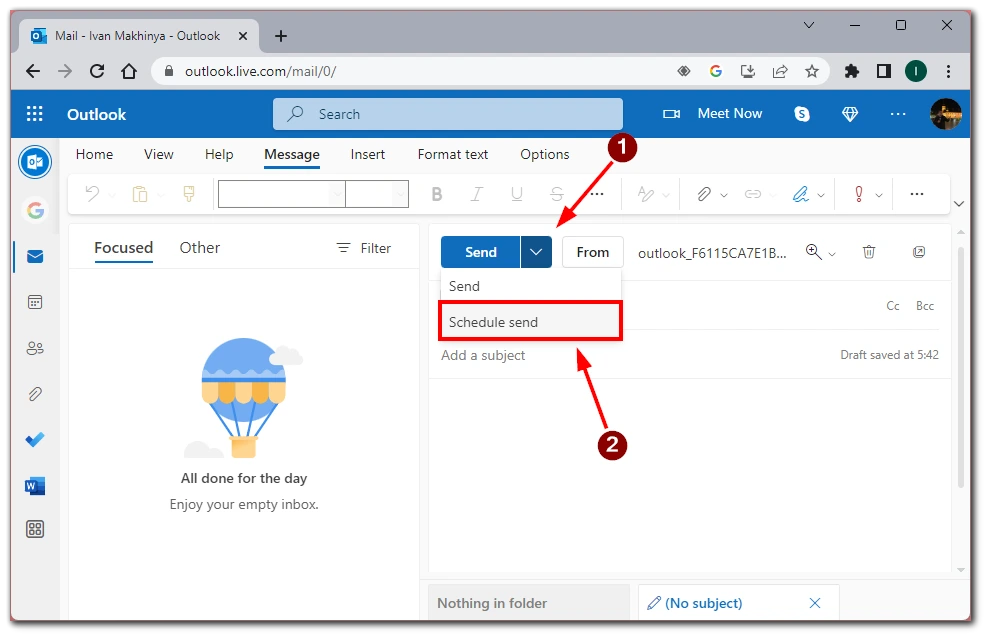
- Click on “New mail,” located in the top-left corner of the screen.
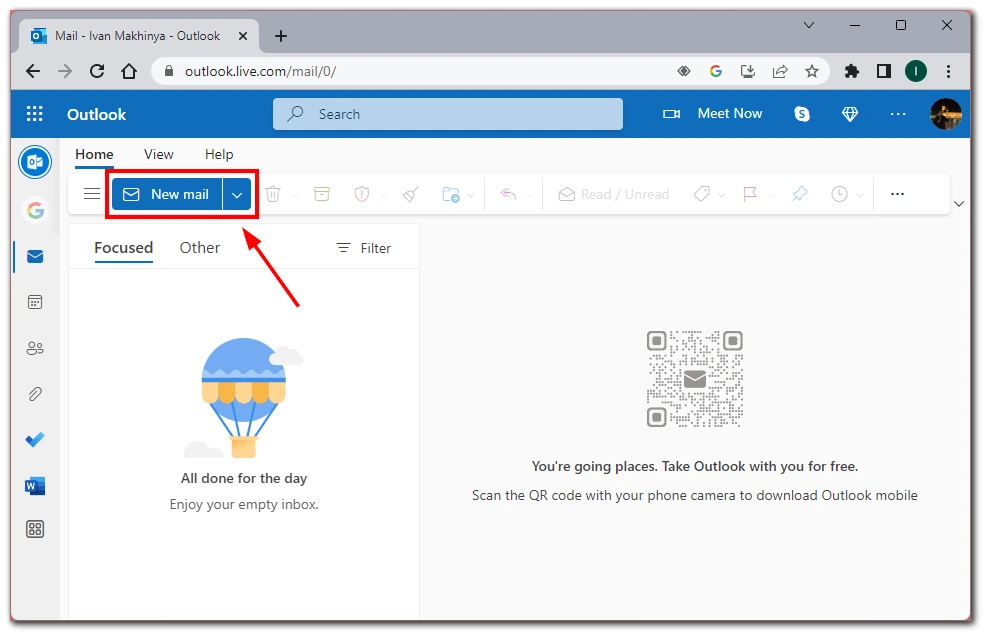
- Compose your email by adding the recipient’s email address, entering the subject line, and crafting the body of the message, just as you would in a regular email.
- When you’re ready to schedule the email for later delivery, look at the top of the email composition window. You’ll notice an arrow icon located to the right of the “Send” button. Click on this arrow to reveal a drop-down menu, and select the “Schedule Send” option.
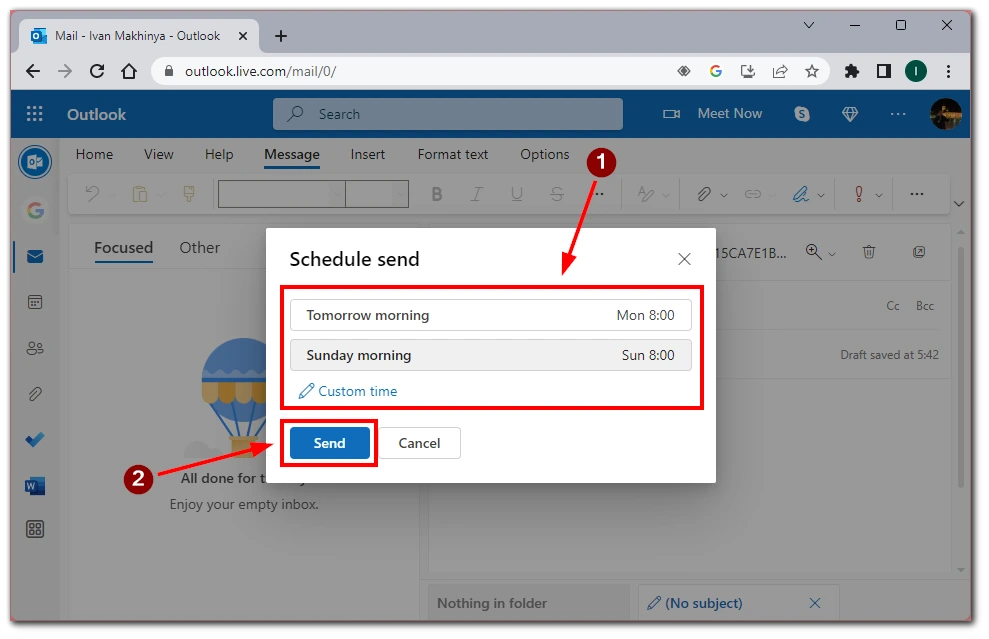
- A list of suggested date and time options will appear. You can choose one of these pre-set options that best suits your needs. Select the “Custom time” option if no suggestions are suitable, and manually enter your desired date and time.
- Click the “Send” button once you select the desired delivery time.
By following these simple instructions, you can easily schedule emails for later delivery, allowing you to manage your communication effectively and stay organized no matter where you are.
How to schedule an email in Outlook mobile app
Outlook’s mobile app lets you schedule emails on the go, allowing you to stay organized and in control of your communication. The app for iOS and Android is similar, so the steps won’t differ regardless of your mobile system. Here’s how you can schedule an email using the Outlook mobile app:
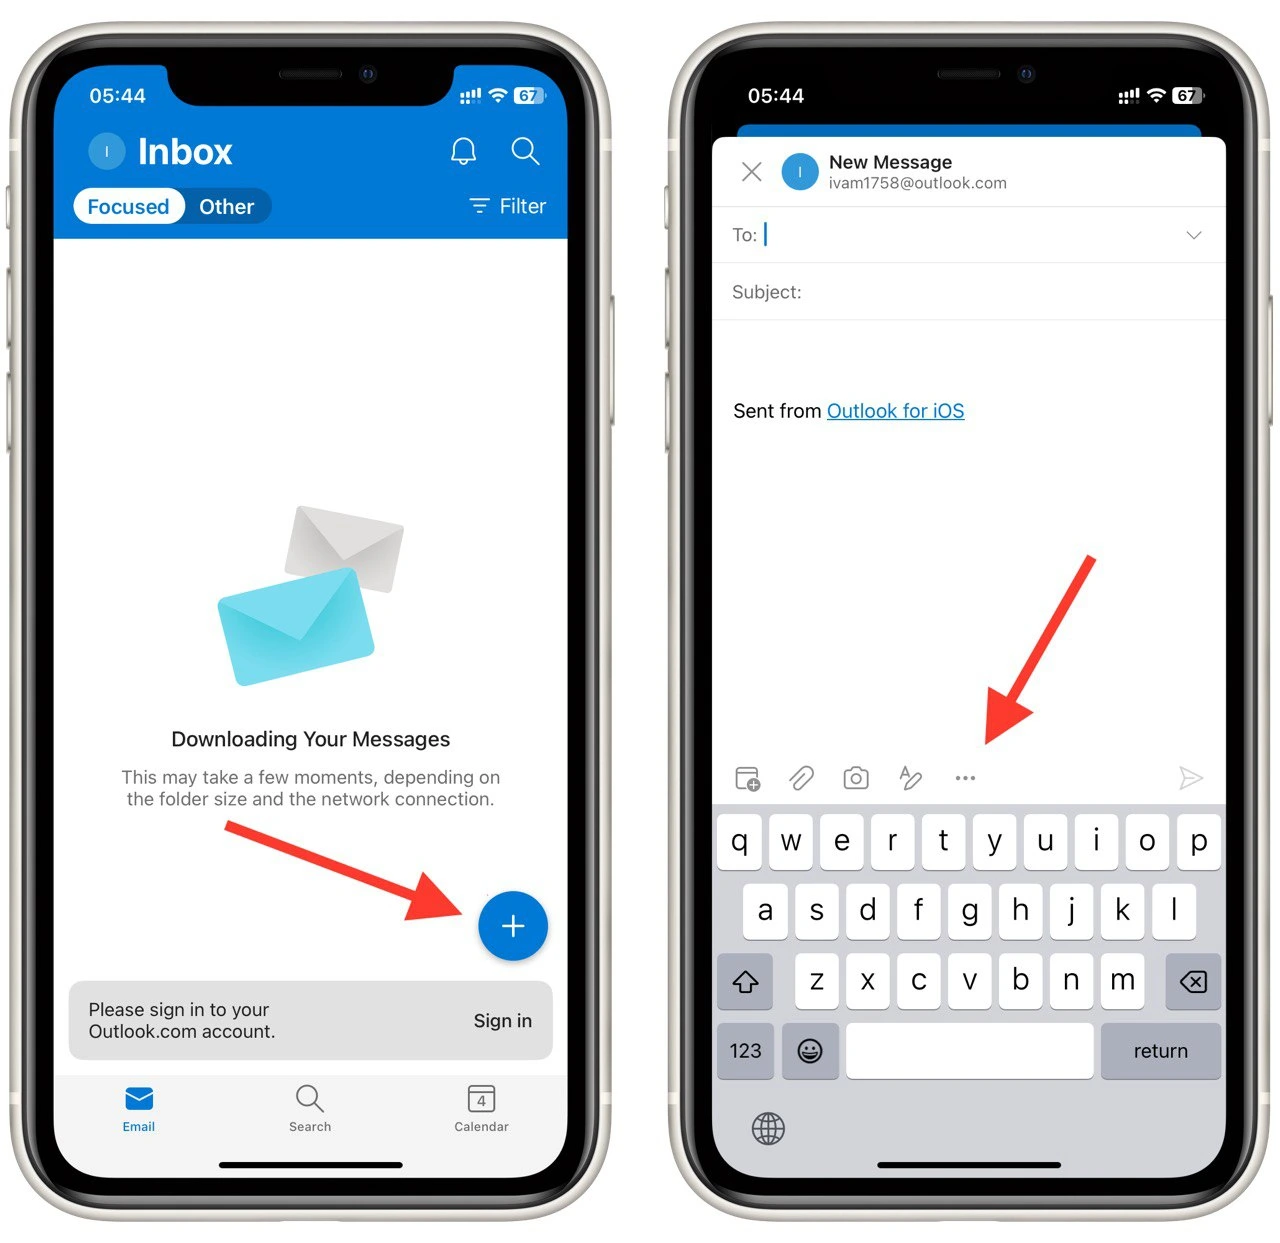
- Tap the “Plus” button to start composing a new message on the bottom right side. Compose the email, including the recipient’s address, subject, and body.
- Once you’ve completed composing the email, tap on the three-dot menu icon (More options) in the email composition toolbar.
- From the menu options, select “Schedule Send.”
- In the “Schedule Send” dialog box, choose send time.
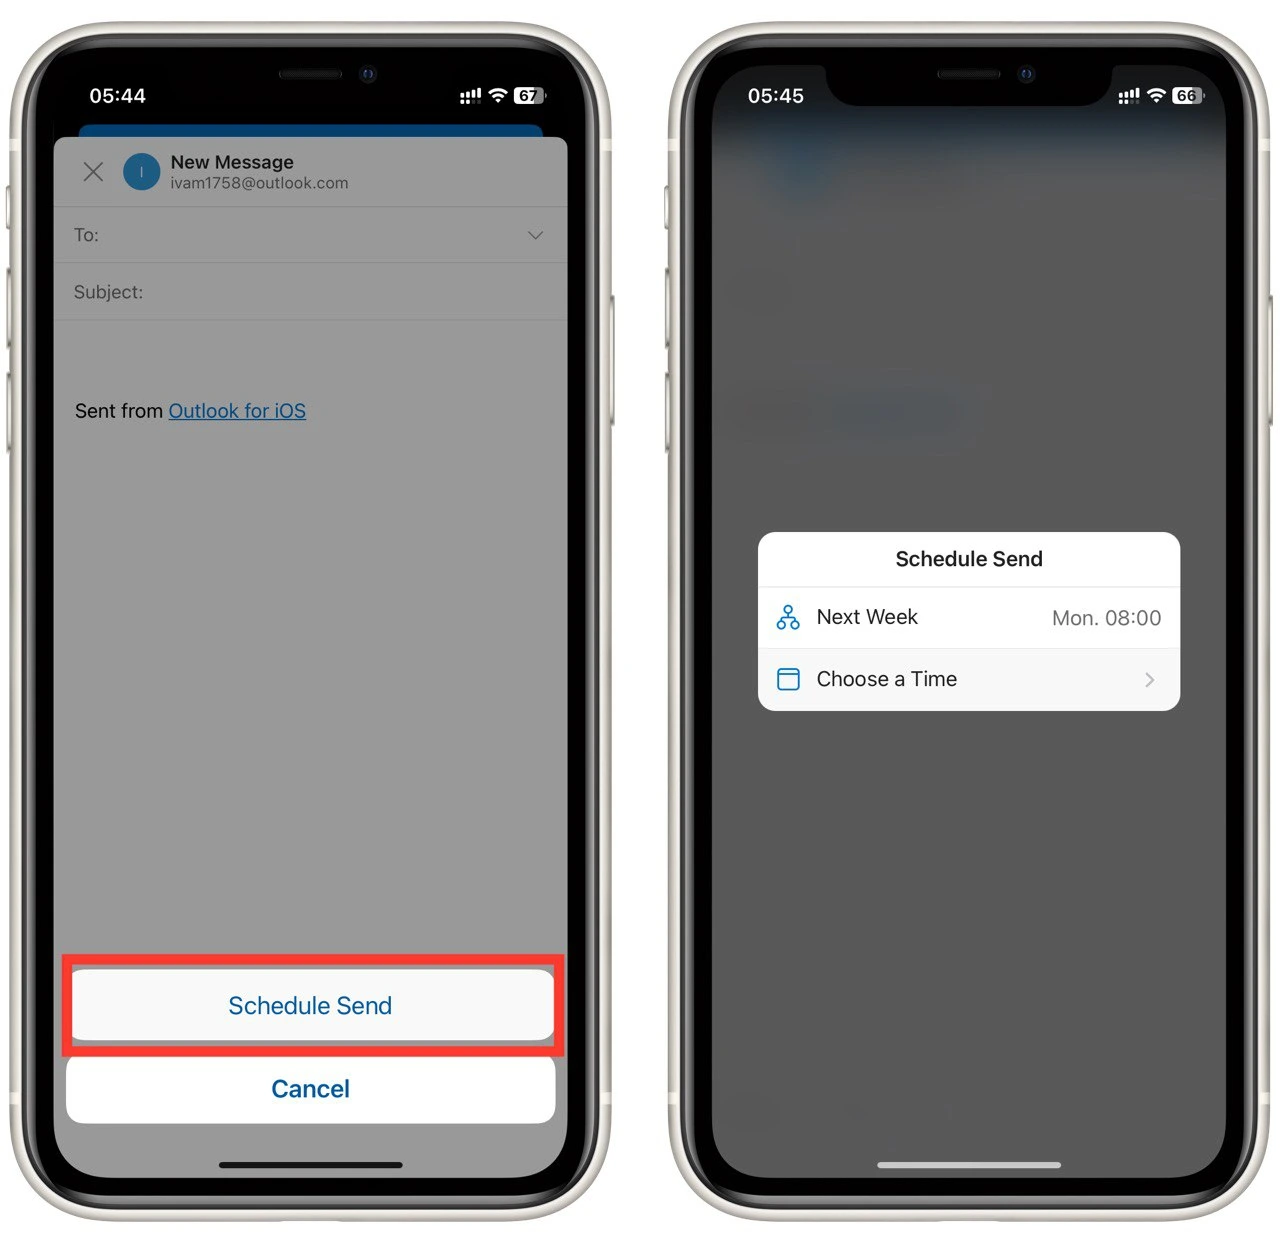
- Finally, tap the “Send” button to schedule the email for delivery at the specified time.
Conclusion: Following these steps, you can conveniently schedule emails using the Outlook mobile app to manage your communication while moving.
Things to keep in mind when scheduling emails in Outlook
Scheduling emails in Outlook offers convenience and flexibility, allowing you to send messages at specific times. However, it’s important to consider a few key factors to ensure successful delivery and effective communication. Let’s explore some important things to keep in mind when scheduling emails in Outlook:
- Time zones: When scheduling emails, it’s crucial to consider the time zones of your recipients. Ensure that the scheduled delivery time aligns with their working hours to maximize the chances of your email being seen promptly. If you send emails to recipients in different time zones, be mindful of the time difference and adjust the delivery time accordingly.
- Connectivity and offline status: To ensure the successful delivery of scheduled emails, it’s important to have a stable internet connection. If your device is offline or not connected to the internet at the scheduled delivery time, the email may not be sent until you regain connectivity. Ensure that your device is powered on and connected to the internet to avoid delays in sending your scheduled emails.
- Editing or canceling scheduled emails: Outlook allows editing or canceling scheduled emails before they are sent. If you need to make changes or cancel a scheduled email, locate the email in your “Drafts” or “Scheduled” folder. From there, you can open the email, make any necessary modifications, reschedule, or cancel the scheduled delivery. This feature allows you to correct any mistakes or update the content of your emails even after scheduling them.
- Reminder for follow-ups: Scheduling emails in Outlook is not limited to initial communications. You can also use the scheduling feature to set reminders for follow-up emails. Consider scheduling a reminder for yourself when sending an important email that requires a response or follow-up. This way, you can ensure that you don’t forget to follow up with the recipient at the appropriate time, increasing the chances of a timely response and maintaining effective communication.
- Consider urgency and relevance: While scheduling emails can be convenient, it’s essential to consider the urgency and relevance of the message. Evaluate whether it’s necessary to schedule an email or if it can be sent immediately. Some messages require immediate attention or might lose their relevance if delayed. Use your judgment to determine when scheduling is appropriate and when to send the email immediately.
Scheduling emails in Outlook can significantly enhance your productivity and organization. Remember to utilize these tips to make the most of the email scheduling feature in Outlook and streamline your communication workflow.


