If you are a designer, one of the most common tasks you encounter is the need to remove a background from an image. Creating a transparent background can take a design from good to great, whether for a client’s social media graphics or my own personal projects. However, not everyone can access expensive software or the skills to use it. That’s where Paint comes in – a simple, free graphics editing tool that most of us already have on our computers.
How to make a transparent background in Microsoft Paint
Microsoft Paint is a graphics editing tool pre-installed on most Windows computers. While it may not have all the features of more advanced software, it’s a great option for simple tasks like removing the background from an image. To do this, you will need the following:
- First, you’ll need to open the image you want to remove the background from in Microsoft Paint. To do this, right-click on the image file and select “Open with” followed by “Paint.” This will open the image in a new Paint window.
- Next, you’ll need to select the background you want to remove. To do this, select the “Select” tool from the toolbar. A dotted square icon represents this. You also can choose a “Free-Form” tool if you need to cut the background around a not square object.
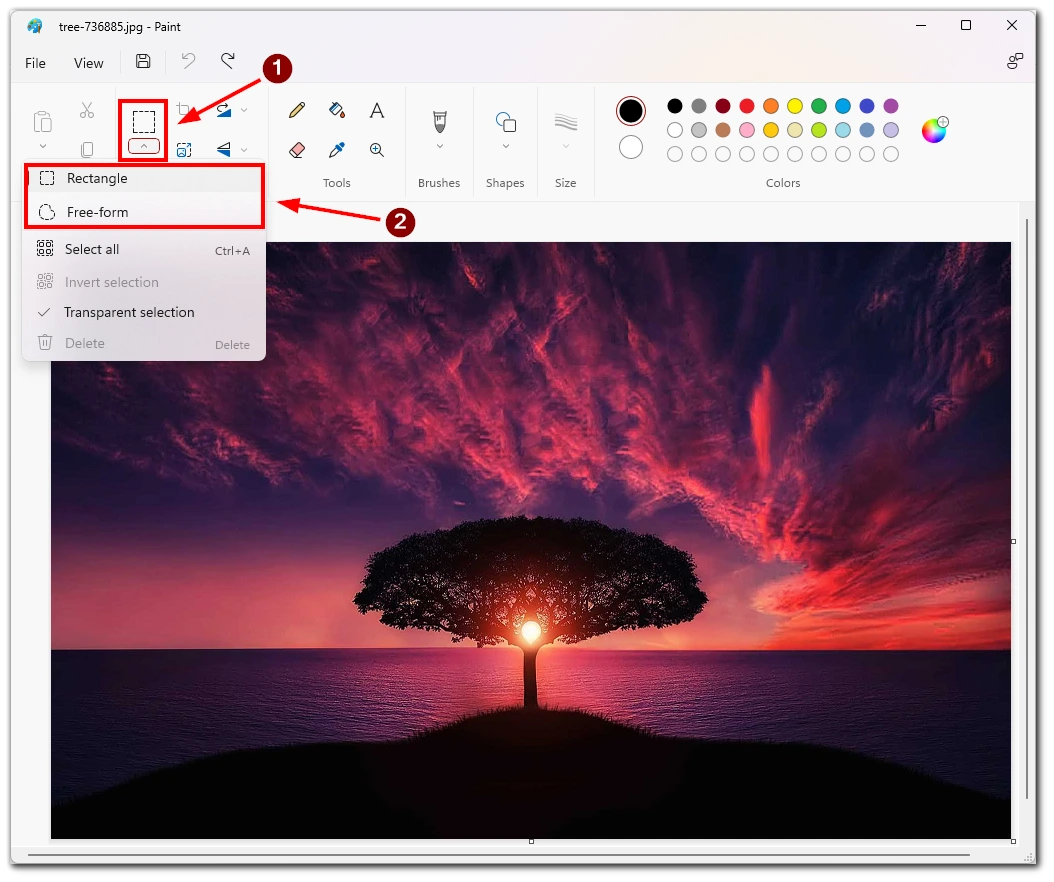
- With the Select tool, click and drag over the background you want to remove. This will create a dotted outline around the selected area.
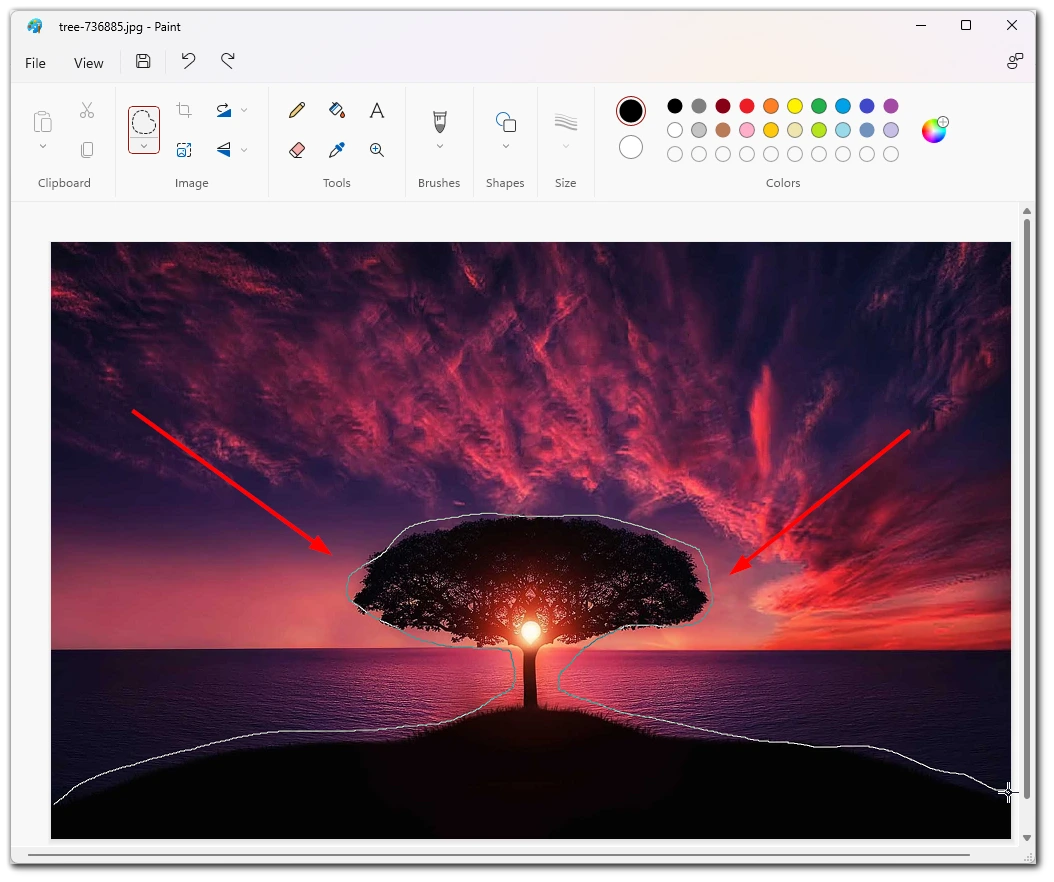
- Once the background is selected, you can remove it by cutting it from the image. To do this, press the “Delete” key on your keyboard. This will remove the selected area, leaving a transparent background.
Finally, you’ll need to save the image with a transparent background. To do this, select “File” from the top menu and then select “Save As.” Choose the image’s file name and location, then select “PNG” as the file format. PNG is a file format that supports transparency, making it ideal for images with transparent backgrounds.
How to make a transparent background in Paint 3D
Paint 3D is a more advanced version of Microsoft Paint with Windows 10. It offers many features beyond those available in the original version of Paint, including the ability to create and edit 3D models. Follow these steps to do so:
- To begin, right-click on the image file and select “Open with,” followed by “Paint 3D.” This will open the image in a new Paint 3D window.
- Next, select the “Magic Select” tool from the toolbar. This tool allows you to select and remove the background from an image automatically.
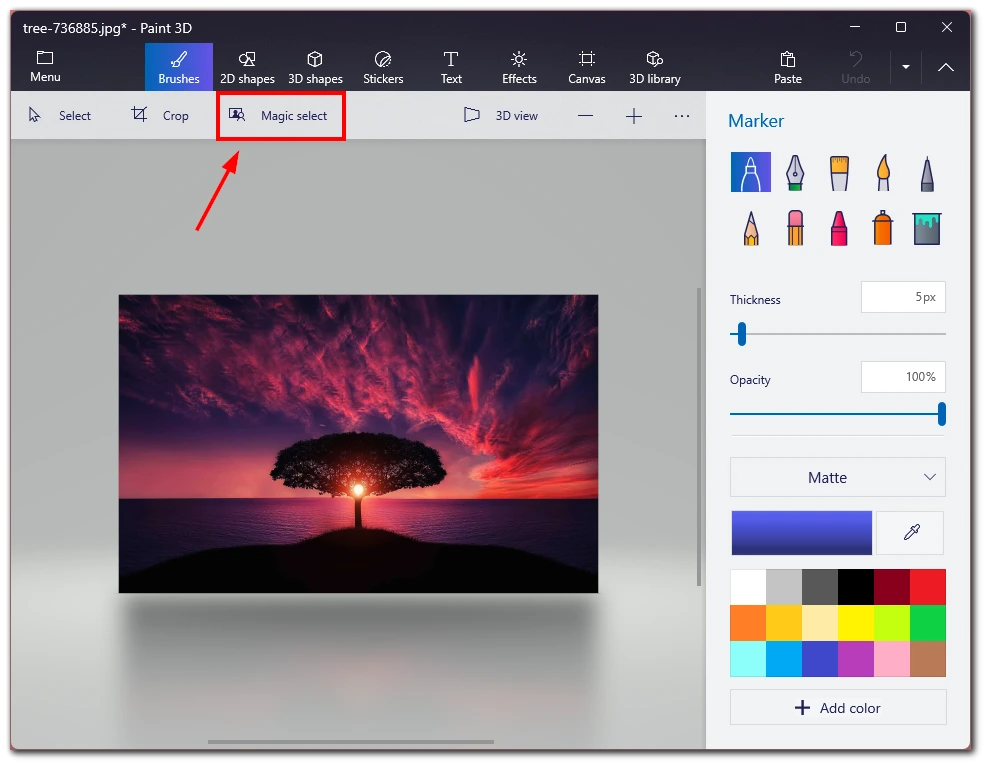
- With the Magic Select tool selected, click and drag over the object around which you want to cut the background. Paint 3D will automatically detect the edges of the object you want to keep and create a transparent background around it.
- Note that Paint 3D’s Magic Select tool is very effective but may not always make the exact selection you want. If this happens, you can refine the selection manually. To do this, select the “Add” or “Remove” tool from the toolbar and click on the areas of the image you want to add or remove from the selection.
- Click “Done” to cut the desired object from the picture.
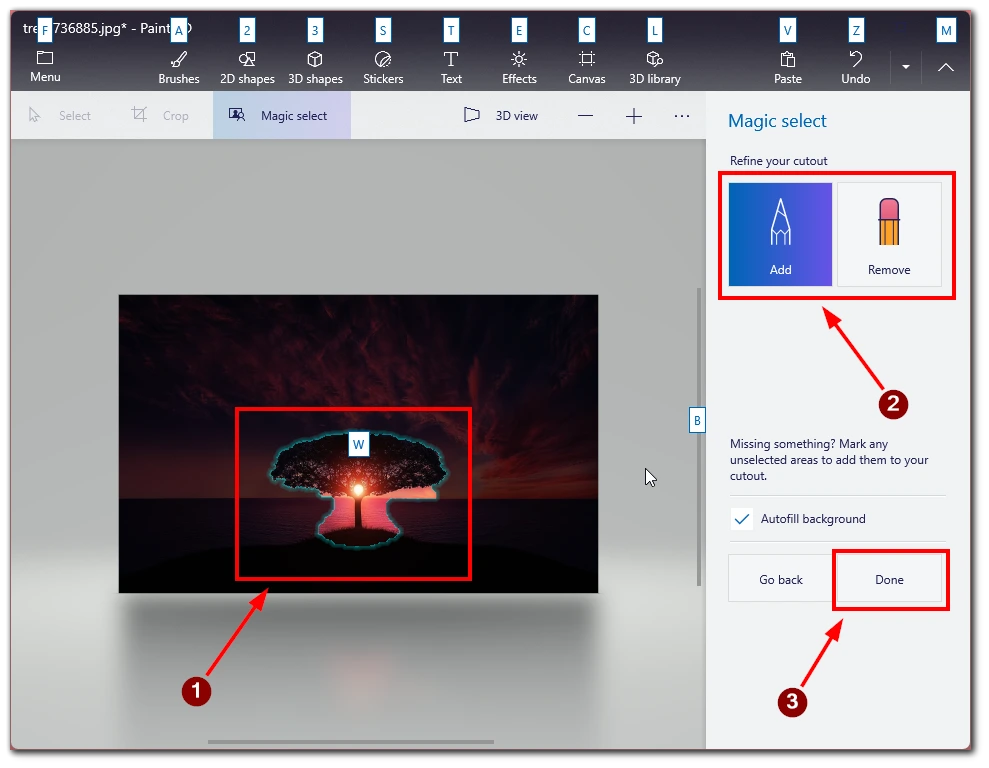
- Then drag it to the side and select the remaining background. Press Delete on your keyboard to delete it.
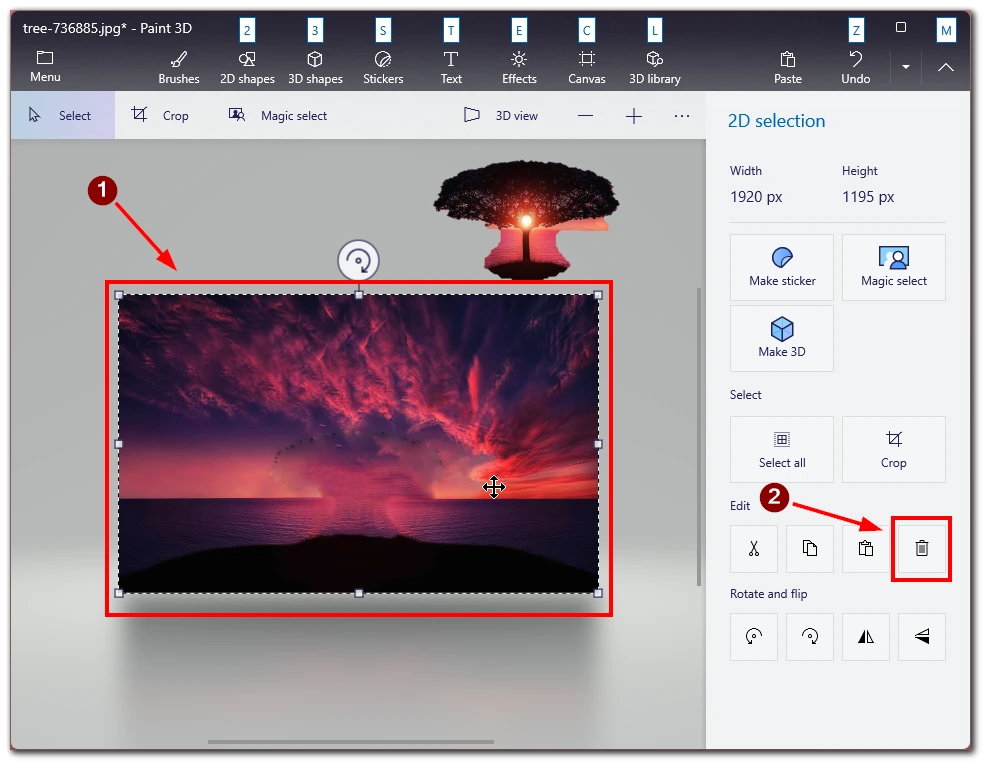
Note that after you remove the background, you may still have a scene behind your image, so to remove it, you have to select Canvas from the tools menu and turn on “Transparent Canvas”.
Tips when making the background transparent in Paint
Making the background transparent in Paint can be a simple process, but it requires attention to detail to achieve the desired results. Here are some tips to keep in mind when removing the background from an image in Paint:
- Choose the right tool. Paint offers several tools for removing the background from an image, including the Magic Wand tool, the Free-form Selection tool, and the Rectangular Selection tool. Each tool works differently and may be more or less effective, depending on the image you’re working with. Experiment with each tool to find the best one for your image.
- Use the zoom function. Zooming in on the image to ensure you’re making precise selections can be helpful when working with detailed images. Use your keyboard’s Ctrl and + keys to zoom in on the image. To zoom out, use Ctrl and -.
- Refine your selection. Your initial selection may not be perfect, even with the right tool and careful attention to detail. To refine your selection, use the Eraser tool to remove unwanted areas or the Paintbrush tool to add missing areas.
- Check the edges. After you’ve removed the background, check the edges of the object to ensure they’re clean and smooth. If there are any jagged edges or leftover background pixels, use the Eraser or Paintbrush tools to clean them up.
- Save as a PNG file. When removing the background, save the image as a PNG file. PNG files support transparency, which means the background will remain transparent when you use the image in other programs.
Making the background transparent in Paint can be quick and easy if you follow the right steps and pay attention to the details. With these tips in mind, you can create stunning graphics that will impress your audience and make an impact.
What other services can you use to make the background transparent?
While Microsoft Paint is a basic image editing program that can help you make the background transparent, other more advanced image editing tools can provide more precision and flexibility. Here are a few other services that you can use to make the background transparent:
Adobe Photoshop
Adobe Photoshop is a professional-grade image editing software that offers a wide range of tools and features for removing backgrounds and creating transparent images. With Photoshop, you can use the Magic Wand tool, the Lasso tool, or the Pen tool to make precise selections, and you can fine-tune your results using adjustment layers, masks, and other advanced features.
GIMP
GIMP (GNU Image Manipulation Program) is a free and open-source image editing software that can create transparent images. Like Photoshop, GIMP offers a range of tools for selecting and removing backgrounds, including the Fuzzy Select tool, the Scissors Select tool, and the Paths tool.
Canva
Canva is a web-based graphic design tool that offers a range of templates, images, and design elements for creating graphics for social media, marketing, and other purposes. While Canva doesn’t offer as many advanced editing features as Photoshop or GIMP, it does allow you to make the background transparent using its “Background Remover” tool.
Clipping Magic
Clipping Magic is a web-based service that removes backgrounds from images. With Clipping Magic, you upload your image, mark the areas you want to keep and remove, and the service does the rest. While Clipping Magic isn’t a full-fledged image editing software, it can be useful for quickly removing backgrounds from images.
Ultimately, the service you choose to use for making the background transparent will depend on your experience level, budget, and specific needs. While basic image editing tools like Paint can be a good starting point, more advanced tools like Photoshop or GIMP can offer more precision and flexibility.


