

As someone who loves taking photos, I was thrilled to discover how easy it is to create a slideshow using Google Photos. I’ve used this feature to create slideshows of family vacations, special events, and even everyday moments I want to remember. And the best part is that it only takes a few minutes! All you have to do is enter the album with the photos you want and run the slideshow. Let’s take a closer look at this process.
How to start a slideshow from Google Photos on desktop
Starting a slideshow from Google Photos on the desktop is quick and easy. Here are the steps to follow:
- Open your preferred web browser and go to Google Photos.
- Navigate to the album where the photos you want to show with Slideshow are located. You can also start a slideshow from your library, showing all your photos in the main section.
- Select the first photo for the slideshow and click on it to open it full screen.
- Once you have selected your starting photo, click on the “More options” button (three vertical dots) in the upper right corner of the screen and select “Slideshow” from the dropdown menu.
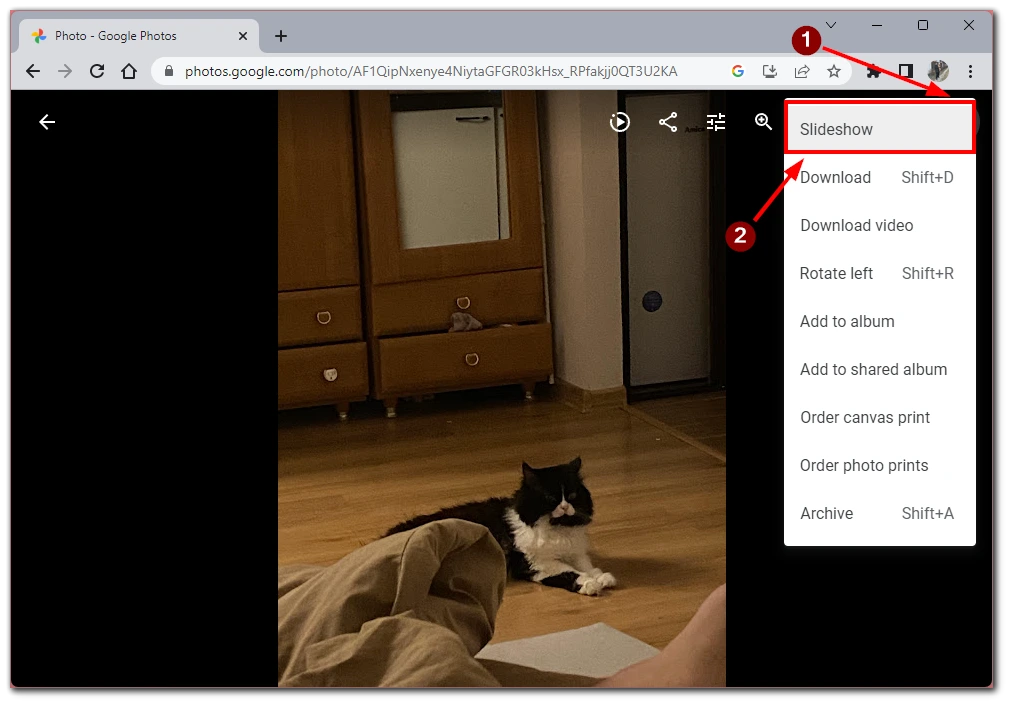
- After that, the slideshow will immediately start and automatically open to the full screen of your computer. At the bottom left of the screen, you will find the tools to control the slideshow. You can also use the ESC button to end it instantly.

The slideshow function is perfect if you want to show vacation photos to someone else or watch old party photos together. One disadvantage of this function is that you can’t share slideshows with other users. However, you can share your album with them, and they will run the slideshow on their computer.
How to make a slideshow from Google Photos on iPhone or Android
There is no Slideshow function like in the desktop version of the smartphone’s Google Photos app. However, you can use the built-in tool to create video clips from your photos, making your slideshow even more interactive. To do this, you need the following:
- Open the Google Photos app on your iPhone or Android device. If you’re not already signed in to your Google account, sign in with your email and password.
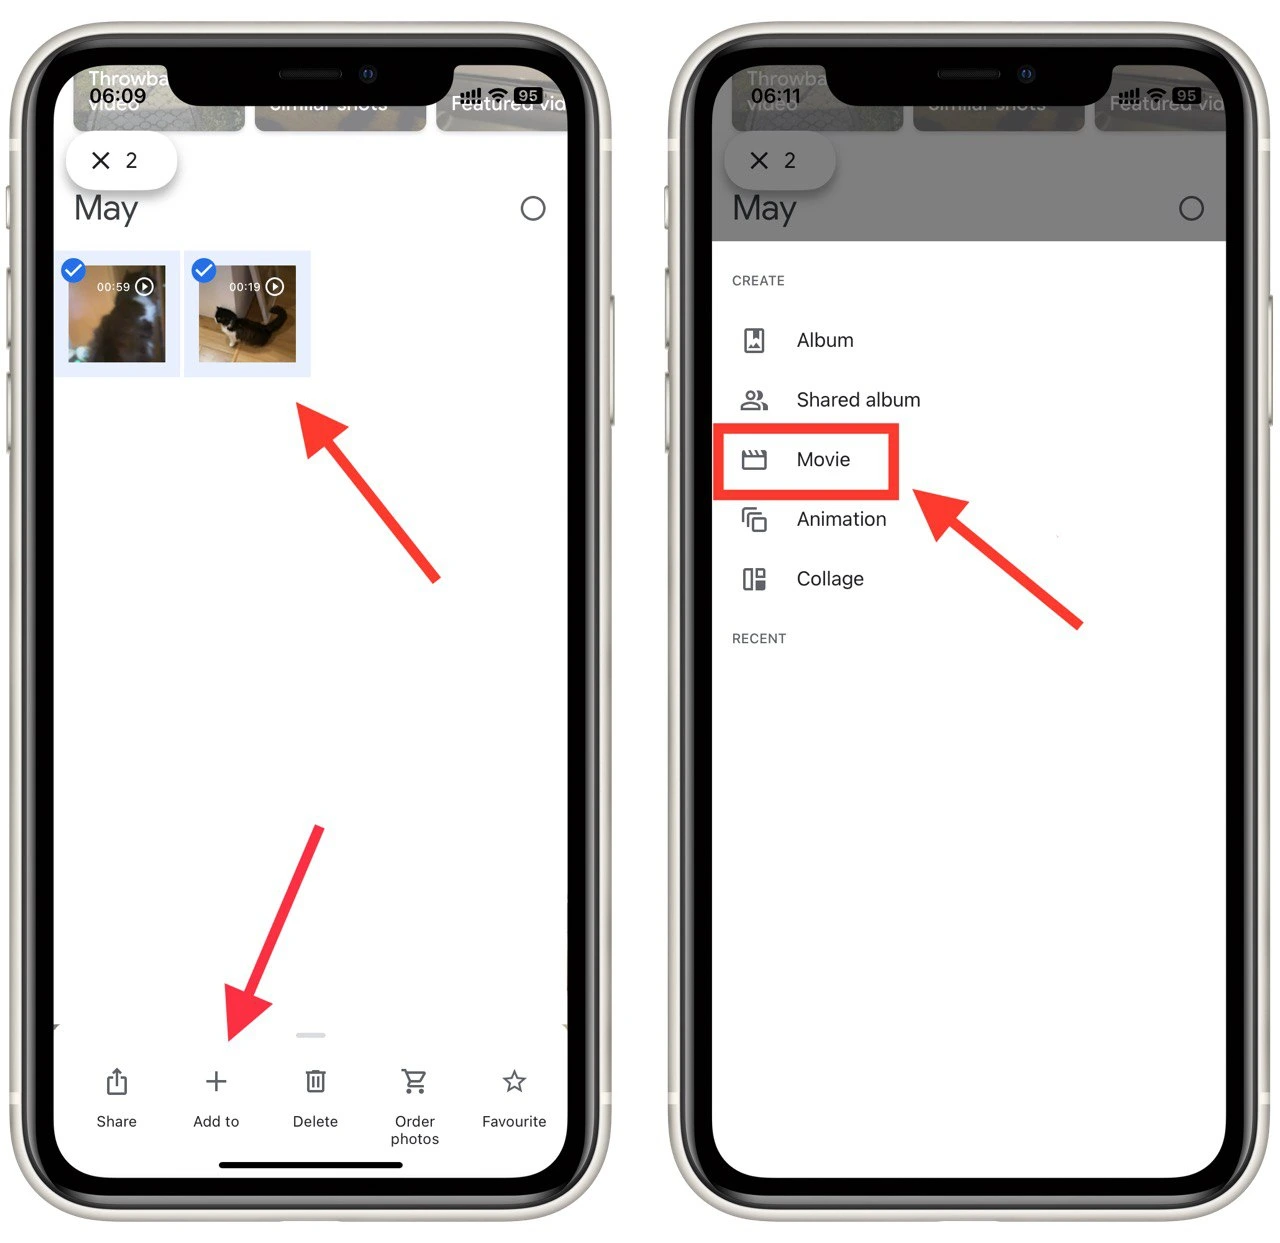
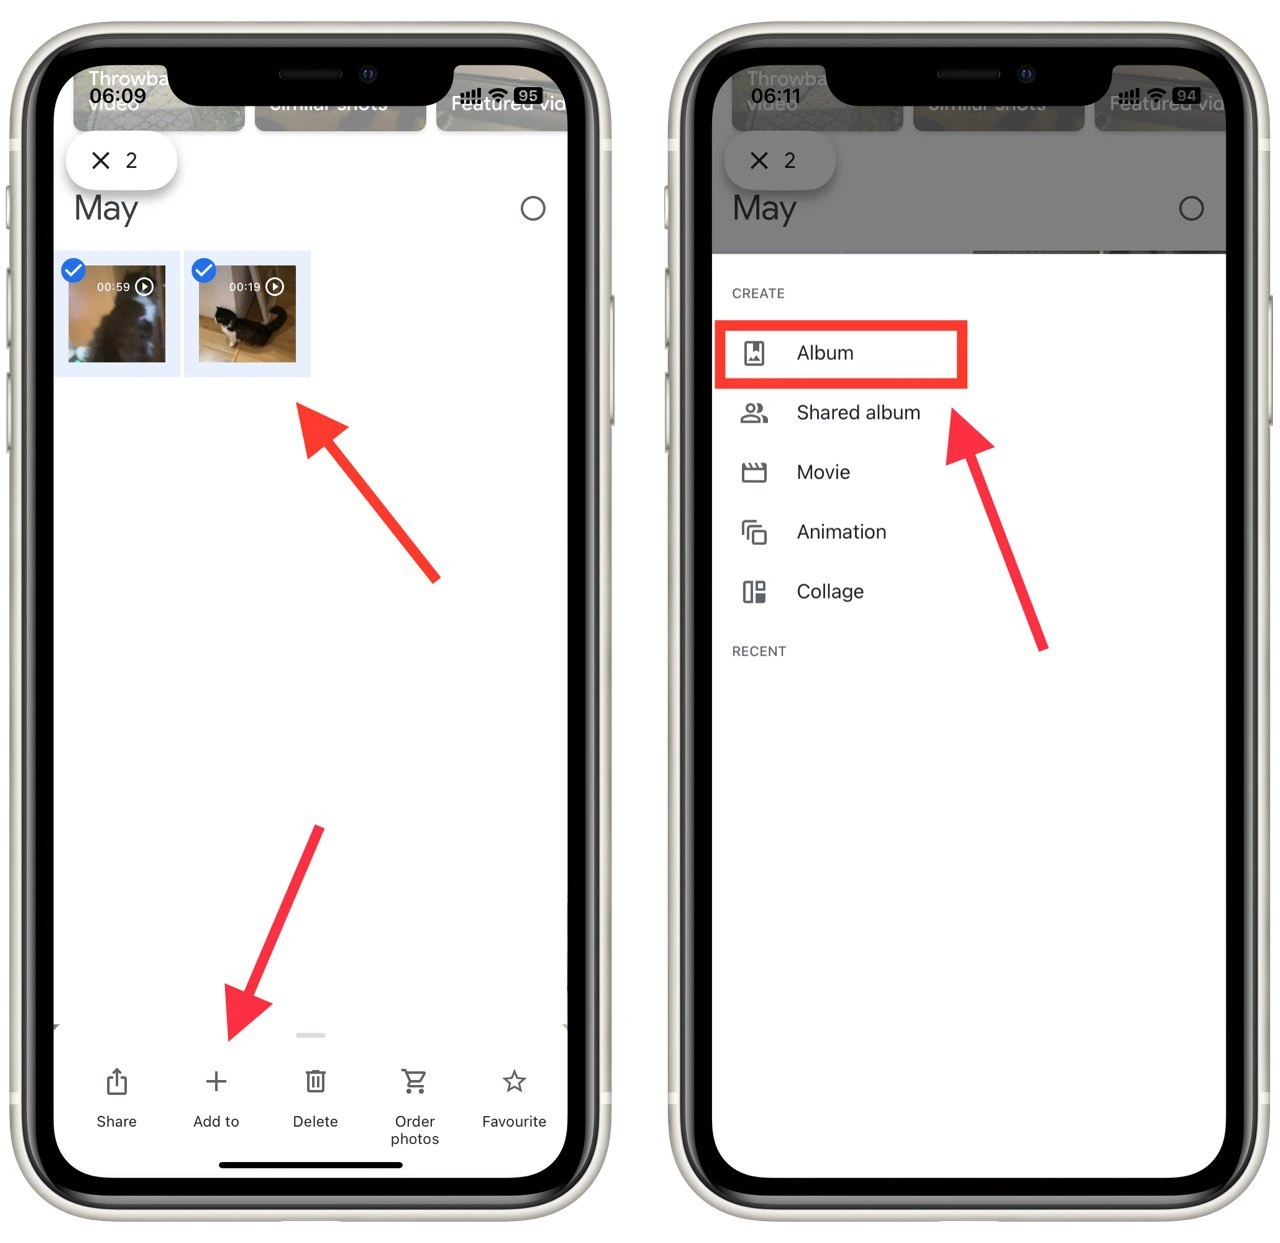
- Select the photos you want to include in your slideshow by long-pressing on the first photo and tapping the checkmark button in the top left corner of the following photos or videos.
- Once you have selected your photos, tap on the “+ Add to” button in the lower-left corner of the screen and then select “Movie” from the options presented.
- You can customize the settings for your slideshow in the editor menu. Here are some of the customization options available:
- Add music: You can add music to your slideshow by selecting a song from your phone’s music library. Tap on the Music icon, select a song, and tap the “Done” button.
- Change the timing: You can adjust the timing of your slideshow by tapping on the “Duration” button. You can choose from 1, 2, or 3 seconds per slide.
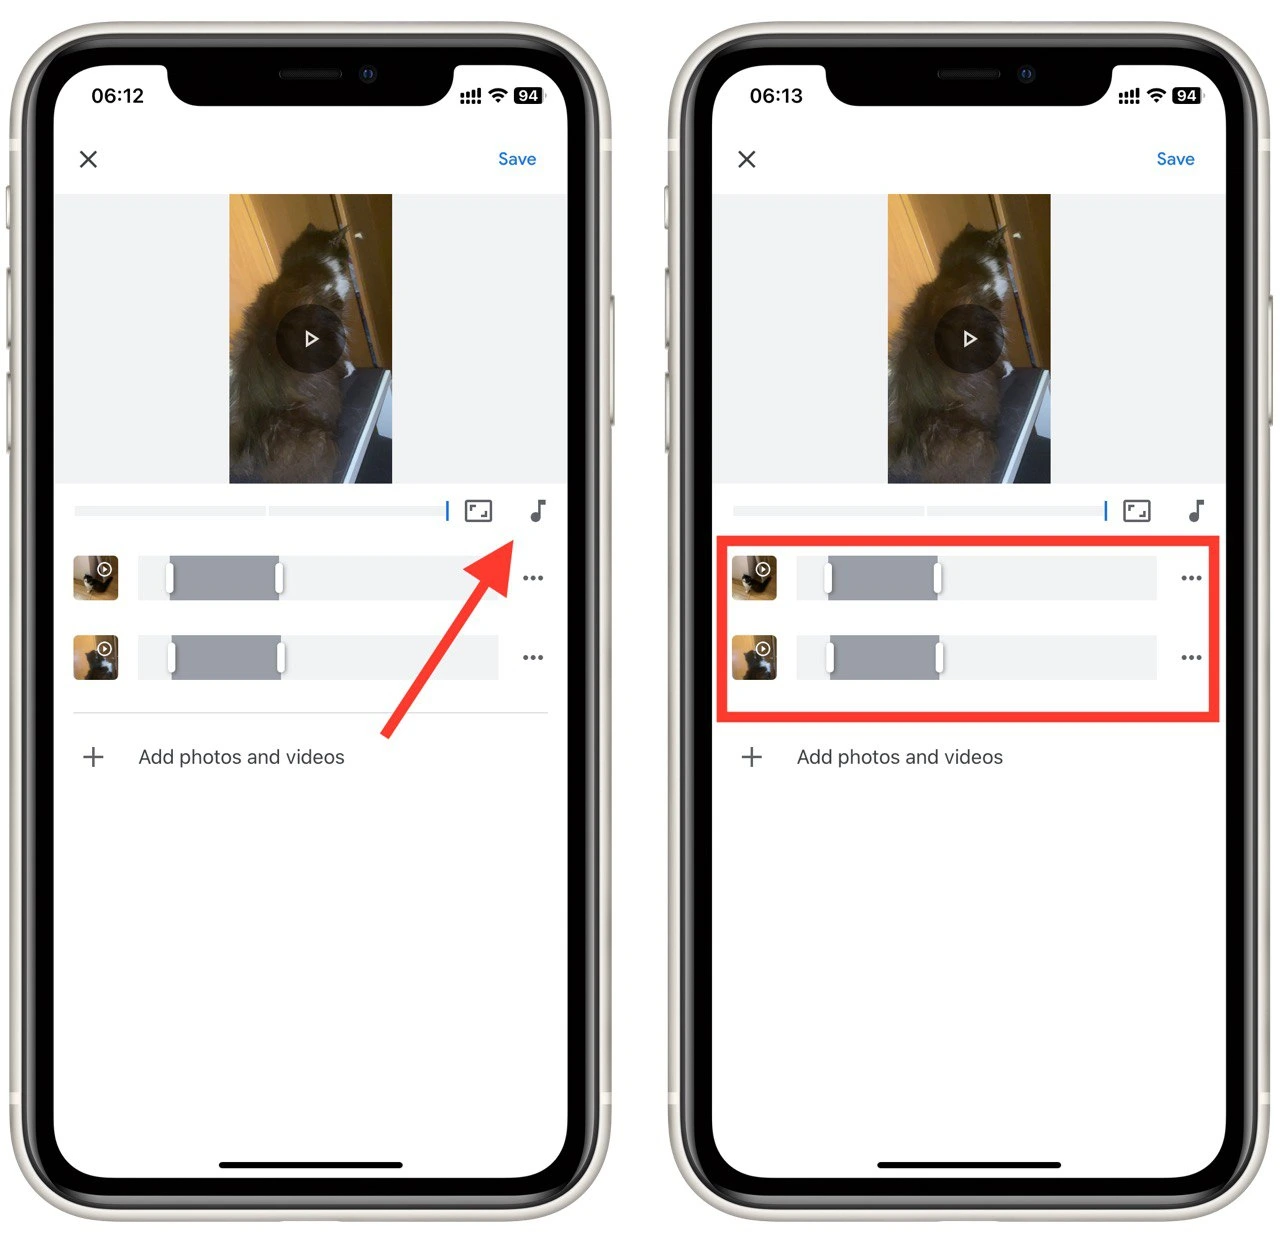
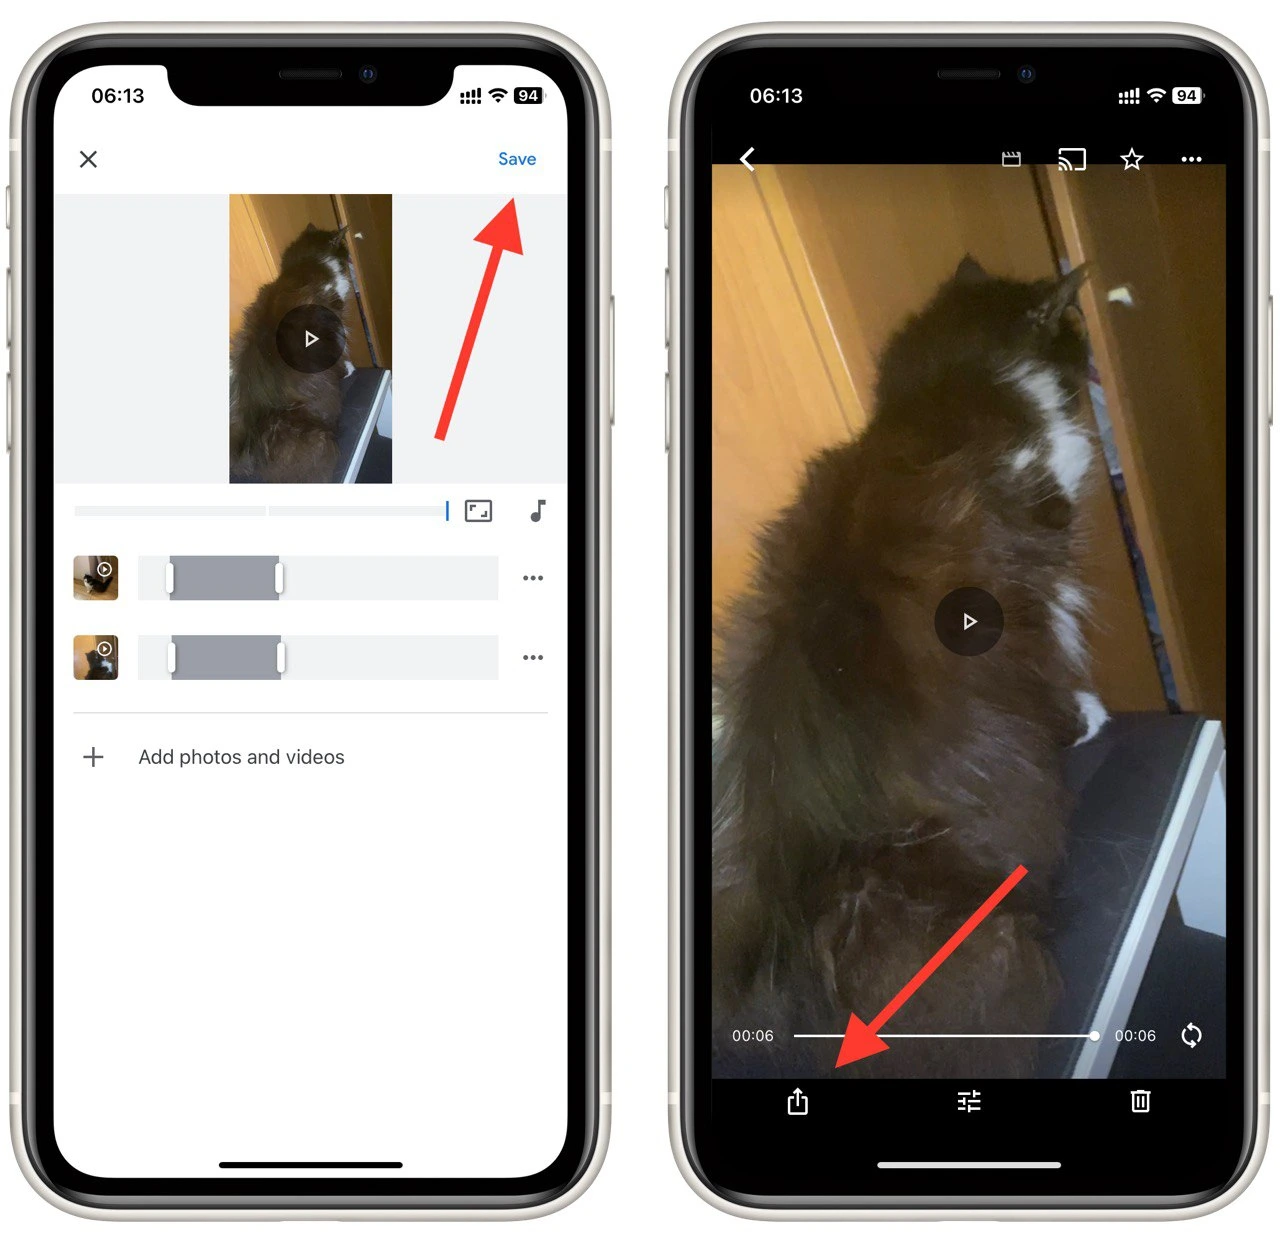
- Once you’re happy with your slideshow, tap on the “Save” button in the upper right corner of the screen. This will save your slideshow to your Google Photos library.
- You can then share your slideshow by tapping on the “Share” button and selecting the method you want to use to share your slideshow.
You can create a Movie on your desktop Google Photos using the same steps. This method is better than a standard slideshow in that you can add a video, select different timings for different photos and then share the result with friends, but note that this video will take up space on your Google Drive. So if you don’t have a lot of memory, creating a Movie with lots of photos or videos might not be the best idea.
How to create an album in Google Photos
One of the basic things you need to know to create a slideshow quickly and easily is how to make a new album. To do this, you need to:
- Open the Google Photos app on your smartphone or tablet.
- Tap and hold on to the first photo you want to add to your album. Once the photo is selected, you can continue to select additional photos by tapping on them. You can also select a range of photos by tapping on the first photo and then sliding your finger to the last photo you want to select.
- Once you have selected the photos, you want to add to your album, tap on the “+ Add to” button in the lower-left corner of the screen and select “Album” from the options presented.
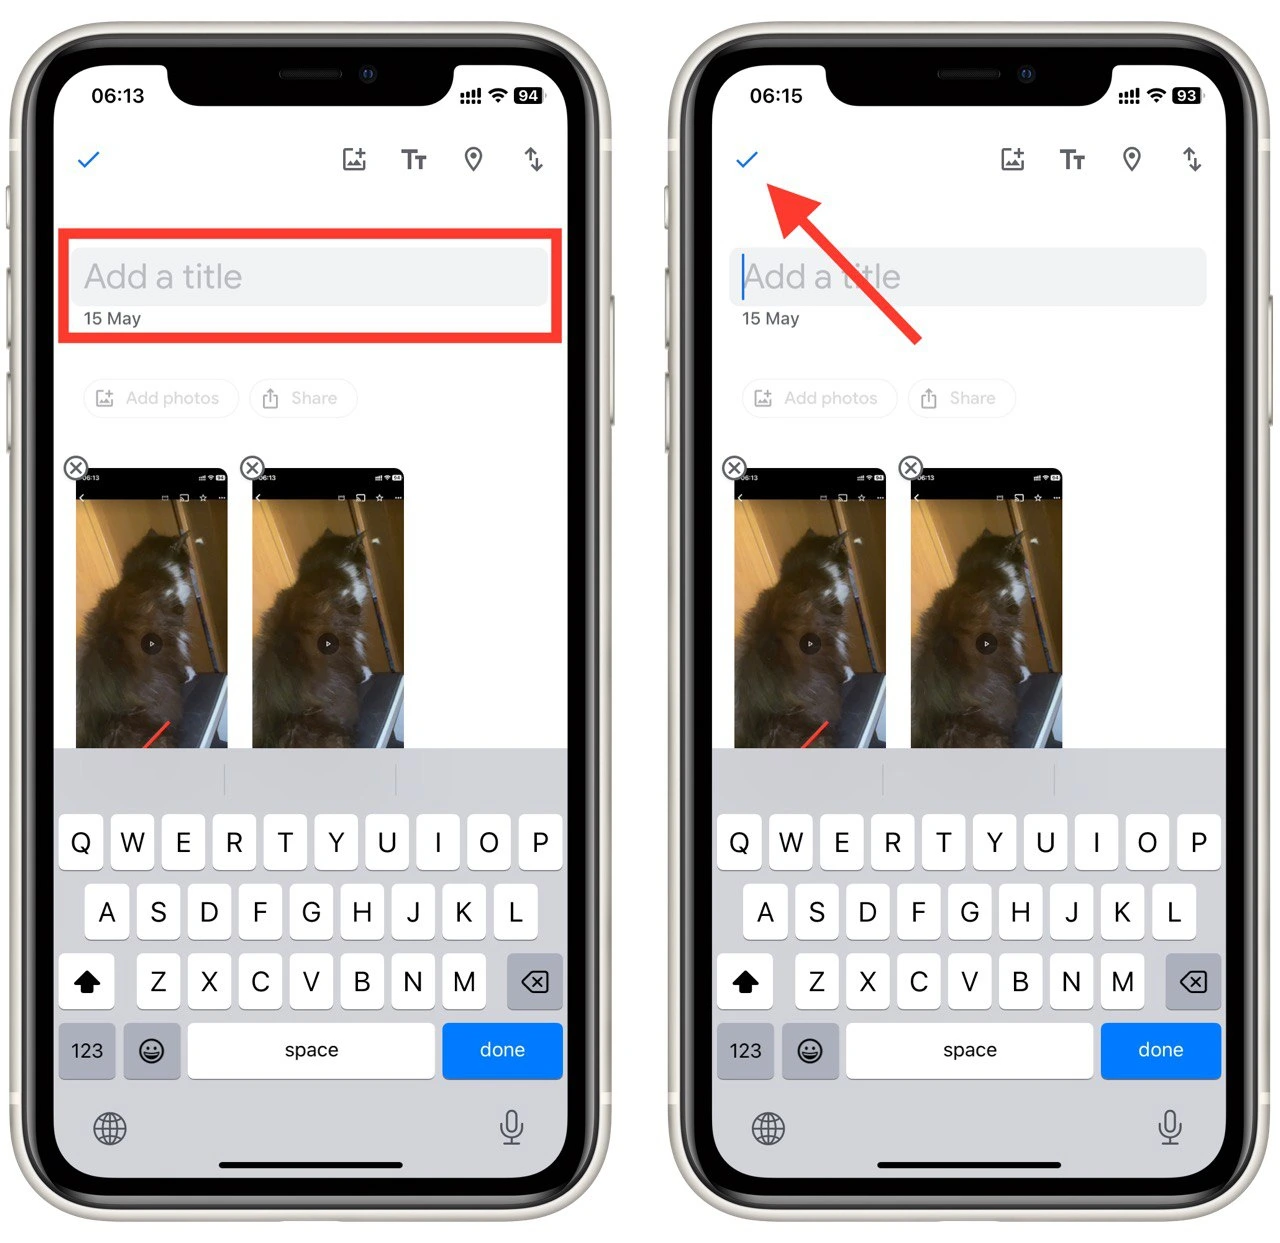
- Give your album a name by typing it into the “Album title” field. You can also add a description if you want. Then press on the checkmark button at the left upper side of the screen.
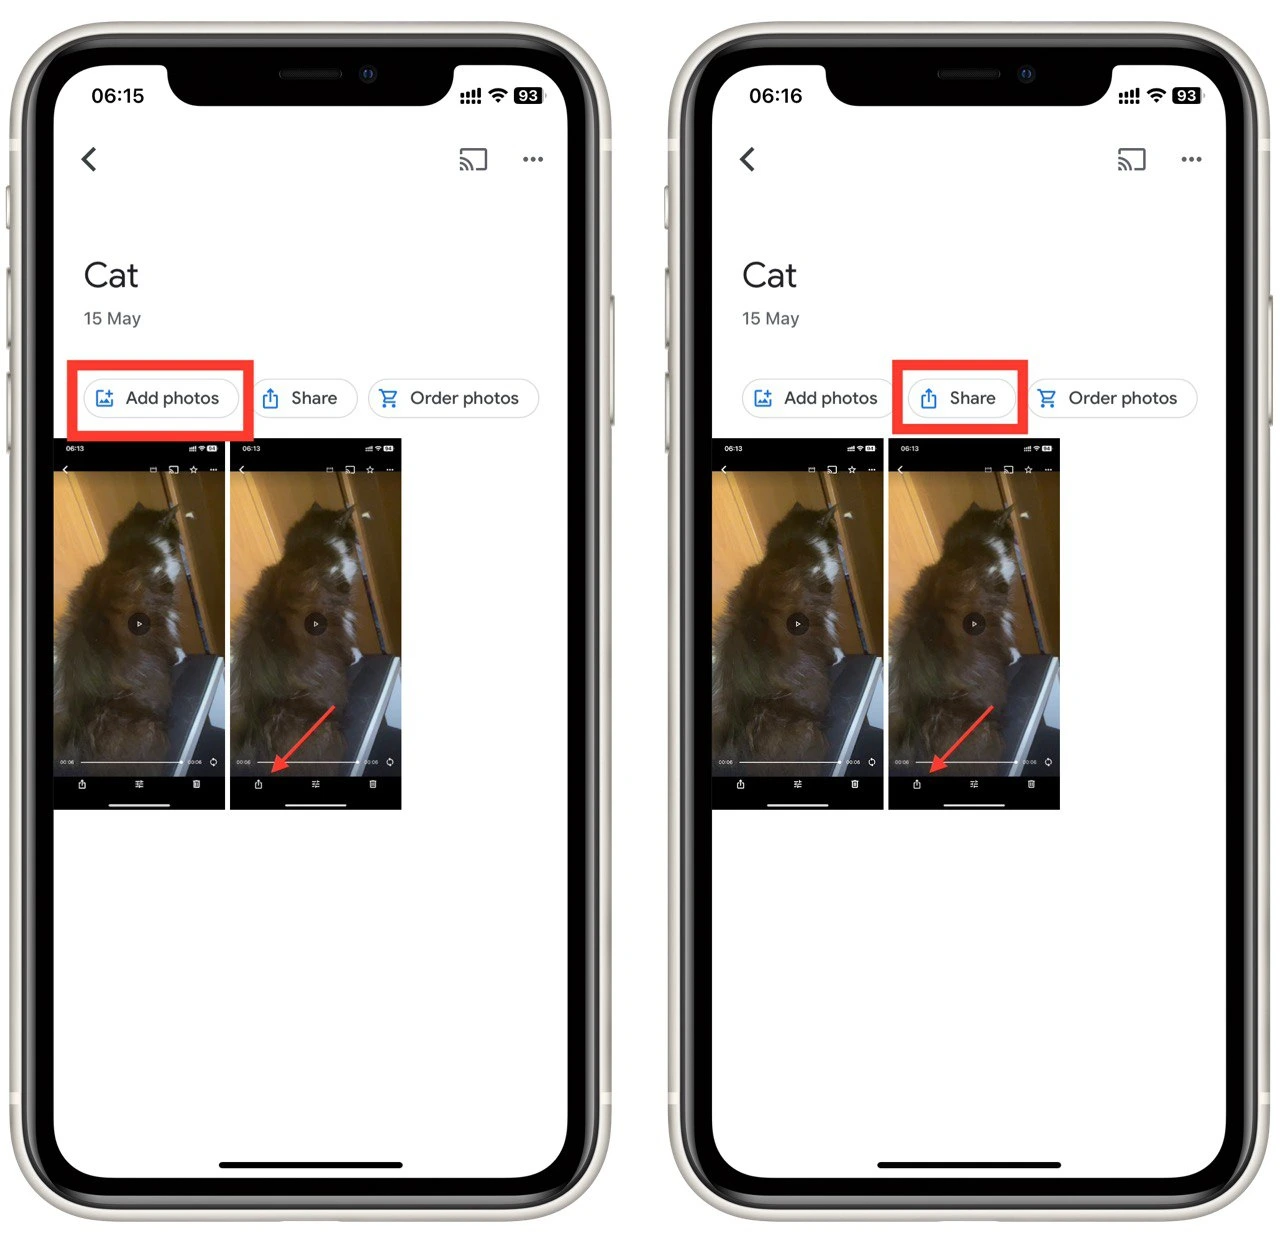
- To add photos to your album, tap “Add photos” on the home page of your new album. You can then select additional photos to add to the album.
- Once you’re happy with your album, you can share it with others by tapping the “Share” button in the upper right corner of the screen. You can then select the method you want to share your albums by email, text message, or social media.
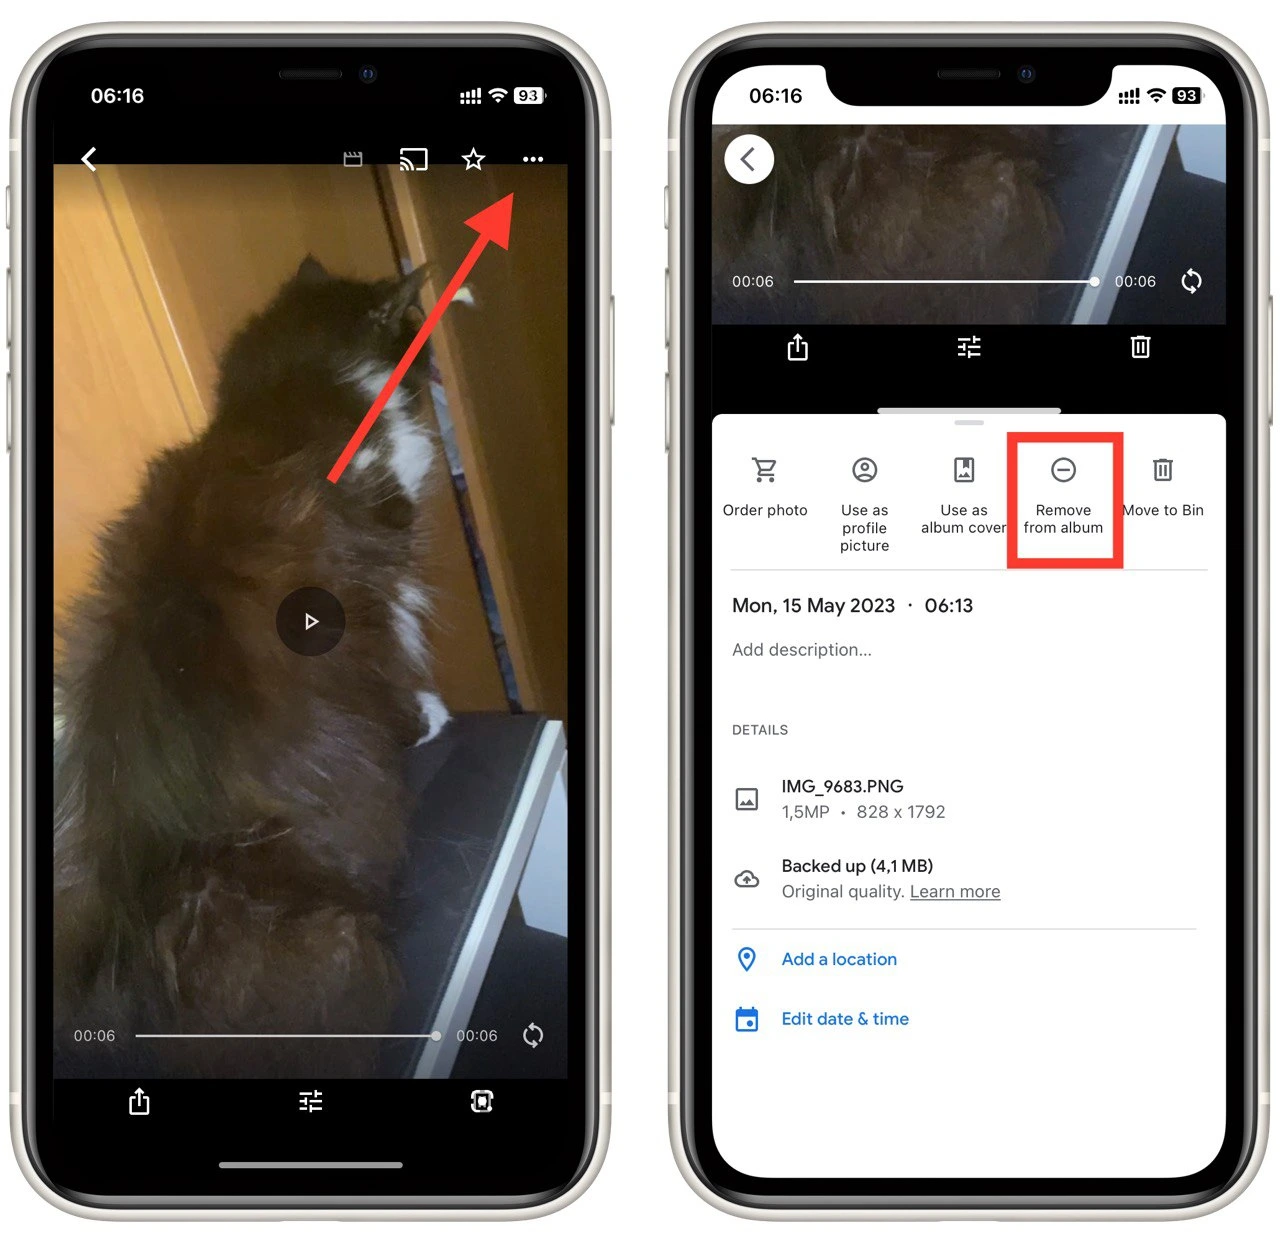
To remove a photo from the album, open the album and tap and hold on to the photo you want to remove. Once the photo is selected, tap on the three-dot menu in the upper right corner of the screen and select “Remove from the album”.
Creating an album in Google Photos is a simple and effective way to keep your photos organized and easily accessible. So, start organizing your photos today and create an album you can cherish for years!
What you should remember when making a slideshow from Google Photos
Making a slideshow from Google Photos is a great way to showcase your photos and create a visual story. Here are some important things to keep in mind when making a slideshow from Google Photos:
- Select the right photos: Choosing the right ones is crucial to making a great slideshow. You want to ensure the photos you choose are visually interesting and tell a story. Consider the theme or message you want to convey and select photos that best represent it.
- Edit your photos: Before creating your slideshow, consider editing them to enhance their visual impact. You can use Google Photos’ editing tools to adjust brightness, contrast, color, and more.
- Choose the right music: Selecting the right music is also important to create an engaging slideshow. Consider the tone of your slideshow and choose music that complements it. You can select music from the Google Photos library or upload your own music.
- Share your slideshow: Once you’ve created it, you can share it with others by exporting it to a video file or sharing a link. You can also share it directly from the Google Photos app to social media platforms like Facebook, Instagram, and Twitter.
- Keep your photos organized: Finally, it’s important to keep them organized in Google Photos. Ensure you have properly labeled and categorized your photos so you can easily find and access them when creating a slideshow.
By selecting the right photos, editing them, choosing the right music, customizing settings, and keeping your photos organized, you can create a professional-looking slideshow that you can share with friends and family.


