

Gmail offers a powerful “Rules” feature that helps you regain control and optimize your email management. When you create rules in Gmail, you can automate the organization, categorization, and actions you take on incoming messages.
In this guide, I’ll walk you through the simple steps of creating rules in Gmail from scratch, using a particular in Gmail. Also how to edit or delete filters.
How does Gmail rule work?
Gmail provides a feature called “Filters and Blocked Addresses” that allows you to automatically create rules to manage your incoming email. These rules, also known as filters, help you organize, prioritize, and take specific actions on your email messages. Also, this feature is only available in a desktop, so you can’t set up filters using the mobile app.
In the filter creation form, you can specify the criteria Gmail should use to apply the rule. You can choose various options like the sender’s email address, specific words in the subject or body of the email, recipients, attachment presence, and more. You can also combine multiple criteria to create more complex filters.
Gmail applies filters in the order they appear in the “Filters and Blocked Addresses” settings. If multiple filters match an incoming email, Gmail will apply the actions of the first filter that matches and subsequent filters will not be processed for that particular email.
You can set up filters, for example, which will automatically put all emails from a particular sender in a separate folder. This is fine if you have a friend who always emails you interesting articles. When your friend sends you an email that matches your filter, it is automatically moved to the Interesting Articles folder. You can create many rules for different senders or other criteria to simplify your email organization.
What to do to create rules in Gmail from scratch?
Creating rules in Gmail “from scratch” means starting with a blank slate and configuring the filters and actions based on your specific needs. This allows you to tailor the rules to your preferences, ensuring that Gmail automatically handles incoming emails according to your desired criteria and actions.
Creating rules in Gmail from scratch means starting the process and setting up rules based on your specific requirements. Here’s what you need to do to create rules in Gmail:
- Open Gmail first.
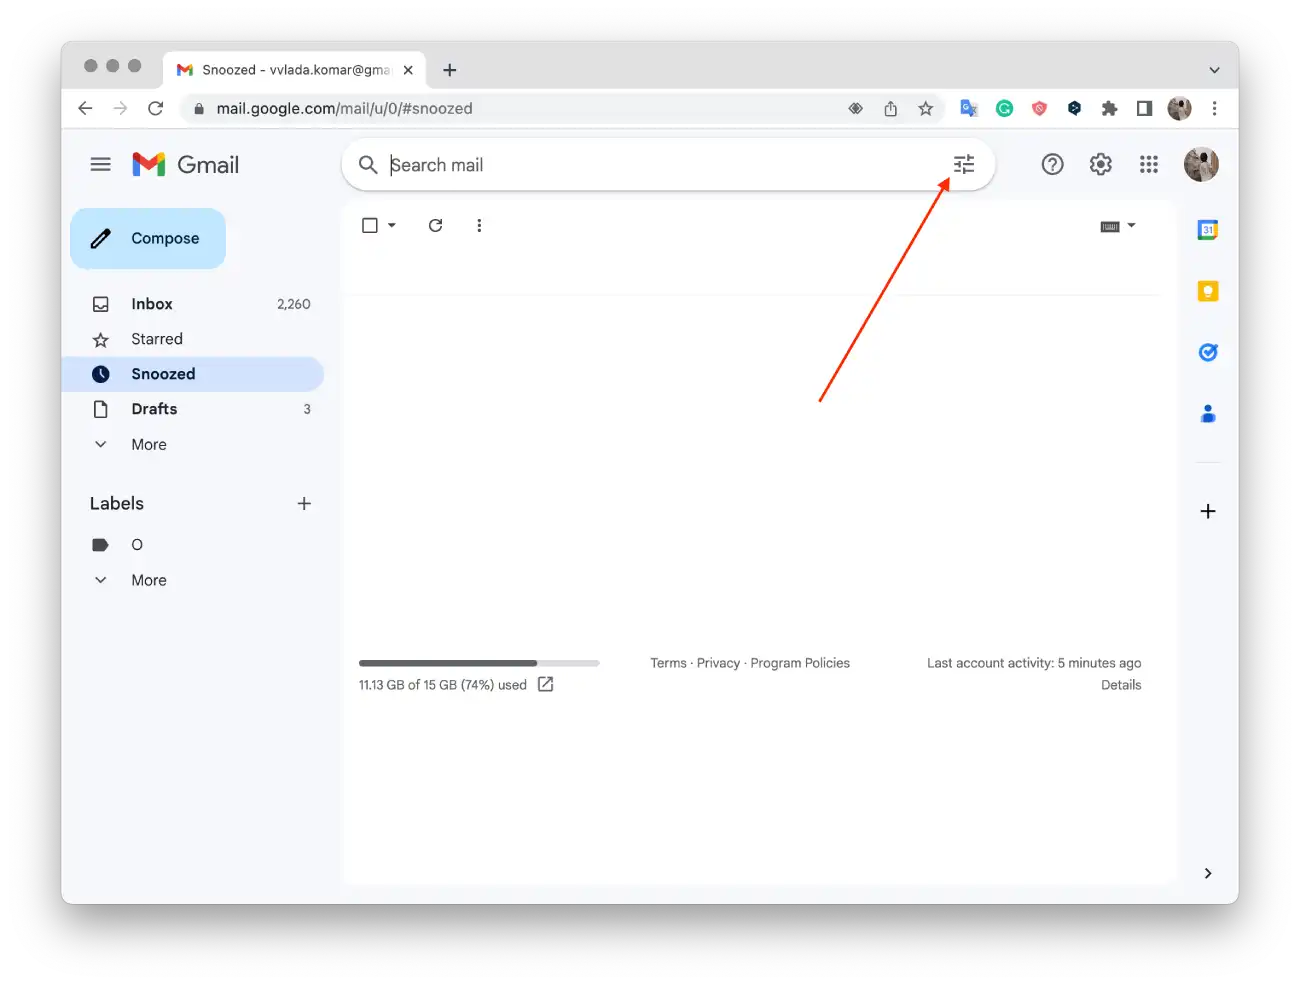
- Then in the search box at the top, click Show search options.
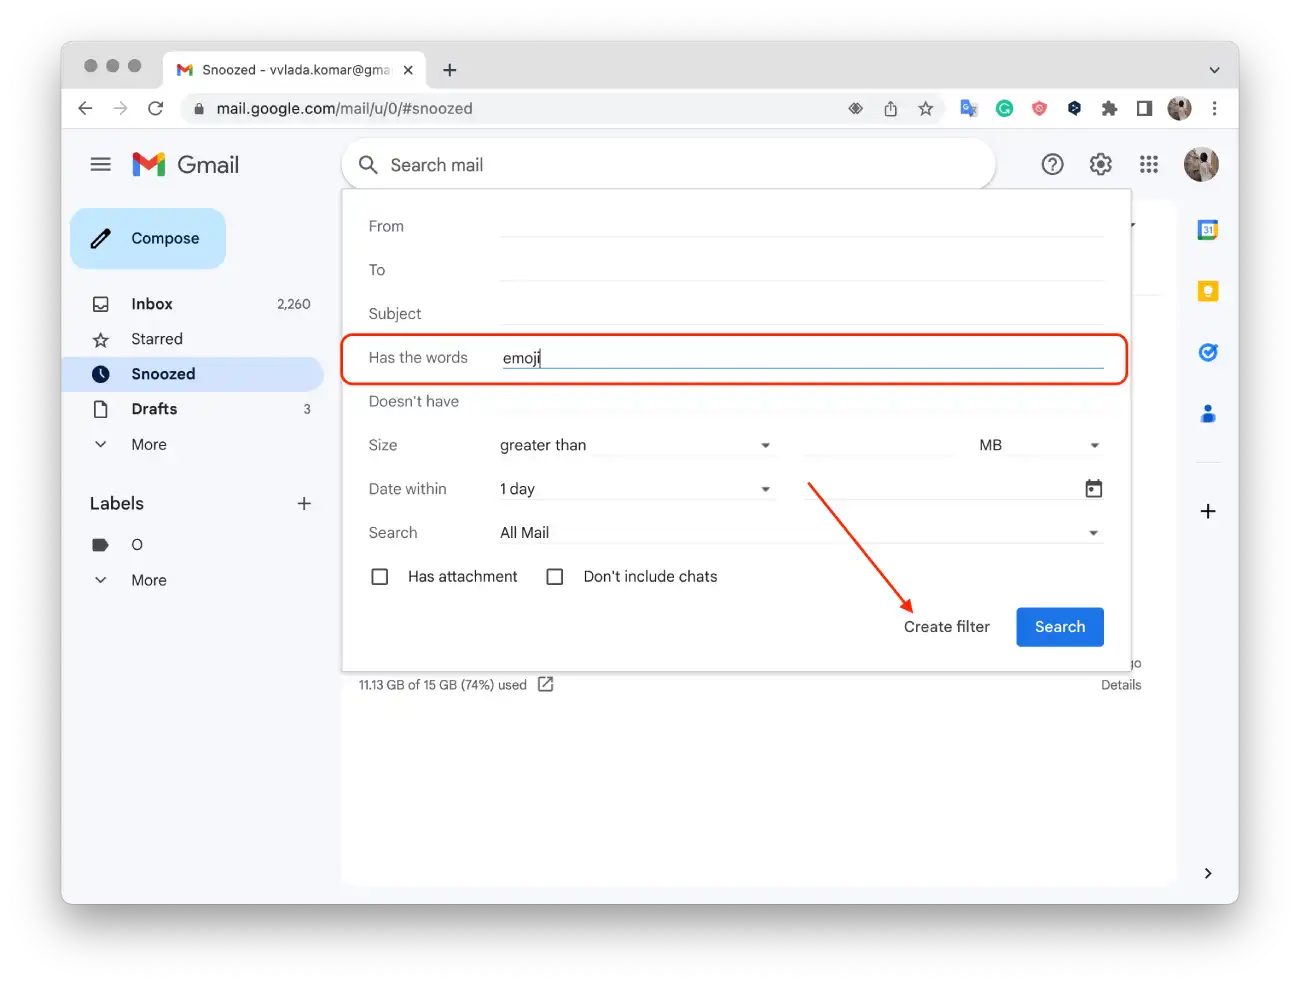
- Next, enter the search criteria, such as the sender’s address or keywords.
- At the bottom of the search box, click “Create Filter“.
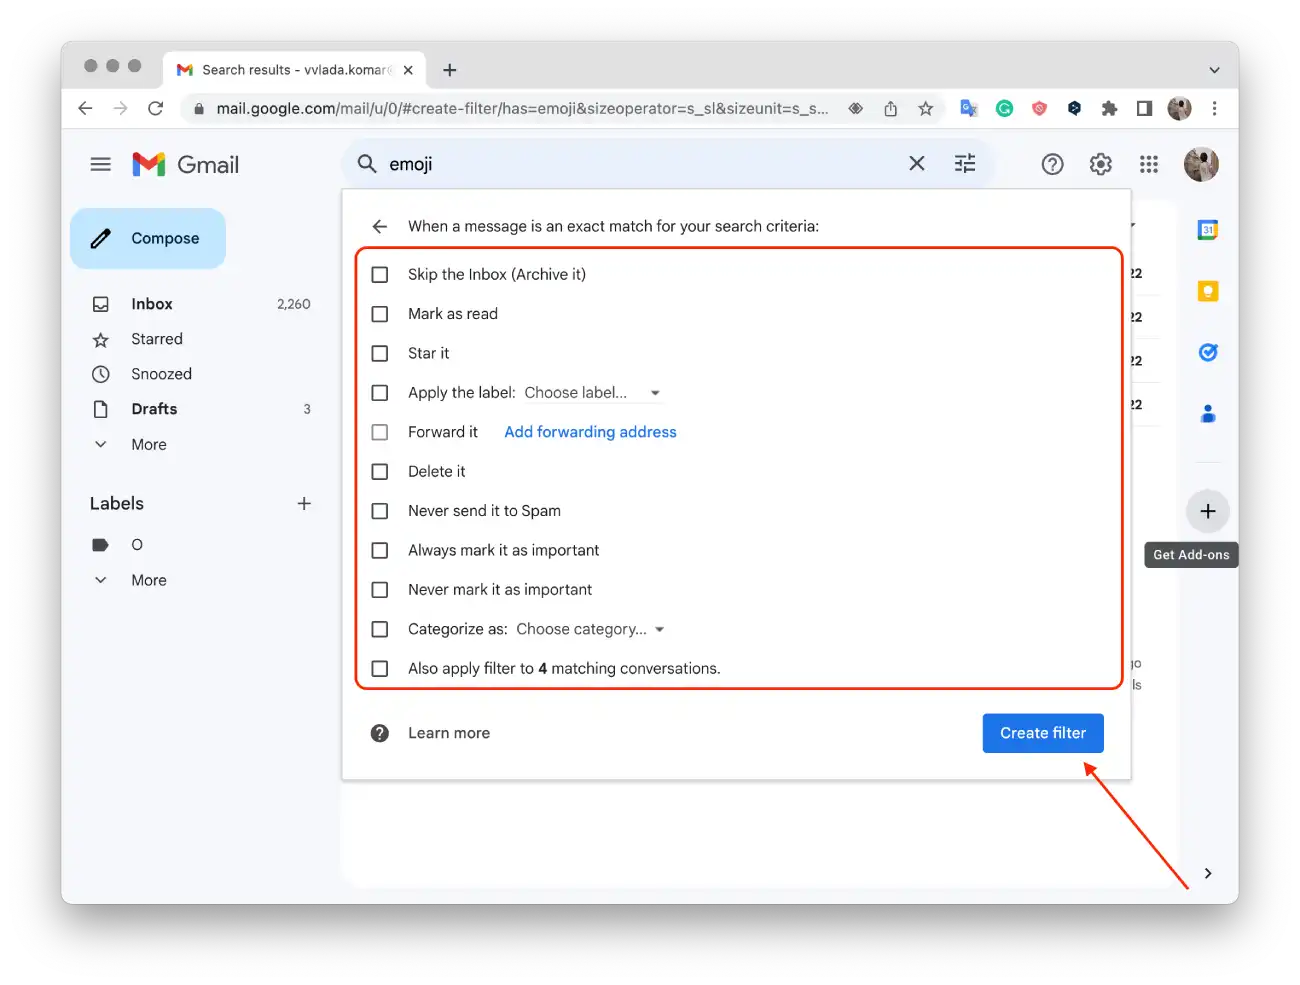
- Select the actions you want the filter to perform, such as marking emails with a certain color or moving them to a folder.
- Click “Create Filter” to complete the rule.
This way, you can create simple rules in Gmail to automatically manage your mail according to your preferences.
What to do to create a filter using a particular in Gmail?
If you create a sender-specific filter in Gmail, you can automate the organization and processing of emails from that sender. For example, you can have Gmail automatically apply a specific label to emails from that sender or forward them to a different address.
This will help you optimize your email management and provide easy access to important messages or sort them accordingly. The filter will constantly monitor incoming emails, and whenever an email matches the specified sender, the selected action will be applied automatically.
To create a filter using a particular sender in Gmail, follow these steps:
- Open Gmail first.
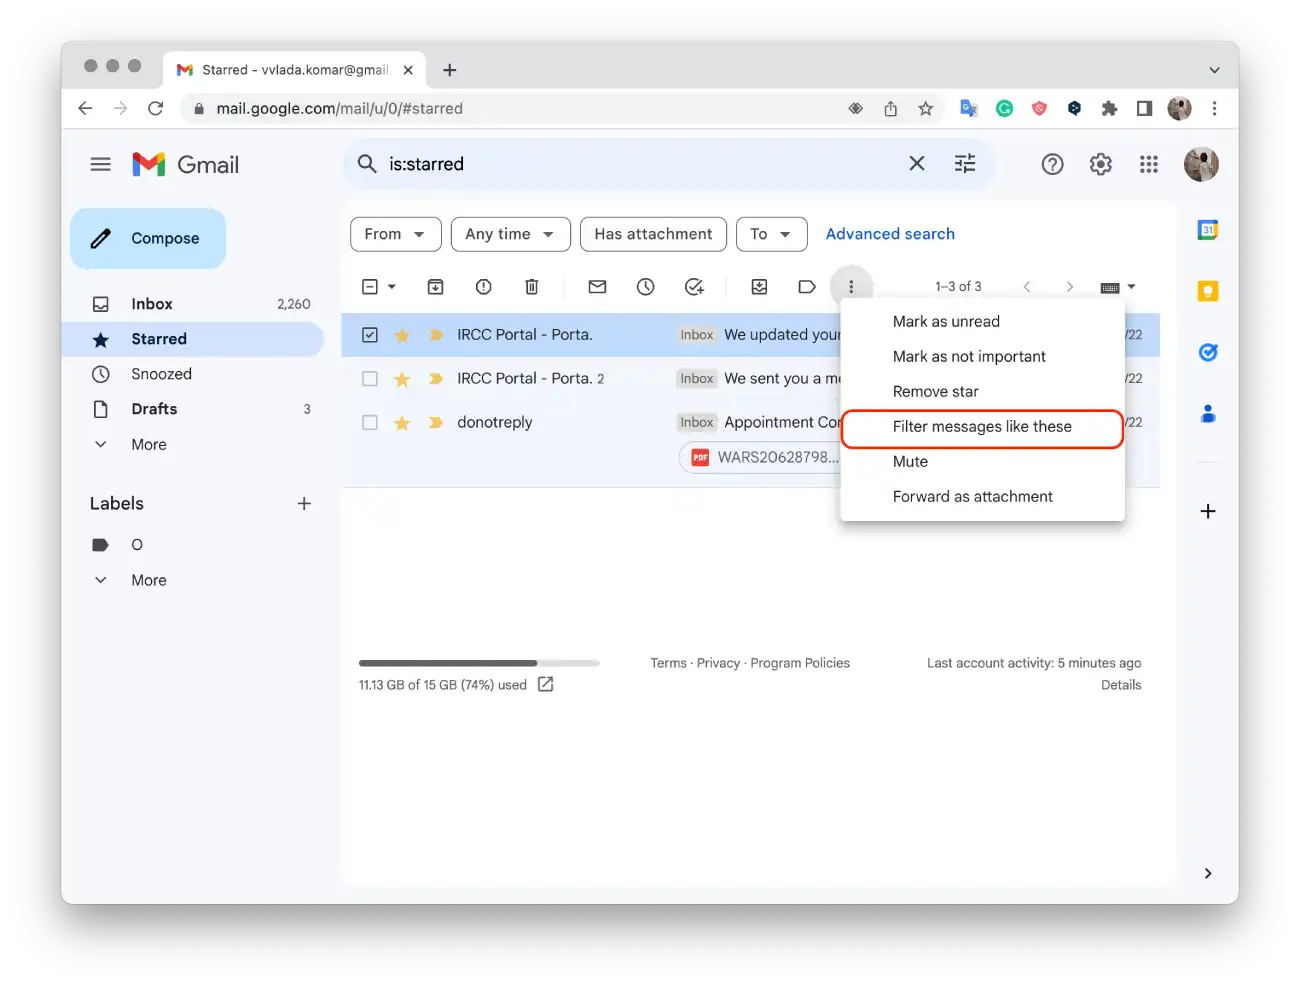
- Then click the checkbox next to the email you want.
- After that, click on the three dots.
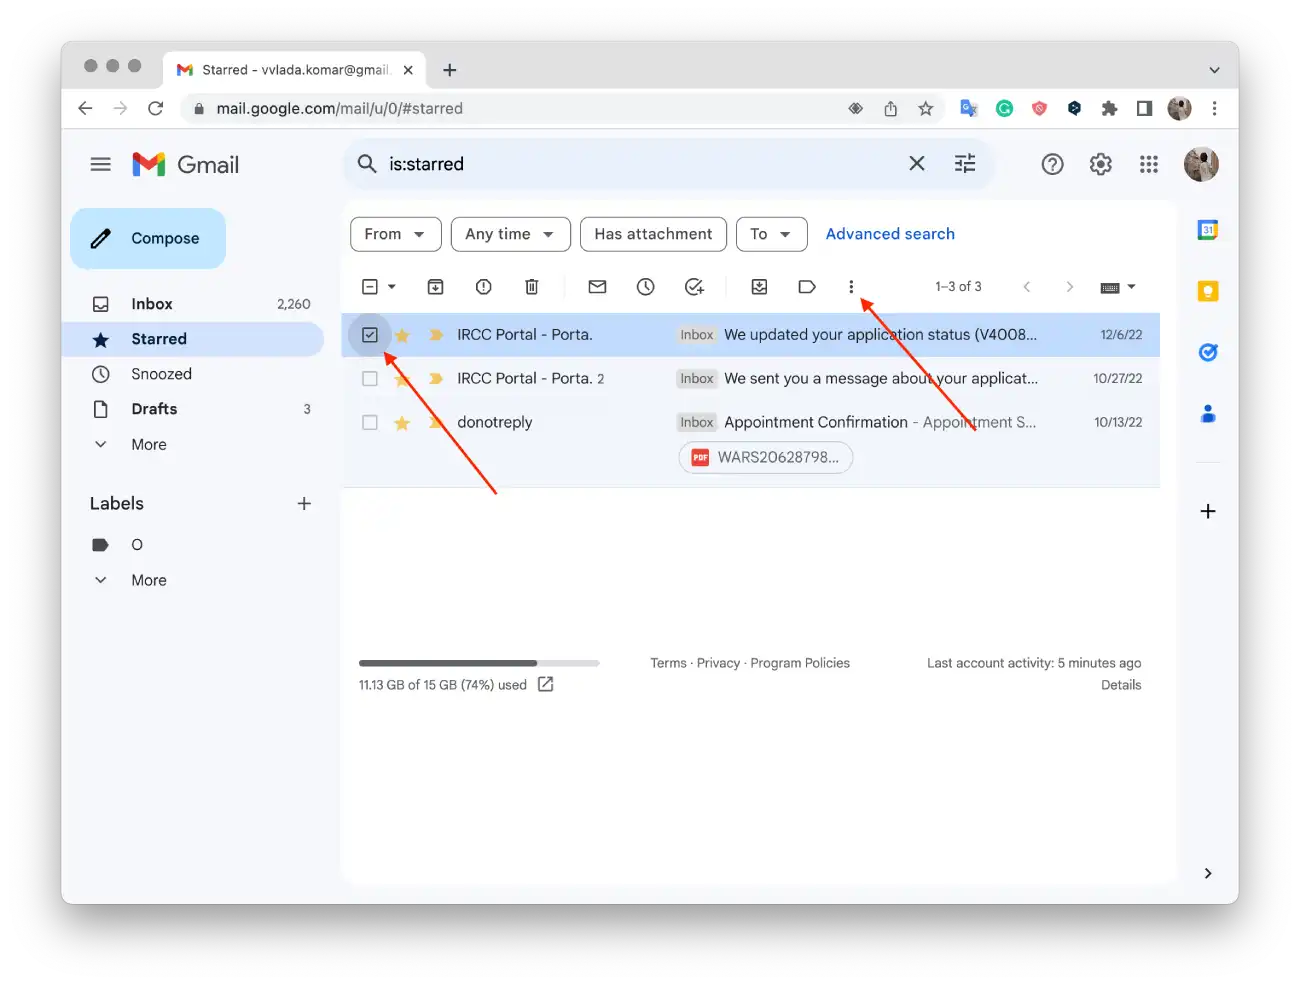
- Next, click “Filter messages like these.”
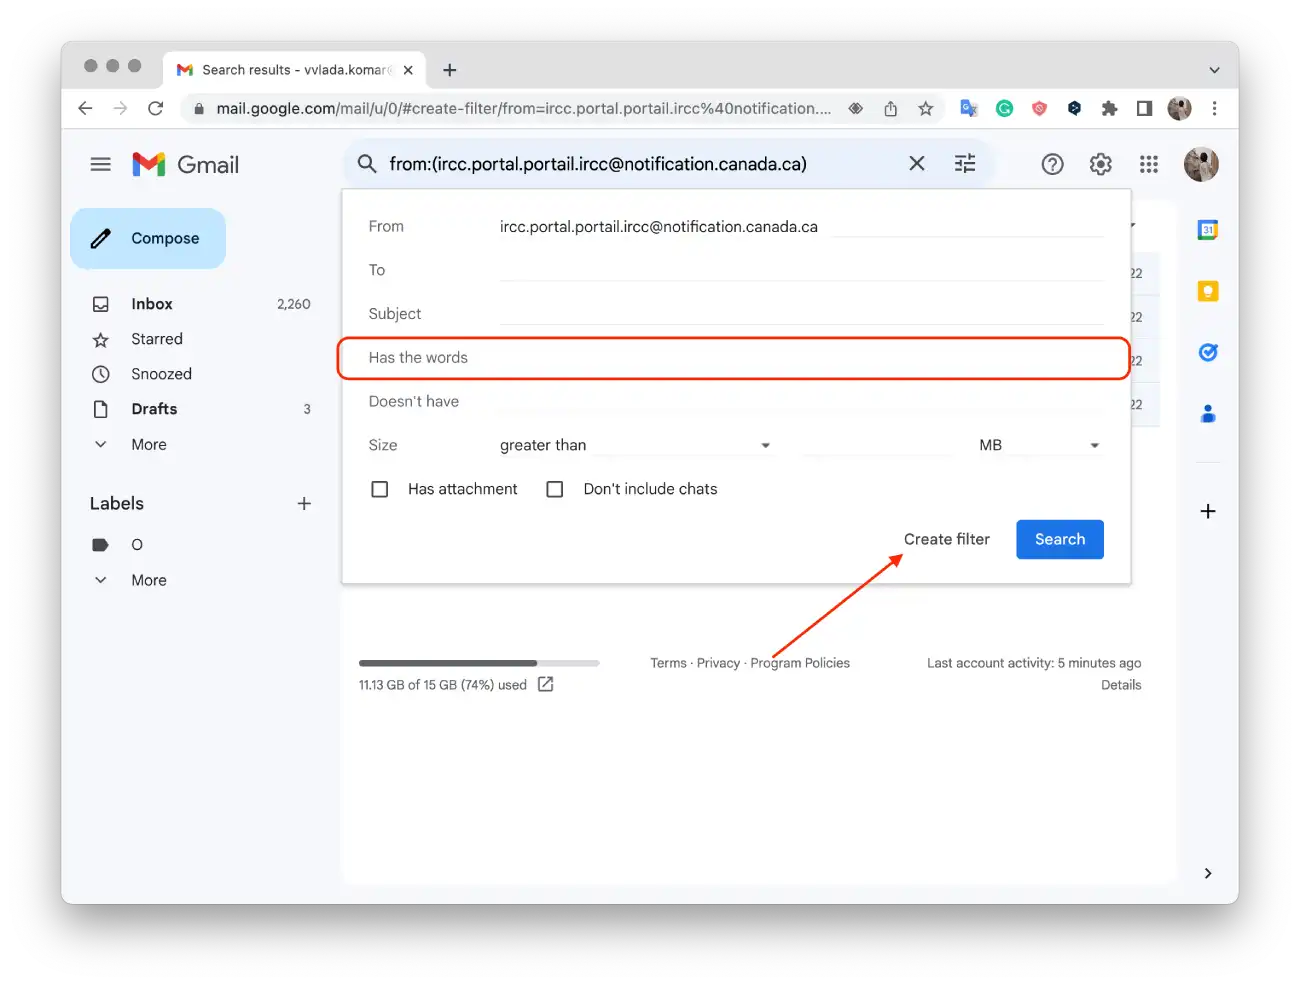
- Then enter your filter criteria.
- Click “Create filter.”
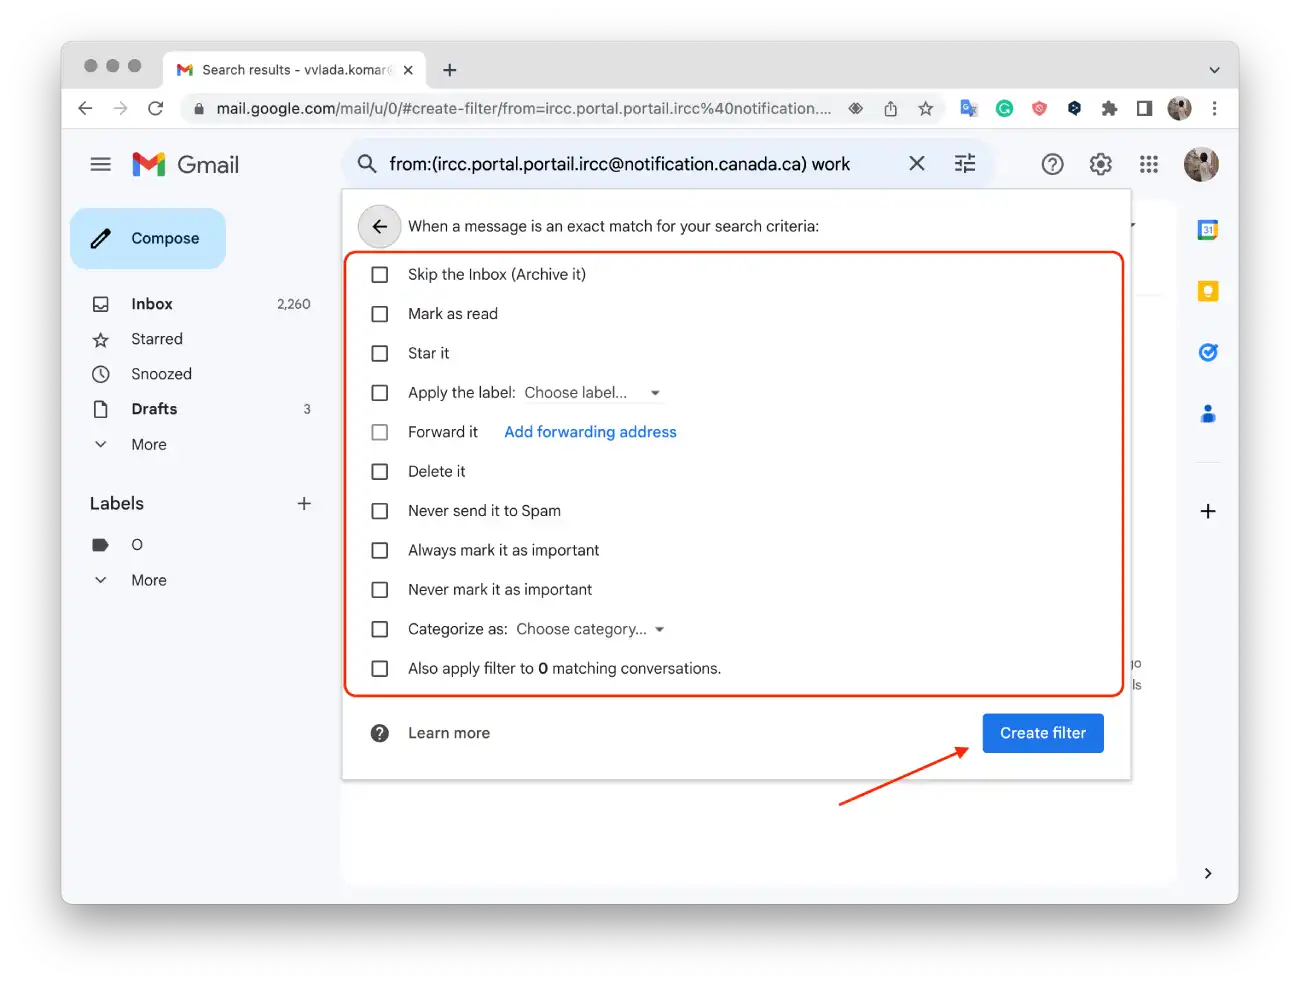
- Select the actions you want the filter to perform, such as marking emails with a moving them to a folder.
- Click “Create Filter” to complete the rule.
After performing these steps, Gmail will automatically handle mail from the specified sender according to your created filter. This can include tagging, categorizing, moving to specific folders, marking as read or unread, forwarding, or deleting emails. You’ll get a more organized mailbox, where emails from a particular sender are automatically processed according to your filter settings.
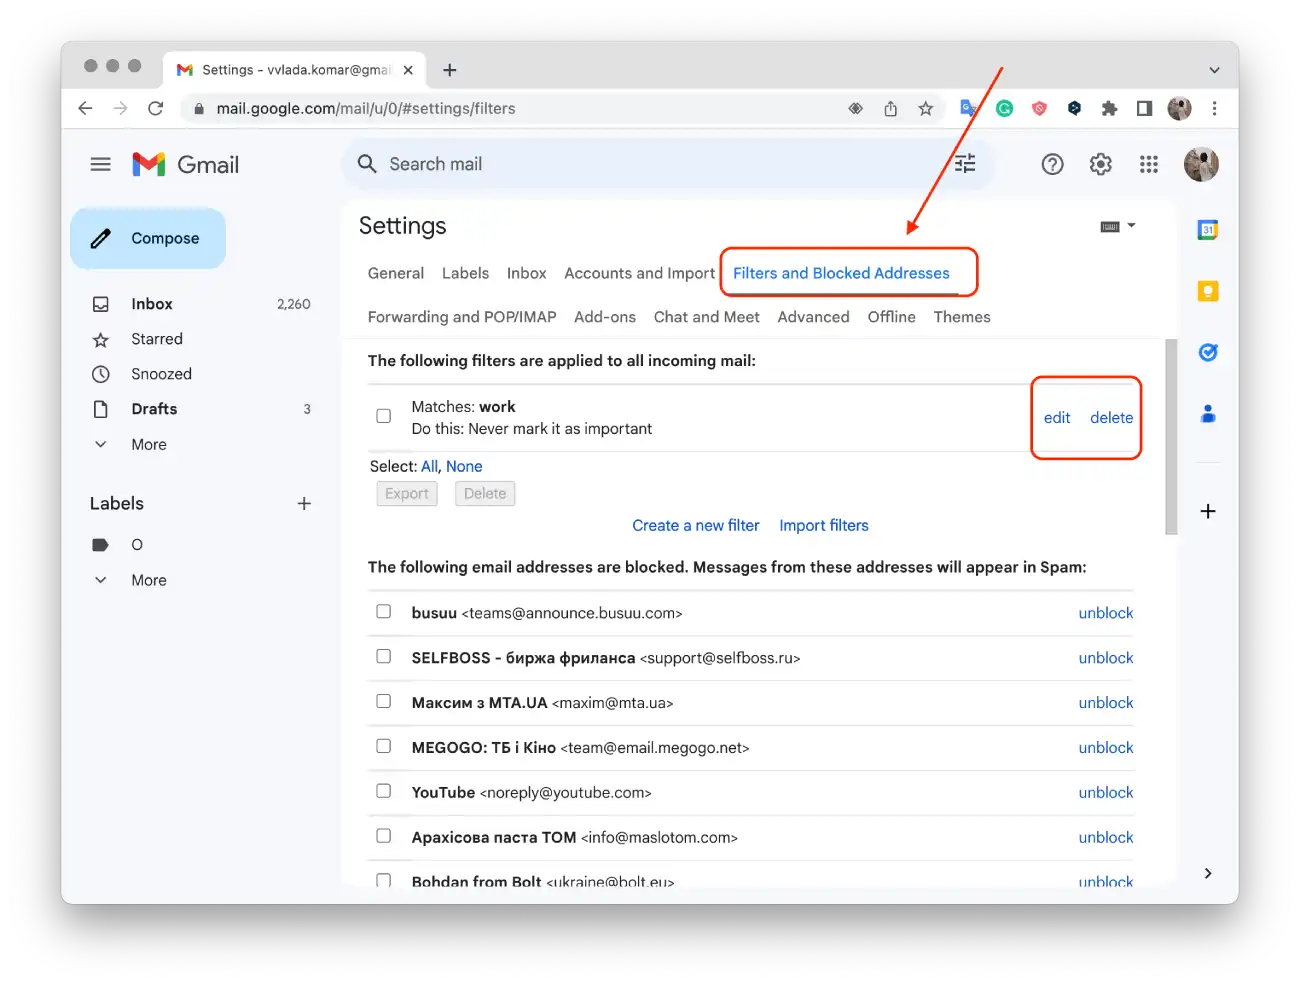
What to do to edit or delete filters?
To edit or delete filters in Gmail, follow these steps:
- Open Gmail first.
- Click Settings and select See all settings.
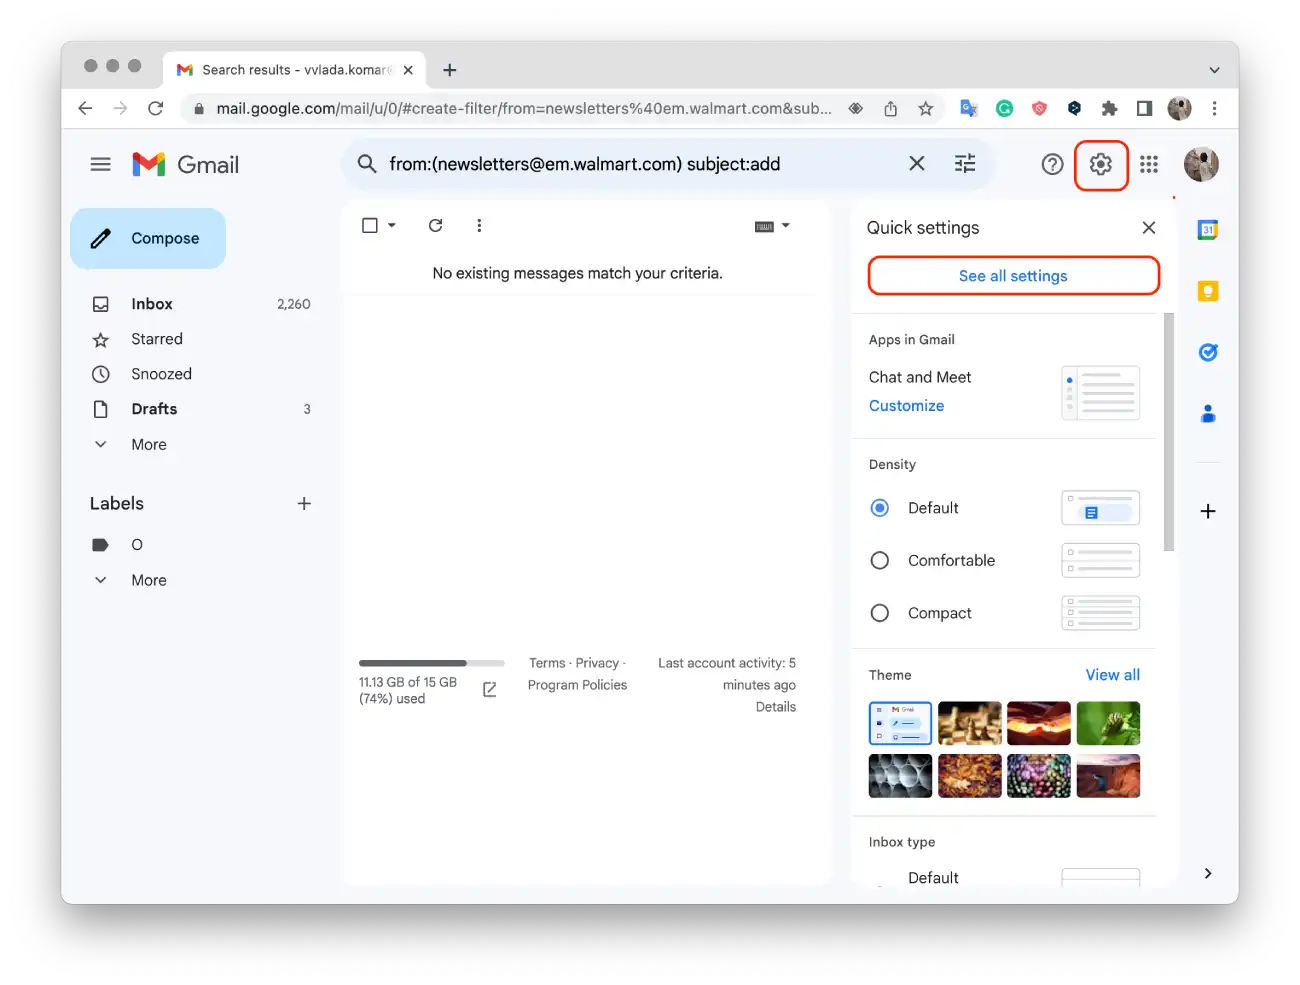
- Then click Filters and Blocked Addresses.
- After that you need to find the filter you’d like to change or delete.
- Click Edit or Delete.
- If you clicked Edit, click Continue when you’re done editing.
- Then click the Update filter.
After completing these steps, the edited filter will reflect the updated criteria or actions, while the deleted filter will no longer be active. Editing a filter allows you to refine or change the conditions and actions applied to specific emails. Deleting a filter removes it completely, and any emails that previously matched the deleted filter will no longer have the associated actions applied.


[…] How to create rules in Gmail […]