

Windows 11 has no built-in guest account feature, which was removed from the operating system. However, creating a new user account in Windows 11 through the Settings app is still possible, which can be customized to suit your specific needs.
Creating a new user account can be useful in a variety of scenarios. For example, if you share your computer with other family members, you may want to create separate accounts for each person to ensure that their files and settings are kept separate. You may also want to create a new account for a friend or colleague who needs to use your computer temporarily without granting them full access to your personal files and settings.
Does Windows 11 have a built-in guest account?
Windows 11 does not have a built-in guest account feature. Microsoft has removed this feature in Windows 11, likely because they found that it was not used very often and was not essential for most users.
Instead of a guest account, Windows 11 offers the ability to add users to your computer as a family member or someone else. These user accounts can be customized with various settings and permissions, and you can set up parental controls to restrict access to certain content and apps.
How to create a guest account in Windows 11 via Settings
As previously mentioned, Windows 11 does not have a dedicated guest account feature. However, you can still create a new account through the Settings app. Here’s how:
- Open the Settings app by clicking the Start menu and gear icon.
- In the Settings app, click on the Accounts tab.
- In the Accounts section, click on the Other users option.
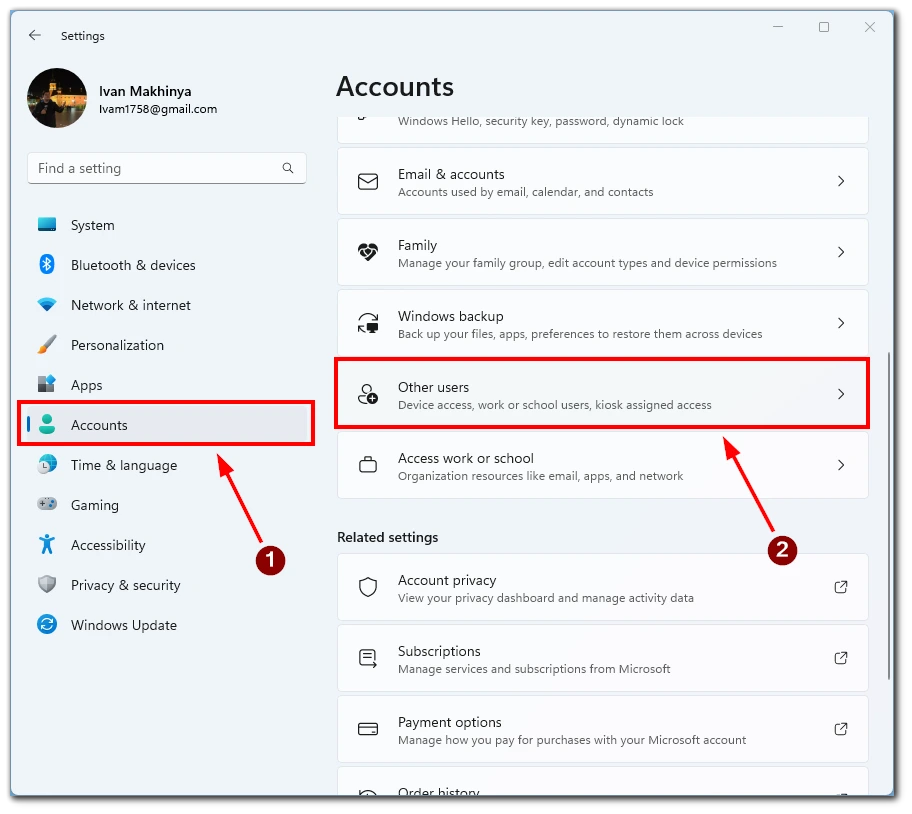
- Then click the Add account button.

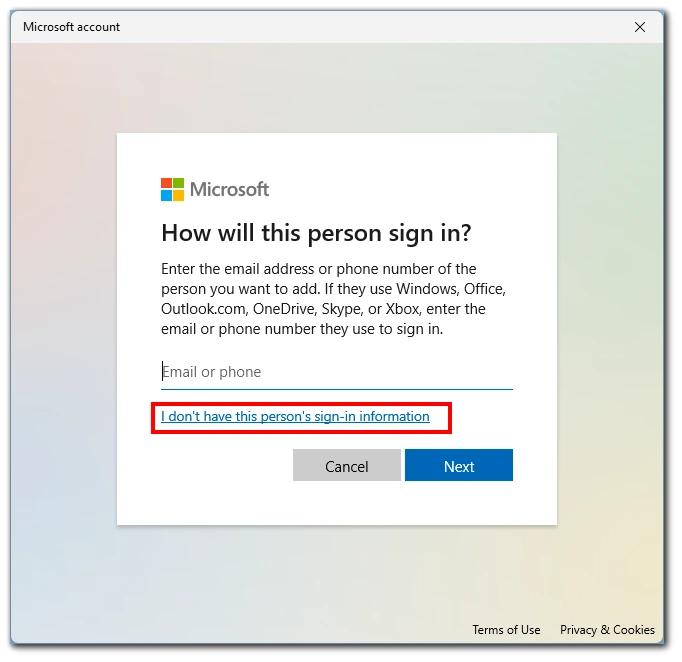
- In the “Add an account” window, click the I don’t have this person’s sign-in information. Button.
- Next, choose to Add a user without a Microsoft account.
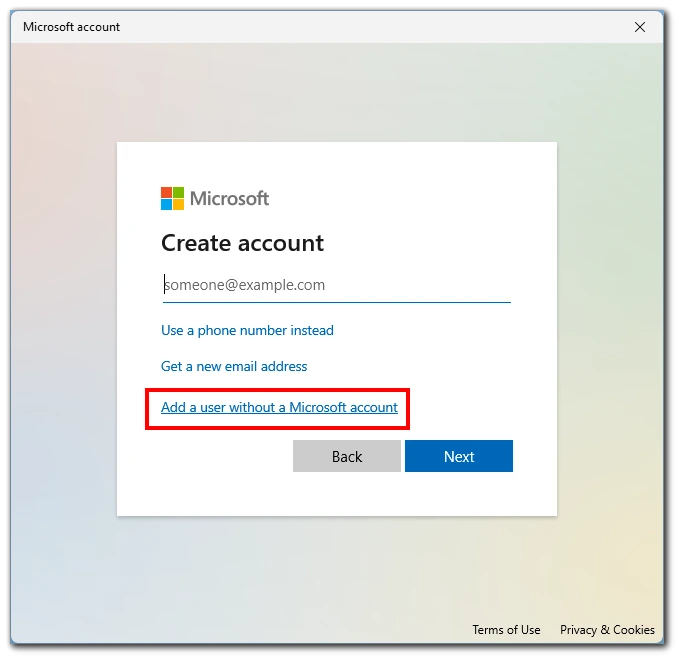
- Fill in the username and password and hit Next. Creating a local account with a generic name like “Guest” is recommended for a guest account to prevent confusion.

You can then go to your guest account using the Start menu. By default, this account will be added to the Standard User. This means that the user cannot open windows as an administrator or make changes to the computer’s configuration without the administrator account’s password. You can also add a Microsoft account to this account and set age restrictions on it to limit unsafe content.
How to create a guest account in Windows 11 via Command Prompt
While Windows 11 doesn’t have a guest account feature, you can still create a user account with restricted access using Command Prompt. This method can be useful for setting up temporary accounts for guests or creating accounts for shared devices with limited access. In this section, we’ll walk you through creating a user account via Command Prompt in Windows 11.
- Open Command Prompt with administrator privileges.
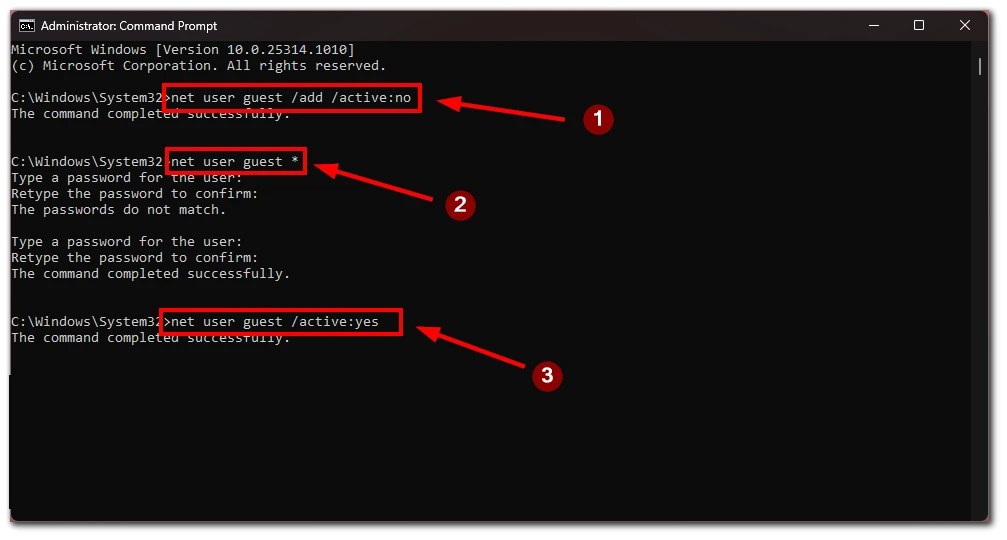
- In the Command Prompt window, type the following command and press Enter:
net user guest /add /active:noThis command will create a new user account named “guest” and set it as inactive, meaning it can’t be used until it’s activated. - Next, type the following command and press Enter to set a password for the guest account:
net user guest *Note that nothing will appear on the screen for security reasons when you type the password. Type the password and press Enter. - To activate the guest account, type the following command and press Enter:
net user guest /active:yesThis will enable the guest account and make it available for use.
By following these steps, you can create a guest-like user account with restricted access in Windows 11 using Command Prompt. However, remember that this method does not provide the same level of customization as creating a new user account through the Settings app, and you will need some knowledge of Command Prompt to complete the process.
How to delete an account in Windows 11
If you want to delete a user account in Windows 11, you can do so through the Settings app or Command Prompt. First, however, you must sign out of the account you want to delete. You cannot delete an account that you are currently logged into.Here are the steps for both methods:
Via Settings:
- Open the Settings app by pressing the Windows key + I.
- Click on Accounts in the left-hand menu.
- Select Other users from the options on the right.

- Click on the user account you want to delete and select Remove.
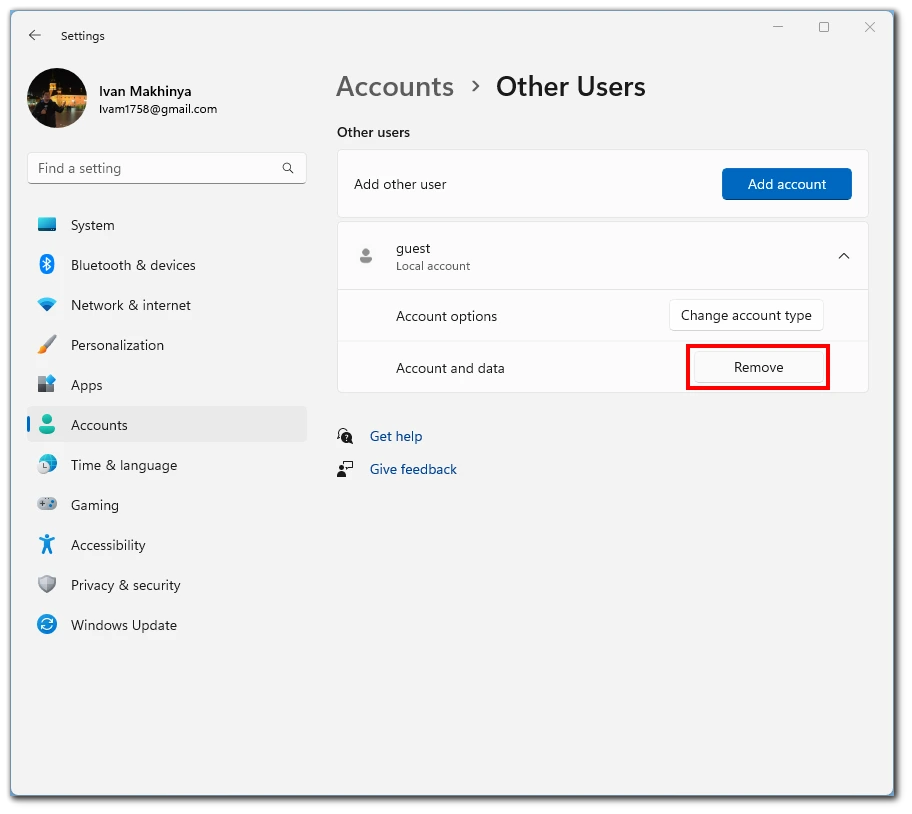
- Confirm the deletion by clicking on Delete account and data.

Note that if the account is a Microsoft account, you’ll be prompted to sign in with your Microsoft account password to complete the deletion.
Via Command Prompt:
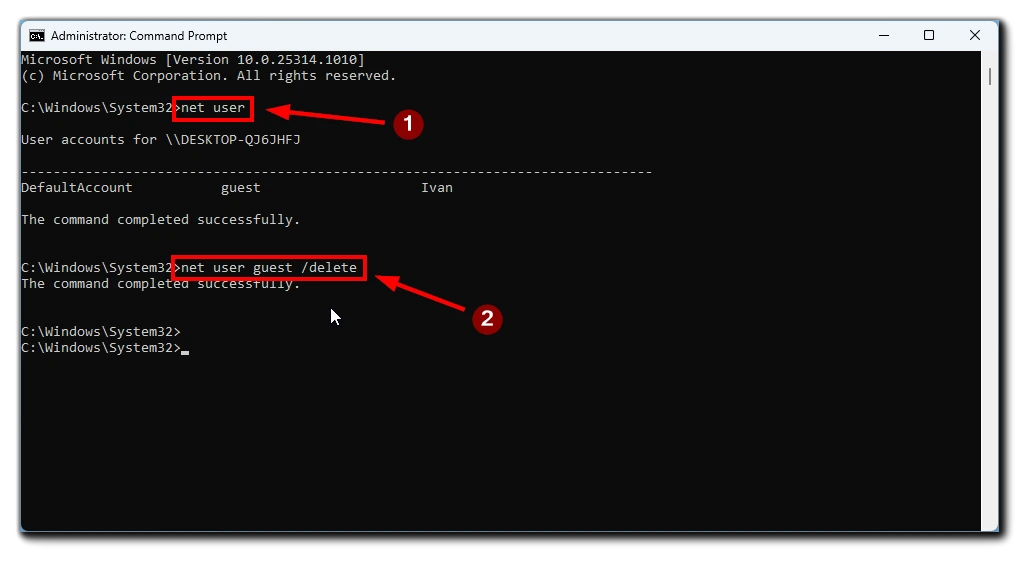
- Open Command Prompt with administrator privileges.
- Type the following command and press Enter to list all the user accounts on the system:
net userNote the name of the account you want to delete. - Type the following command and press Enter to delete the user account:
net user <username> /deleteReplace “<username>” with the account name you want to delete. - Confirm the deletion by pressing Enter.
Note that all the user’s data and files are deleted when you delete an account. Make sure to back up any important files before deleting an account. In conclusion, deleting a user account in Windows 11 is a straightforward process that can be done through the Settings app or Command Prompt if you’re deleting an account with important data, back up the data before proceeding.


