

Changing the margins in Google Docs can be a very useful action if you want your document to look nice. You should know that you can do this on all devices that have the app or where you can go to the Google Docs website.
What do you need to change margins on Google Docs
Google Docs gives you the ability to make all kinds of changes to the text. With Google Docs, you can modify your documents in any way you want, so that they aren’t only pleasant to read on your PC or mobile device but also in printed form. There are many properties that you can customize in Google Docs. One of those properties is margins.
Margins are empty spaces surrounding your Google Docs file. The margins contain no images or text, and allow you to prevent text from colliding with the edges of your document and to print correctly. As a result, the aesthetic look of the document is improved because the margins prevent the text from stretching too far and don’t make it difficult to read the document. Furthermore, attaching bindings for all types of printed documents may require you to adjust the margins to certain dimensions so that the binding doesn’t interfere with the text.
It’s worth noting that margin and indent are different things. Indent means the distance between the margin and the initial line of the paragraph. Another important difference is that you can set several different indents in the same file, whereas margins can only be set once.
So, if you want to change margins in your document on Google Docs, here’s how you can do it in different ways.
How to change margins on Google Docs on your desktop
If you want to make changes to the margins in Google Docs on your desktop, you should know that there are several methods of making such adjustments.
The first way you can change margins on Google Docs is with the ruler. To do this, you have to follow these steps:
- First of all, open your Google Docs file and make sure that the ruler is visible on your desktop. To do that, select the “View” option and click “Show ruler”.

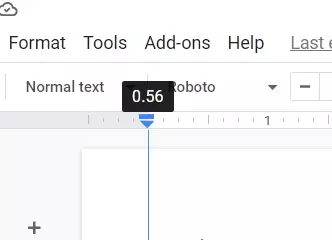
- After that, you can start from the left margin of your file. Place the cursor anywhere in the gray area of the program on the screen on the left side of the ruler. In this way, you will see that the ruler pointer has turned into a two-directional arrow.
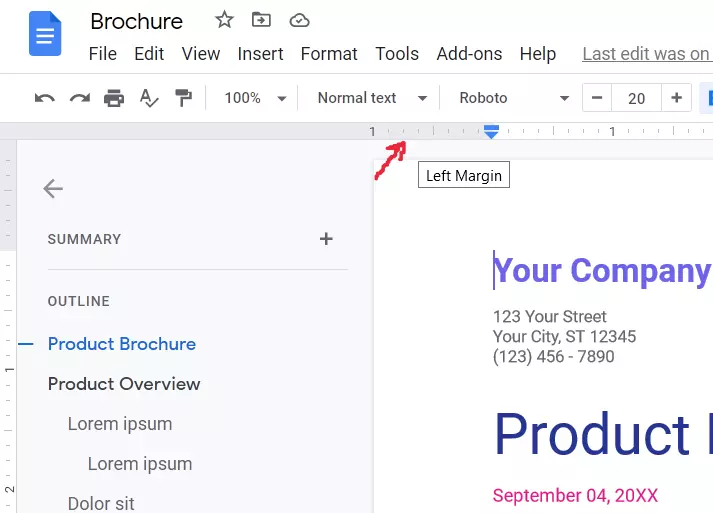
- Then, сlick and drag the gray area to the right side of the workspace to enlarge the margin. Otherwise, move the pointer to the left to get a smaller margin.
- Next, you can try to do the same with top, right and bottom margins.
- At the end of the margin, you will see a downward-pointing triangle and a blue rectangle. These icons signify the left indent and the first line indent, respectively. You must also position these indents because the indent icons move with the margins.
- The document will have no indents by default. However, you can change this by dragging the first line indent to the right of the document by about half an inch.
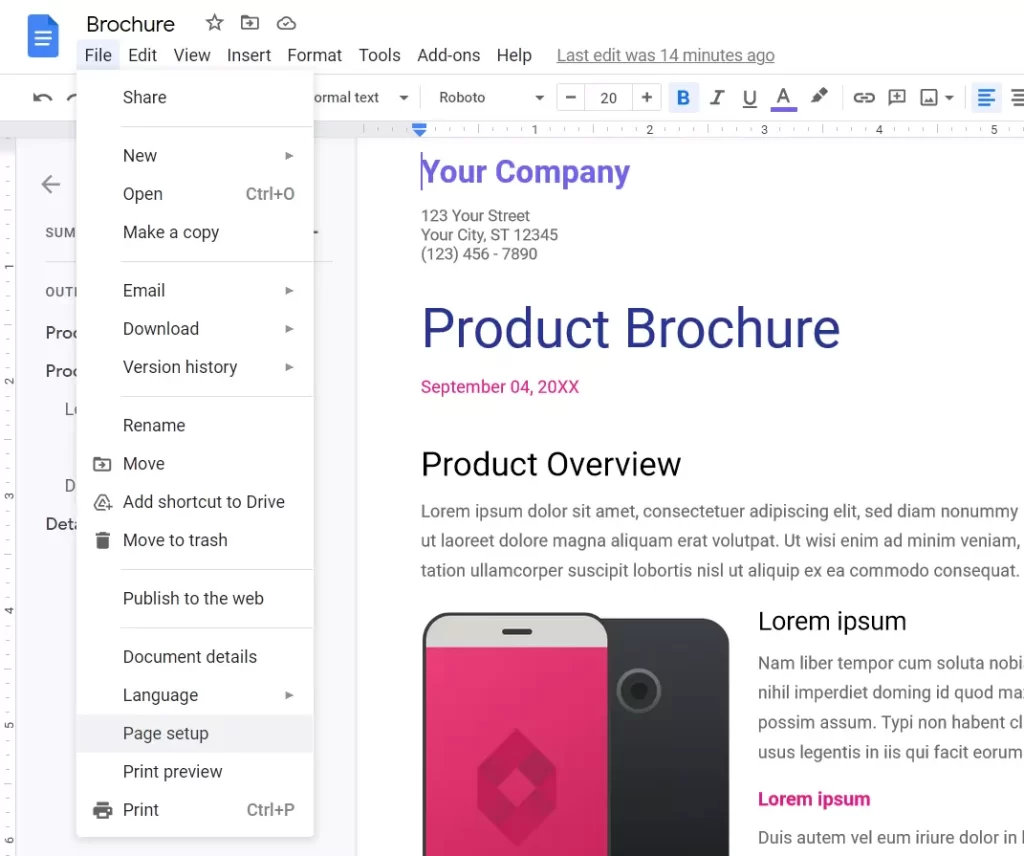
Another way to change margins on Google Docs on your desktop is the “Page Setup” option. If you want to do so, you have to follow these steps:
- First of all, open your Google Docs file.
- Then, navigate to the “File” options in the menu and click the “Page Setup” option.
- After that, enter the size of the left, right, top and bottom margins in the boxes under the “Margins” section.
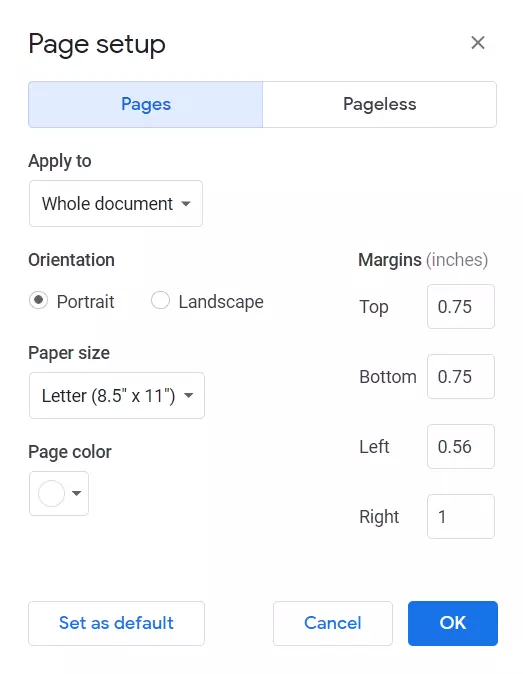
- Finally, click “OK” to save changes.
You have also to be aware that Google Docs doesn’t allow you to change margins for just one page of your file. Also, you don’t have the ability to change margins on your Android device, but you can do it on iPhone and iPad.
How to change margins on Google Docs on iPhone and iPad
If you want to change margins in your Google Docs file on your iPhone or iPad, you have to follow these steps:
- First of all, open your Google Docs file.
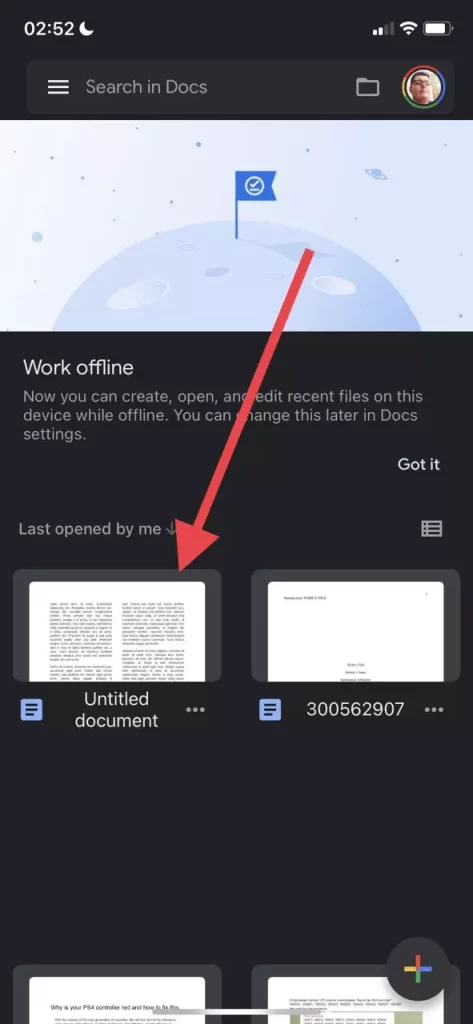
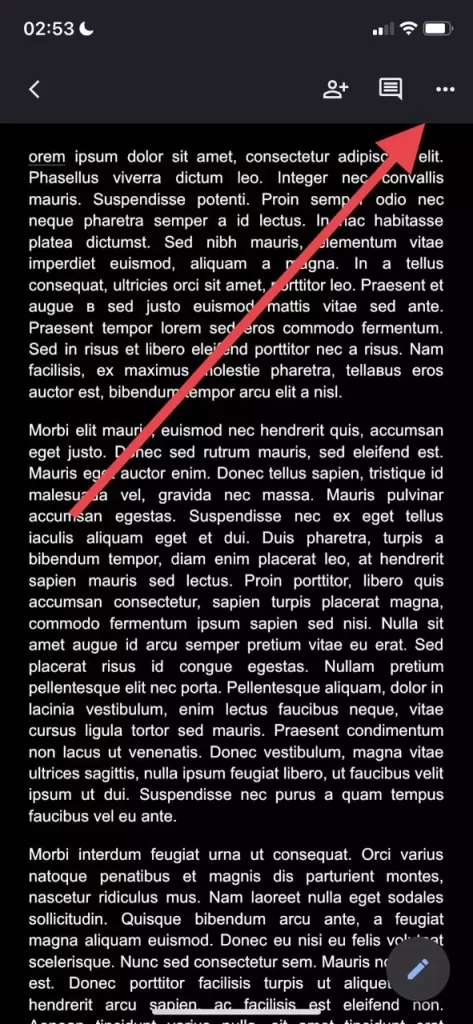
- Then, navigate to the “Menu”, represented by the “three dots” icon in the top right corner of the screen.
- After that, select the “Page Setup” section and tap “Margins”.
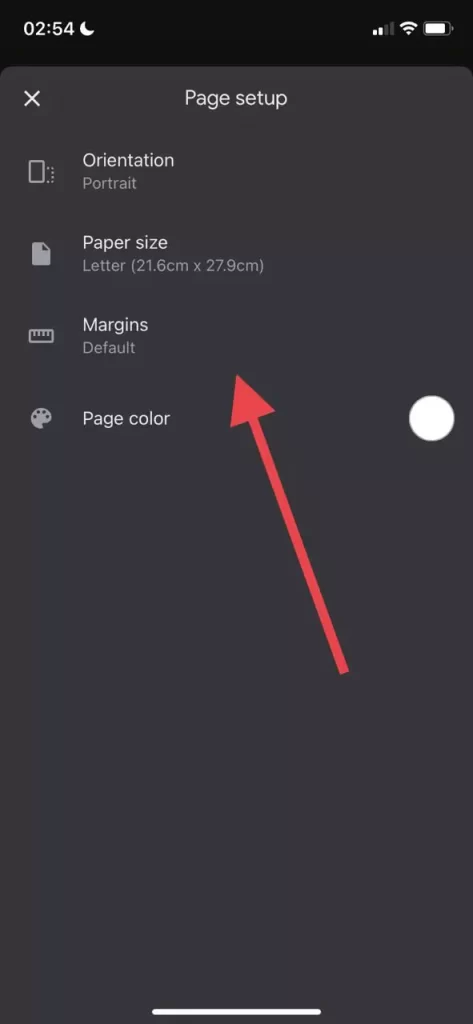
- Select which margins you want to set for the document: custom, wide, default, or narrow.
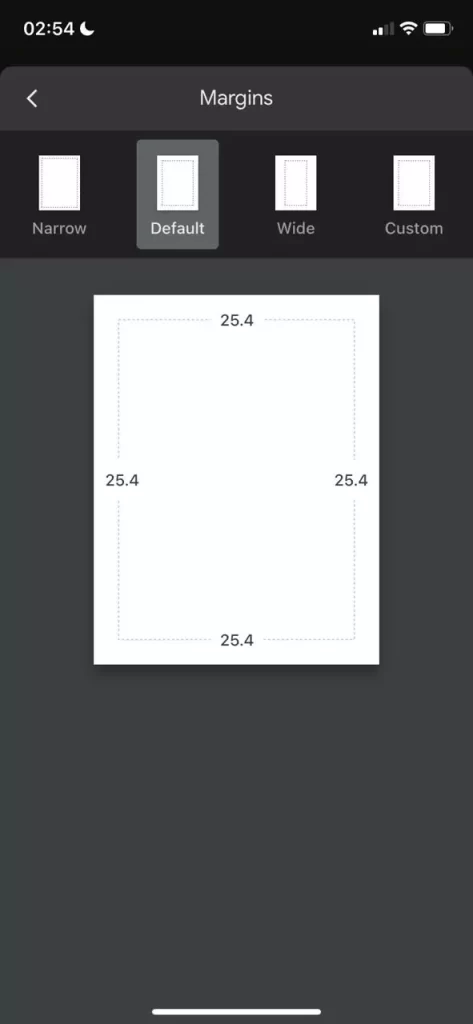
Custom margins allow you to enter specific dimensions. The “Wide” setting uses two-inch right and left margins, and one-inch top and bottom margins. Default margins mean that all the margins will be set to one inch. And narrow margins mean that you create half-inch margins for all four sides.
How to change margins on Google Docs on an Android device
Unfortunately, you can’t change margins using your Android device. However, you can change the paper size in your Google Docs document on your Android device, you have to follow these steps:
- At first, open the Google Docs app on your Android device and go to the document.
- Then, open the document you want to edit and tap on the pencil icon in the bottom right corner of the screen.
- Next, tap on the “three dots” icon at the top right corner of the screen and select the “Page Setup” option.
- Now, you can select “Paper size” to change the settings of the page.
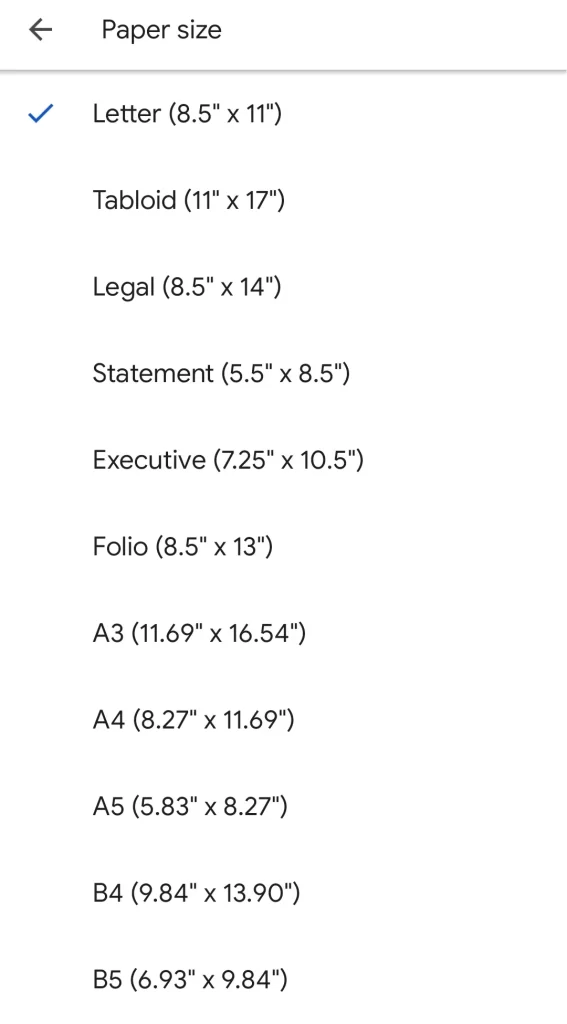
- Finally, just select the size you want to use and go back to the file.
Once you have completed these steps, you will be able to change the paper size in your Google Docs document on your Android device.
Why are the margins in Google Docs used
Margins are empty spaces surrounding your Google Docs document. Margins contain no images or text, and their main purpose is to prevent text from colliding with the edges of your document. As a result, it improves the aesthetic appearance of your document because the margins keep the text from stretching too far and make the document harder to read.
Moreover, inserting a binder for all types of printed documents may require you to adjust the margins to certain sizes so that the binder doesn’t interfere with the text.
Margins shouldn’t be confused with indents. The latter term refers to the distance between the margin and the opening line of the paragraph. For example, an indentation may be set at half an inch, but a document may have margins of one inch, which means that the text begins 1.5 inches from the edge of the document.
Another important difference is that several different indents can be set in the same file, whereas margins can only be set alone.
Also, if you’re wondering if you can change fields on just one page, you’re probably saddened by the fact that, unfortunately, you can’t. While this would be a useful feature, Google Docs doesn’t allow you to change the margins for just one page of the document.
However, you can still indent paragraphs. So in some cases, this feature can make up for a disadvantage.
In general, you should know that working in Google Docs is quite simple and in many ways can be easier than in Microsoft Word. Yes, perhaps in the familiar for many people Word does have more features and the ability to somehow modify the text and the document as a whole.
Nevertheless, the Google team is constantly working to improve the features and capabilities of Google Docs. After all, today people not only want but even demand simplicity in the use of various apps and programs. This also applies to text editors.
Therefore, if you like the ease of use, as well as the presence of useful and interesting features, then Google Docs is just right for you.


