

The LC code on a Samsung dishwasher indicates there’s a water leak. LC leak detection code pops up when the machine senses moisture where it shouldn’t be. But sometimes, that may be a false alarm when there’s no real leak.
If that’s a false alarm, you need to unplug your dishwasher for 10-15 minutes, wait, and then plug it back. If there’s no real moisture or leak, that will probably fix the problem, and your dishwasher will be reset and will work as usual. However, if there’s a real problem, unplugging won’t help.
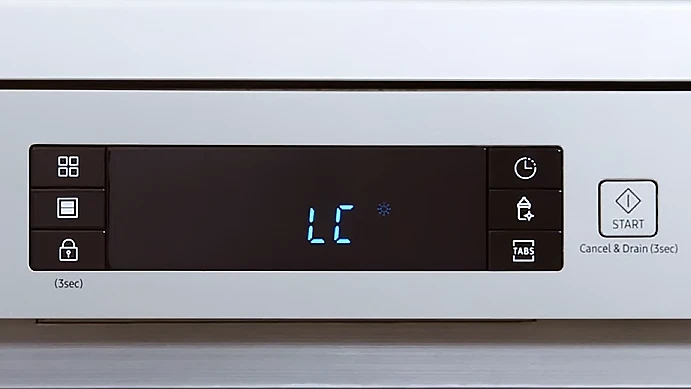
Why does the Samsung dishwasher show an LC error code?
The one reason may be a false alarm, but if you tried unplugging and that hasn’t helped, there are three options:
- There is a real leak or moisture in your Samsung dishwasher.
- There’s a problem with a leak sensor that isn’t working properly (that’s quite rare; usually, it works as needed).
- The bottom pan of your dishwasher has moisture, so your Samsung dishwasher indicates this as a leak.
How to solve Samsung dishwasher LC error
You should start by unplugging your dishwasher and waiting for 10-15 minutes, then plug it back and see whether the LC code is still displayed.
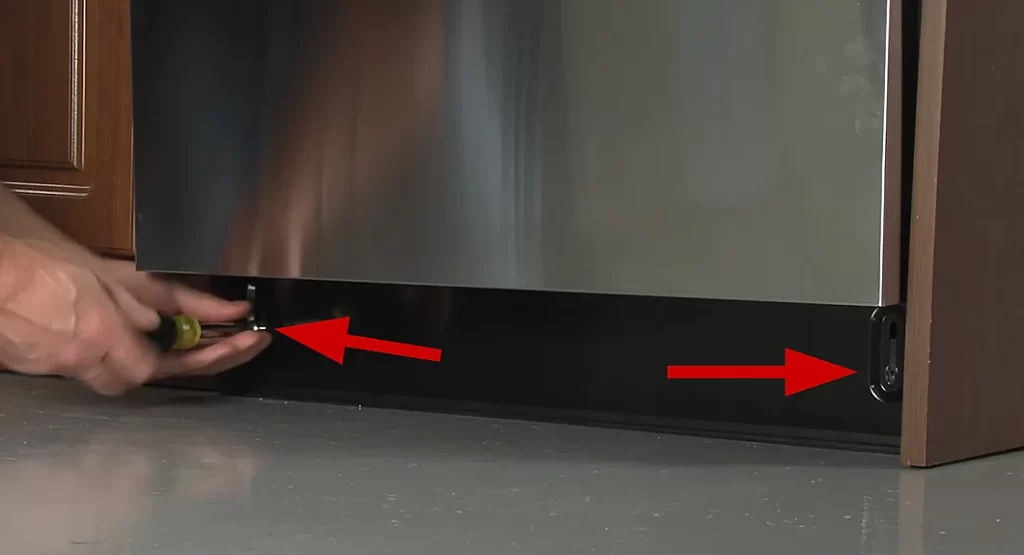
If you’ve done this and the problem comes back, then the next step I recommend is to check the bottom pan to find whether there’s moisture. But to do this, you must disconnect your Samsung dishwasher from power again. And don’t forget to disconnect the water supply and drainage. Don’t turn off the water-supply valve.
Now, you need to find the screws and clips that keep the dishwasher in place. In some models, they’re located at the bottom, but depending on your model, the exact position may differ. For example, my Samsung dishwasher has 2 screws on the bottom and clips on the top. So you need to locate them all and remove them.
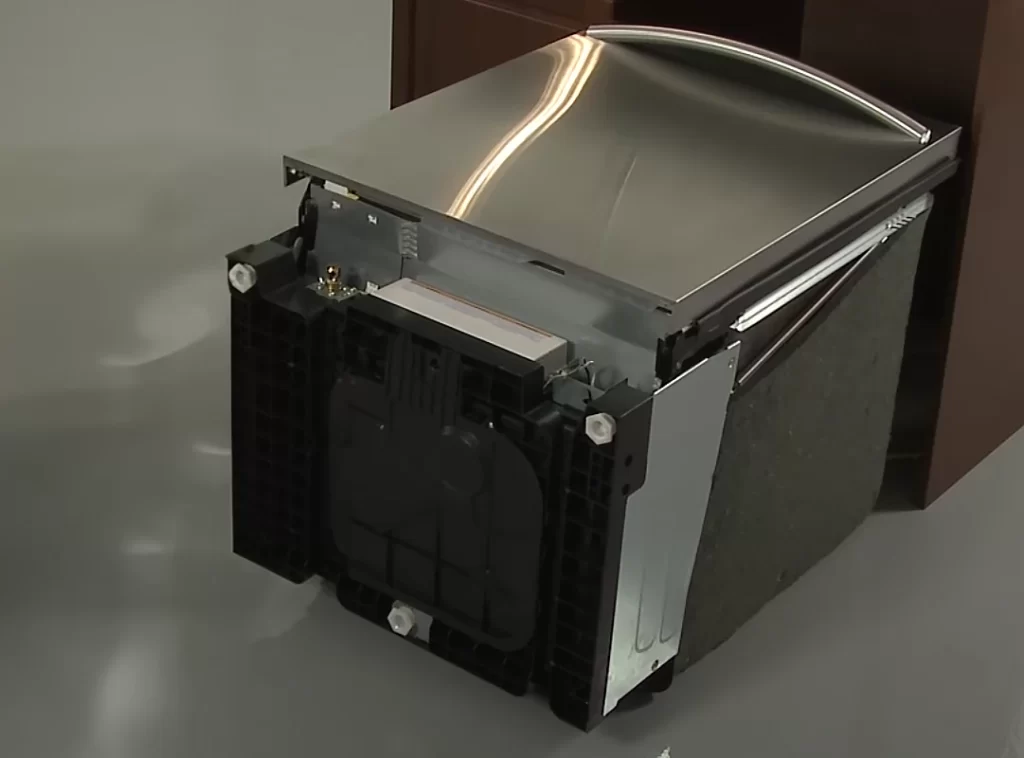
Then, you need to pull out a dishwasher and inspect it for leaks and moisture. The most common issue with the LC dishwasher code is moisture in the bottom pan. I spoke with an appliance repair technician; he said that’s the most common moisture type that may trigger leak sensor and LC error.
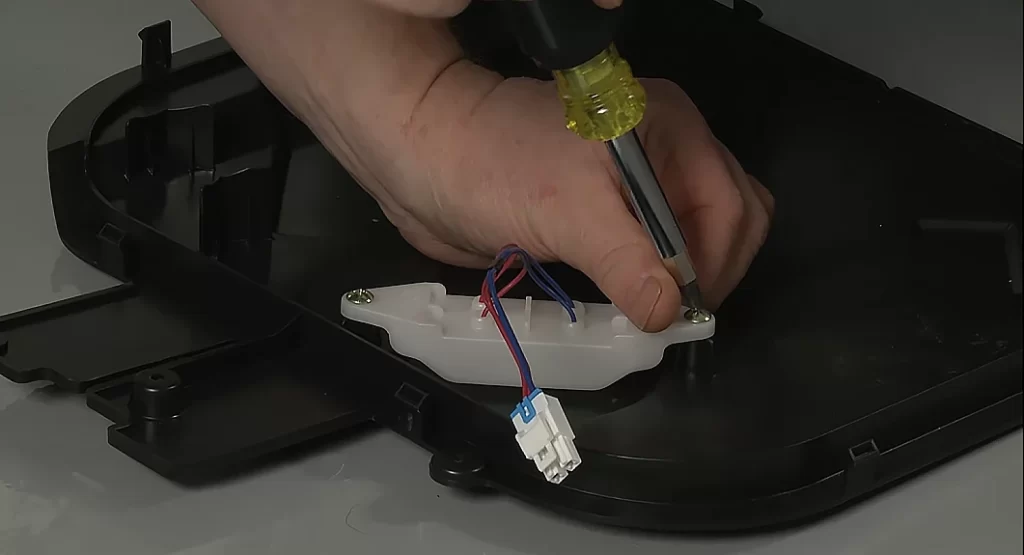
The bottom pan is covered with a lid; you need to place your dishwasher on the side and remove the screws and clips that keep this lid in place.
Sometimes, a tiny amount of water accumulates, possibly from condensation or minor spills during the dishwashing cycle. It doesn’t necessarily mean you have a significant leak. Even a small amount of water can set off the sensor, making your dishwasher go into lockdown mode with the LC code.
After you open the lid and see the moisture under it, use a towel or sponge to soak up any water you find in the pan. Make sure it’s bone-dry.
While you’re at it, look for any foreign objects that might be causing water to accumulate. Sometimes, a piece of food or a small object can block the drain, leading to minor pooling.
Once you’ve dried the pan and removed any debris, put the panel back and plug in the dishwasher. Run a quick cycle to see if the LC code has been cleared.
Usually, that’s just a condensation that may appear in the bottom pan, so all you need to do is to get rid of it. If the error isn’t recurring in a short time, like 5-10 dishwashing cycles, but then appears once again, that’s probably because the sensor is placed too low, so it’s triggered even on the small condensation of water in the bottom pan. Technically, that’s not a false alarm (the sensor detects moisture and works triggers, respectively), but that’s probably not how you wish it to work.
However, on the other hand, that may be leakage; maybe that’s a small one, but it may be. So, you should inspect the dishwasher to find the leak source.
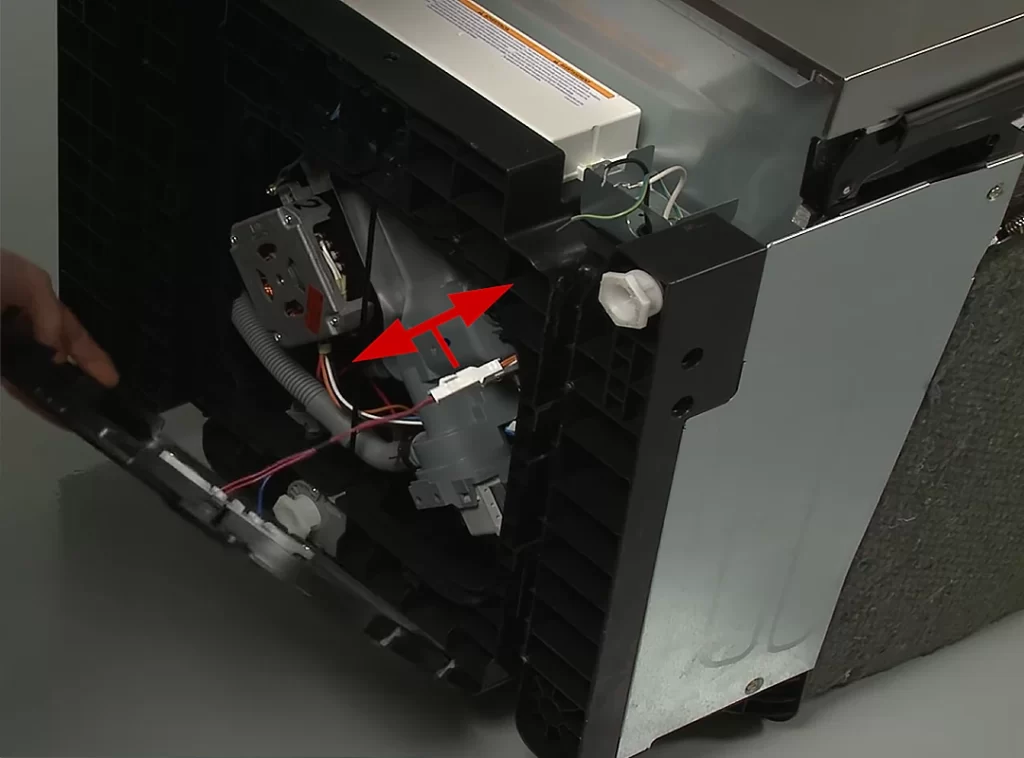
Some repair technicians suggest you remove the screws that keep the leak sensor on the bottom lid and use sticky tape to place it on the side of the bottom pan, a little bit higher than it’s originally placed. This way, the sensor won’t be triggered on moisture condensation on the bottom pan and will work only in case of a real water leak.
But that’s not what I will recommend as a one-to-go solution. First, if there is constant moisture and you move the indicator light, it will not be able to report moisture, and you may have mold on the bottom tray of your dishwasher.
Second, while the idea of using sticky tape to reposition the leak sensor might seem like a quick fix, it’s not without its pitfalls. You could void your dishwasher’s warranty, leaving you high and dry if something major goes wrong. The sensor’s new position might also give you inaccurate leak readings.
And let’s not forget the potential for the tape to lose its stickiness, causing the sensor to fall and trigger a false alarm. Add to that the risk of electrical hazards and the possibility of overlooking minor leaks that could escalate, and you’ve got a recipe for long-term issues.
However, if there’s only some water, not a significant amount, and you can’t find a leak source, the chance is that it’s condensed. You can not replace the sensor but put two small washers under it (better choose not metal ones) at each end of the leak sensor to raise it a little. This way, it wouldn’t be triggered on a small amount of water but will work if there’s a significant amount.
You can’t find the leak source, but there’s a water
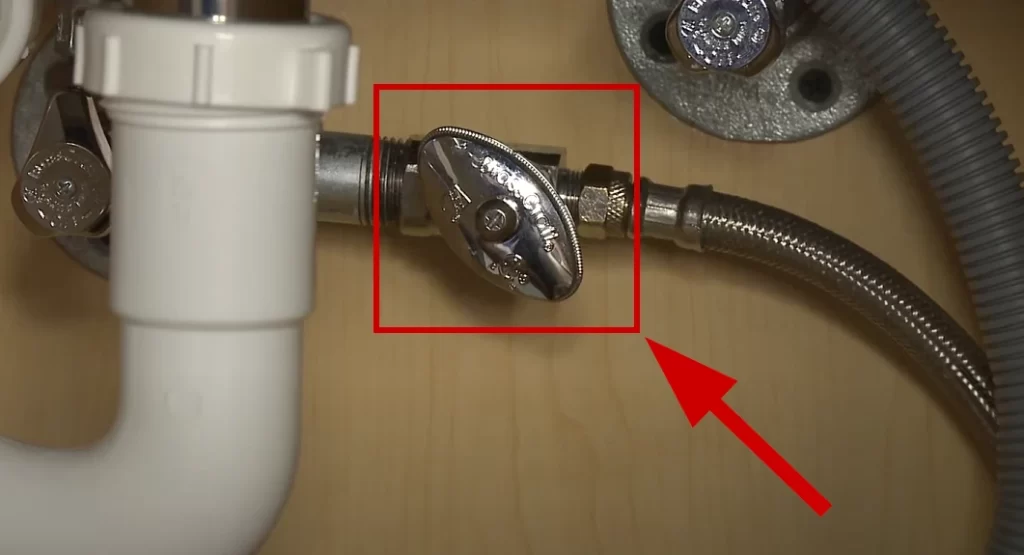
If the culprit turns out to be a malfunctioning inlet valve that’s letting water seep through even when it’s supposed to be closed, here’s what you should do. First, cut off the water supply to the dishwasher. You’ll find a dedicated shut-off valve for this purpose right under your sink. Once that’s done, go ahead and swap out the faulty water inlet valve for a new one.
Inspect your dishwasher to find other leak sources
No matter whether there’s moisture on the bottom pan, the thing you already pulled out of your dishwasher is a good opportunity to inspect it for other leak sources.
Here are the common leak sources, according to the appliance repair technician:
- Door Seal:
- What to look for: Cracks or wear in the rubber seal around the door.
- How to check: Run your fingers along the seal and look for water trails around the door area.
- Water Inlet Valve:
- What to look for: Water pooling or dripping.
- How to check: Locate the valve inside the dishwasher, usually at the bottom left or right corner, and inspect for moisture.
- Drain Hose:
- What to look for: Cracks, holes, or loose connections.
- How to check: Pull out the dishwasher slightly to access the hose at the back. Examine it for any signs of damage.
- Spray Arms:
- What to look for: Cracks or holes in the spinning arms.
- How to check: Open the dishwasher, manually spin the arms, and look for any visible damage.
The leak may be often caused, based on my experience and information provided by a repair technician, by these things:
- Cracked water-fill inlet switch.
- Cracked bottom spray arm.
- Loose water inlet valve.
- Clogged vent around the door.
So check these parts to find the leaks. If the water filter is loose, you can screw it down so it’s tighter. And if your vent is clogged, below is the possible solution.
How to clear the clogged vent
- Open the door: Start by opening the dishwasher door to get a clear view of the interior.
- Locate the round cover: Look for a round cover on the inside of the door, held in place by two screws.
- Unscrew and remove: Use a screwdriver to remove the screws and reveal the round plastic vent beneath.
- Twist and shout: Grab some needle-nose pliers and turn the vent counterclockwise to remove it.
- Inspect and clean: Lift the flap, and you’ll likely find a buildup of grime and gunk. Clean it thoroughly.
- Replace the vent: Put the vent back in place and turn it clockwise to secure it.
The vent is a part of the dishwasher’s drainage system. If it’s clogged with gunk, it can interfere with proper drainage and potentially trigger an LC error. Cleaning it out can restore normal function.
Clean the drain of your dishwasher
If your dishwasher is stuck on LC mode and nothing helps, you can also try to clean the drain.
Here’s how:
- Pour water: Add about a half-quart of water into the main compartment of the dishwasher. Some technicians even suggest using two quarts of hot water.
- Let it drain: The dishwasher should automatically start draining the water you just poured in.
- Power off: Once the water is drained, shut off the unit.
- Run a test cycle: Turn the dishwasher back on and run a rinse and drain cycle to confirm the issue is resolved.
This method essentially “resets” the draining mechanism. Adding water gives the dishwasher something to drain, which sometimes clears the LC error. It’s like your dishwasher must complete its draining task to escape the error mode.


