

By default, the Windows 11 clipboard works the same way as in previous versions of the system. However, if you wish, you can enable additional functionality. First of all, you can enable the log or history of the clipboard, but there are also interesting new things.
Clipboard history is disabled by default in Windows 11 settings. So you also need to enable it first. With it, you can quickly see all the recently copied elements, which you can then use to paste into the desired location. So, let’s take a closer look at how to enable and use clipboard history on your Windows 11 PC.
How to enable clipboard history on Windows 11
The Clipboard is intermediate storage for information, where it gets after you perform a “Copy” or “Cut” operation. The information is then moved from the clipboard to a new location.
While in the past you could only paste the most recently copied fragment using the standard operating system tools, now in Windows 11 you can work with earlier copies of texts or drawings as well.
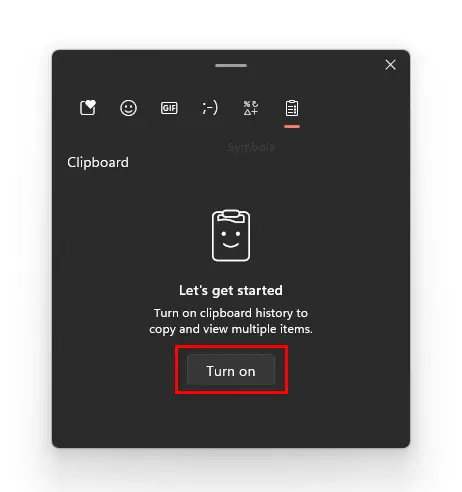
The clipboard is invoked by the keyboard shortcut “Win + V”. The first time you press this shortcut, the operating system will offer to enable the history of the clipboard.
To do this, you will need to click on the “Turn on” button.
How to enable clipboard history on Windows 11 via Settings
There is also a way to enable clipboard history on Windows 11 using the Settings app. Just do the following:
- Click on the Start icon and open “Settings”.
- Then go to the “System” section, scroll down and select “Clipboard”.
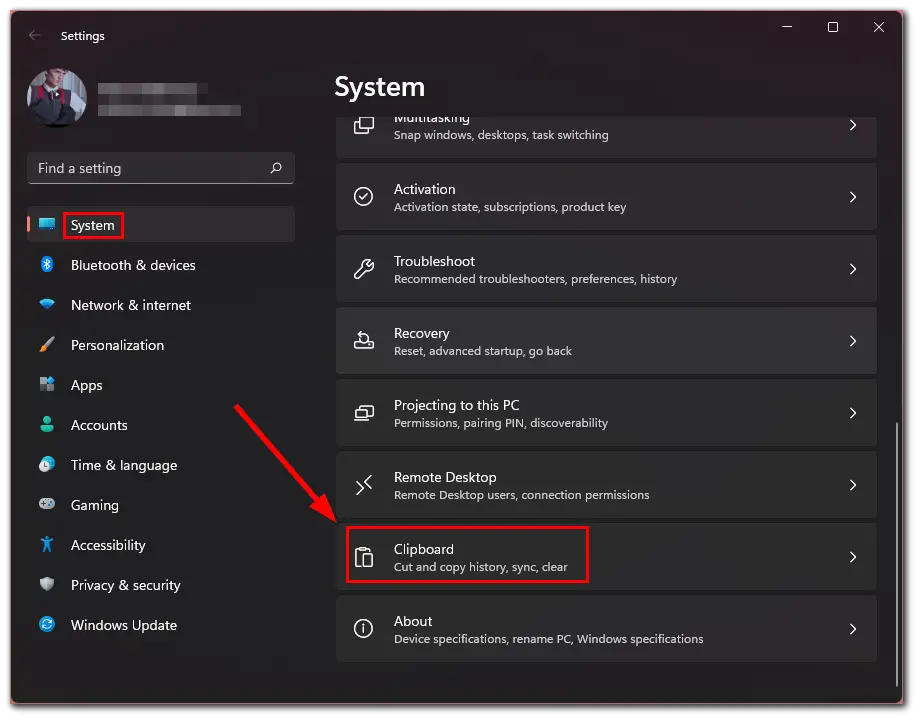
- Finally, turn on the “Clipboard history” toggle switch.
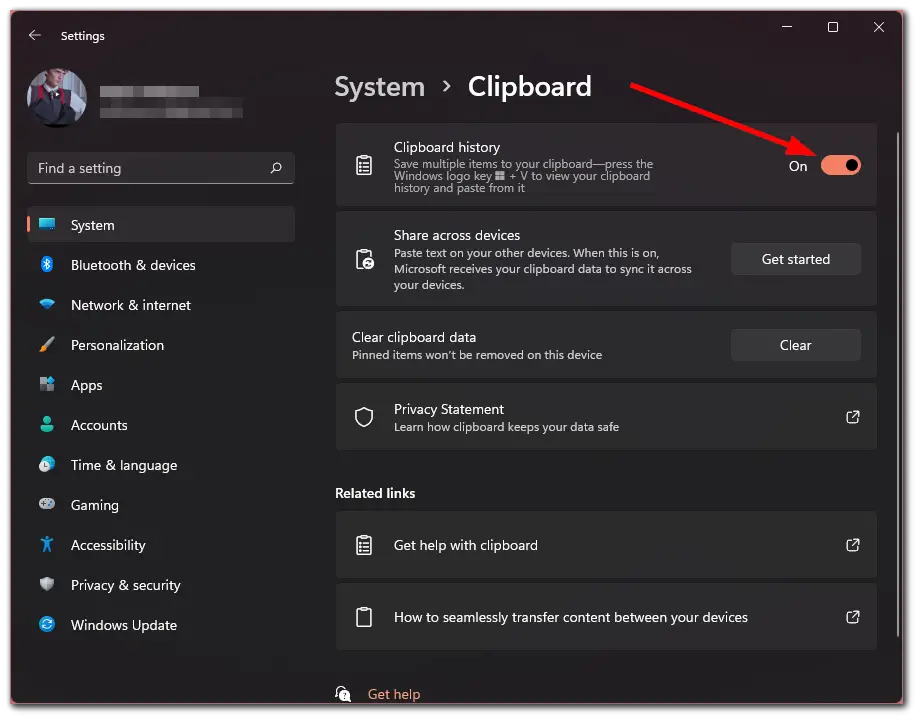
After completing all the steps, you can start copying and pasting as before, with an additional interface for managing the copied content.
How to use clipboard history on Windows 11
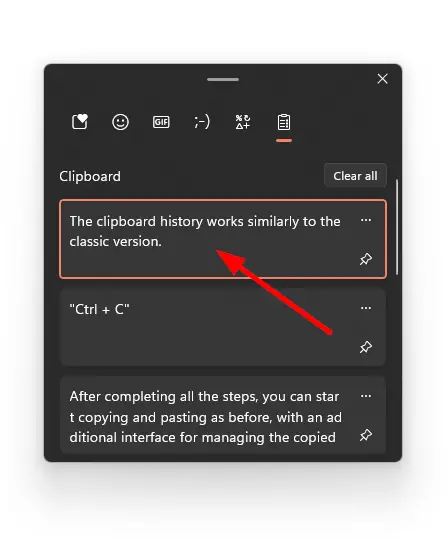
The clipboard history works similarly to the classic version. The only difference is the interface that allows you to view and manage the saved content. In addition, if you choose the synchronization option, you can paste text and images uploaded to the clipboard to different devices.
In Windows 11, when the feature is enabled, you can continue to use the “Ctrl + C” key combination to copy and “Ctrl + V” to paste anything you’ve saved in history. You can do the same using the context menu or the command line in File Explorer.
How to copy/paste using a clipboard on Windows 11
If you want to copy and paste something using a clipboard on Windows 11, you can follow these steps:
- Go to the content you want to copy.
- Select it and press “Ctrl + C” (or “Ctrl + X” to cut).
- After that, go to the app where you want to paste this content.
- Press “Win + V” and select the item to paste it.
- Finally, just click on it.
As you can see on the screenshot, there’s also an option to “Clear all” the clipboard. Once you click on it, all the data will be removed. That’s why you have to be careful doing this because you can’t restore your clipboard data.
You can clear all your clipboard history also via Settings. Just follow the above steps in the Settings menu and click “Clear” (you can see this option on the screenshot above).
How to delete an item from the clipboard on Windows 11
There’s also an option to delete a single item from the clipboard history. To do this – follow these steps:
- Press “Win + V” and go to the item you want to delete.
- Then click on the “More” icon (three dots).
- Finally, click on the “Delete” icon.
Moreover, you can also pin an item in your clipboard history on Windows 11. Simply click on the “Pin” icon to do so.
Read Also:
- How to rotate your screen in Windows 11
- How to take screenshots on Windows 11
- How to change or customize the mouse cursor on Windows 11
What else is in the clipboard history on Windows 11?
Pressing the Windows key in combination with the V key opens a clipboard management window in the Clipboard History tab, from which you can quickly select the items you want. In the same window there are new tabs (icons at the top of the window), allowing you to quickly insert certain elements not directly from the clipboard into the current document:
- Emoji
- Animated GIFs
- Classic text emoticons
- Special Symbols
You can search for emojis and GIFs you need. And for text emoticons and special symbols, some tabs categorize them. Finding the right item to insert is relatively easy. As you use it, the most frequently used items will be placed on the first tab for quick access.
Honestly, I think this feature is really cool, especially when you work with text on a regular basis. Also, interesting seems to be the ability to select different characters that aren’t available on the standard keyboard.
Usually, you had to search for them on the Internet or use special commands via the Alt key. Thanks to Microsoft for finally simplifying this point.


