

Windows 11 is one of the newest and most user-friendly operating systems. After the release of the new operating system from Microsoft, many users were not thrilled that the company decided to make quite a noticeable change in the appearance and functionality of its operating system. Since people have been used to the more traditional design of Windows 10 for many years, the transition was quite difficult for many. For example, many people can not get used to the fact that the context menu now has a limited number of options and to open the classic version. You have to click Show more options.
Of course, there is a way to remove this new context menu. However, you will have some problems because you will have to change the registry to change this. Other than that, you can, of course, use third-party applications to change it. Let’s take a closer look at what you need to do to remove the Show more options button by default.
What is “Show more options” on Windows 11
Let me start by telling you more about the Show more options button, which we will discuss later in this article. The Show more options button appears in the context menu when you right-click on a folder or files. After you right-click on Show more options, you will see an expanded version of the context menu in Windows 10 and Windows 7.
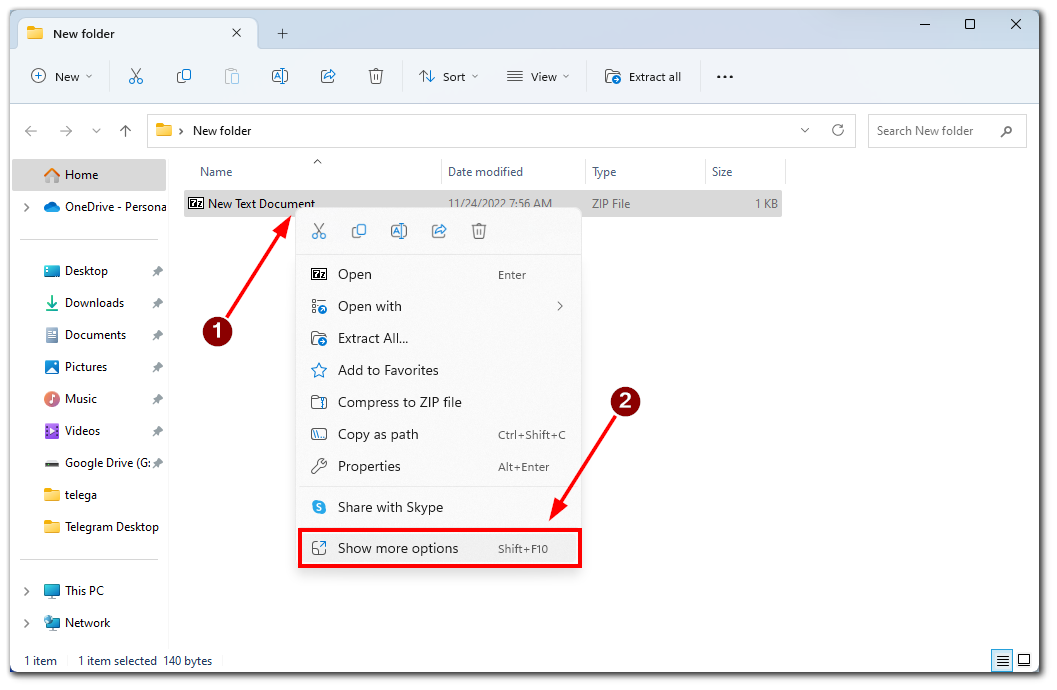
You can also open the classic context menu with the key shortcut Shift + F10. With this shortcut, you can immediately open the extended context menu. However, if you want to set this menu to default, you will have some problems.
As already mentioned, you can’t just turn this option on or off because it’s built into the Windows 11 interface. So to change the default context menu, you need to change the registry and the Windows 11 interface. I don’t recommend doing this unless you know how to work with the registry.
How to get the classic Windows 10 context menu on Windows 11
Let me tell you about two ways you can use to remove the Show more options button. Both of these methods will rely on the registry. So I recommend you start by backing up your Windows 11 registry settings.
Changes to the Windows 11 Registry
To change the registry in Windows 11, you will need to follow the exact steps below. Be careful and follow the instructions, so you do not screw things up. As I said before, if you make some mistakes in the registry, you can break some of the functions of your Windows 11. To remove Show more options with the registry, you will need the following:
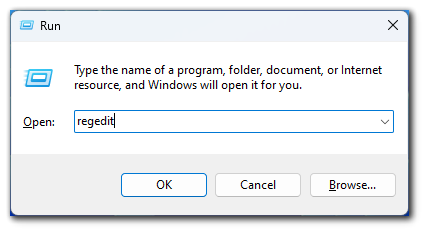
- Open the registry. To do this, you need to press Win+R, enter ‘regedit‘ in the Run command, and hit Enter.
- After that, you need to go to
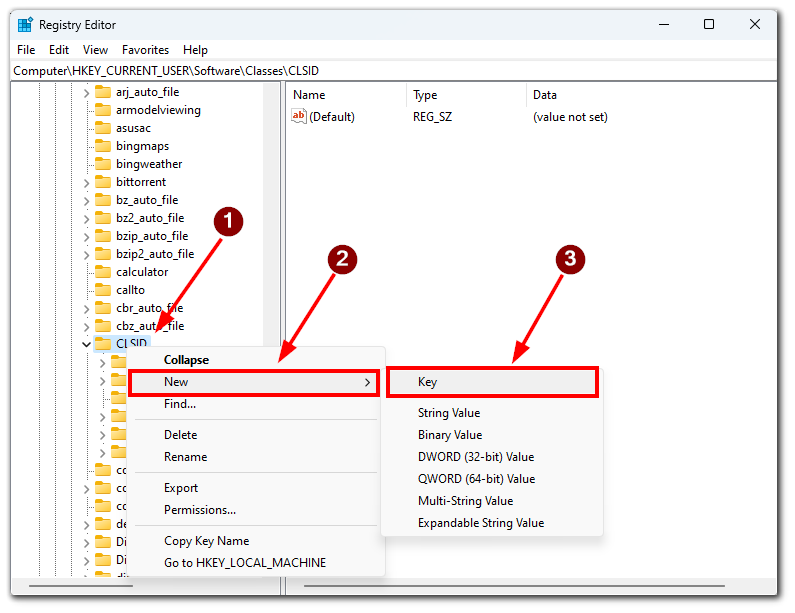
Computer\HKEY_CURRENT_USER\SOFTWARE\CLASSES\CLSID - Right-click on CLSID in the left pane.
- In the drop-down menu, hover the mouse over New. In the following menu, click on Key.
- In the new folder, you need to click on
{86ca1aa0-34aa-4e8b-a509-50c905bae2a2a2}.
- After that, you need to right-click on this folder and create another, which you need to name InprocServer32.
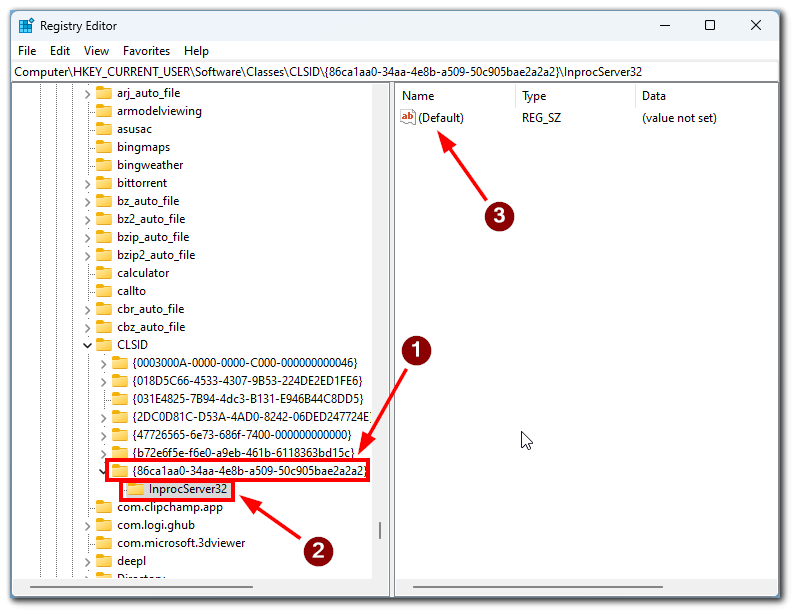
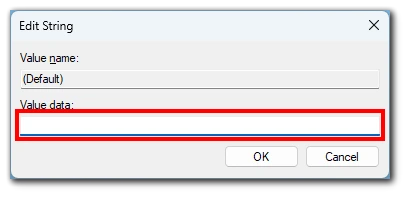
- In this folder, open a registry file called (Default), and in Value data, remove all symbols. This field must remain empty. Click on OK.
- Then restart your computer.
After this, you will no longer see the Show more options button. The most important thing to remember is that you should not change the registry of Windows 11 so that you do not accidentally break the essential functions of your operating system.
Remove Show more options using the Registry file
Another way is the same for the registry, but with this method, you do not need to go into the registry. All you need to do is create a registry file which will automatically change the registry. However, you still have more chances to make a mistake here, so you must copy all the commands and paths precisely as shown in these instructions. To do this you need to:
- First, right-click anywhere on your desktop or folder and select New Item.
- In the drop-down menu, click Text Document.
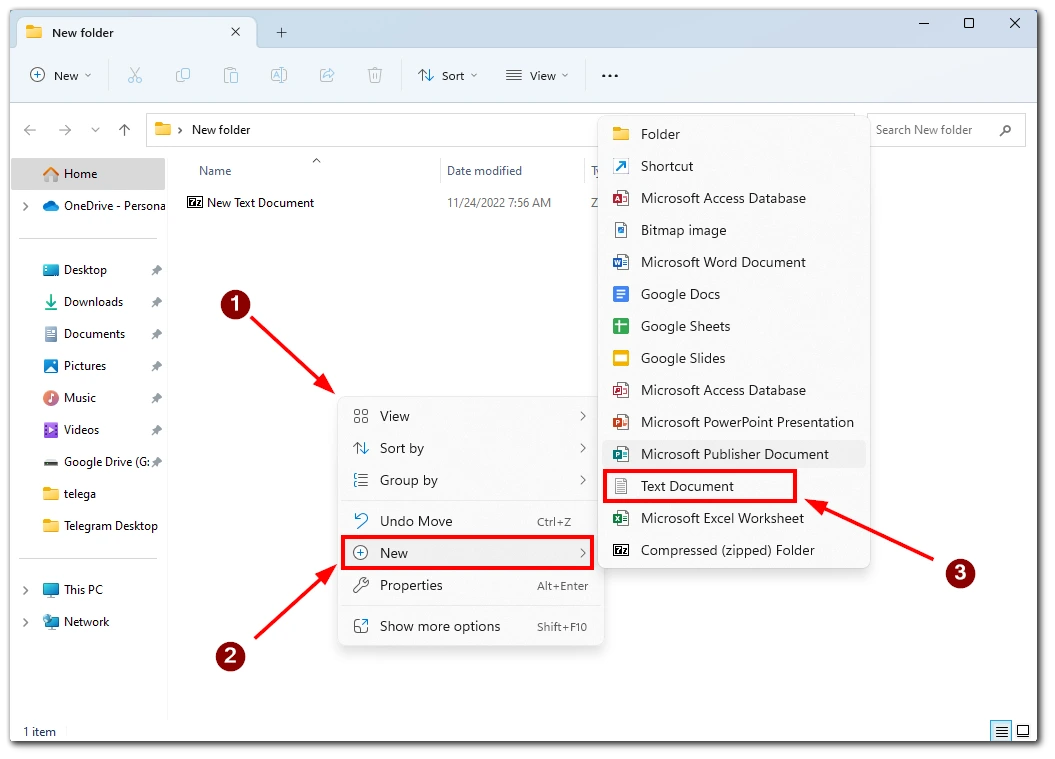
- Name whatever you want and make changes to this document with the following text:
Windows Registry Editor Version 5.00
[HKEY_CURRENT_USER\Software\Classes\CLSID\{86ca1aa0-34aa-4e8b-a509-50c905bae2a2}]
@=""
[HKEY_CURRENT_USER\Software\Classes\CLSID\{86ca1aa0-34aa-4e8b-a509-50c905bae2a2}\InprocServer32]
@=""
- After that, you need to click on File at the top left of the screen and select Save As…
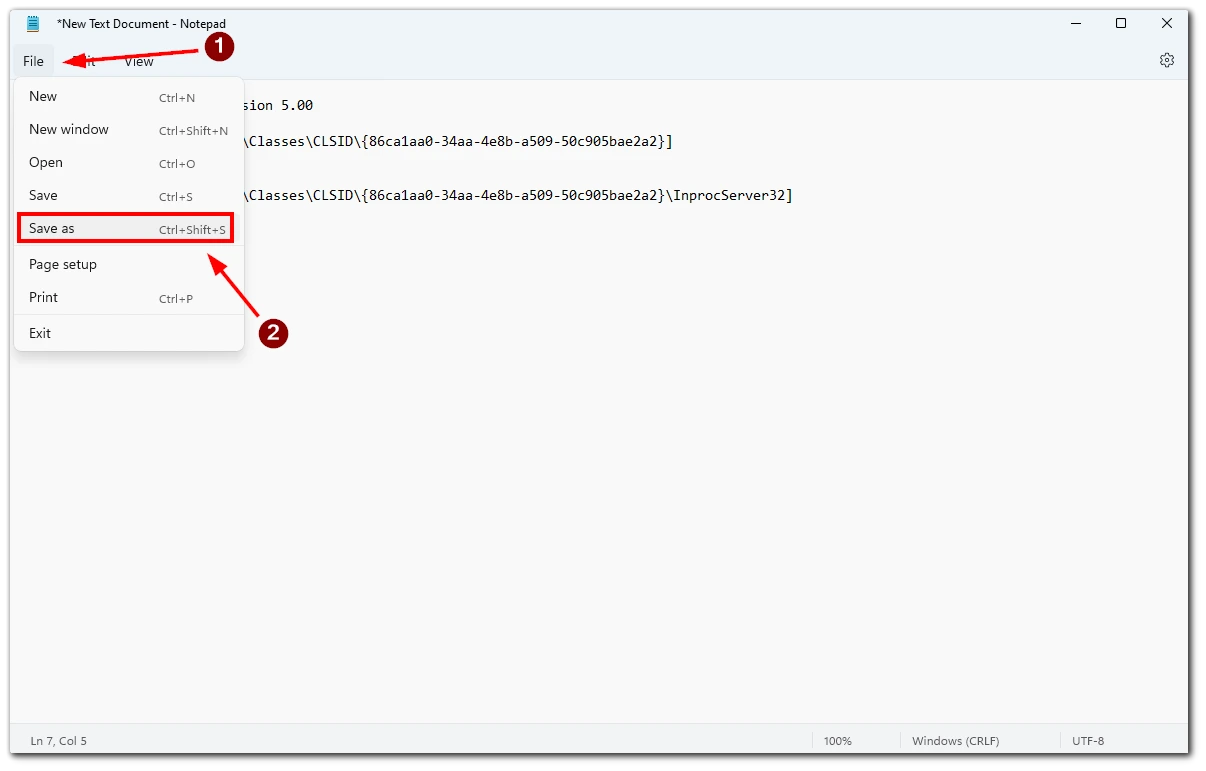
- Select All Files (*.*) in the Save as type field
- In the file, the name specifies after the name .reg.
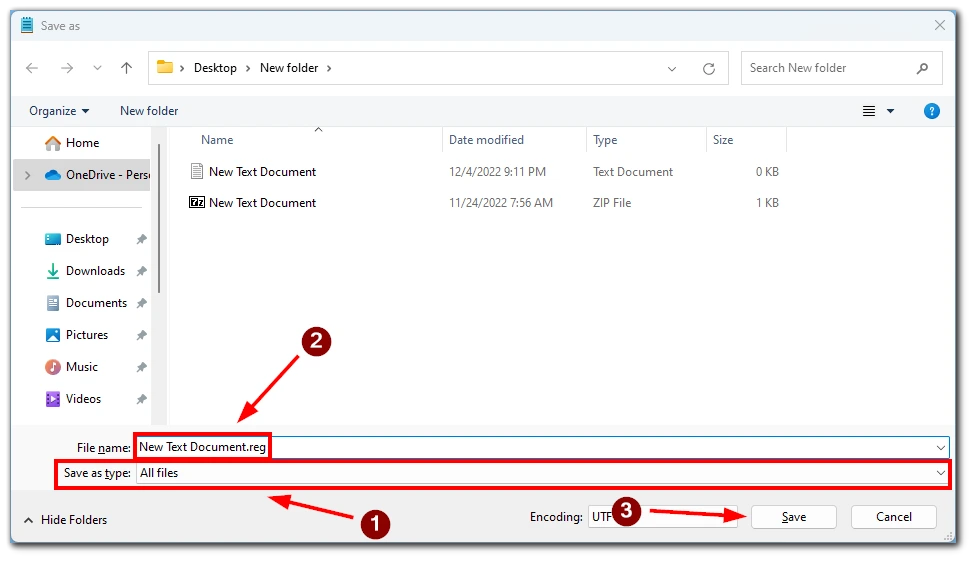
- After that, the File should be saved as a reg file. Then you will have to run the File, and it will automatically be able to make changes to the registry.
After that, you also need to reboot your PC to make changes to Windows 11. If you need to return the changes in the future, you need to create a new registry file with the following content: Windows Registry Editor Version 5.00
[-HKEY_CURRENT_USER\Software\Classes\CLSID\{86ca1aa0-34aa-4e8b-a509-50c905bae2a2}]


