

The Apple account recovery contact is the person or phone number designated by the Apple ID owner. This is needed to assist with account recovery if the owner cannot access their account. This contact is usually a trusted friend or family member who can be contacted if the owner forgets their password, loses access to their trusted devices, or encounters other problems preventing them from logging into their Apple ID.
When the owner initiates the account recovery process, Apple may contact a designated recovery contact to confirm the owner’s identity and assist in the recovery process. This contact may also receive a verification code to help the owner regain access to their account. It is important to keep this contact information up to date and choose someone easy to contact and willing to help with account recovery, if necessary.
What do you need to set up an account recovery contact?
To set up a recovery contact for your Apple ID on Mac, certain conditions must be met:
- You must have a Mac running macOS 10.15 or later.
- You must be signed in to your Apple ID on your Mac.
- Two-factor authentication must be turned on for your Apple ID.
- You must not have set up a recovery contact for your Apple ID. If you have, you can change or remove the existing recovery contact but not add another one.
- The person you want to choose as a recovery contact must be 13.
- You must choose someone willing and able to help you recover your account if you ever need to. Choosing someone you trust and who will be available to help you if needed is important.
- You must have the person’s contact information, such as their email address or phone number, readily available to enter into the account recovery contact setup process.
After you have completed these steps, your recovery contact will be set up and ready to assist you if you ever need to recover your account. Choosing someone you trust and who will be available to help you if needed is important.
What to do to set recovery contact for Apple ID on Mac?
To set up a recovery contact for your Apple ID on Mac, follow these steps:
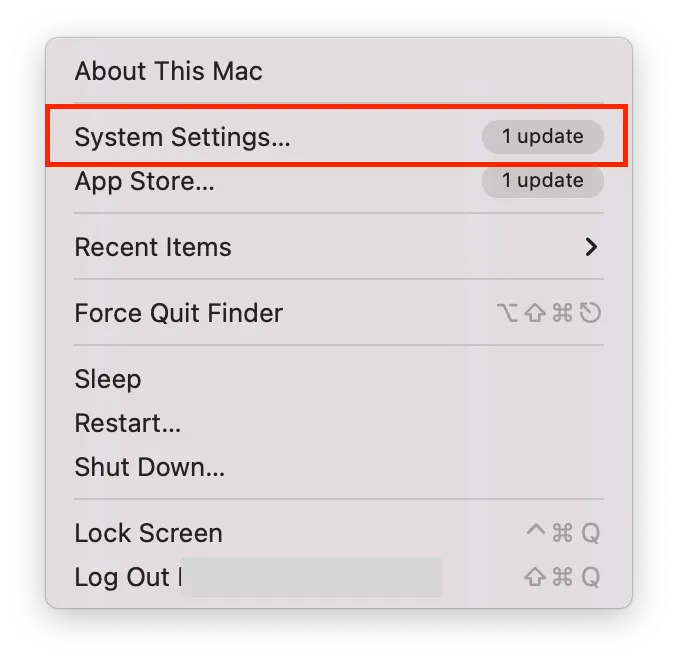
- Click on the Apple menu in the upper left corner of the screen and select System Settings.

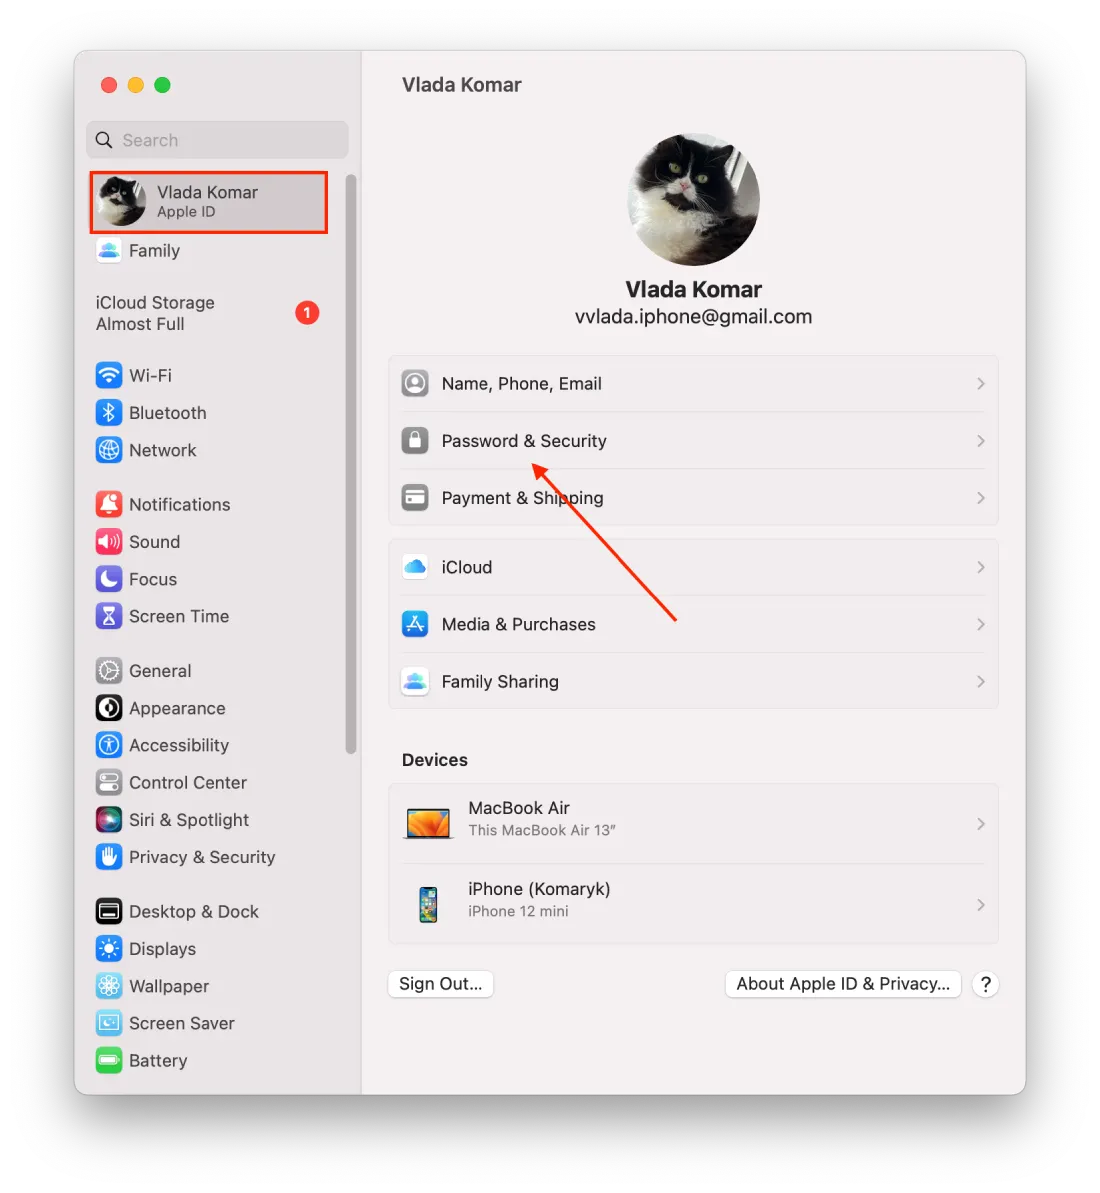
- Click on Apple ID.
- Click on Password & Security.
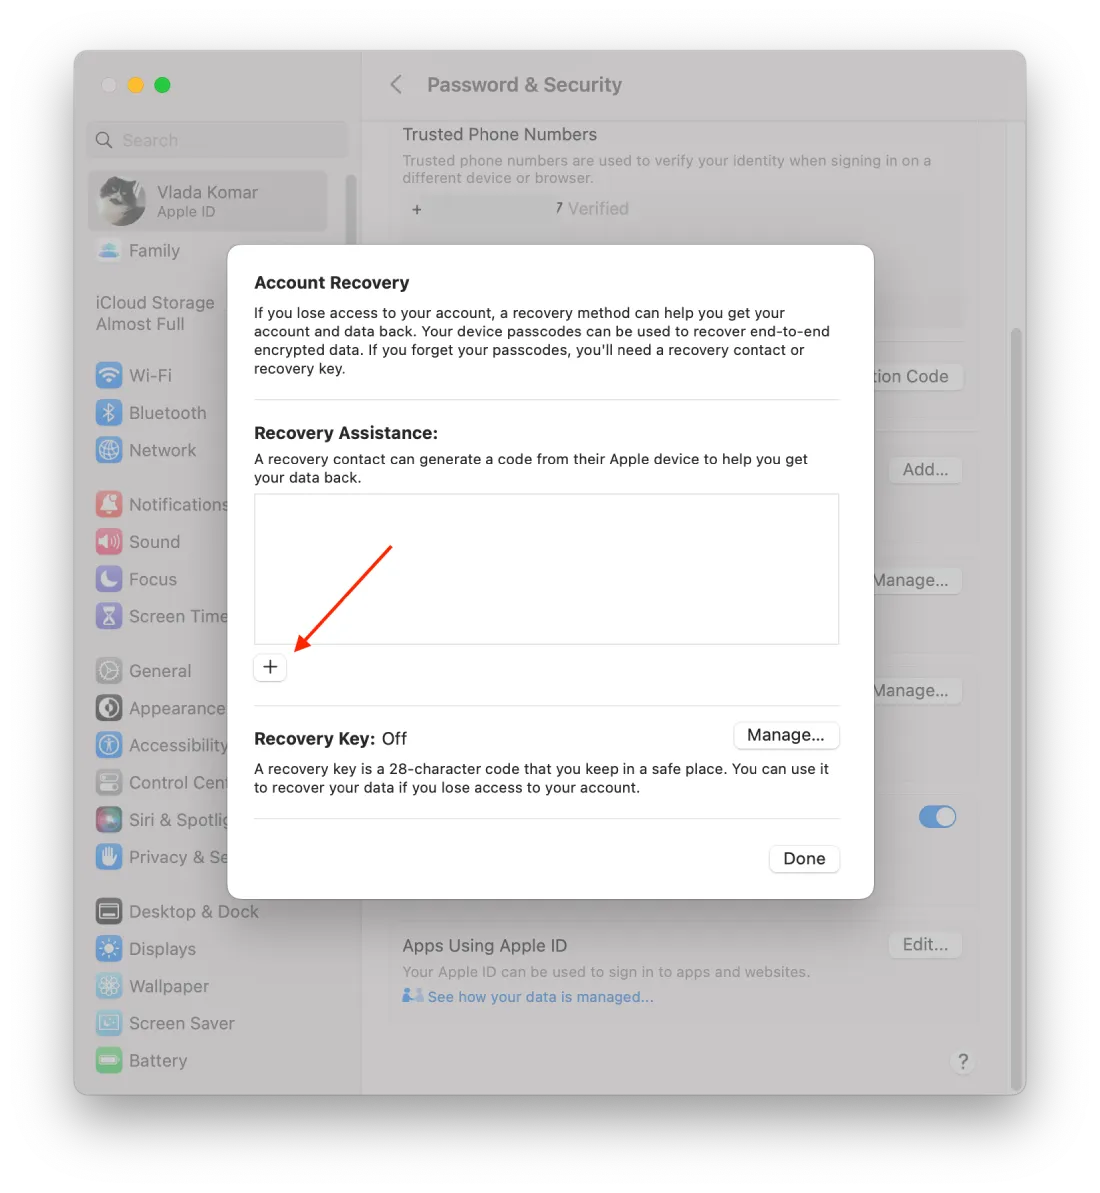
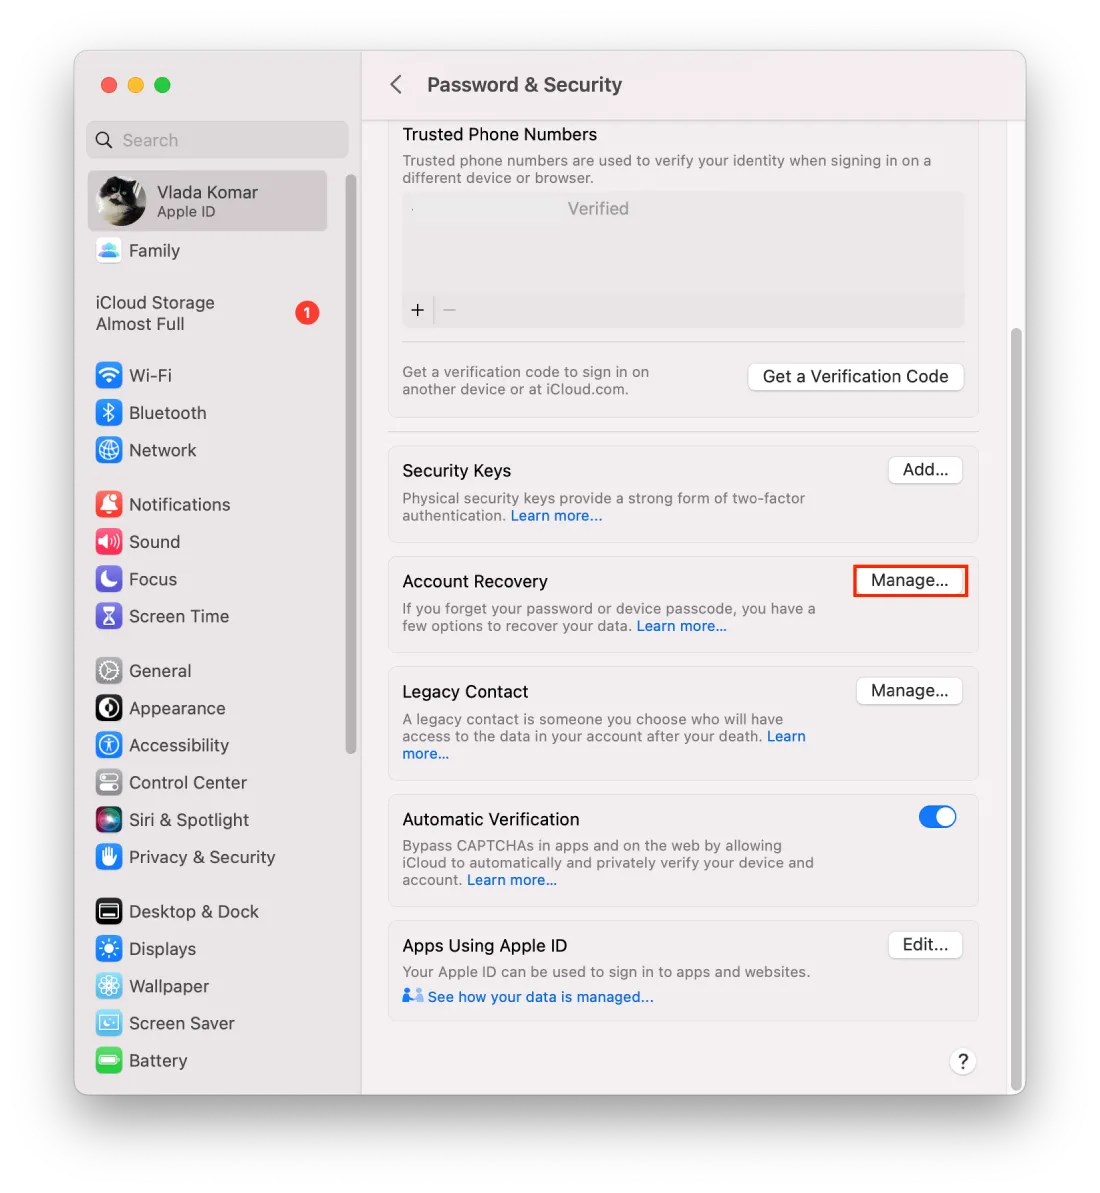
- Scroll to the Account Recovery section and click “Manage.”

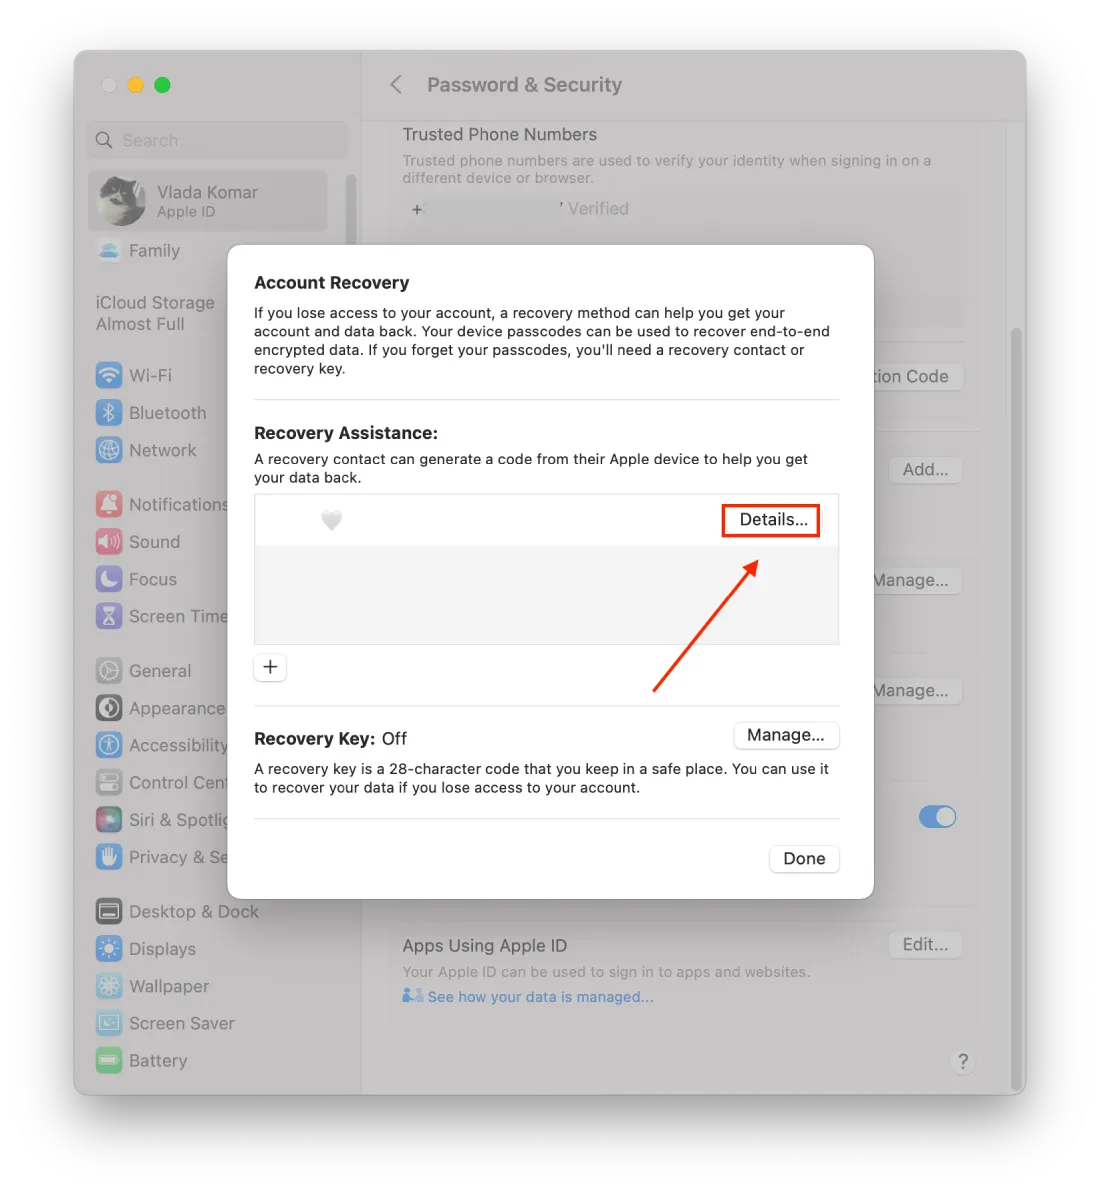
- Click on the “+” icon.
- In the new window, click on “Add Recovery Contact.”
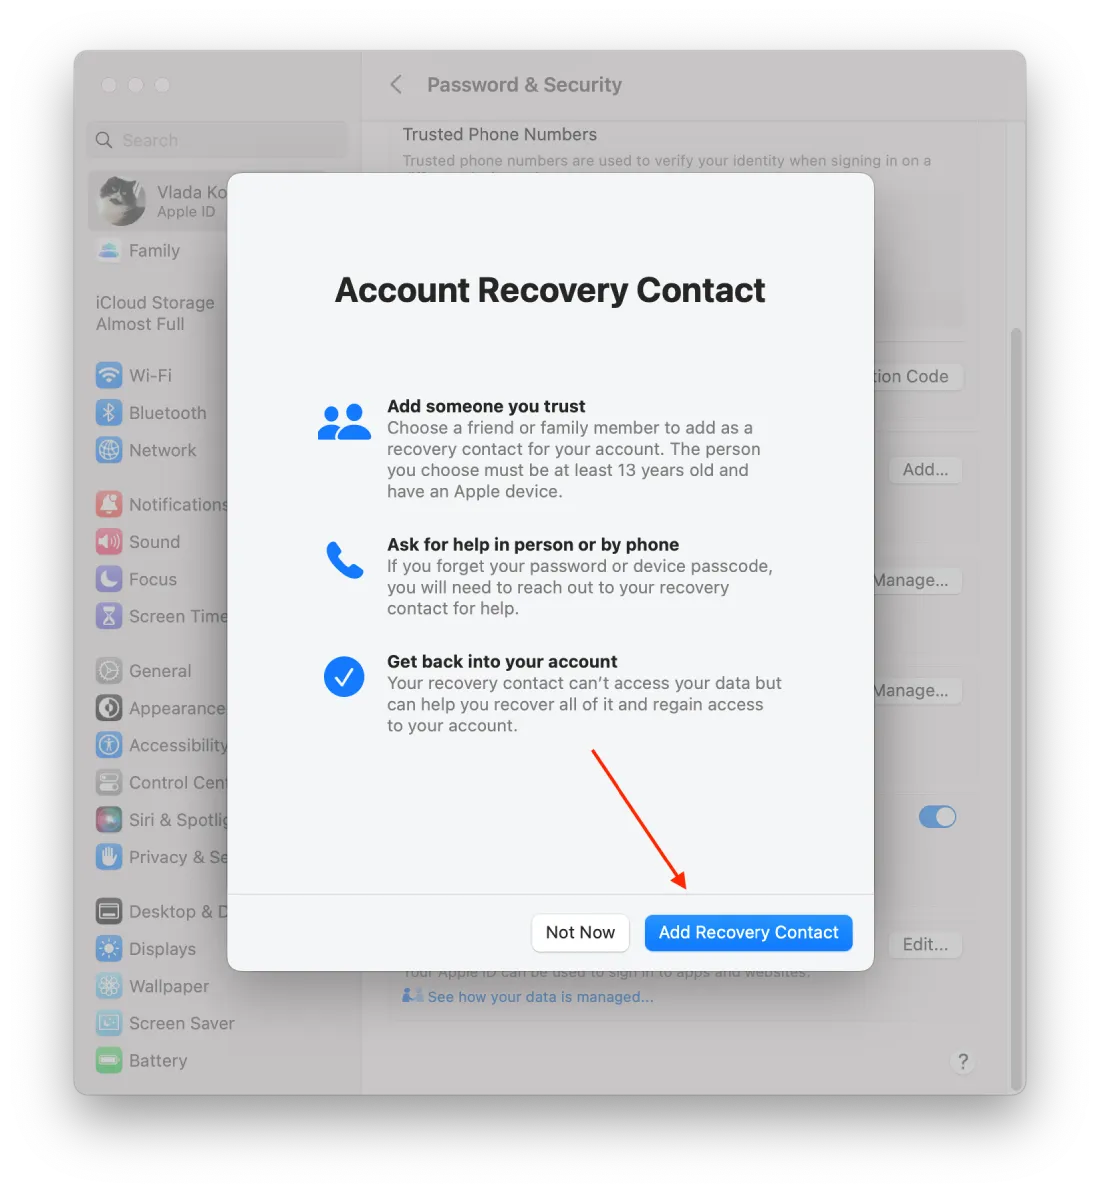
- Then select who you want to add.
- Choose how you want to notify the person that they have been added as your recovery contact. And change the text of the message as needed. That way, the person will know they have been added as your recovery contact.
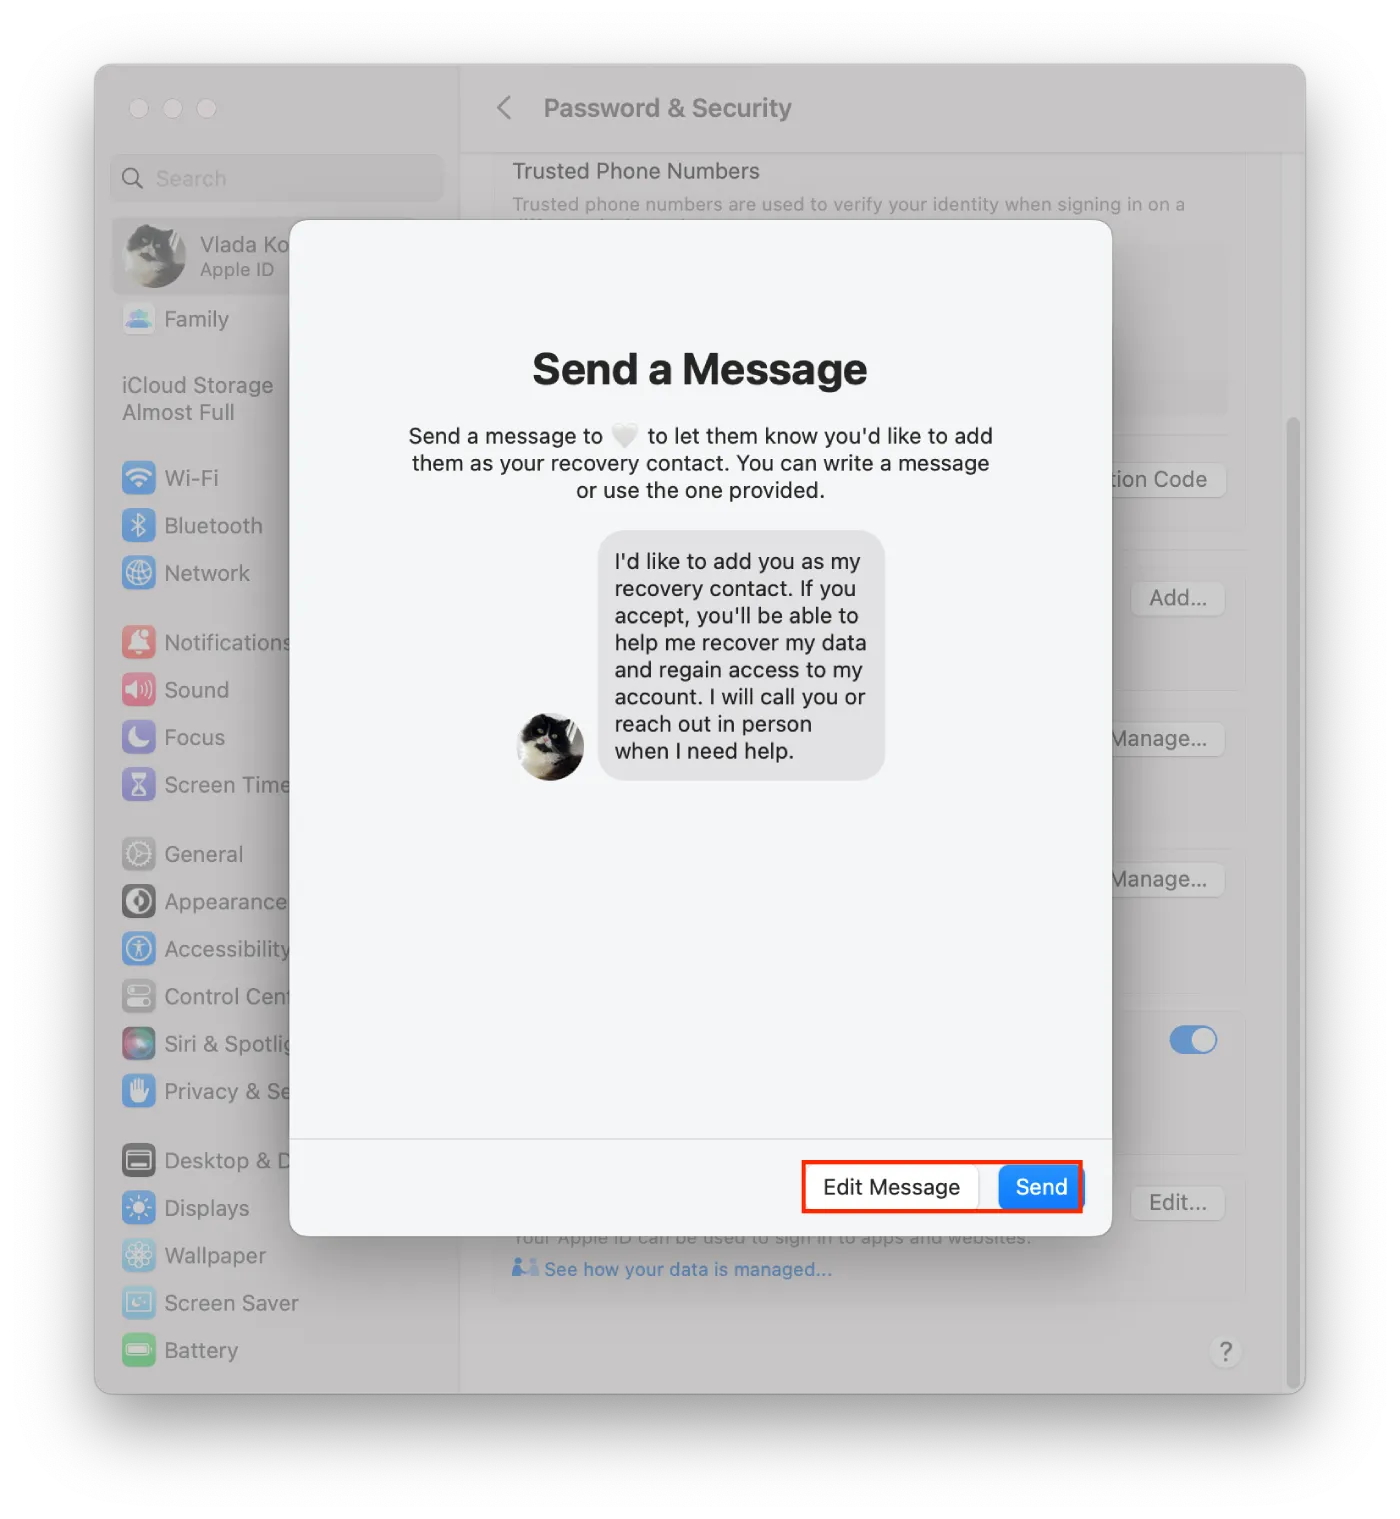
The person you added as your recovery contact will receive a message with the information you provided. Once they verify their information, they will be added as your recovery contact. You will then receive a notification on one of your devices.
How to delete a recovery contact for Apple ID on a Mac?
To delete a recovery contact for your Apple ID on a Mac, follow these steps:
- Click on the Apple menu in the upper left corner of the screen and select System Settings.
- Click on Apple ID.
- Tap on Password & Security.

- Scroll to the Account Recovery section and click “Manage.”
- Then click on “Details” next to the contact.
- In the new window, select “Remove contact.”
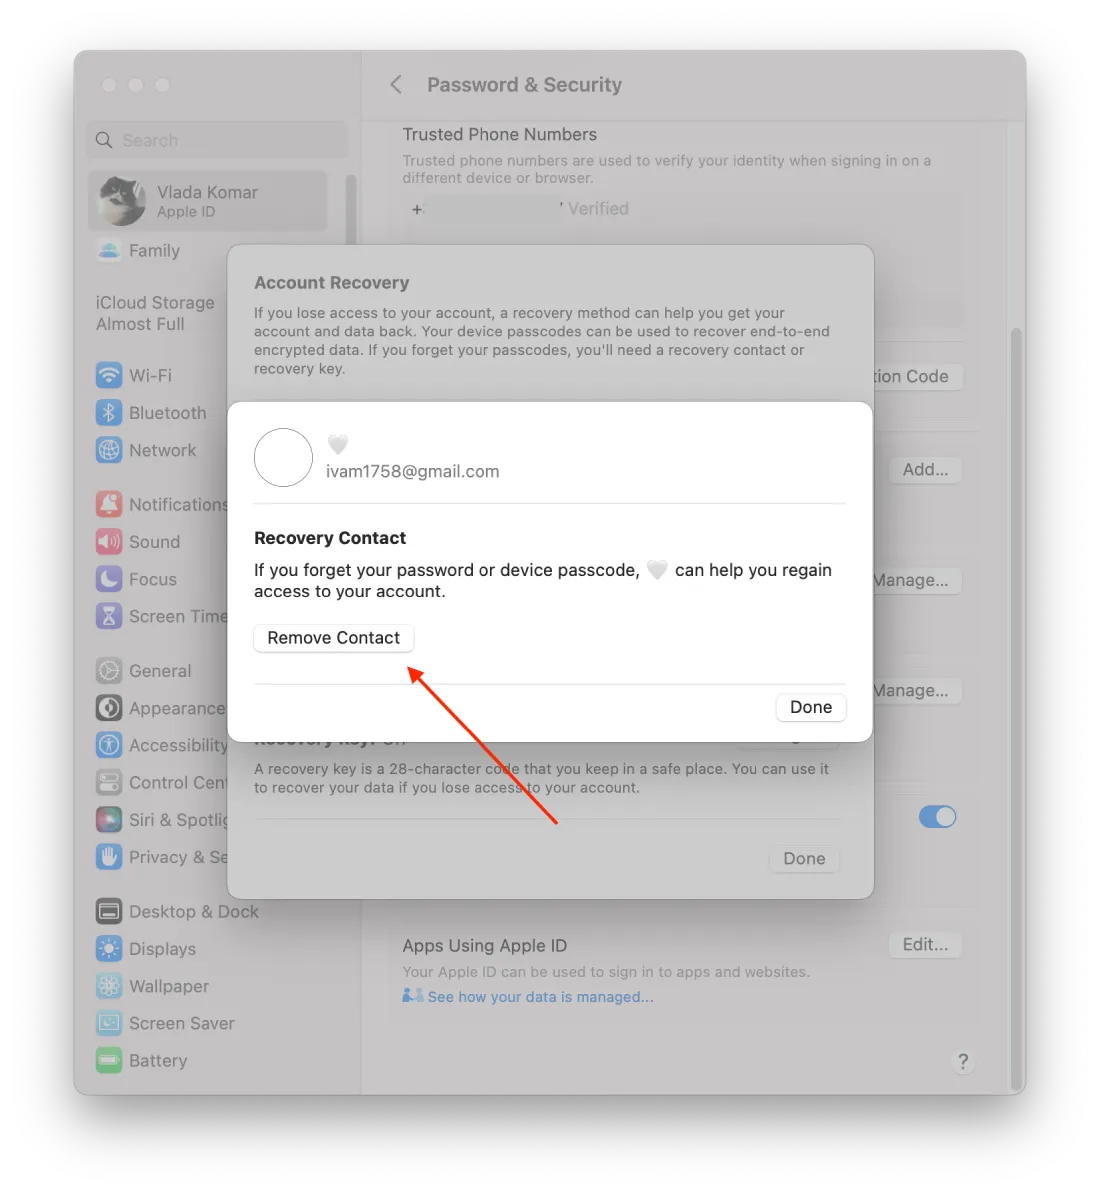
- Then you need to confirm your actions and enter your Mac password.
Once you have completed these steps, the selected contact will be removed from your recovery contacts. If you ever need to add a new recovery contact, you can follow the steps to set up a new one. It is important to have at least one trusted recovery contact for your Apple ID to help you recover your account if needed.


