

If you have a question about how to see your saved cards on your Mac, don’t worry – I’ll help you figure it out. In this article, I’ll tell you how to easily see a list of saved cards in Safari or ApplePay. If your list of saved cards has become confusing or outdated, follow the next steps.
You will be able to open the list of cards in Safari, then delete some of them and add new ones. You can do the same with your saved cards under ApplePay.
How to view your saved credit card numbers in Safari for Mac?
When you save credit cards in Safari, the browser keeps them safe on your Mac. Your data is encrypted, that is, converted into a special code so that it cannot be read without a special key. Encrypted data is saved locally on your computer, not sent to the Internet or the cloud.
It is important to note that Safari secures the saved cards. The card requires your password or biometric authentication before you can use the stored data. This helps prevent unauthorized access to your credit cards and keeps them secure.
To view your saved credit card numbers in Safari for Mac, you can follow these steps:
- Open Safari on your Mac.
- In the top menu bar, click on “Safari” and then select “Settings” from the drop-down menu. You can also use the keyboard shortcut Command+ comma (,) to open Safari Settings.
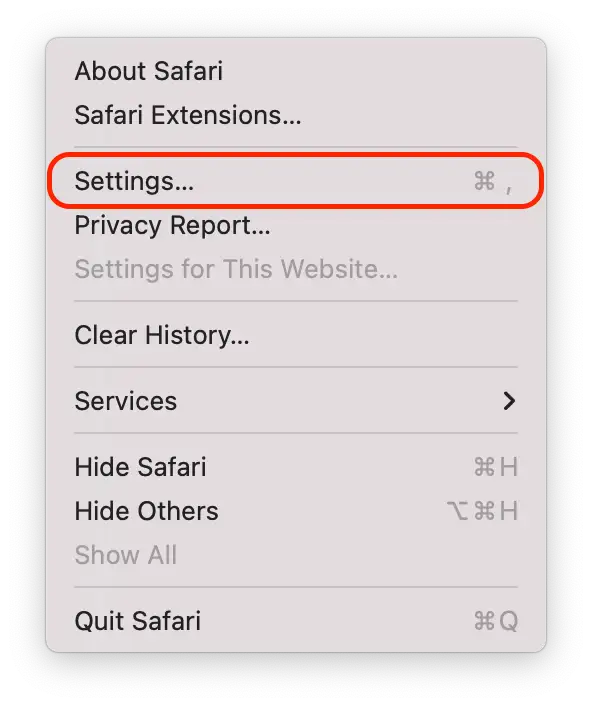
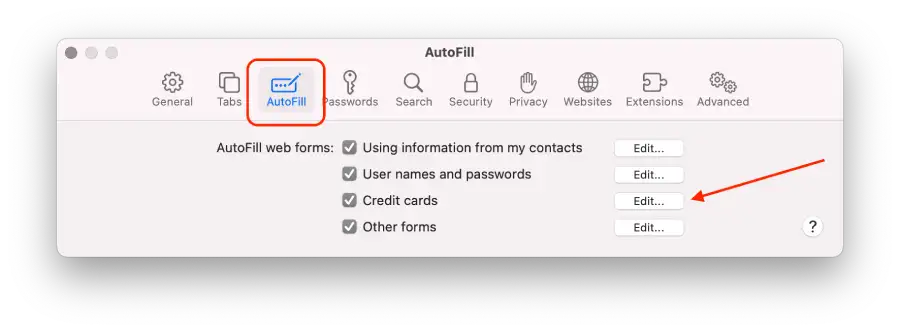
- Select “Autofill” tab.
- Within the Autofill tab, click on the “Edit” button next to “Credit cards”.
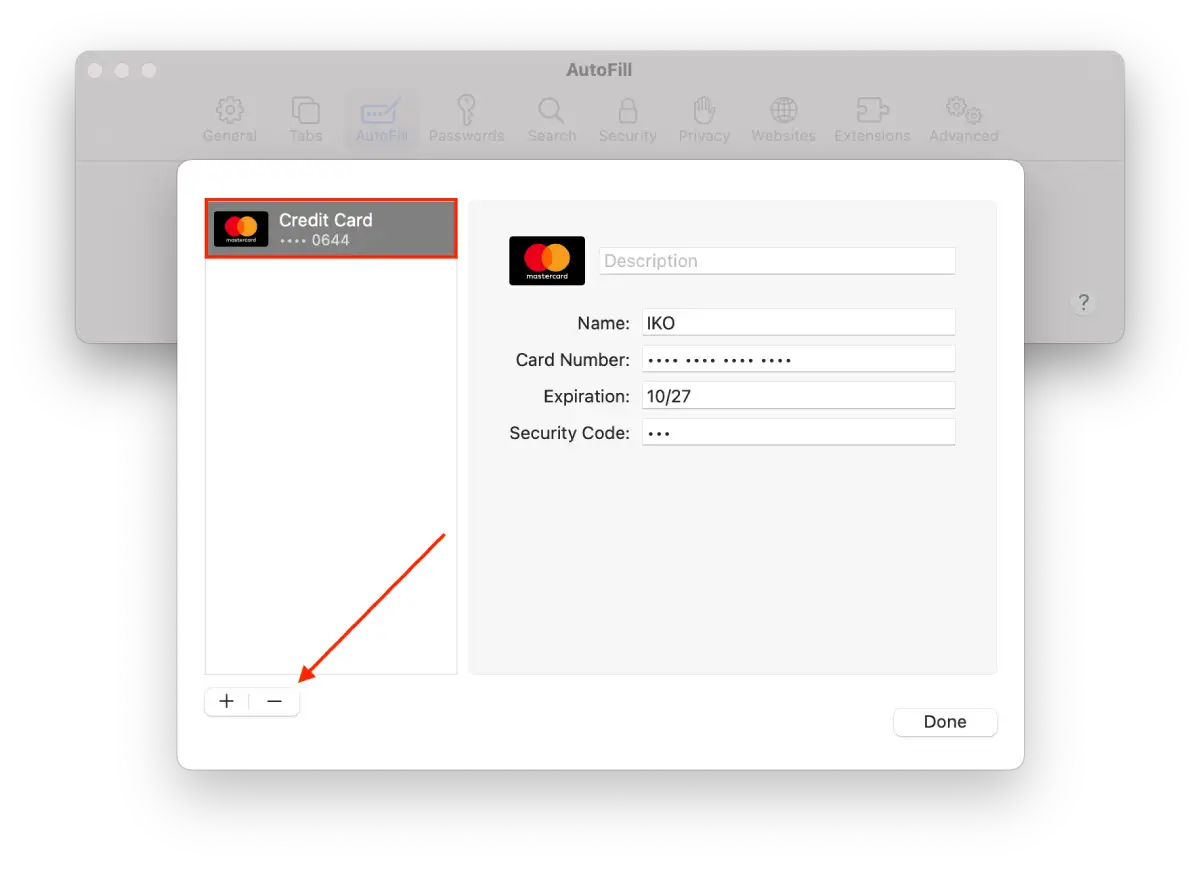
- You can view the credit card numbers partially masked for security reasons. To view the complete card number, click on the field.

After these steps, you can manage your saved cards in Safari.
How to add or remove your saved credit card numbers in Safari for Mac?
To add or remove saved credit card numbers in Safari for Mac, you can follow these steps:
- Open Safari on your Mac.
- In the top menu bar, click on “Safari” and then select “Settings” from the drop-down menu. You can also use the keyboard shortcut Command+ comma (,) to open Safari Settings.

- Select “Autofill” tab.
- Within the Autofill tab, click on the “Edit” button next to “Credit cards”.

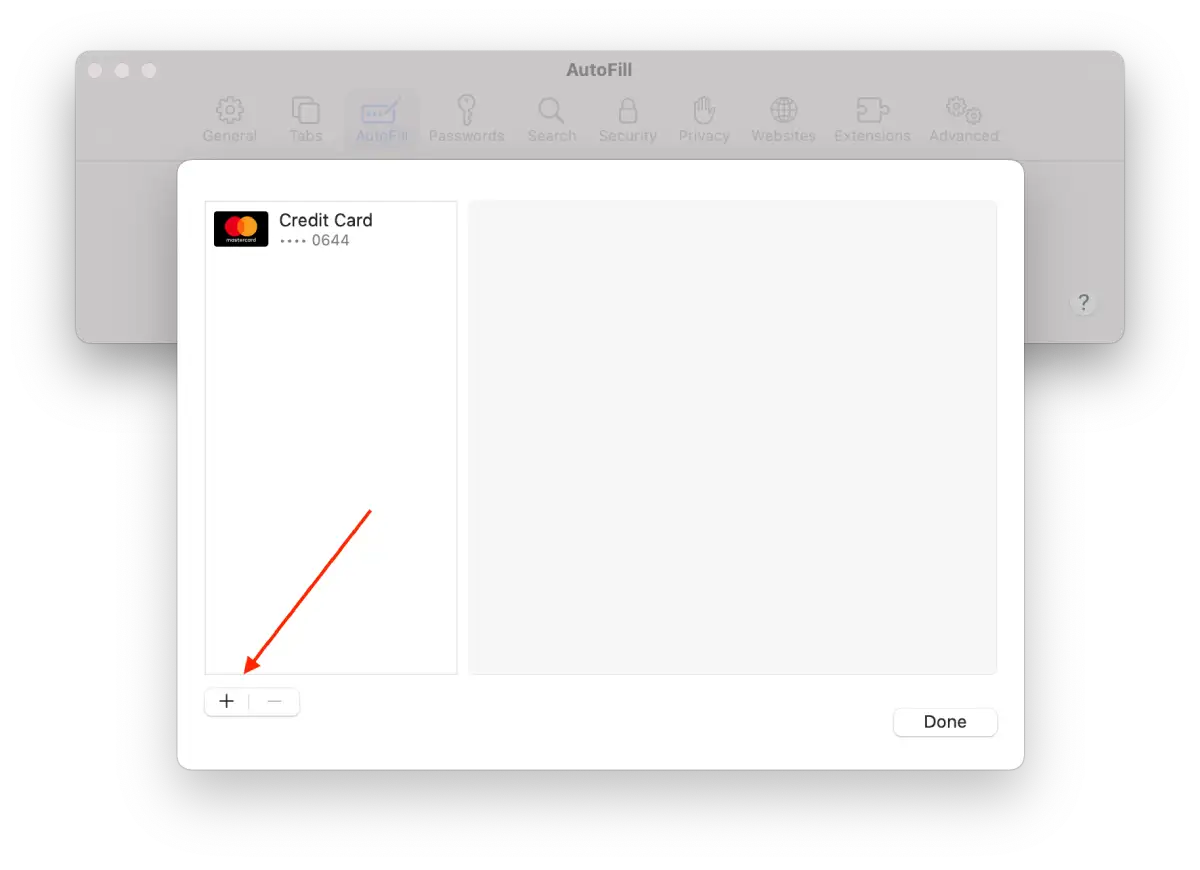
- A new window will appear, showing a list of your saved credit cards.
- To delete a card, select the desired card and press “–.”
- To add a new one, press “+” and enter the data.
After performing the following steps, you can easily add or delete stored credit card numbers in Safari for Mac.
How to change the default card for Apple Pay on your Mac?
The default card for Apple Pay on your Mac is the card that will automatically be used for payment when you make purchases through Apple Pay on your computer.
So setting a default card for Apple Pay on your Mac makes the payment process more convenient and faster because you don’t have to choose a card from the list each time you make a purchase. You simply make your purchases, and the card you choose will be used automatically to pay.
If you need to change the default card for Apple Pay on your Mac, follow these steps:
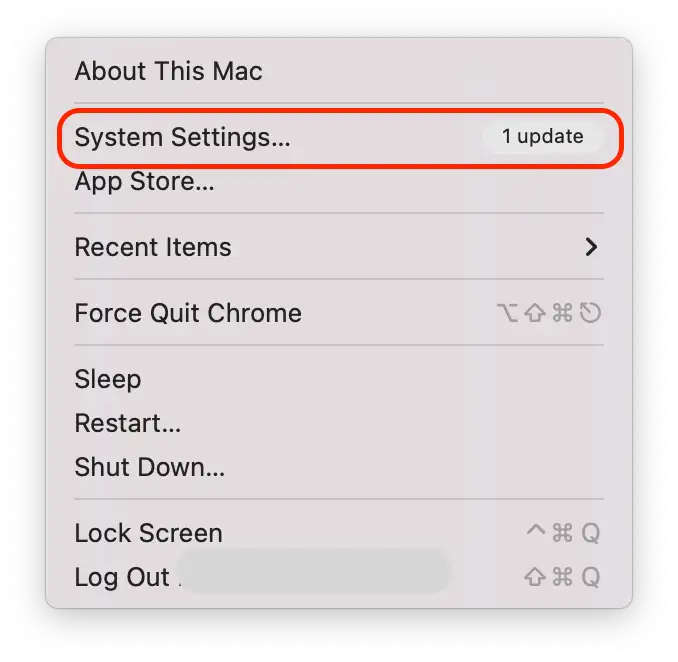
- Click on the Apple icon in the upper left corner.
- Then select System Settings.
- Then click on the “Wallet & Apple Pay” icon.
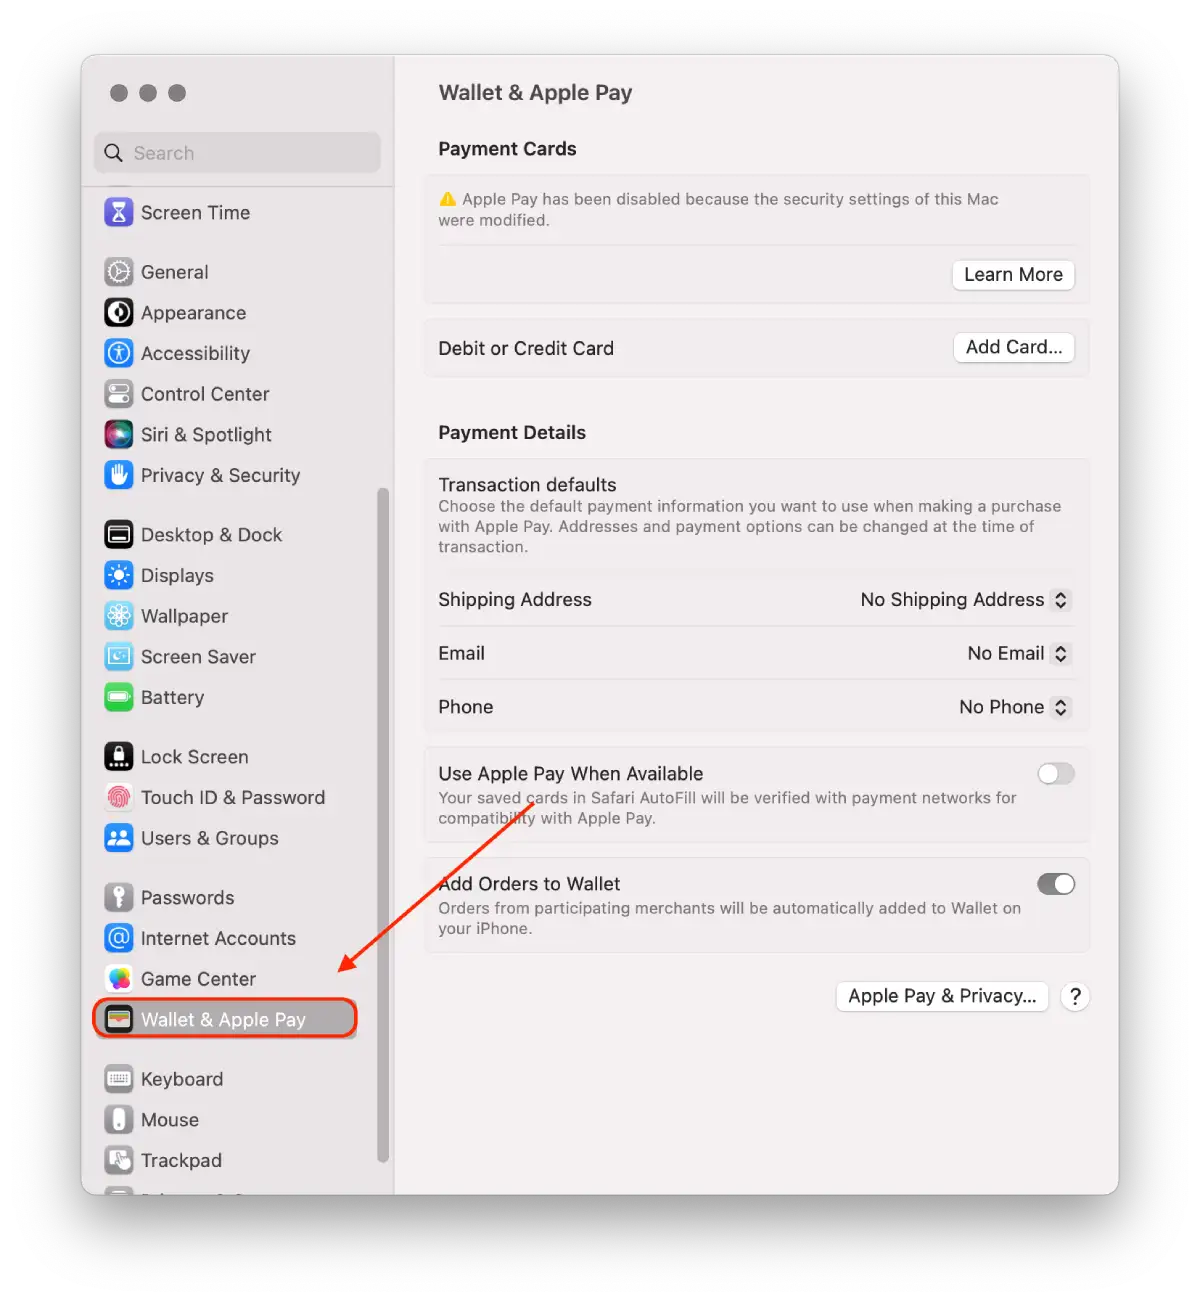
- In the Wallet & Apple Pay settings, you will see a list of your added payment cards. Find the card that you want to set as the default.
- Click and drag the desired card to the top of the list. The card at the top will become the default card for Apple Pay on your Mac.
After following these steps, your selected card will be set as the default for Apple Pay on your Mac, and it will be used automatically for transactions unless you specify otherwise during the payment process.
How to remove a payment card on your Mac?
To remove a payment card from Apple Pay on your Mac, you can follow these steps:
- Click on the Apple icon in the upper left corner.
- Then select System Settings.
- Then click on the “Wallet & Apple Pay” icon.

- Find the card that you want to remove.
- Click on the minus (-) button to remove the selected card from Apple Pay on your Mac.
Please note that removing a payment card from Apple Pay on your Mac does not delete the card from your actual bank or financial institution. It simply removes it from the list of available payment options in Apple Pay.
What to do if your Mac is lost or stolen?
Here are some steps you can take if your Mac is lost or stolen:
- Report the loss or theft to local law enforcement
Officials might request the serial number of your computer. You can find this information on the original box or receipt you received when you purchased your Mac.
- Use the “Find My” service
If your Mac is stolen or lost, you can use Find My to try to track its location and take appropriate action. Here’s what to do:
- On another device, such as an iPhone or iPad, open the “Find My” app.
- Then select the “Devices” section and tap on the lost or missing Mac.
- Depending on the situation, you have several options:
- If you think your Mac is nearby and safe, you can use the “Play Sound” feature to make the device beep. This will make it easier for you to find it indoors.
- If you’re concerned that your Mac might be stolen or access is not secure, you can turn on “Mark as lost” mode. This will lock your device with a password and display a message on it with your contact information so that an honest resourceful person can return your Mac to you.
- If you have important data on your device and are concerned about its security, you can delete all content on your Mac using the “Erase” feature. This will erase all the data on the device, but it will also lock it so no one else has access to it.

- Change your passwords
If you’re concerned about the security of your personal information, change your Apple ID password to prevent anyone from accessing your iCloud data or using other services from your missing device.
- Remove your lost or stolen Mac from your list of trusted devices
Remember, while you can take these actions to increase the chances of recovering your Mac or protecting your personal data, it’s always a good idea to regularly backup your computer and keep your personal information secure.


