

If you use Gmail, you can take advantage of the ability to schedule an email to reach the recipient at a certain time. And the best part about this is that you can schedule emails from both the Gmail mobile app and your browser.
If you prefer to use the browser-based version of Gmail, you can easily schedule your email to be sent while changing the delivery time. The browser version gives you the flexibility to edit the sending time, allowing you to make the necessary changes to your scheduled emails.
The Gmail mobile app only allows you to cancel scheduled emails and create new ones.
How to send an email later in Gmail using a browser?
To schedule an email to be sent later in Gmail using a browser, you can use the “Schedule Send” feature. So follow these steps:
- Open your web browser and go to the Gmail website.
- Sign in to your Gmail account by entering your email address and password.
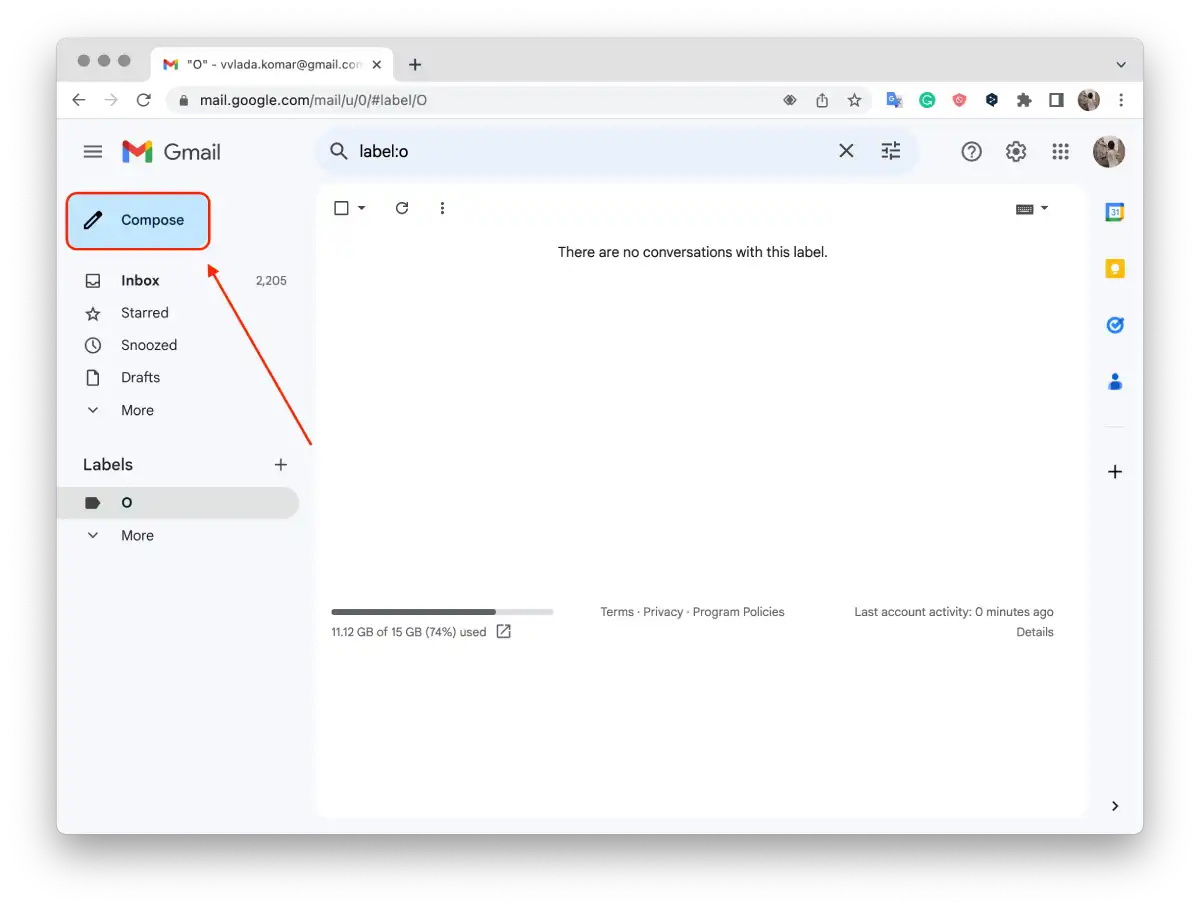
- Click on the “Compose” button to start composing a new email.
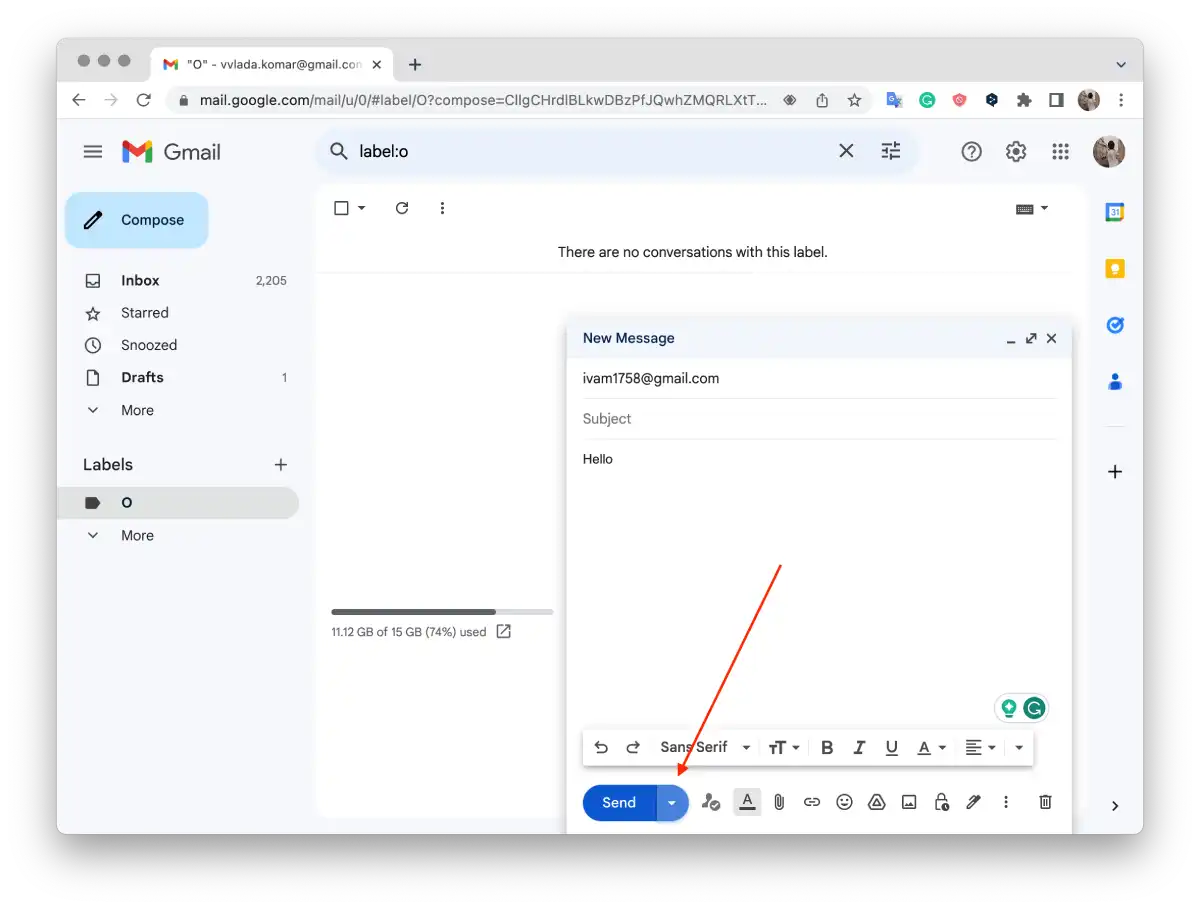
- Enter the recipient’s email address, subject, and compose the content of your email as you normally would.
- Once you have finished writing your email, click on the small arrow icon next to it instead of clicking the “Send” button.
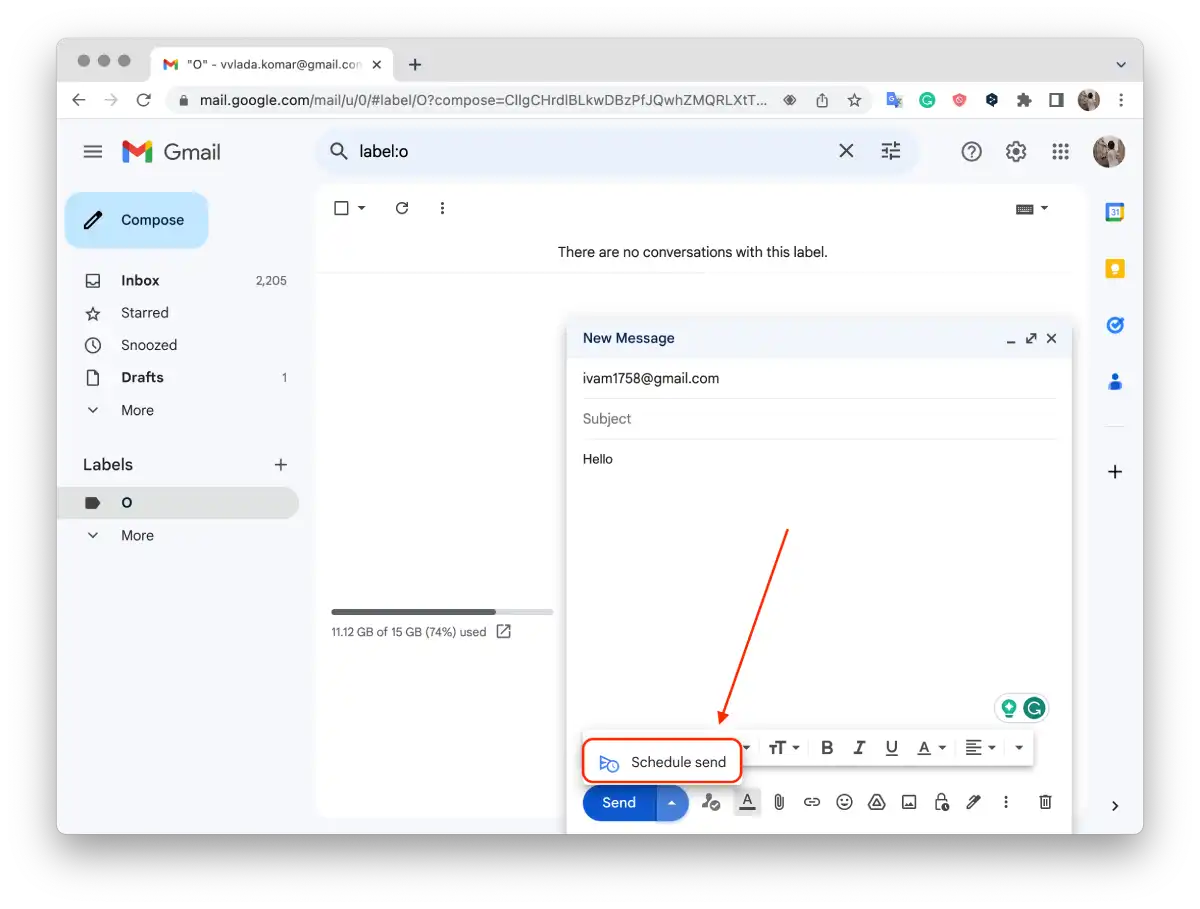
- In the drop-down menu, you will see an option called “Schedule Send.” Click on it.
- A list of suggested sending times will appear, or you can select a specific date and time if you click “Select date and time“.
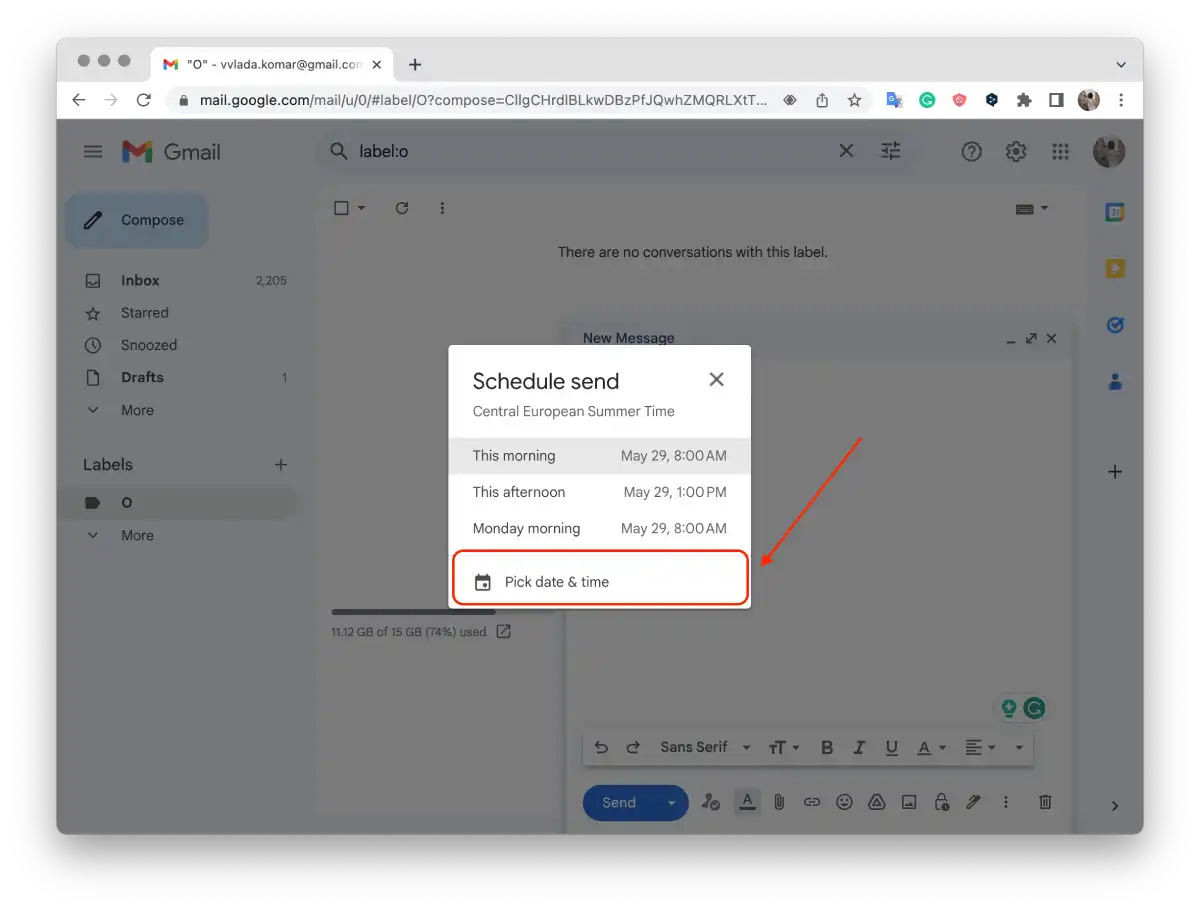
- Select the desired date and time when you want the email to be sent.
- After selecting the date and time, click on the “Schedule Send” button.
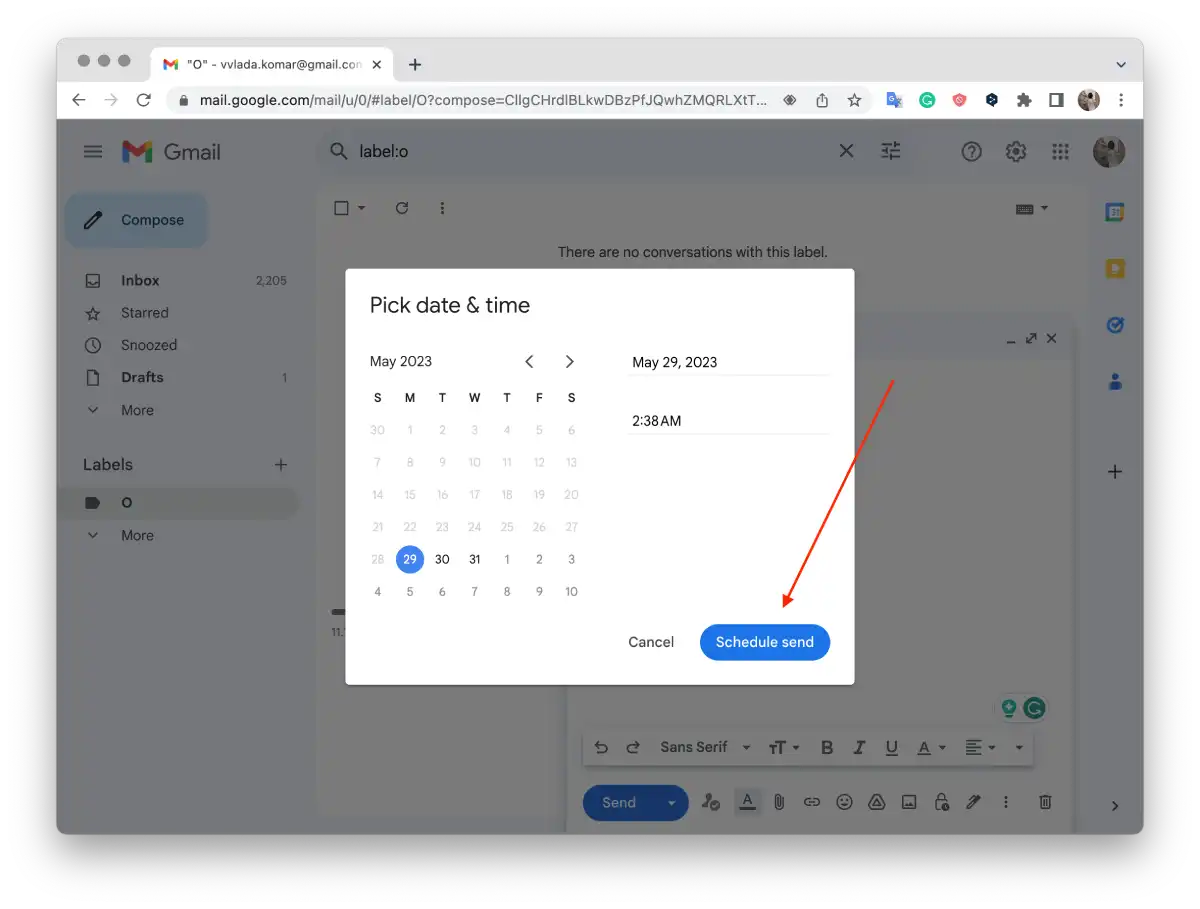
Your email will be scheduled and sent at the specified date and time.
How to send an email later in Gmail using the mobile app?
To send an email later in Gmail using the mobile app, you can use the “Send on Schedule” feature. Here’s how you can do it:
- Open the Gmail app on your mobile device.
- Tap the “Compose” button to start composing a new email.
- Enter the recipient’s email address, subject, and compose the content of your email as you normally would.
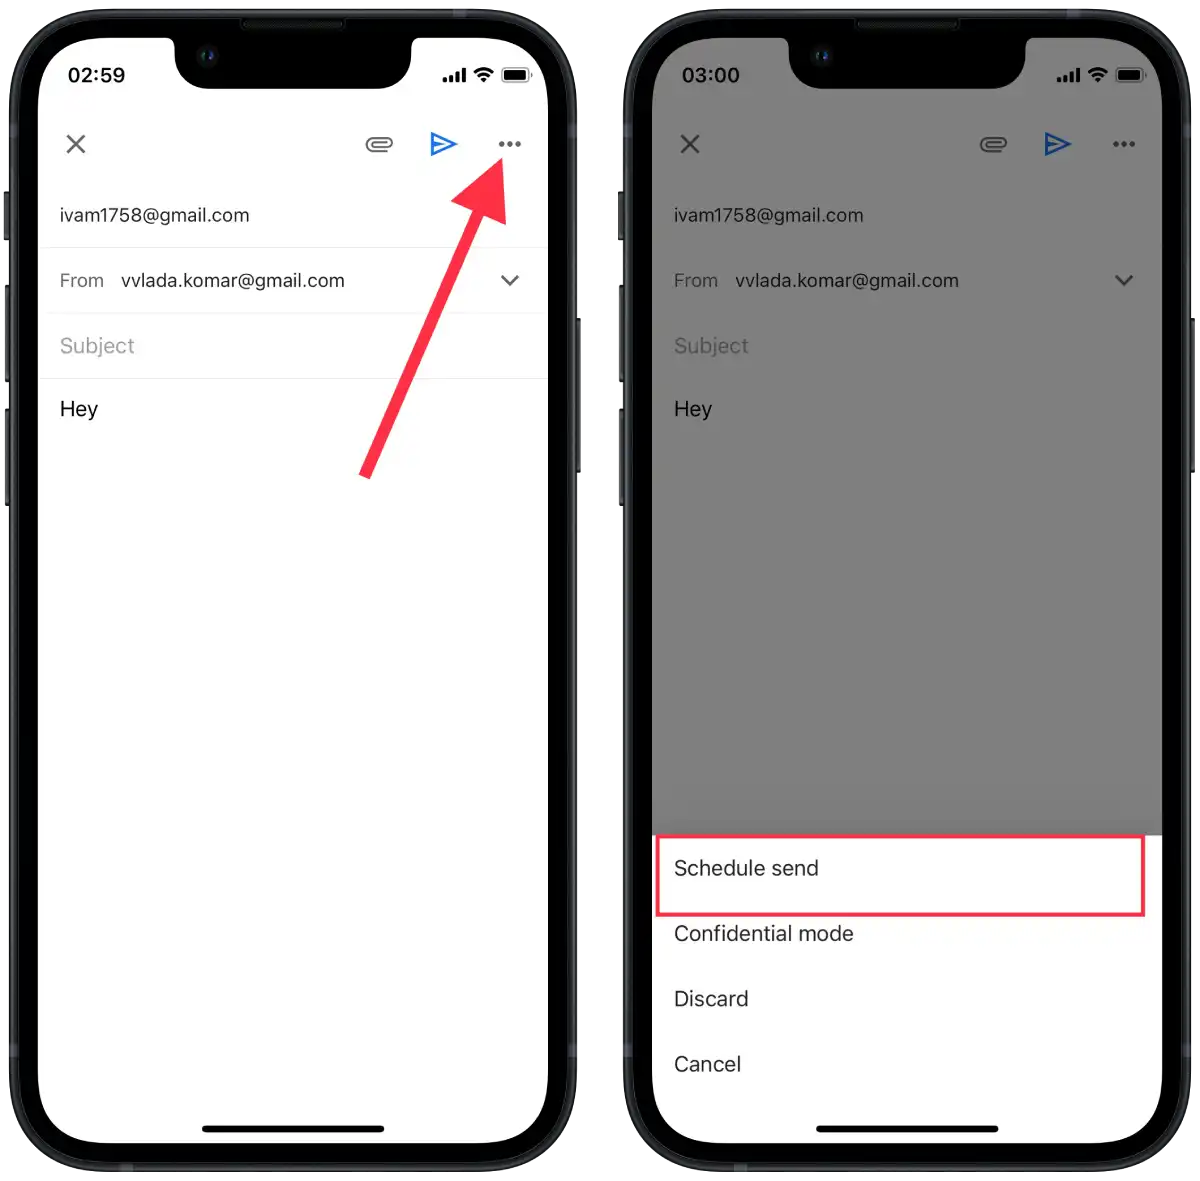
- Once you have finished composing your email, instead of tapping the “Send” button, look for the three-dot menu icon (vertical ellipsis) located in the top-right corner of the screen. Tap on it.
- In the menu that appears, scroll down and select “Schedule send.”
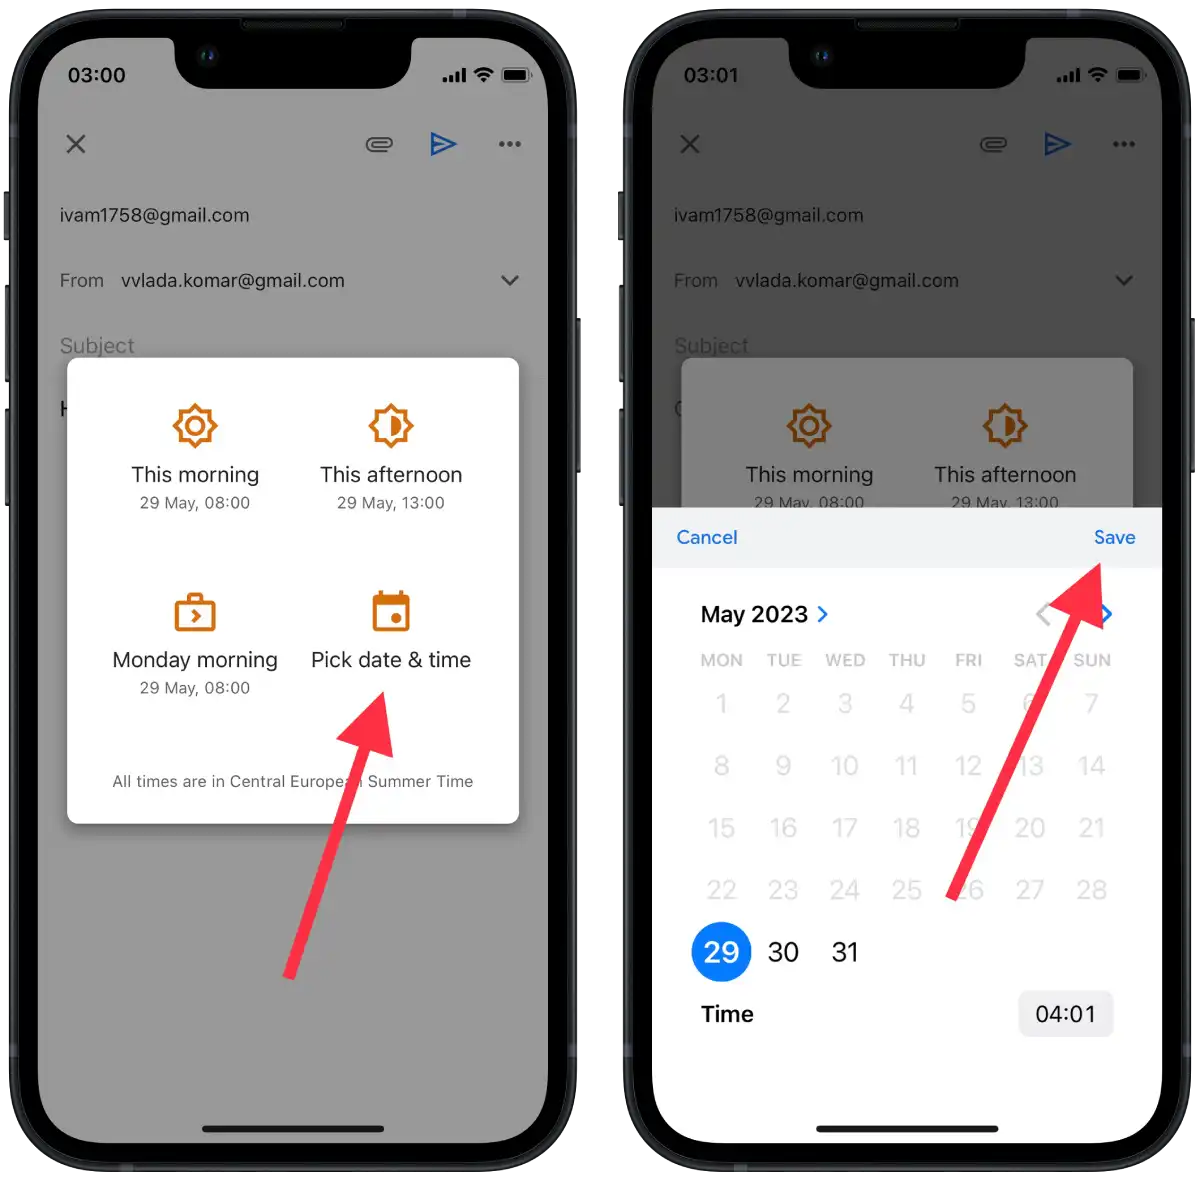
- You will see a list of suggested sending times or the option to “Pick date & time.” Choose the desired date and time for sending the email.
- Tap on the “Save” button.
Despite some differences, both the browser-based version of Gmail and the mobile app provide the ability to schedule the sending of emails, which allows you to conveniently manage the delivery time of your messages in the future.
How to view or change scheduled emails using a browser?
To view or change scheduled emails using a browser in Gmail, you can follow these steps:
- Open your web browser and go to the Gmail website.
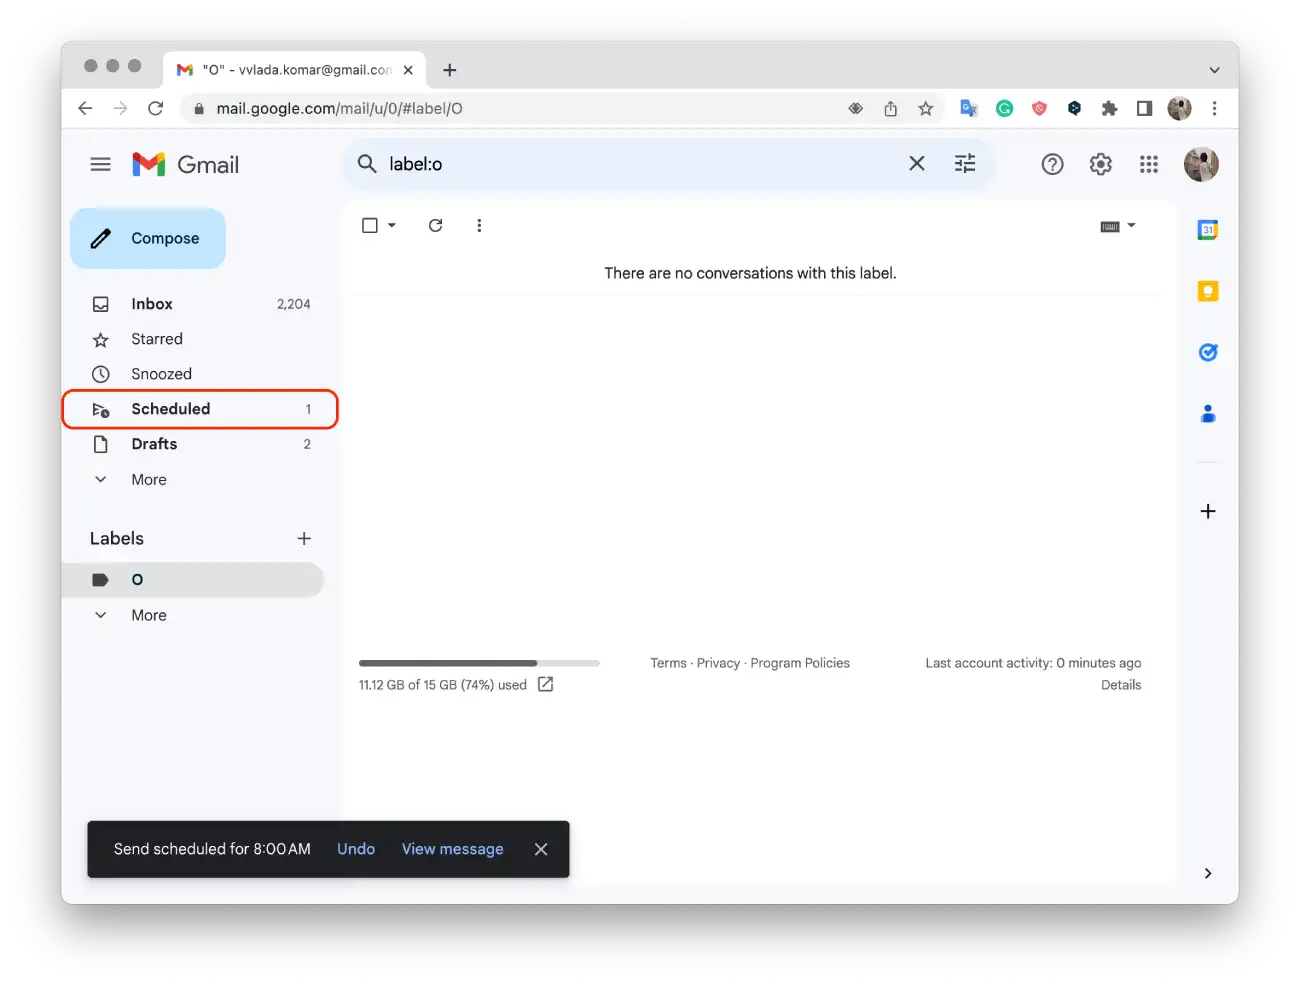
- In the left sidebar, click on the “Scheduled” label.

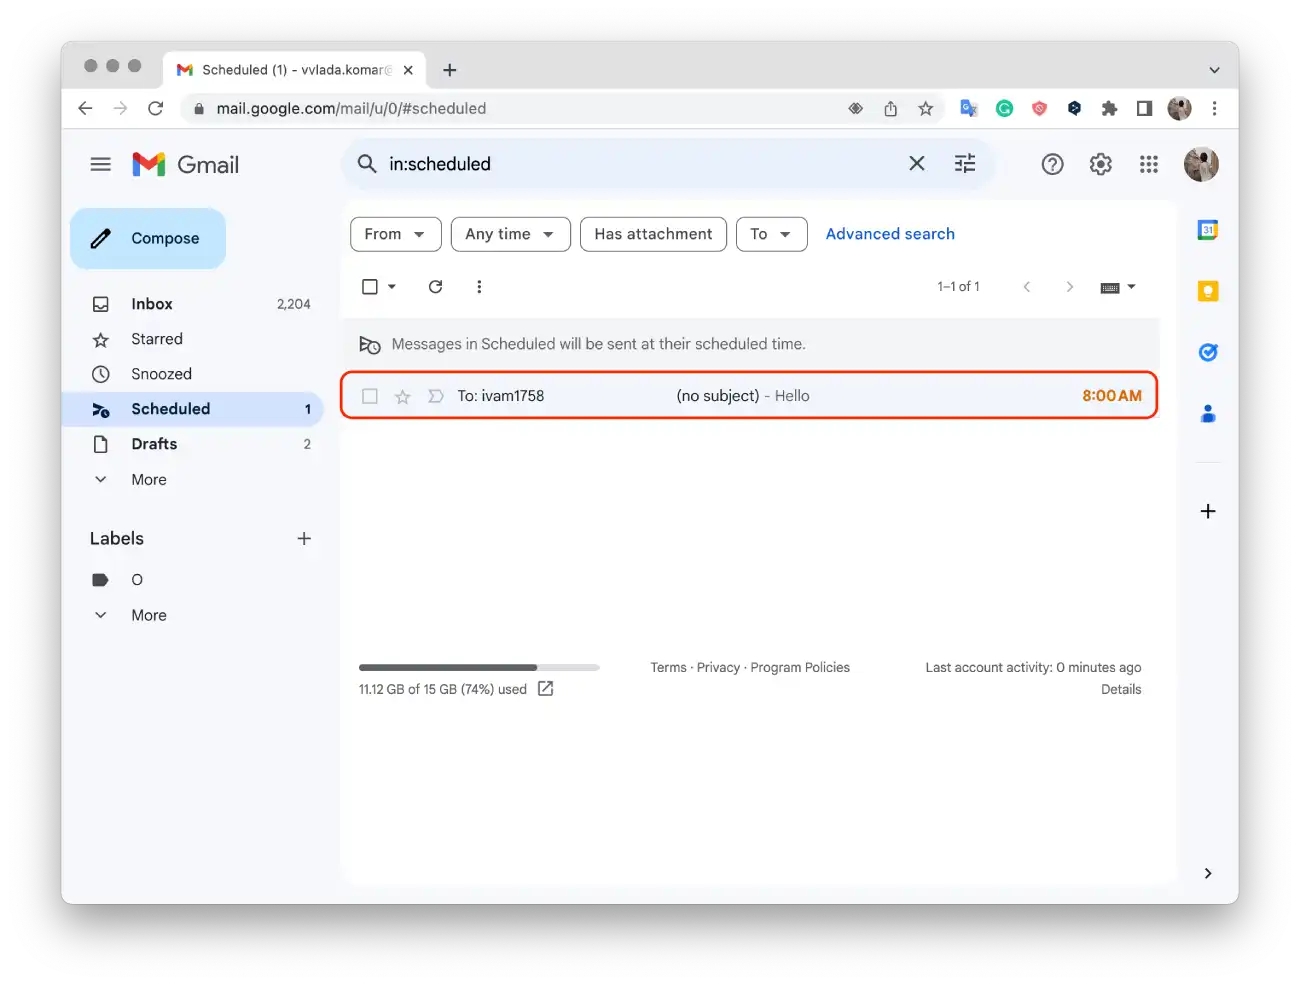
- You will see a list of all your scheduled emails.
- To view the letter, just click on the one you need from the list.
- To change the time, hover over the email from the list and click on the clock icon.
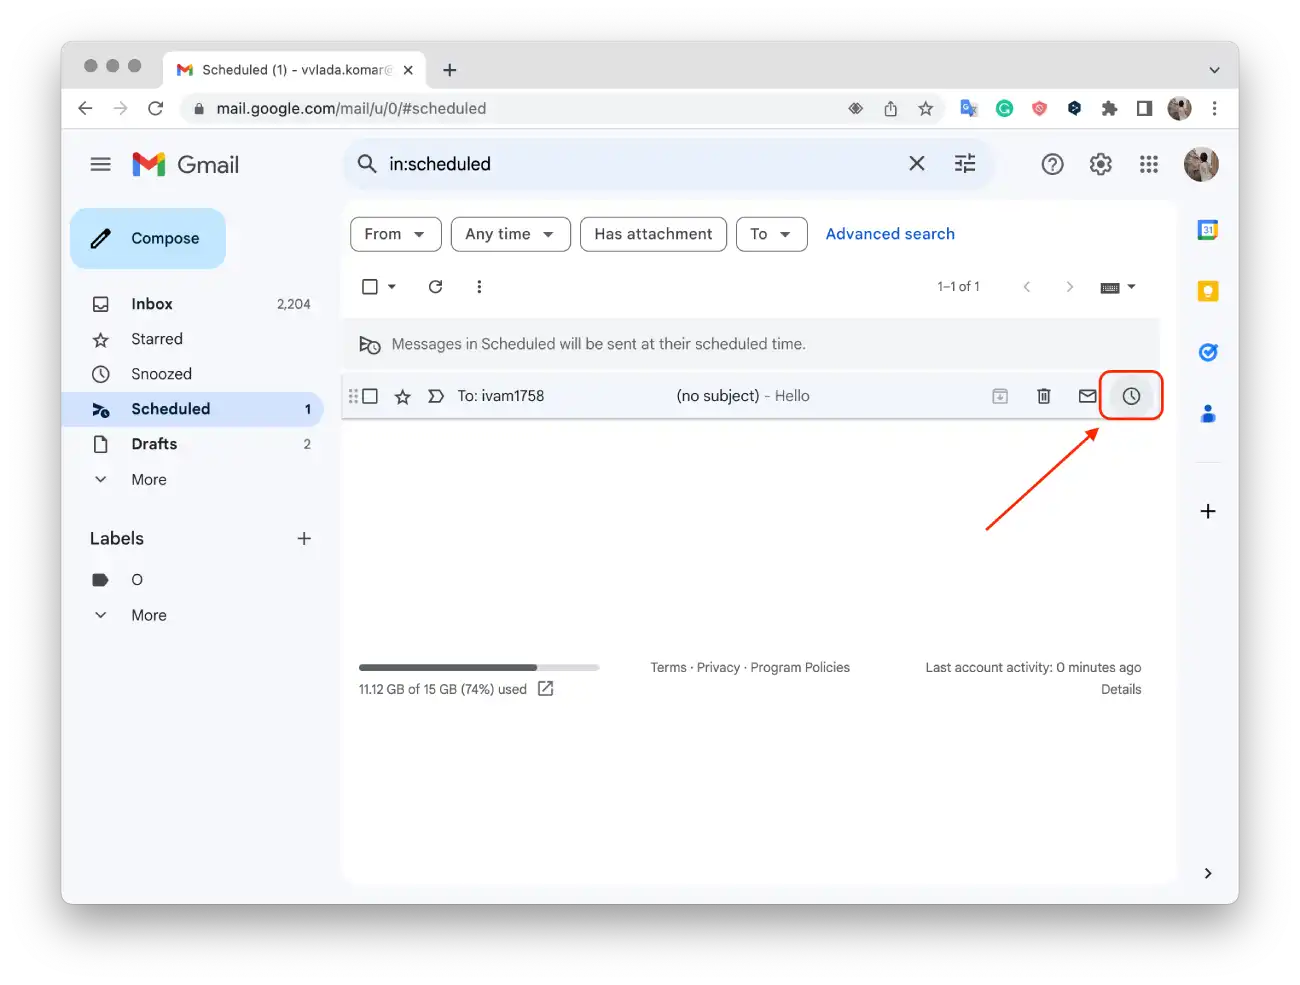
- Then, select “Pick date and time” from the list or another suitable suggested time.
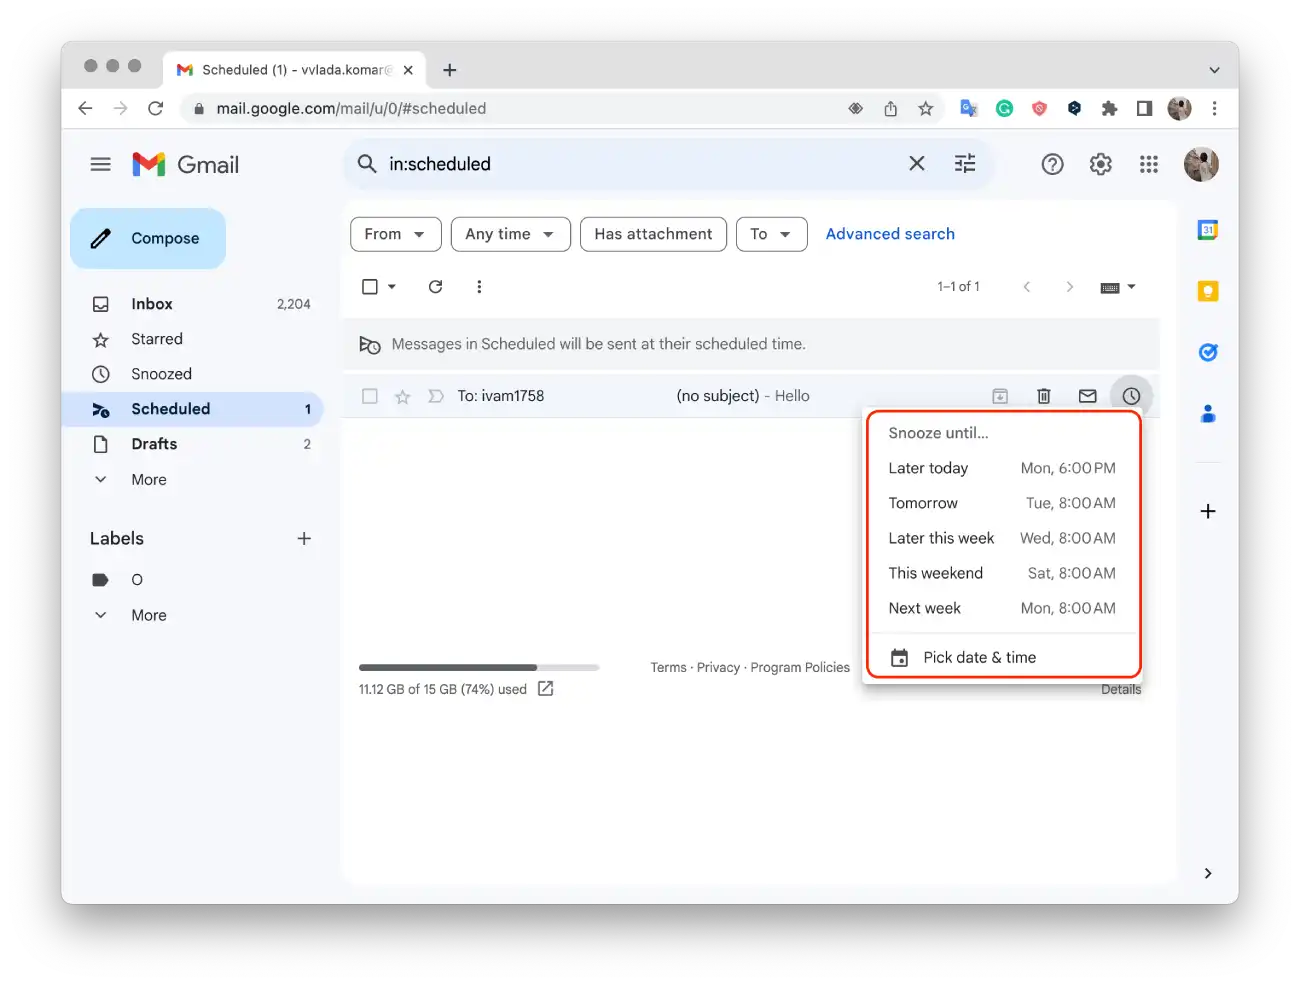
- Then click “Save“.
At this point, when you view scheduled emails in your Gmail browser, you cannot change the message text or the recipient. The ability to edit is limited to changing the sending time. If you need to make changes to the text or recipient, you must cancel the scheduled email.
Can you view or change scheduled emails using a mobile app?
The mobile app has no option to change the time to send a scheduled email.
At this stage of viewing scheduled emails in the Gmail browser, you cannot change the message text, time, or recipient. If you need to make changes to the text or the recipient, it is recommended that you cancel the scheduled email and then create a new one with the correct information.
How to cancel scheduled emails using a browser?
To cancel a scheduled email using a browser in Gmail, you can follow these steps:
- Open your web browser and go to the Gmail website.
- In the left sidebar, click on the “Scheduled” label.
- You will see a list of all your scheduled emails.
- Select the letter you want and click on it.
- Then click the “Cancel send” button.
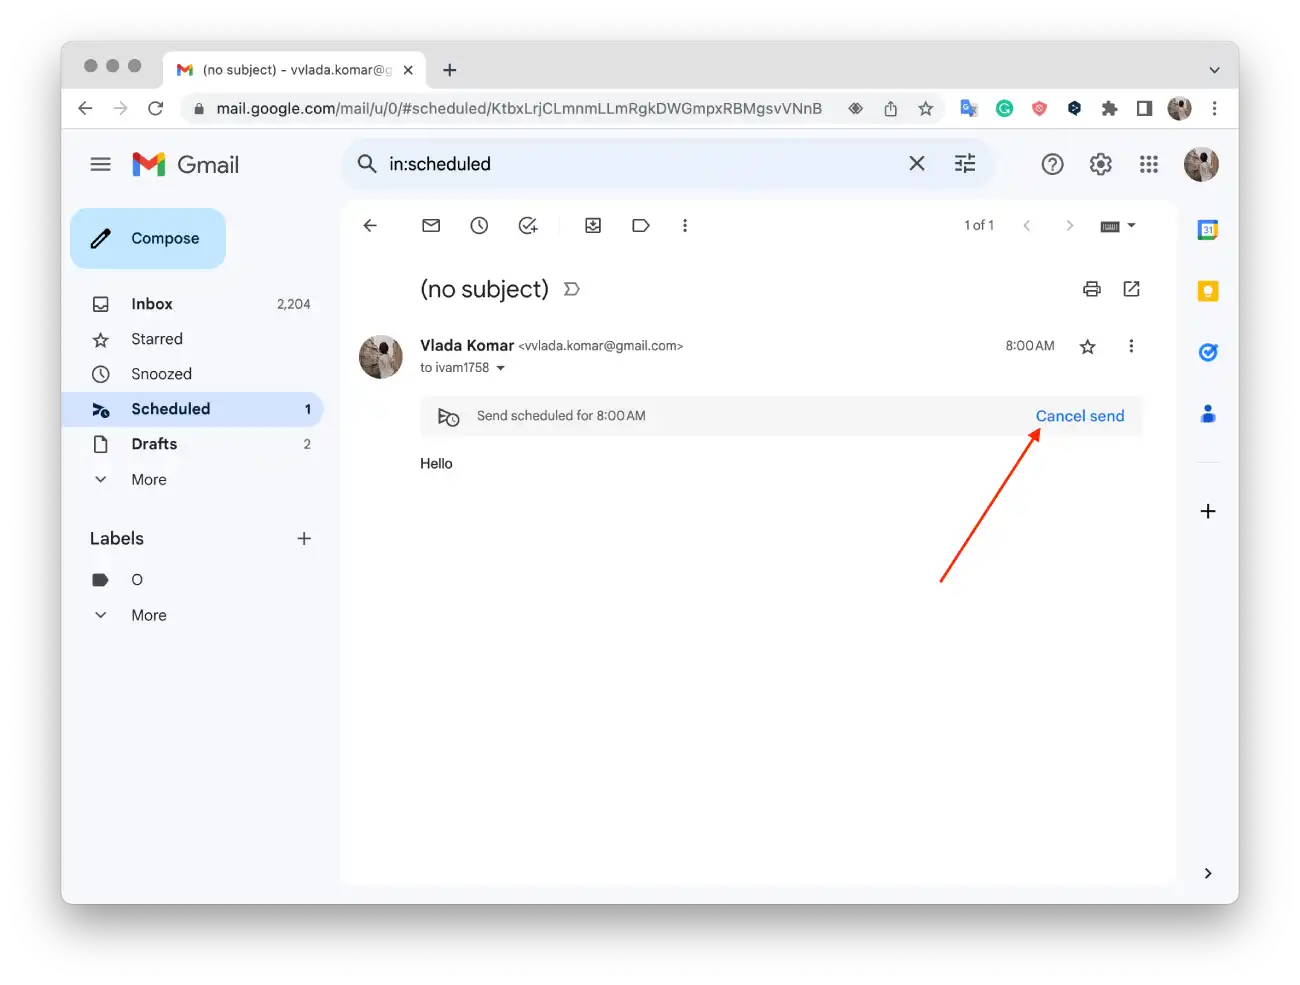
Following these steps, you can cancel a scheduled email using your browser in Gmail. The email will be removed from the scheduled list and not be sent at the previously scheduled time. But a window will open where you will see a draft of your email, and here you can make edits and send it again.
How to cancel scheduled emails using a mobile app?
To cancel a scheduled email using the Gmail mobile app, you can follow these steps:
- Open the Gmail app on your mobile device.
- Tap the three-line menu icon in the top-left corner of the screen to open the app’s sidebar.
- Scroll down and find the “Scheduled” label. Tap on it to view your scheduled emails.
- You will see a list of all your scheduled emails. Tap on the email that you want to cancel.
- The email will open in the composition window.
- Tap on the “Cancel send” option, and a confirmation prompt will appear.

This way, you can cancel a scheduled email using the Gmail mobile app. The email will be removed from the scheduled list and will not be sent at the previously scheduled time. Note that after canceling, you will need to create a new email if you still want to send the message to the recipient.


