

Many PC or notebook users may have encountered problems with a black screen, distortion of the picture, freezing. These problems usually occur after a long period of non-stop PC operation or after installing a new version of video card drivers. Restarting the video driver may help in such cases.
Each time you turn on Windows 11/10 your video drivers are restored, but there are situations when you don’t want to end the session. To do this, in Windows 11/10 you can manually restart your graphics driver. Let’s find out how to do this.
How to restart the graphics driver with a special keyboard shortcut
The fastest and easiest way to reload the graphics driver on your PC is to use the special combination Win+Ctrl+Shift+B on your keyboard. The combination can be used on Windows 11/10. After you press this combination there will be a short beep and the screen may go blank for a few seconds or start flashing, don’t worry, this is no problem.
This keyboard shortcut is part of Windows 11/10, so it will automatically restart the NVIDIA, AMD, and also Intel video driver, depending on the installed hardware on your PC or laptop. No one will give you a guarantee that this will fix things 100% of the time.
However, if your PC has problems with graphics drivers, this is exactly the option you should try to activate. It’s also worth clarifying that this combination may not work if you’re not using a licensed version of Windows or if your Windows key is disabled.
What to do if the special keyboard shortcut didn’t work
If the method above didn’t help you, then most likely the video card driver isn’t working properly and may be corrupted. You will either have to uninstall the driver so that Windows can reinstall it automatically or update it to the latest version. Below you will see how to do this.
Uninstall the drivers with the Device Manager
To do this, you will need administrator rights to perform such actions with the video driver. To uninstall a driver using the Device Manager you need to:
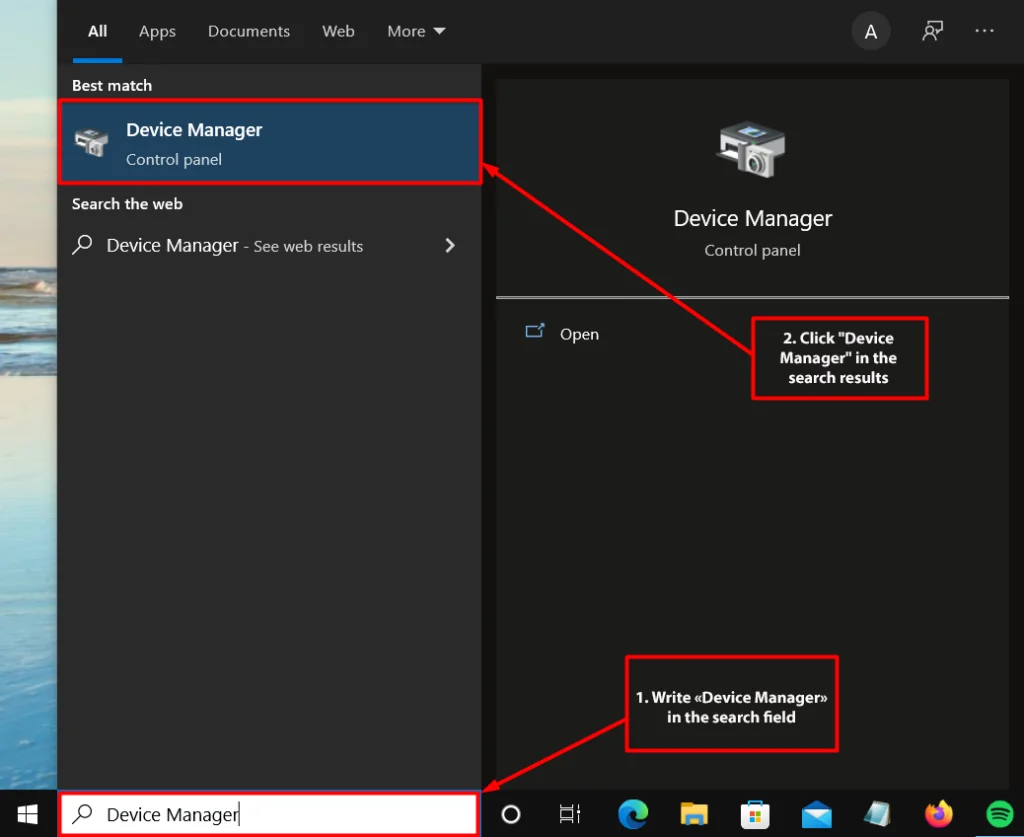
- Open the search menu and enter Device Manager. In the available search results, click “Device Manager” to open it.
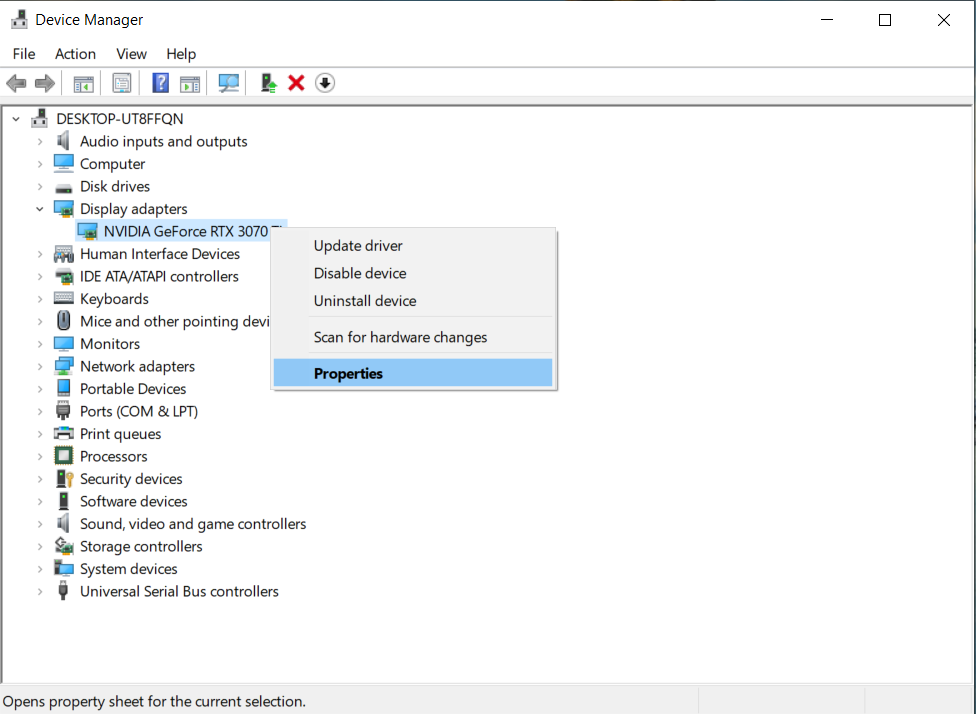
- In “Device Manager”, find “Display adapters” and expand it. Right-click on the adapter and select “Properties”.
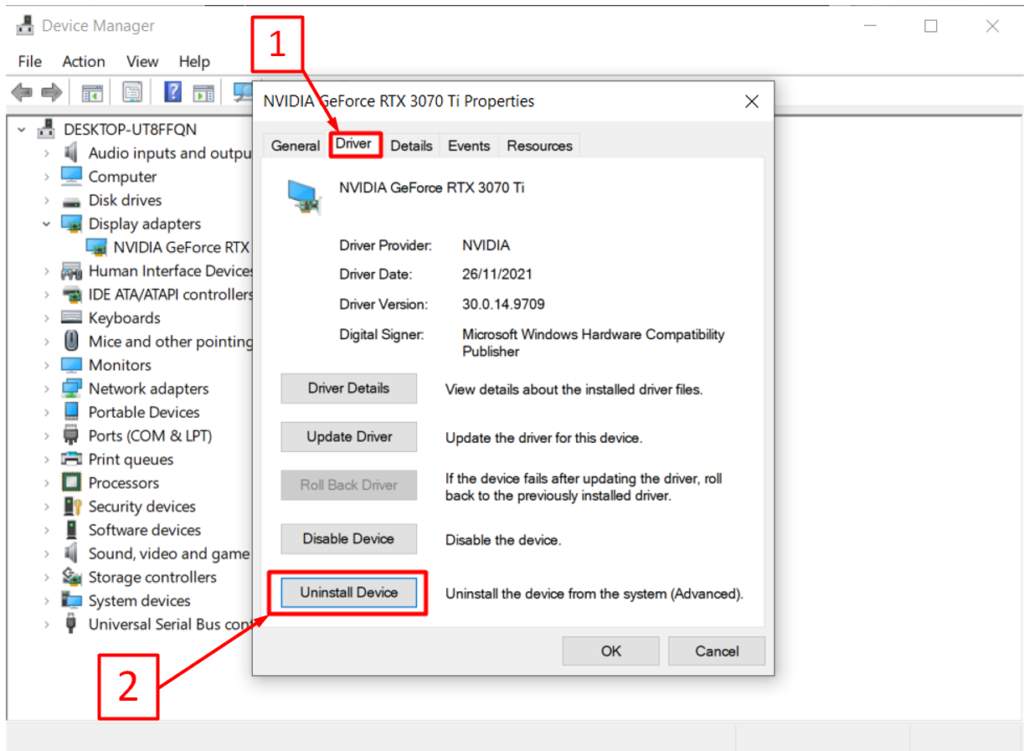
- First, in the Properties window, click the “Driver” tab. Second, on the “Driver” tab, click the “Uninstall Device” button to remove the graphics driver.
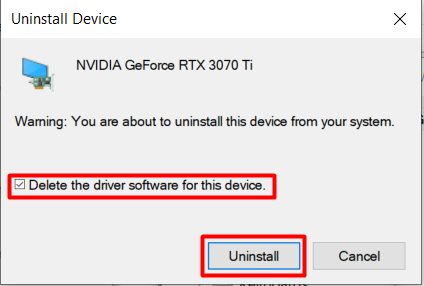
- After clicking, the “Uninstall Device” window opens. Select the “Delete the driver software for this device.” And click the “Uninstall” button.
Windows will automatically download and install the proper drivers for your hardware as soon as you restart your computer.
How to Remove Drivers from the Control Panel.
If Windows doesn’t automatically install the correct driver, then after manually uninstalling the driver, you need to uninstall the driver from the control panel and to do this you need to:
- In the search menu, type Control Panel
- From the search results, select, “Control Panel” and click to open it.
- Then go to “Programs” and then to “Programs and Features” and “Add or Remove Programs”.
- Find the Driver program, select it and uninstall it.
After these steps, reboot your computer again and wait for Windows to install new drivers.


