

The thermal paste needs to be changed from time to time because it periodically loses its properties, which can cause your PS4 to overheat.
However, many people are afraid to change the thermal paste manually because it still requires some skill. On the one hand, changing the thermal paste in your PS4 is actually quite easy, all you need is the ability to tighten and unscrew screws. On the other hand, if you do something wrong, your PS4 will overheat.
So it’s up to you to save money and do everything manually or go to a service.
Why you need to replace thermal paste in your PS4
I think that if you have at least a basic understanding of what electronics are and how they work, then you know what thermal paste is. However, if you don’t know what it is, thermal paste is a silvery liquid that is applied to the CPU. Then, it stores heat and transfers it to the cooling device. That way, the processor doesn’t overheat.
The thermal paste needs to be changed from time to time (usually every 2-3 years) because it dries out and loses its heat transfer abilities.
You may notice that your PS4 has started to perform worse, getting hot and lagging. This happens because the thermal paste dries out and dust builds up on the heatsink.
This is quite easy to fix – you just need to replace the thermal paste and clean your PS4 (especially the radiator grill) from dust. If you do it right, your PS4 will start working like new.
If you don’t change the thermal paste in time, however, the PS4 will overheat and make more noise than usual as the fans try to cool the console.
As I said before, even though it’s simple enough, you still need to have basic skills and care. Because if you apply thermal paste incorrectly, your PS4 will overheat.
Below, here’s the full guide to replace PS4 thermal paste.
How to replace PS4 thermal paste
I suggest you read this guide first and then follow the steps on it. Here’s how to replace PS4 thermal paste:
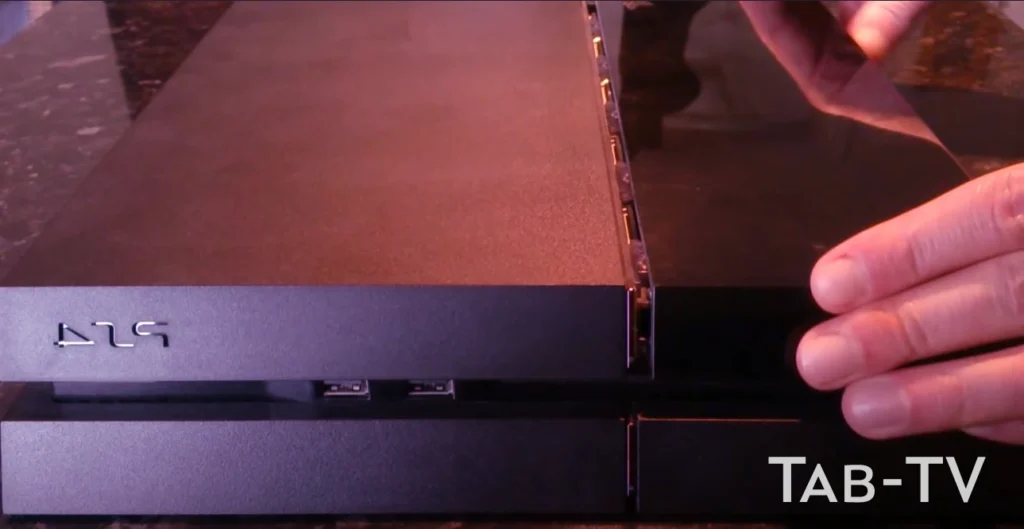
- Remove the hard drive cover:
- Grasp the PS4 with both hands and slide your fingers along the gap in the top cover.
- With your thumbs, push down on the glossy side of the top cover until it opens to the side.
- To remove the top cover, lift it up and back.
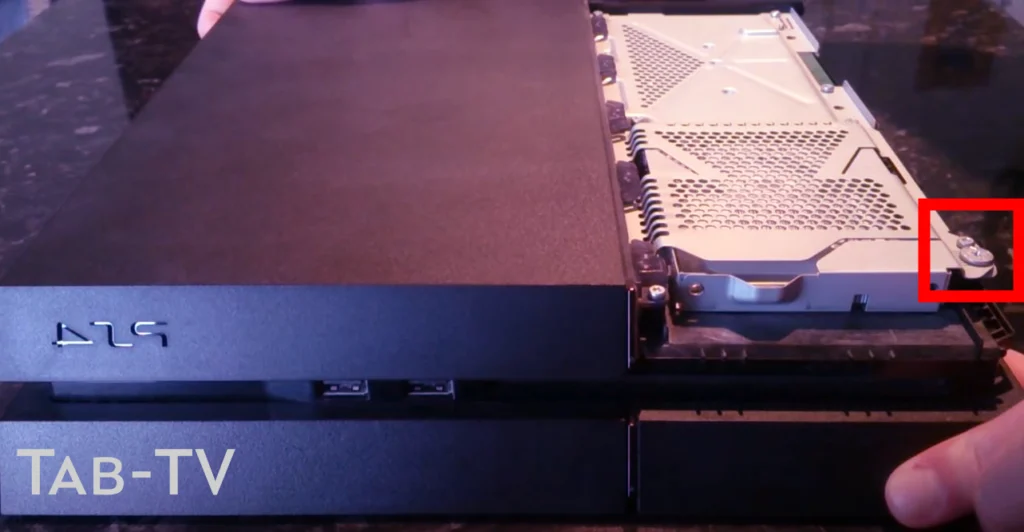
- Remove the hard drive bracket screw
- You need to use 6.5 mm screwdriver to remove the screw that’s protecting the hard drive bracket.
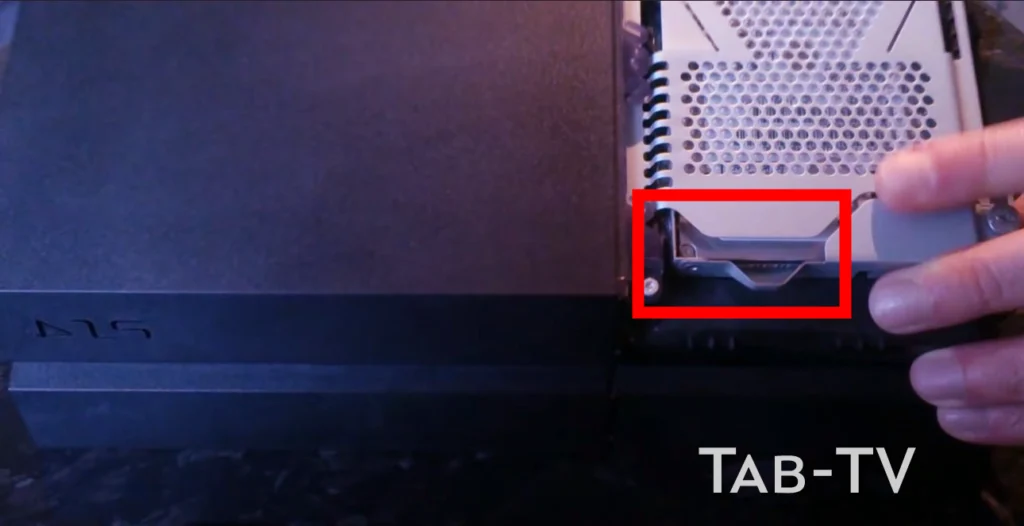
- Take out the hard drive bracket
- Be careful when taking out the hard drive, as dropping it may cause hard drive’s failure because it components are quite fragile
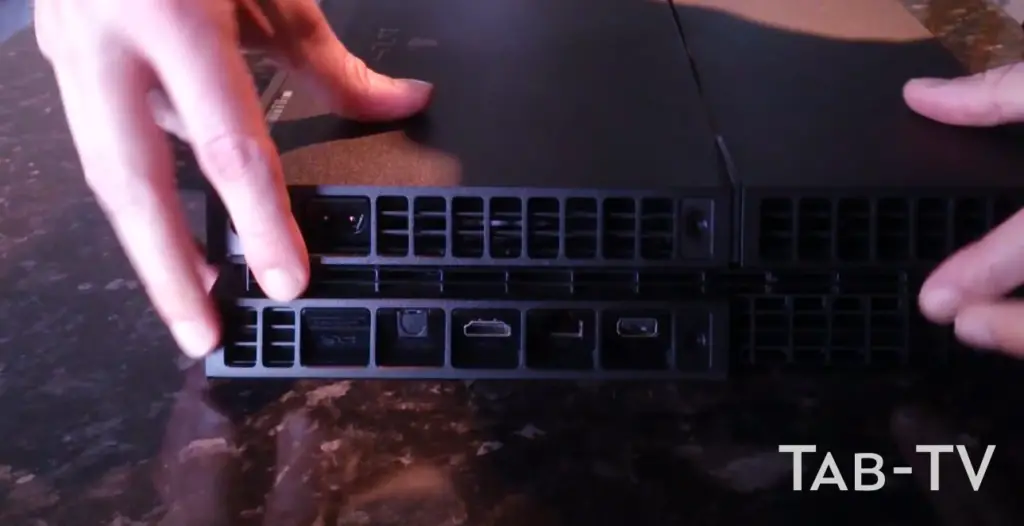
- Flip your PS4 upside-down to make back-side facing towards you
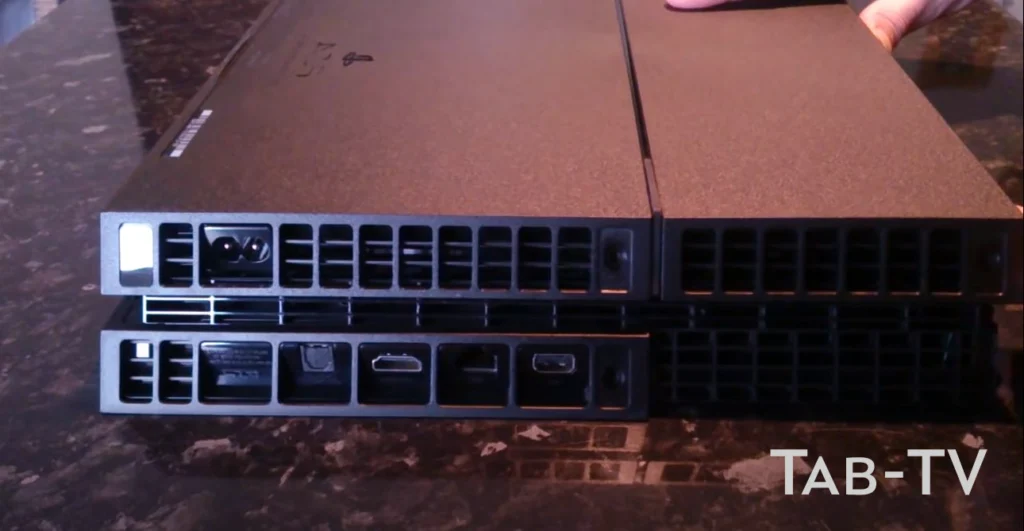
- Use tweezers and remove the two warranty stickers on the back of the PS4 that hide the two screws (if those stickers are still in place).
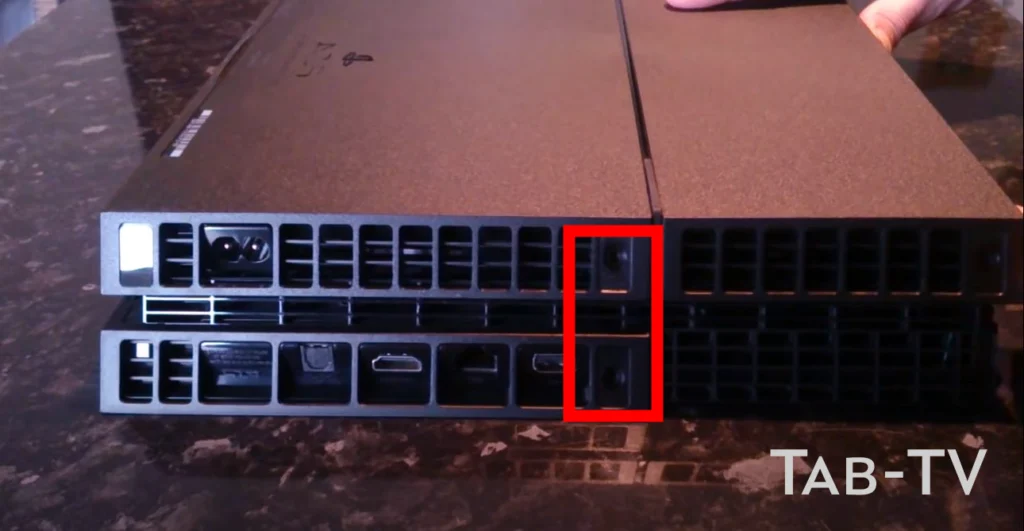
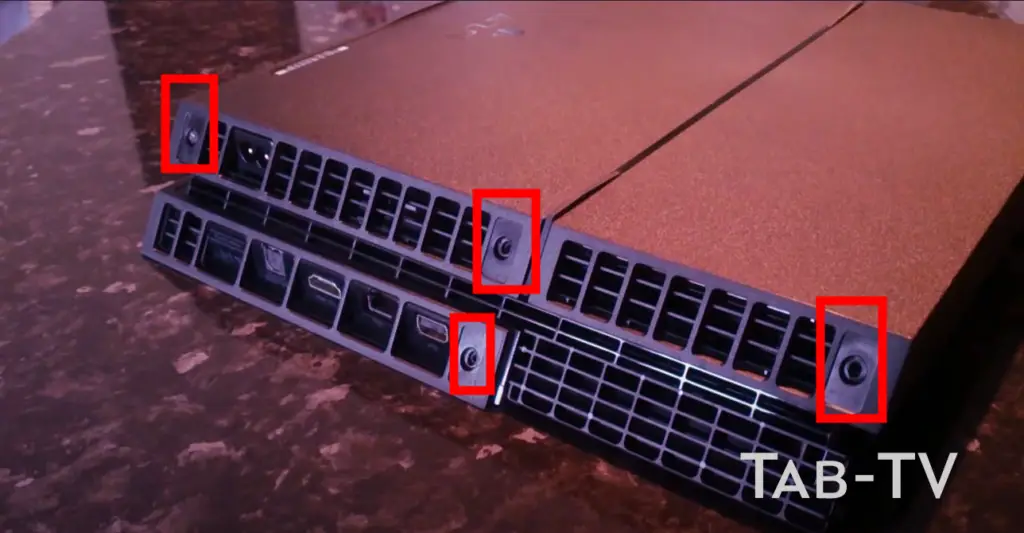
- Use tweezers to remove plastic screw covers in side corners to see two screws’ place
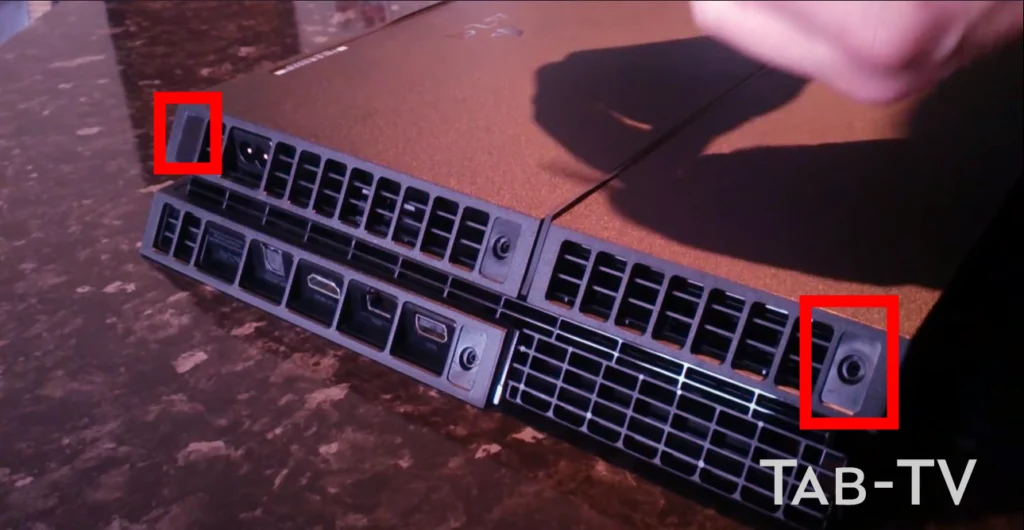
- Remove 4 screws that were revealed in the previous two steps.
- To take out these screws, you need to use 7.2 mm screwdriver
- Take out the lower case
- Lift the bottom case up using your thumbs. Keep in mind that it is held in place by the latches, so use your thumbs to get it out of place.
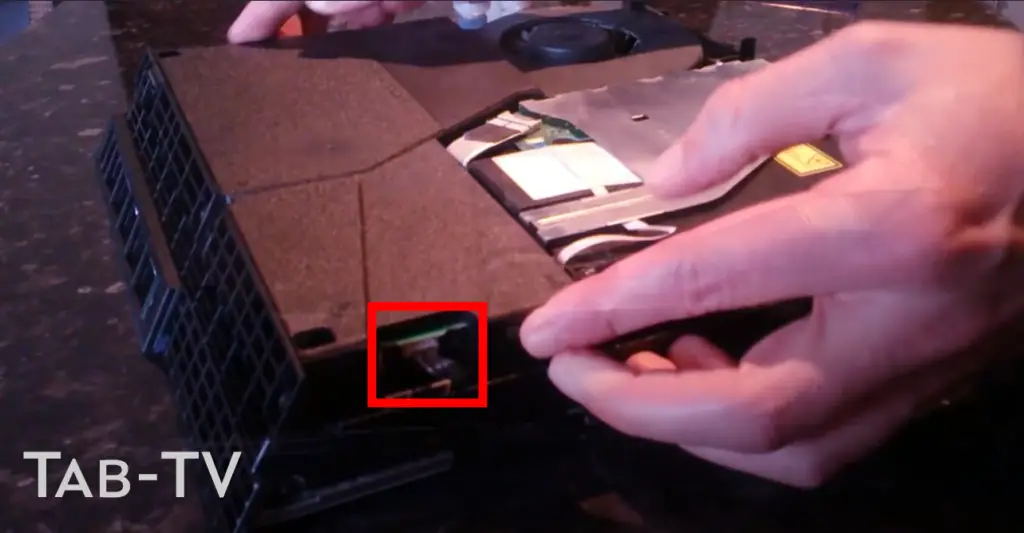
- Use the tweezers to pull out the power supply cable and discontect it from the motherboard.
- Then, remove the power supply cover.
- To do this, you need to use 9.7 mm screwdriver and 41 mm screwdriver
- To remove it, lift the power supply straight up and out.
- It may take a several attempts to remove lt, as it has prongs on the left side.
- Remove the Wi-Fi antenna.
- Use a needle or small spatula to disconnect the Wi-Fi cable from the motherboard.
- Use tweezers to grip the antenna cable and pull it out.
- Use tweezers to remove the cable from under the Blue-ray drive cable.
- Remove the 9.7 mm screw securing the Wi-Fi module.
- Take out Wi-Fi module.
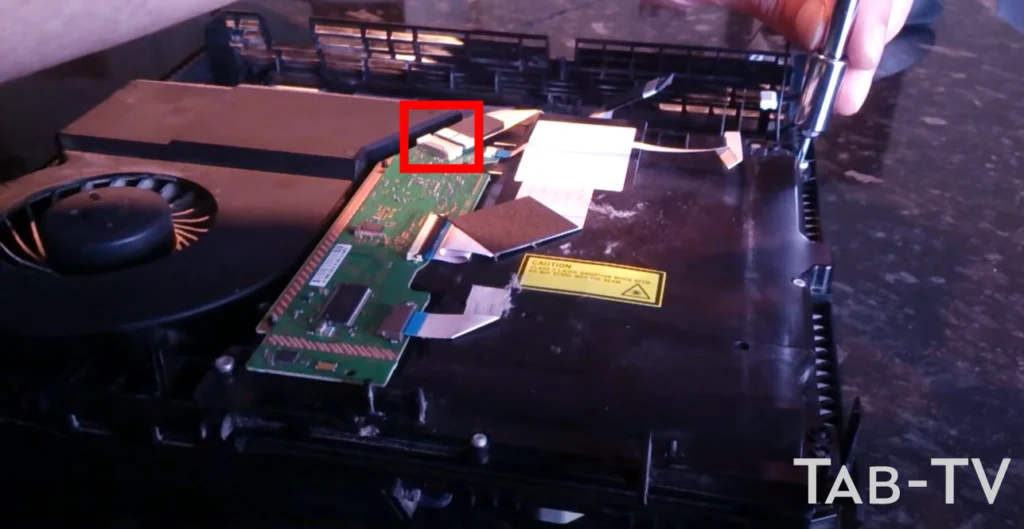
- Disconnect and pull out the Blue-ray drive.
- Use your fingernail to press the metal lever on the tape retainer that attaches the Blu-ray drive to disconnect it.
- Disconnect the cable by pulling on the tab.
- Pull the cable out of the cable guides on the PS4 body.
- Set the cable aside, but be careful not to lose it.
- Remove the screws securing Blu-ray, there is 4 of them. Three 9.7 mm screws and one 6.2 mm screw.
- Lift the Blu-ray drive up and out of PS4.
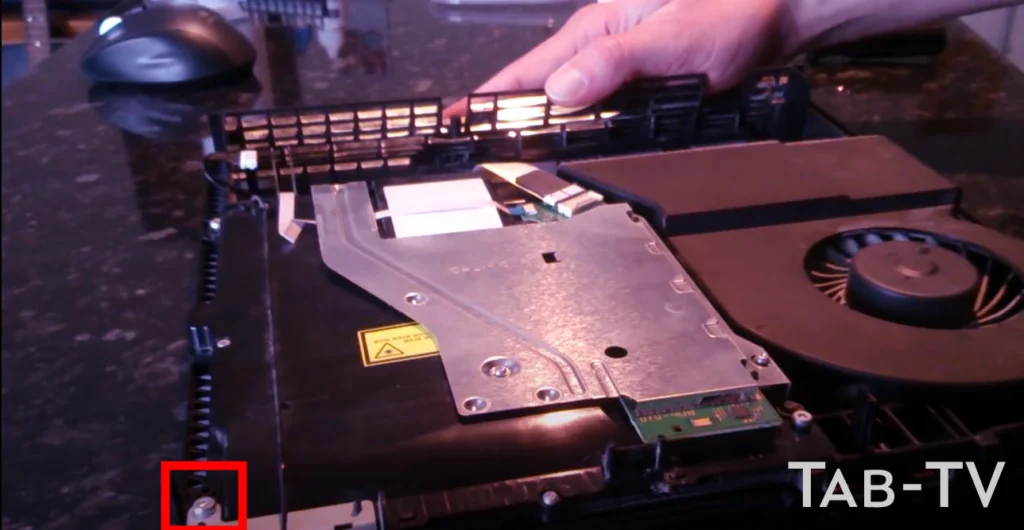
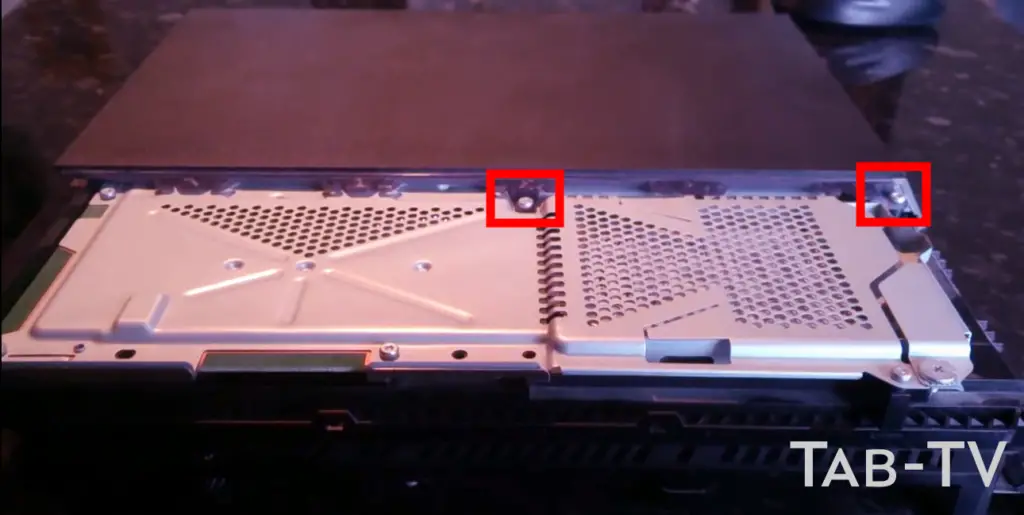
- Now, lets return to the upper case.
- You need to remove 2 screws as shown on picture below (9.7 mm screws)
- Lift the matte case up to remove it. It is held in place by stoppers, so you will have to make an effort.
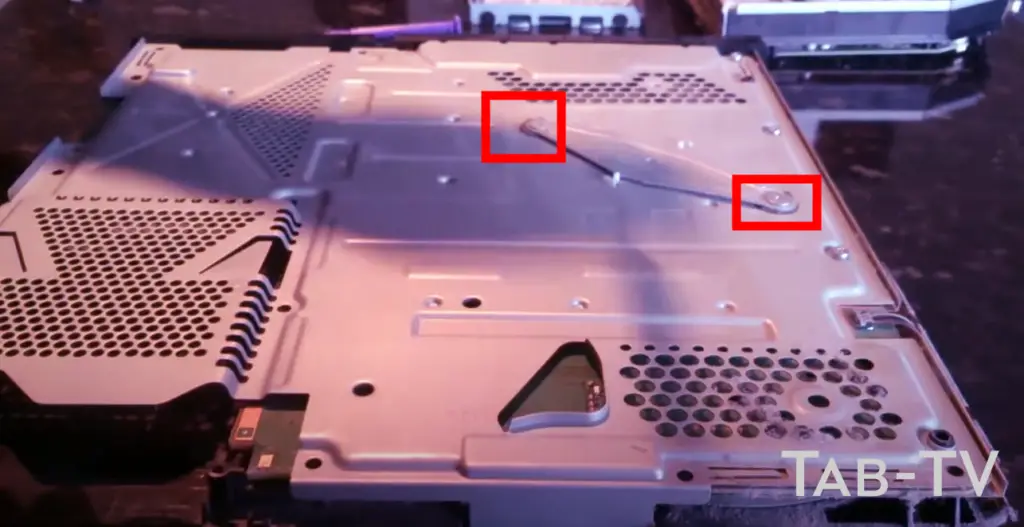
- Unscrew the remaining 9.7 mm screws.
- Unscrew the pressure plate by removing 15.6 mm screws. Unscrew them half a turn at a time. Unscrew them one by one and avoid unscrewing only one screw at a time because it may damage your PS4 processor.
- Remove the pressure plate.
- Lift up the EMI shield.
- Use the spatula to insert it between the fan cable and the motherboard.
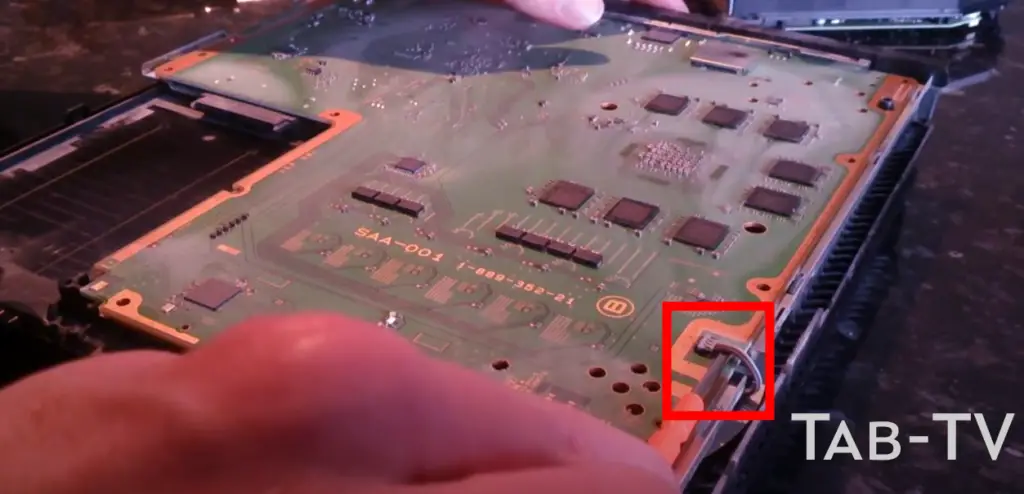
- Lift the connector up and disconnect it from the motherboard.
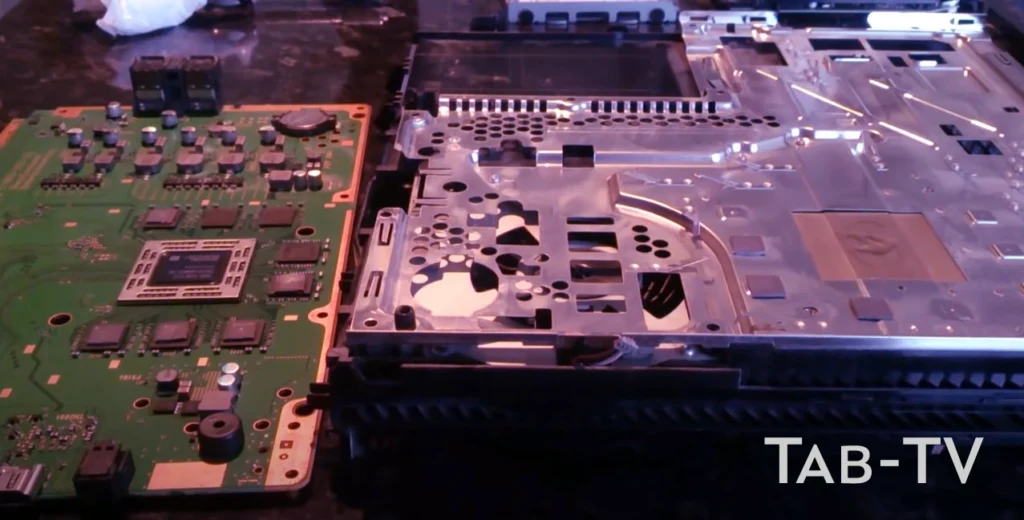
- Grab the motherboard by the edge and lift it up until the USB ports come out of the case of your PS4.
- Lift up the motherboard and pull it out of the PS4 case.
- Use a paper or cloth to remove the old thermal paste.
- Make sure that you have completely removed the old thermal paste.
- Apply a small amount of thermal paste to the middle of the CPU (the best way is to use a syringe).
Note that if you apply the thermal paste incorrectly, it may cause the PS4 to overheat.
Follow this guide in reverse order to reassemble the PS4.


