

There’s been no wishlist feature in App Store since iOS 11, and we still don’t know why Apple removed it. But wishlists are handy, and I usually create them to plan my purchases and not to save a lot of money at once.
But okay, there are no built-in wishlists in the App Store anymore, so we need to use alternatives to create them. That’s not so convenient as to have an ‘add to wishlist’ button directly in the store, but it still works.
The easiest way is to use Notes, but you also can use third-party services to create wishlists. Imho, it’s better to use Notes unless you already use wishlist apps for other purposes.
Well, let’s dive in!
Why is there no wishlist in the App Store?
It was. Before iOS 11, there was a handy wishlist feature for App Store, but since iOS 11, it has been removed. I don’t know why, but I can make some assumptions.
At first sight, that seems useless, as removing the wishlist feature reduces App Store functionality. But let’s look from another point: Apple loves to create money and sometimes constructs conditions when users need to pay more than they want (remember new devices and no charges inside the box).
The same logic works for wishlists. When you see something you want to buy, you want to act. And adding to the wishlist is your action in this case. Instead of purchasing an app, you’re adding it to your wishlist.
What’s more, you may add them to a wishlist to buy apps when there would be discounts and so on. And that seems not the best pattern from Apple’s point of view.
Of course, I may be wrong; the reason is plainer, and there’s no plan behind it. Maybe wishlists were removed because they weren’t wide-popular.
Never mind, App Store’s a built-in wishlist now, so we need to find third-party solutions.
How to create a wishlist for the App Store using Notes?
The best way to create a wishlist is to use Notes on iPhone. They’re synced between your Apple devices, are easy to edit, and are convenient. Yeah, that’s still just Notepad without a batch of features, usually inside wishlists. But for a simple one, it’s the best way possible.
Here’s how to make a wishlist with Notes:
- Go to App Store and find the app you want to buy (or download).
- The next step is to tap on the app to open the details.
- Then tap the icon to open the action menu (as on the left screen).
- Next, select Share Notes (as on the screen right).
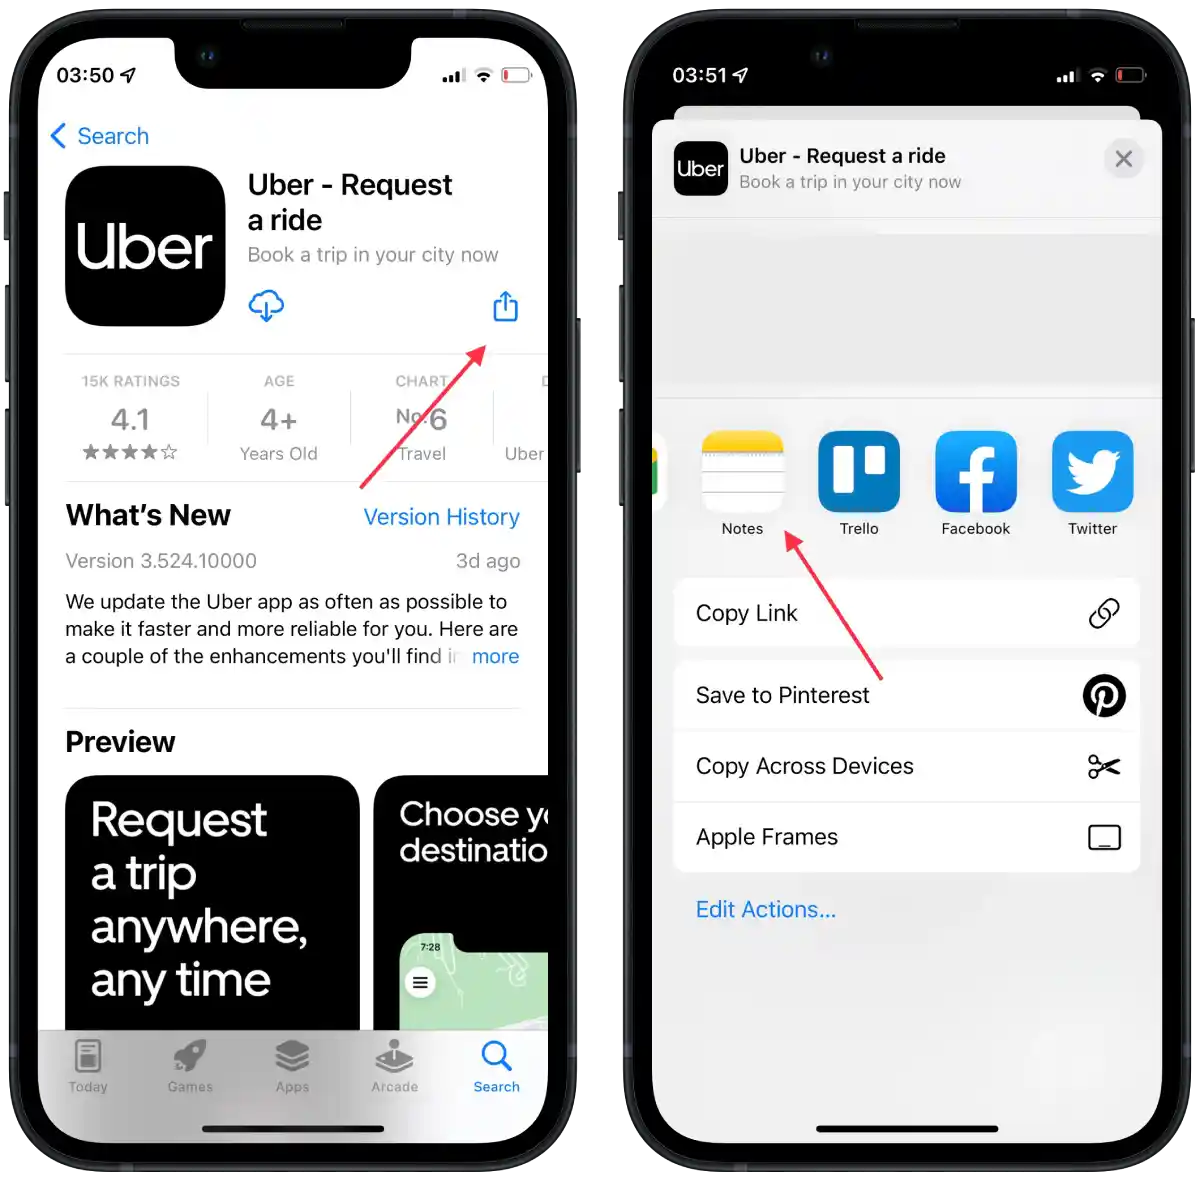
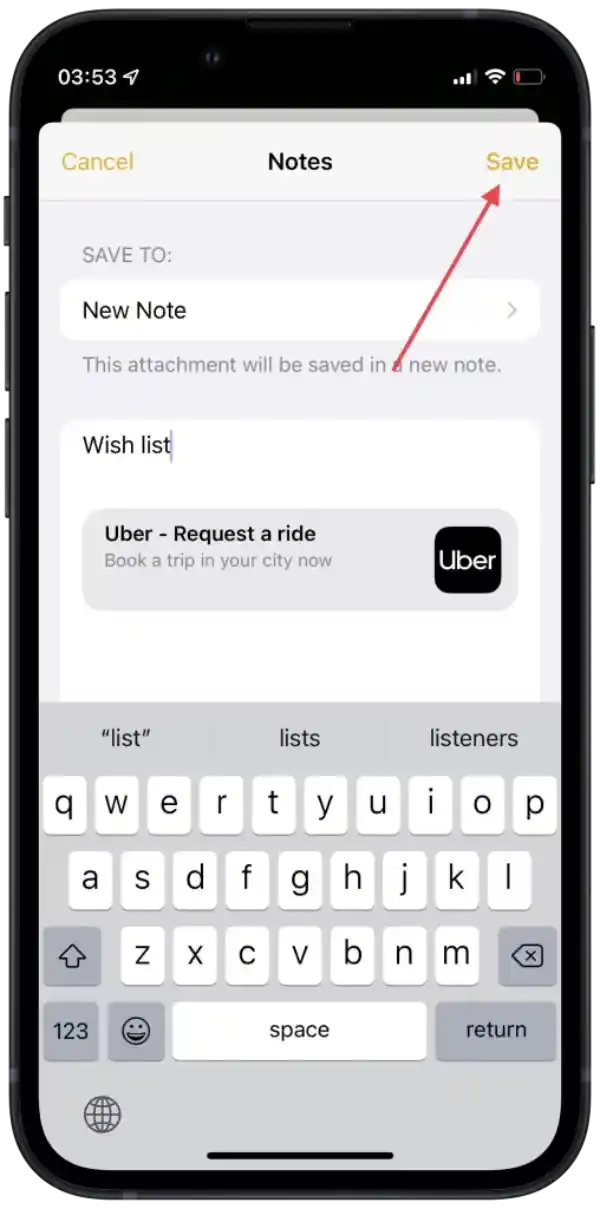
- Then choose the note to save the app to (that should be the note you’re using as a wishlist) or create a new one (if you’re just started creating a wishlist), then tap Save.
You’re all set; now you can use Notes as a wishlist and repeat the same steps with any app you want to add to the wishlist. Don’t forget to select the same note, so all your apps will be saved in one place.
If you create a wishlist for the App Store using Notes, it will look like this:

When you open the note you’re using as a wishlist, you will see the app name, icon, and link to the app in the App Store.
How to create a wishlist for App Store using a My Wishlist?
Another way to create a wishlist for App Store is to use a third-party service, like My Wishlist.
That’s a service that helps you to create custom wishlists. It’s more convenient, as you can share the lists on Facebook, WhatsApp, or by email and manage them. Also, you don’t need to download an app; you can create your wishlists directly in a browser.
To create a wishlist for the App Store using a website, you need to follow these steps:
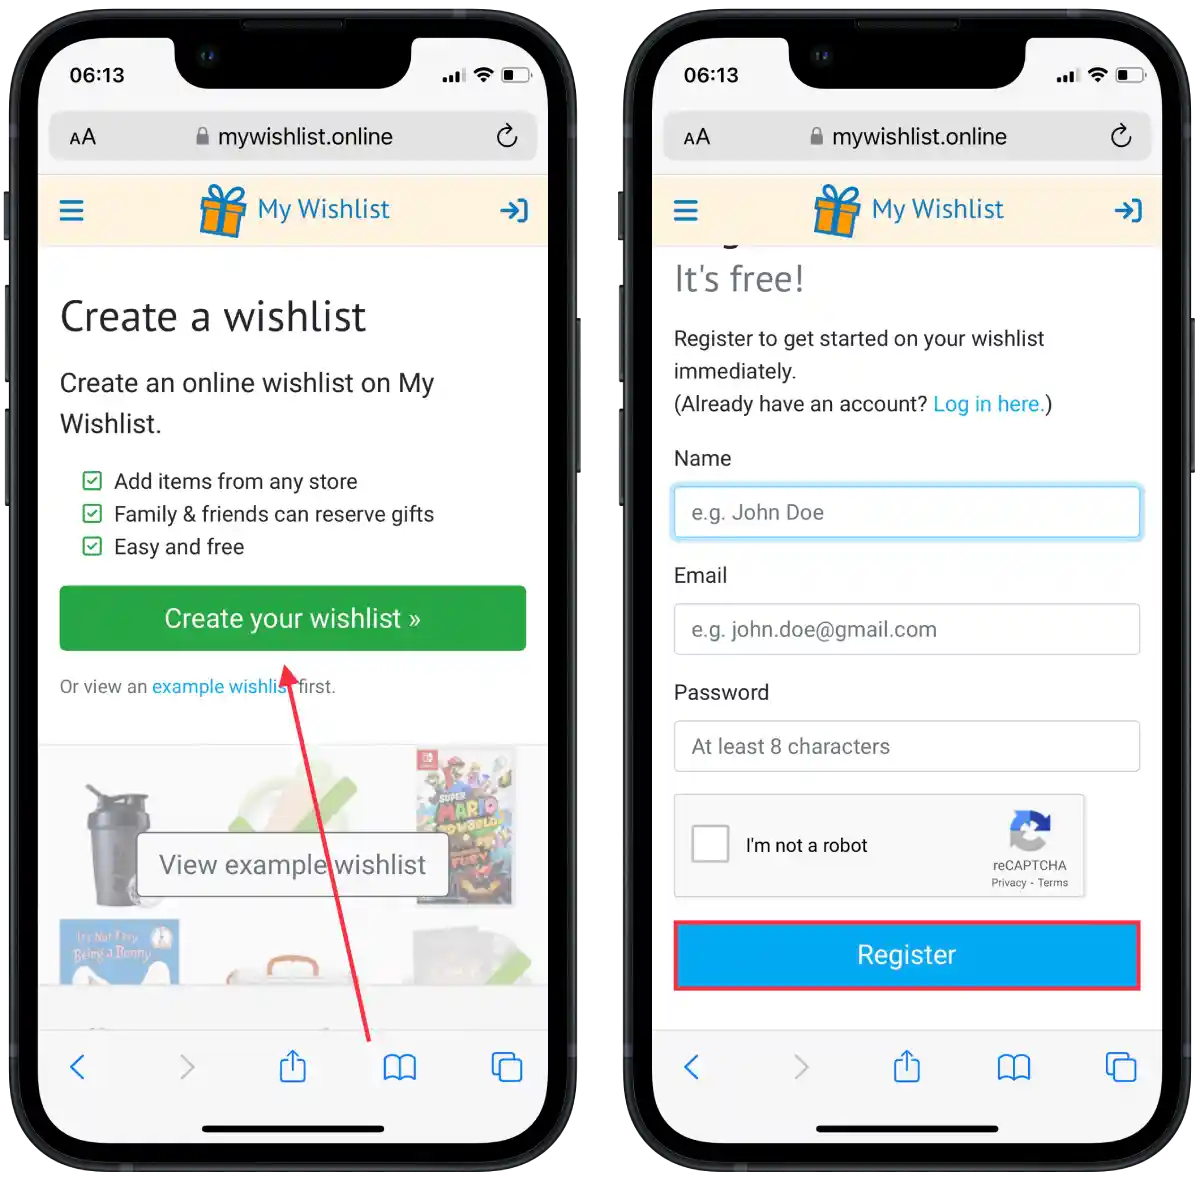
- Open the WishList website.
- Tap Create my wishlist.
- Then sign up.
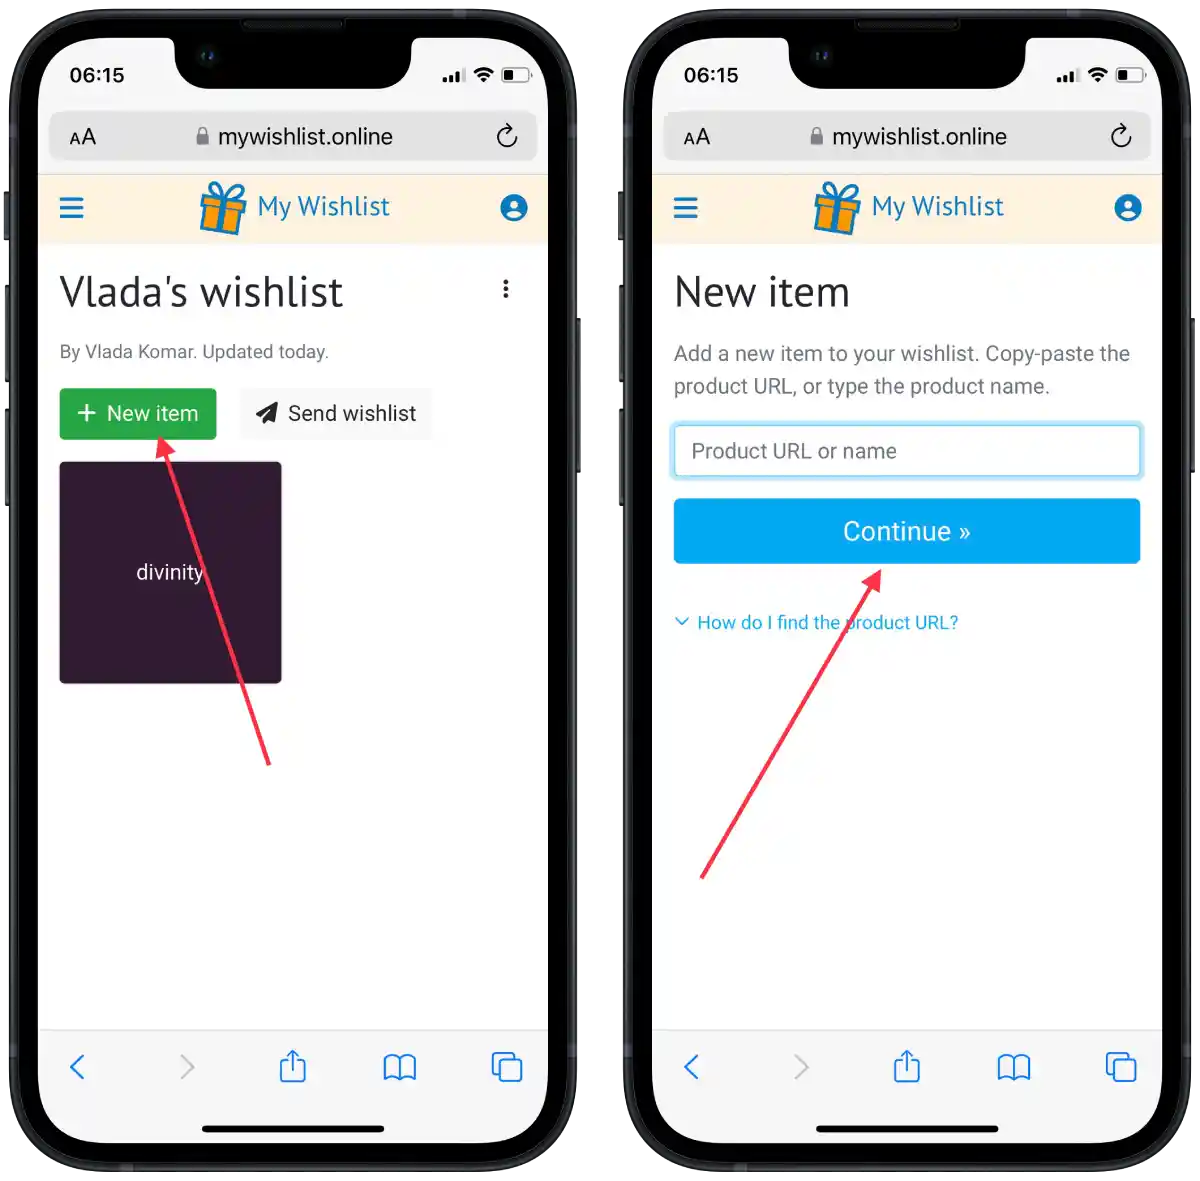
- Tap on New item.
- Next, add a link or title and tap Continue.
- Then add a photo, description, price, and other details and tap save.
- Then tap on Send wishlist and choose the method that suits you best.
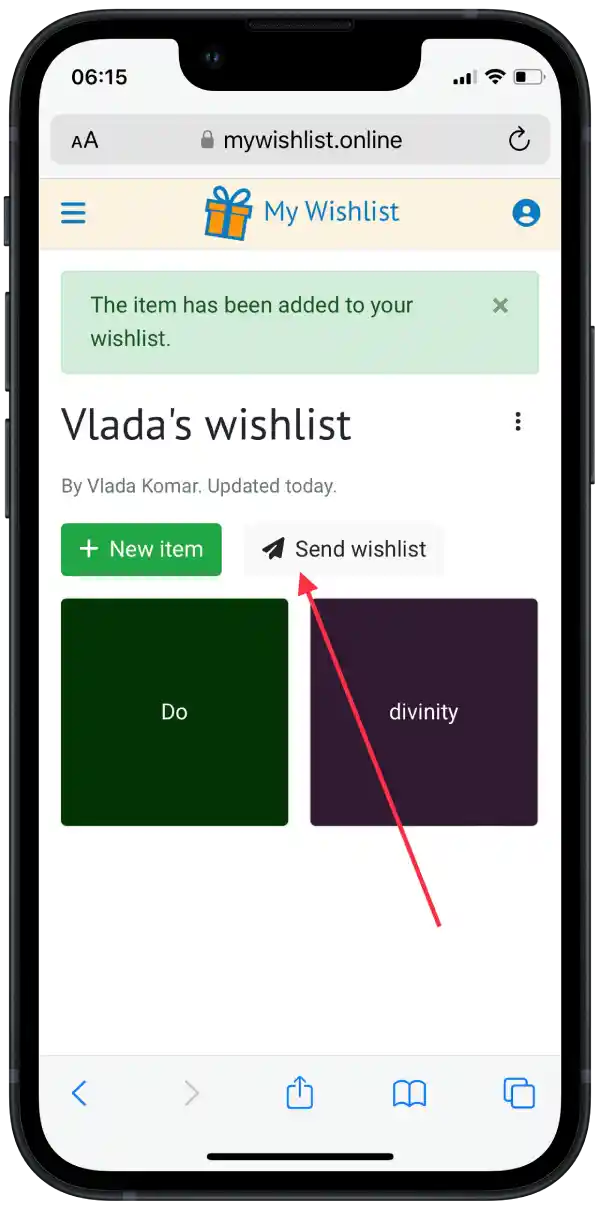
If you create a wishlist for the App Store using My Wishlist, it will look like this:

So you can choose a convenient way to share your wishlist with other people or save the link for you to access the wishlist easily.
How to create a wishlist for App Store wishlist using Lookmark?
Lookmark is a third-party app designed to create wishlists for apps and iTunes, which you can download from the App Store. Lookmark is a great replacement for the missing App Store wishlist feature, as it’s designed specifically for this purpose. If you have enough space on your device to install this app, you can use it. Otherwise, you can use the standard notes app. In case you want to create a wishlist in the App Store wishlist using Lookmark follow these steps:
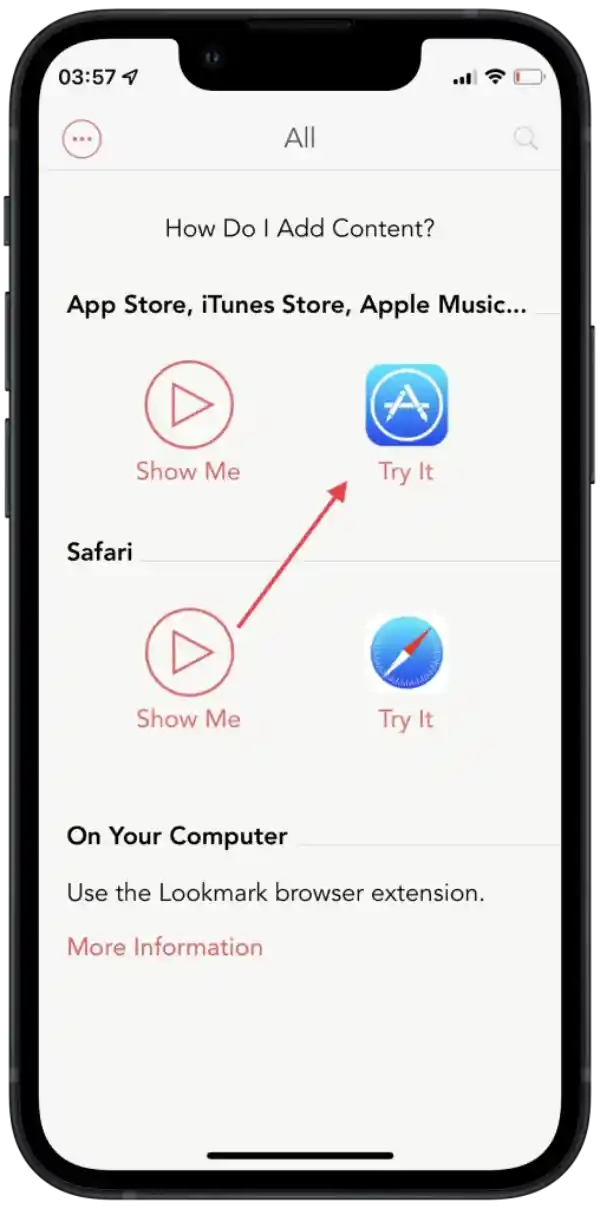
- The first step to creating a wishlist in the App Store wishlist using Lookmark is to load and open the Lookmark.
- Then select the App Store icon on the home page.
- Next, the App Store will automatically open; you need to open the app you want to add to the list.
- Then tap on the icon to open the action menu.

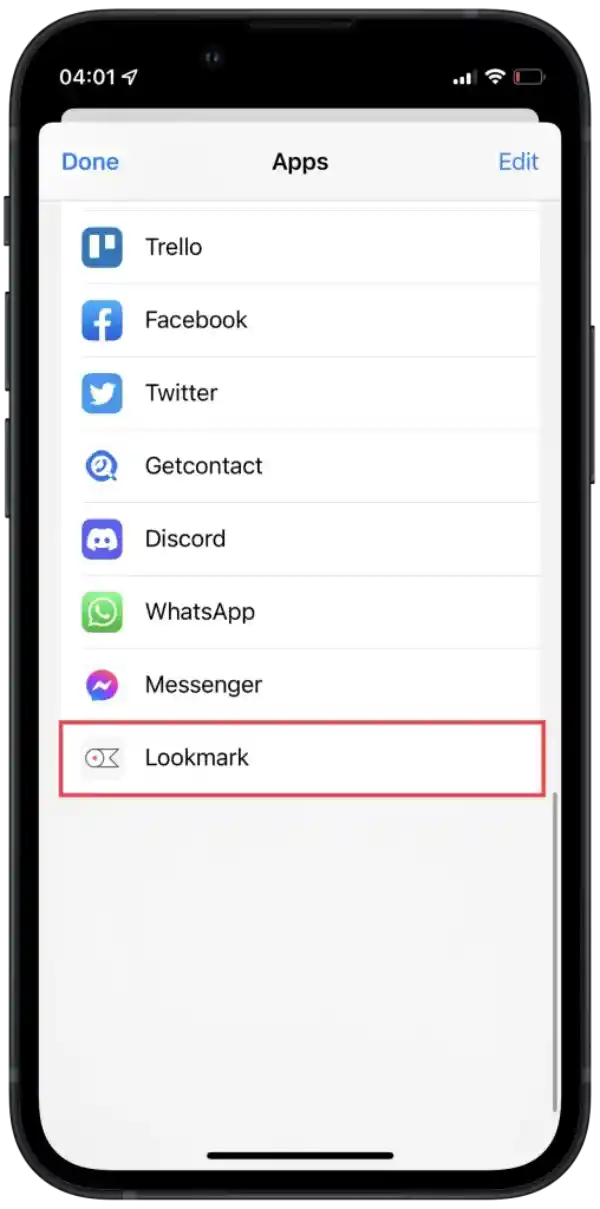
- In the ‘Share’ section, scroll to the end and tap the three dots.
- All available apps will be displayed in front of you; select Lookmark.
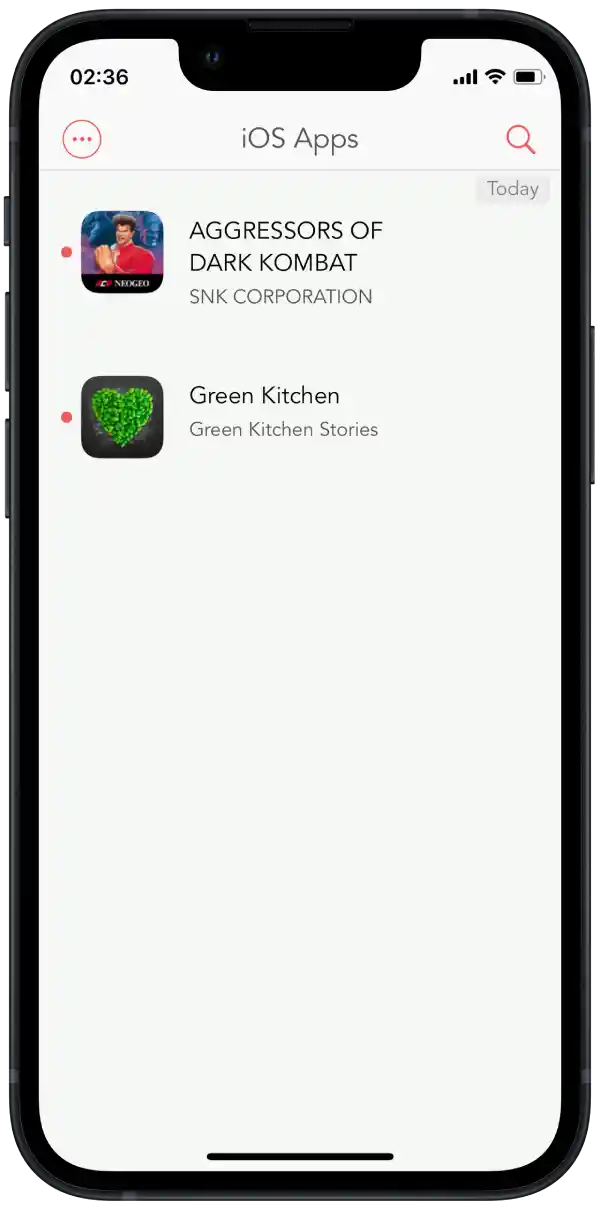
If you create a wishlist for the App Store using Lookmark, it will look like this:
This app is quite handy for such purposes. Since you can not only save apps for later download and create lists with movies, books, music, podcasts, and more. There is also a browser extension that you can add to your Mac and save items to your computer.
The App Store should have a wish list because not everyone can install all the apps they want. They often don’t have the necessary storage space on their iPhones or iPads.
The Lookmark app can completely replace the wish list feature in the App Store. So when you open the wish list, you can go to the App Store to download it.
If, for some reason, you do not want to use Notes or Lookmark, you can install other apps. The most popular listmaking apps are:
You can install one of the apps that suits you best and create wishlists, watchlists, shopping lists, and whatever else you need.


