

One common problem many Windows 11 users face is the inability to rename files. This can be frustrating, especially if you have a large number of files that you need to rename. The inability to rename files can occur due to several reasons, such as the file being used by another program, being set to read-only, or being protected by Windows.
This article will provide an in-depth look at how to fix the unable to rename file issue in Windows 11. We will cover the reasons for the issue and provide step-by-step instructions to resolve it. Whether you need to close a program using the file, change the file’s properties to allow editing, use a third-party file renamer, take ownership of the file, or use Command Prompt, we will provide you with all the information you need to get the job done.
Why are you unable to rename files on Windows 11?
Before we discuss how to fix the issue, it is essential to understand why it occurs. There are several reasons you might be unable to rename a file in Windows 11. Some of the most common reasons include the following:
- The file is in use by another program: If another program is currently using a file, you won’t be able to rename it. You will need to close the program using the file before renaming it.
- The file is read-only: Some files in Windows 11 are set to read-only, which means that you won’t be able to make any changes to them. To fix this issue, you will need to change the file’s properties to allow editing.
- Windows protect the file: Some files in Windows 11 are protected by the operating system and cannot be renamed. This includes system files and files that are part of Windows itself.
Now that you better understand what reasons can lead to the fact that your file in Windows 11 can not be renamed, you can take care not to get into this situation. Let’s now look at ways to solve this problem.
Ways to fix unable to rename files in Windows 11
This section will discuss the various steps you can follow to fix the unable to rename file issue in Windows 11. These steps have been carefully selected and tested to provide the best possible solution. The steps range from simple and easy to more advanced so that you can choose the best method.
Close any programs that are using the file
If a program uses your file on your computer, you will have limited access to edit the file. This includes not being able to change the name of the file. To fix this, you need to:
- Right-click the Start icon.
- From the drop-down list, select Task Manager.
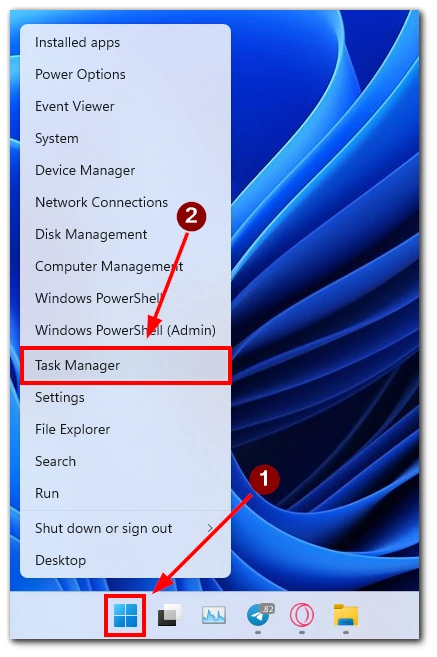
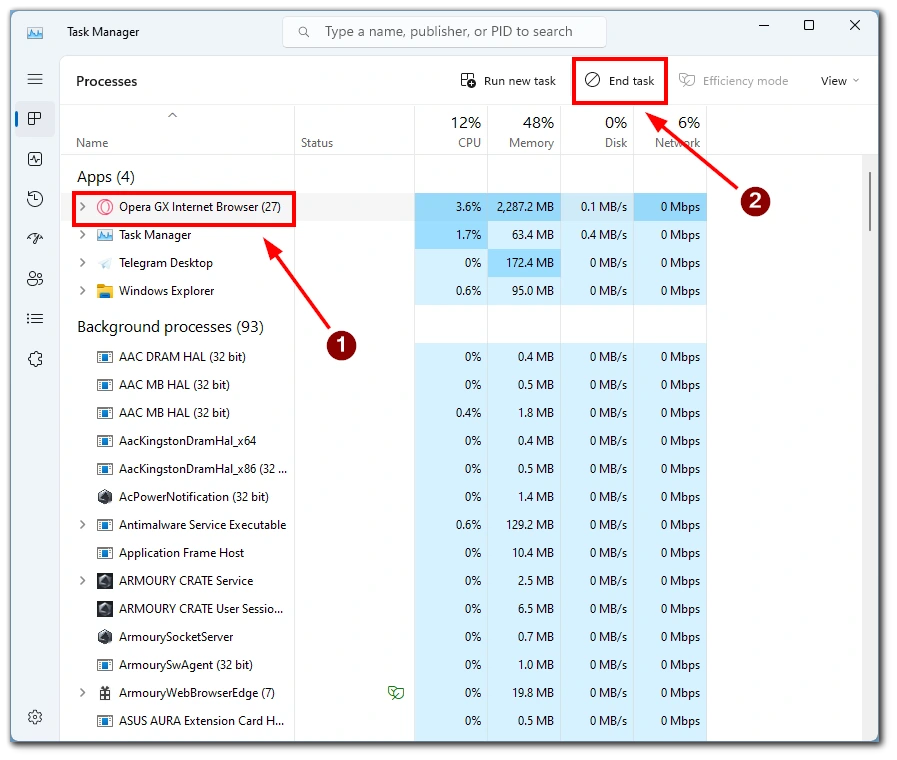
- You must find the app that uses your file and select End Task.
If this doesn’t work, you can also try restarting your computer and then attempting to rename the file. This will close all applications and processes using your file.
Change the file’s properties to allow editing
The second step to fix the unable to rename file issue in Windows 11 is to change the file’s properties to allow editing. This method is perfect for those with files set to read-only, preventing them from being renamed. Here are the steps to change the file’s properties to allow editing:
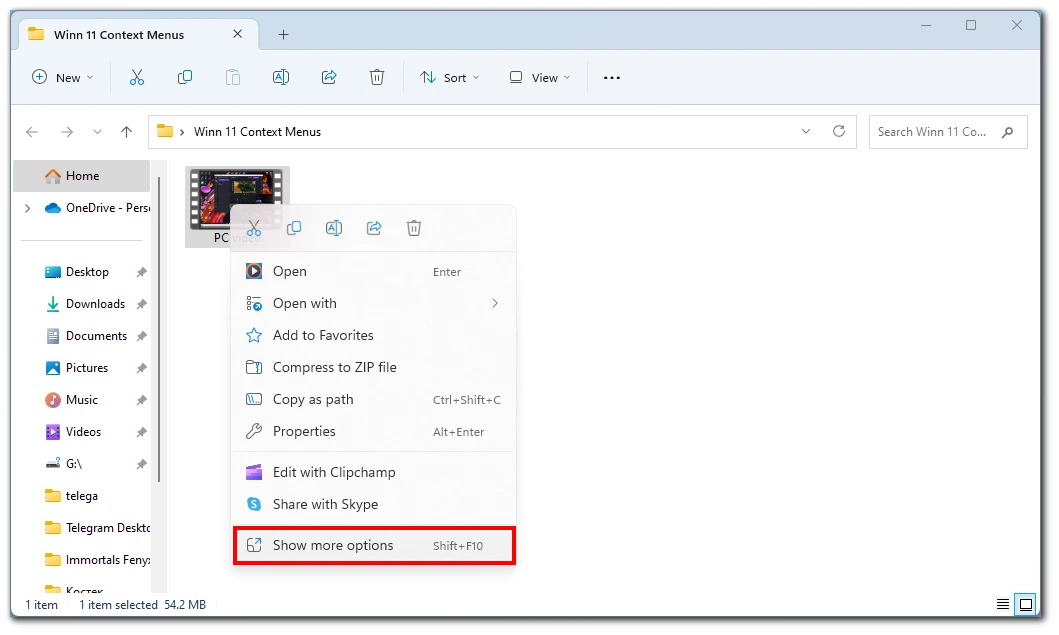
- Locate the file you want to rename.
- Right-click the file and choose Show More Options in the pop-out list.
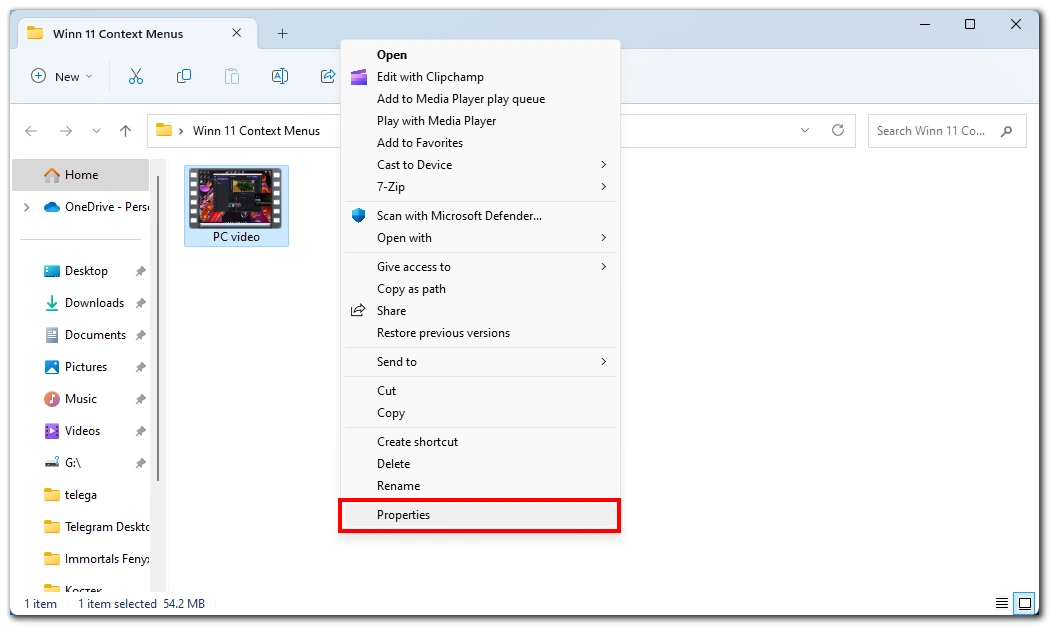
- Select Properties from the context menu.
- In the Properties window, go to the General tab.
- Uncheck the Read-only box.
- Click Apply and then OK to save the changes.
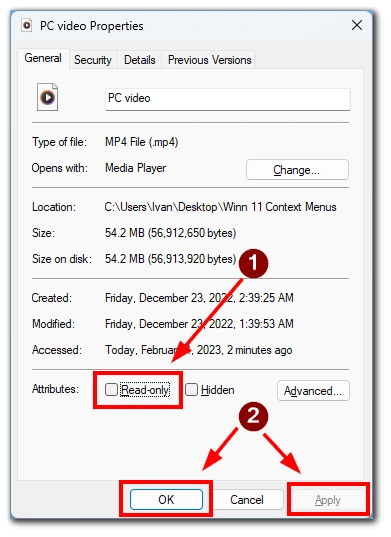
By following these steps, you should be able to change the file’s properties to allow editing, resolving the inability to rename the file issue.
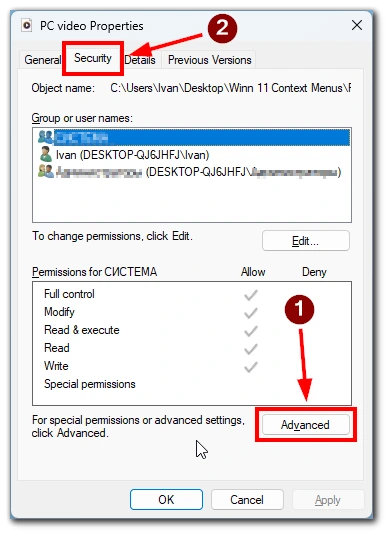
Take ownership of the file
The next step to fix the unable to rename file issue in Windows 11 is to take ownership of the file. This method is ideal for those who need to rename files that are protected by Windows and cannot be renamed due to permission restrictions. Here are the steps to take ownership of the file:
- Locate the file you want to rename.
- Right-click the file and select Properties from the context menu.

- In the Properties window, go to the Security tab.
- Click the Advanced button.
- Here choose the Change button next to the owner’s name.
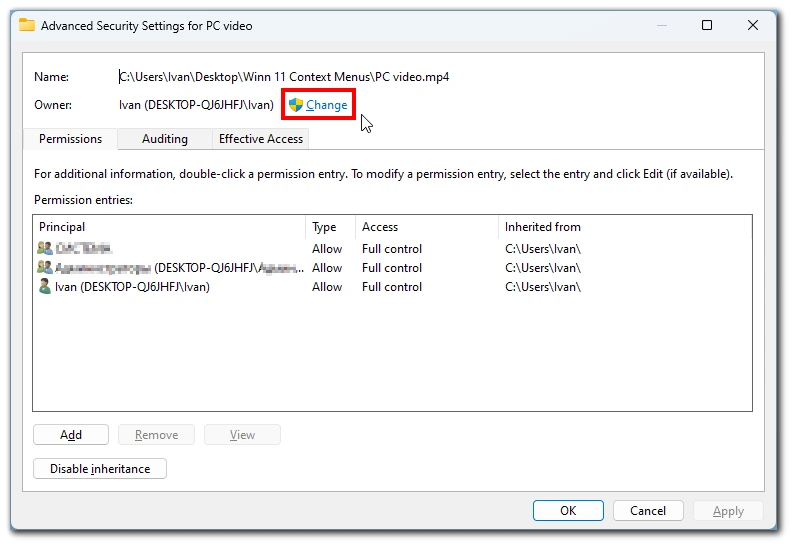
- In this window, click on Advanced.
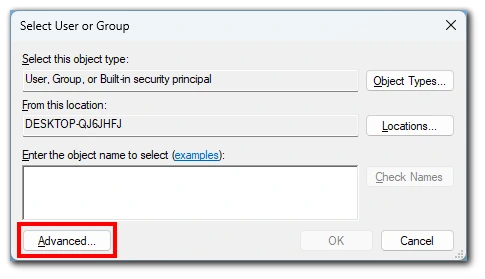
- Select Find Now and choose your account from the list below. To save, click OK.
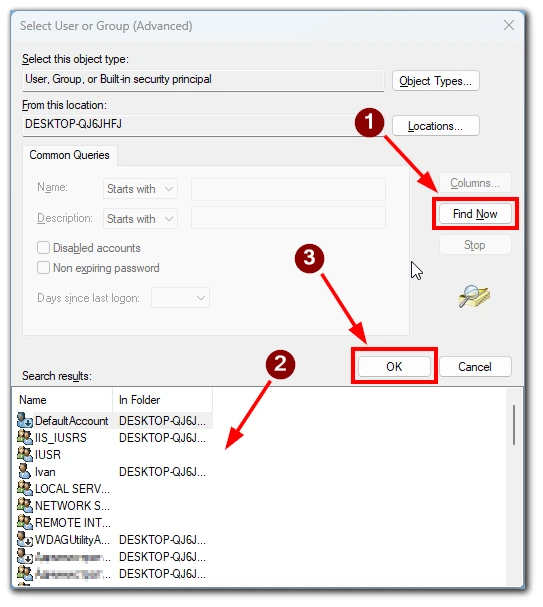
- Then press OK again.
- To save changes, click Apply and OK.
By taking ownership of the file, you can rename it and resolve the unable to rename file issue in Windows 11. If you can still not rename the file, try the other methods this article covers.
Use a third-party file renamer
If you can still not rename the file, you can try using a third-party file rename. Several file renaming tools available for Windows 11 can help you rename files even if the operating system protects them. Some popular file-renaming tools include Bulk Rename Utility, Fast File Renamer, and Rename Master.


