
The cache is actually quite a useful thing. It makes programs and files run and open faster and speeds up system performance. However, when the cache accumulates and takes up valuable disk space, it can cause Windows to glitch.
There are several types of cache in Windows 10 and 11, each with its own unique function. Some are refreshed automatically, while others require manual clearing.
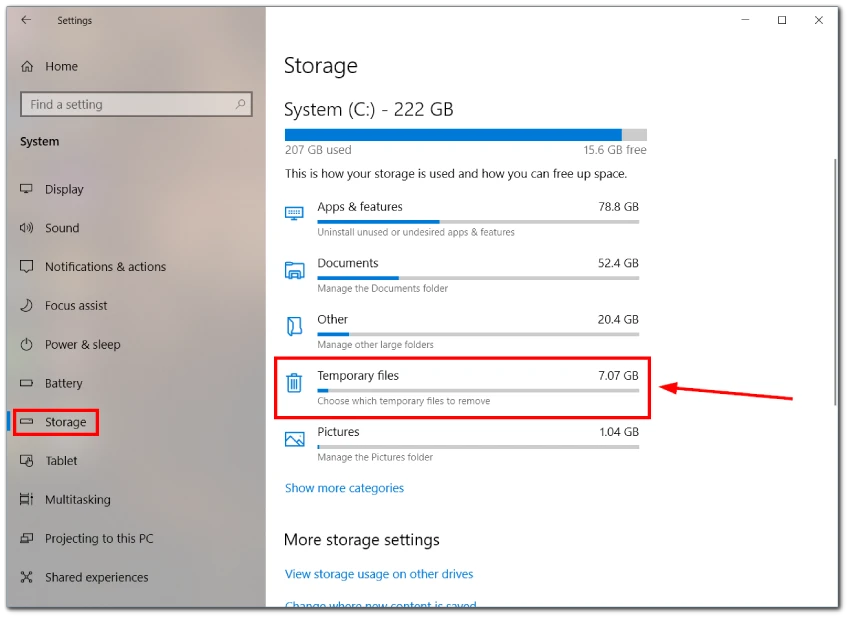
The easiest way to delete the cache is through Windows 10 and 11 settings. For this, you need to navigate to the Storage menu, click Temporary files, and select all you want to clear after a scan.
Let’s explore this and other cache-clearing methods in more detail below.
How to delete cache on Windows using Settings
In this paragraph, we will talk about deleting temporary files. They can include various settings, cached data, and other information that is no longer needed after certain tasks are completed. This also includes copies of all Windows updates in case you want to roll back to a previous version.
So here’s how to clear these files:
On Windows 11
- Open Settings from the Start menu or press Win + I on your keyboard.
- In the System section that will appear first, select Storage.
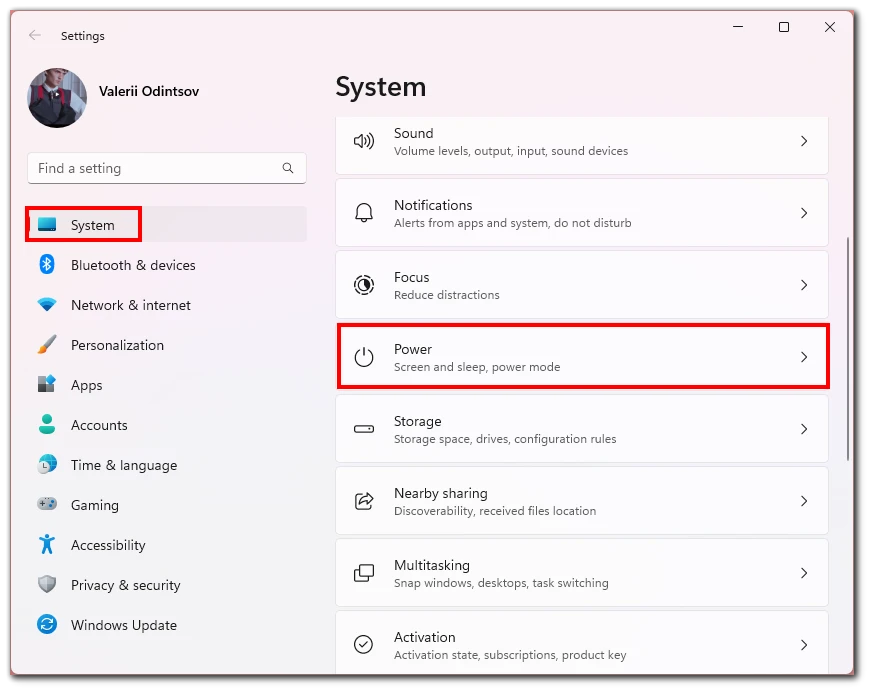
- Then wait for the system to scan your system disk (C) and click Temporary files.
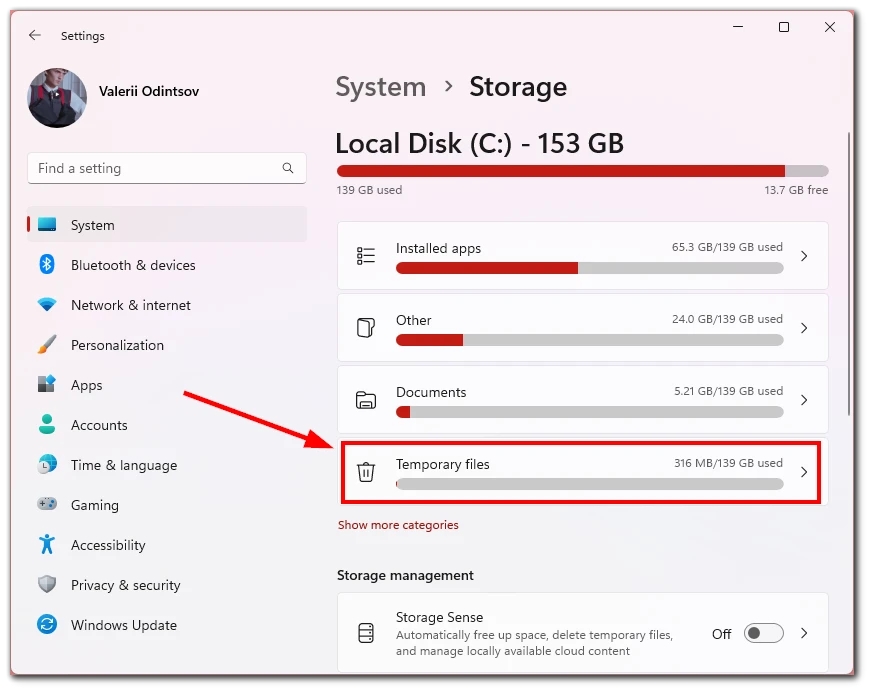
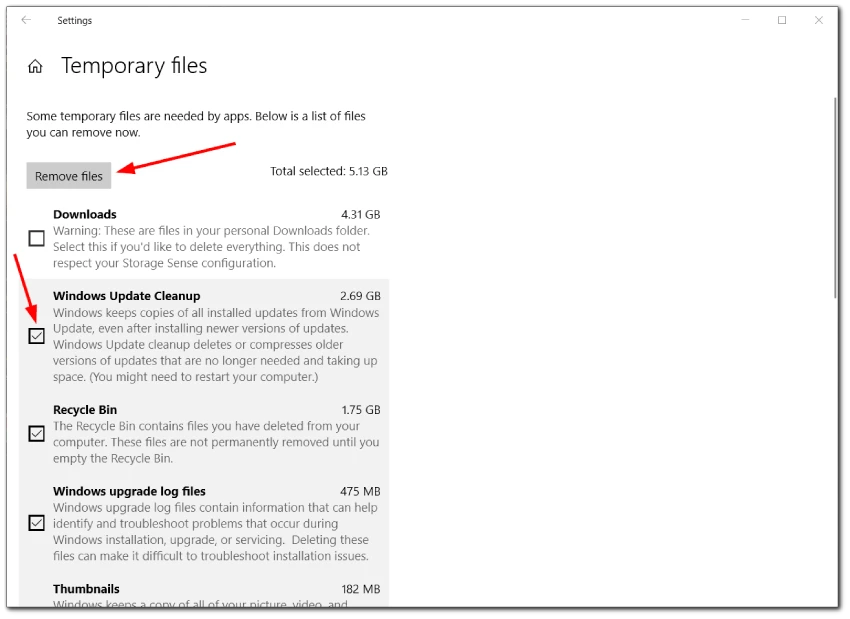
- After that, check all the files you want to clear and click Remove files.
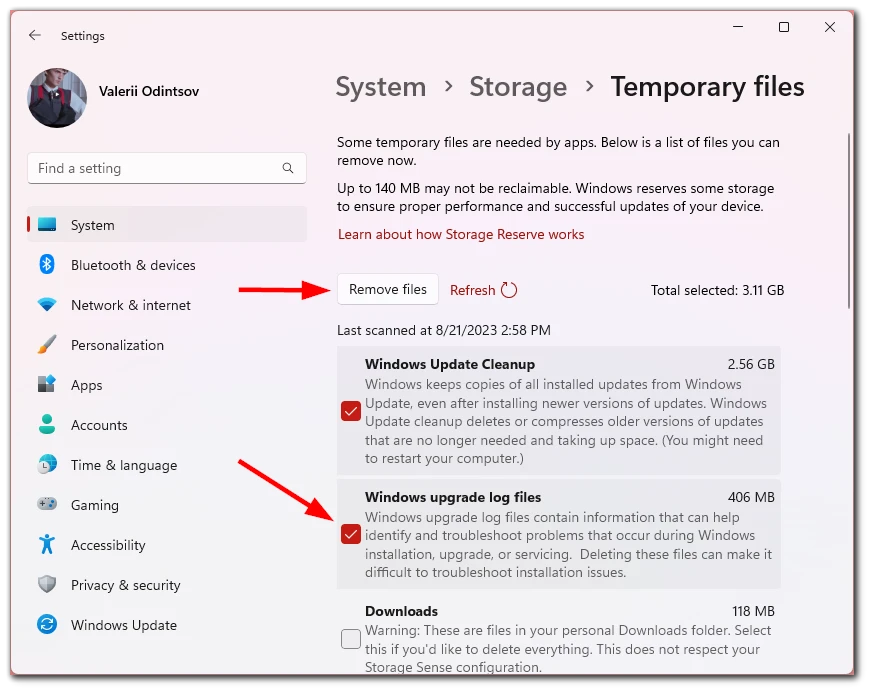
- Finally, confirm it by clicking Continue.
On Windows 10
- Open Settings from the Start menu or press Win + I.
- Go to System.
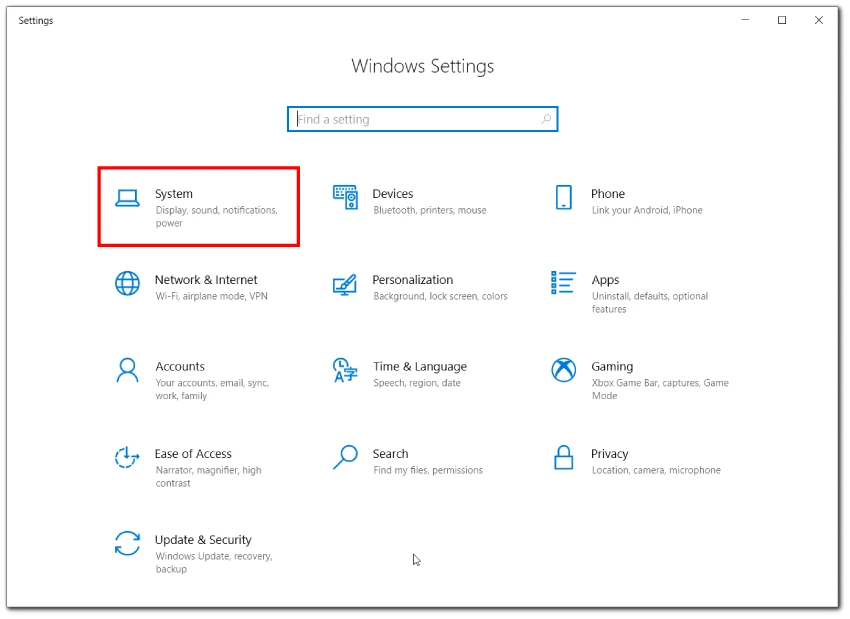
- Select Storage and click Temporary files.
- Wait for the scan to finish and check all the files you want to clear.
- Finally, click Remove files.
The cleaning process may take some time. Therefore, wait, do not close the window, and do not turn off your computer.
Note: If you tick Downloads, the entire contents of that folder will be deleted. Therefore, if you store something important there, it is better to manually delete files from this folder.
How to automatically clear temporary files on Windows
Windows has an automatic memory cleanup feature called Storage Sense. It frees up memory by deleting unnecessary temporary files.
Here’s how to enable it:
On Windows 11
- Open Settings from the Start menu or press Win + I.
- In the System section, select Storage.
- Under Storage management, you will see the Storage Sense feature. Enable it.
- If you click on it, you can also configure cleanup schedules (every day, every week, every month).
On Windows 10
- Open Settings from the Start menu or press Win + I.
- Go to System.
- In the Storage tab, enable Storage Sense. You can configure it as well.
If you don’t want to wait for Storage Sense to run automatically, you can run it manually now by clicking on the appropriate button.
How to clear the cache on Windows using Disk Cleanup
Disk Cleanup is a built-in utility in Windows that allows users to free up disk space by deleting unnecessary files, including various caches. It’s a comprehensive tool that can help improve system performance and ensure you’re not wasting storage on redundant files.
So here’s how to use it on Windows 10 and 11:
- Press the Win + R keys to open the Run dialog box.
- Type
cleanmgrand click OK to launch Disk Cleanup.
- Select the drive you wish to clean (C:) and click OK.
- Disk Cleanup will scan the selected drive and provide a list of file types that can be safely deleted to free up space.
- Check the boxes next to the file types you want to delete. This can include Temporary Internet Files, Temporary Files, and others.
- Click OK, then confirm by clicking Delete Files in the prompt that appears.
Disk Cleanup can help maintain optimal system performance and ensure your storage isn’t cluttered with unnecessary files.
How to clear system cache on Windows
The system cache contains files the operating system uses for quick data access and performance enhancement. However, these files can become outdated or corrupted over time, leading to system slowdowns or other issues.
Clearing the system cache can help remove unnecessary files and restore system performance. So here’s how you can do it both on Windows 10 and 11 (the process is the same):
- Press Win + R keys simultaneously to open the Run dialog box.
- Type
%temp%and click OK. This will open the temporary files folder.
- Select all files in this folder (you can use the Ctrl + A shortcut).
- Right-click and choose Delete or just press the Delete key. If the system indicates that some files are in use, skip them.
- Repeat the process, but this time type
temp(without the percentage signs) in the Run dialog. This is another folder with temporary files that should be cleared. If prompted for permission, click Continue or provide the necessary administrative credentials. - Lastly, type
prefetchin the Run dialog. After confirming access, delete all files from this folder too.
How to clear thumbnails cache on Windows
Thumbnails are small preview images generated by Windows for various files and folders, allowing users to quickly identify content without opening them. Over time, the thumbnail cache can grow significantly in size, taking up valuable disk space. Moreover, corrupted thumbnails can cause display issues in File Explorer. Clearing the thumbnail cache can help resolve these issues and free up storage space.
So follow these steps (the process is the same for Windows 10 and 11):
- Press the Win + R keys to open the Run dialog box.
- Type
cleanmgrand click OK to open the Disk Cleanup utility.
- Select the drive where your system is installed (usually the C: drive) and click OK.
- Disk Cleanup will calculate how much space can be freed. Once done, look for Thumbnails in the list.
- Check the box next to Thumbnails and click OK.
- Confirm by clicking Delete Files in the prompt that appears.
Windows will regenerate thumbnails as needed, ensuring they display correctly in File Explorer.
How to clear DNS cache on Windows
A DNS (Domain Name System) cache is a temporary database that stores records of all recent visits and attempts to websites and other Internet domains. Over time, old or corrupted records can cause connectivity problems or redirect to the wrong sites. Deleting these records may correct the problem.
So here’s how (the process is the same for Windows 10 and 11):
- Press the Win key and type
cmd. - Right-click on Command Prompt from the search results and select Run as administrator.
- In the opened Command Prompt window, type
ipconfig /flushdns. Press Enter.
- You should see a message confirming that the DNS Resolver Cache has been successfully flushed.
- Close the Command Prompt window.
Regularly flushing the DNS cache ensures that your computer correctly resolves domain names and connects to websites without any hitches.
How to clear cache in Microsoft Store
Over time, the Microsoft Store cache can accumulate and potentially cause issues such as failed downloads or app crashes. Clearing this cache can resolve these problems and ensure the smooth operation of the store.
So here’s how (the process is the same for Windows 10 and 11):
- Press the Win + R keys to open the Run dialog box.
- Type
wsreset.exeand click OK.
A command prompt window will appear briefly, and the Microsoft Store will open once the reset is complete.
How to clear cache for individual apps on Windows 11
In Windows 11, there’s an option to clear individual apps’ cache. For this, you can use the Reset option. So do the following:
- Open Settings.
- Then navigate to Apps and click Installed apps.
- Choose the app and click on the three dots button next to it.
- Select Advanced options.
- Scroll down and click on the Reset button.
- Confirm the action if prompted.
The app will be reset to its default state, and all its cached data will be cleared.
Can I clear my location history on Windows?
Yes, you can! Both Windows 10 and Windows 11 allow users to clear their location history. Location history is data that Windows collects when you enable the location service. Various apps can use this data to provide location-based services. However, you might want to clear this history periodically for privacy reasons.
Here’s how it works:
On Windows 11
- Open the Settings app.
- After that, navigate to Privacy & security and select Location under App permissions.
- Scroll down to Location history and click Clear.
On Windows 10
- Open Settings and go to Privacy.
- Select Location.
- Scroll down to Location history and click Clear.
This will remove all stored location data from your computer.


