

Service Host SysMain is an important component of Windows. It is designed to improve system performance by preloading frequently used apps into memory. However, it doesn’t always work correctly.
Although this service generally improves overall responsiveness, sometimes users may experience high disk usage caused by SysMain. This often happens when Windows is installed on HDD, and you don’t have any other disks to spread the load.
What does it look like? Task Manager says that the Disk is 100% loaded. Fortunately, you can eliminate this issue and optimize your system performance.
To begin with, you can try turning off the SysMain service. If that doesn’t work, you’ll have to add an SSD to your build and put Windows on it. This will relieve the OS load on HDD, and programs won’t conflict with SysMain, which constantly monitors them.
Let’s go through all the solutions in more detail.
Solution 1: Disable SysMain
Temporarily disabling the SysMain service can help identify if it’s the root cause of the high disk load. Here’s how to do it:
- Press Win + R and type services.msc.
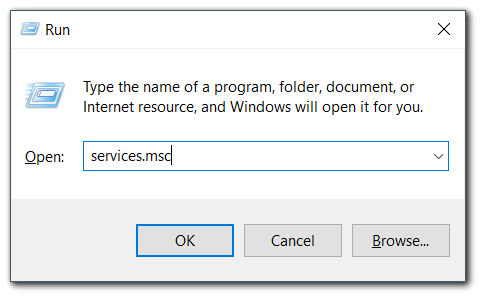
- After that, press Enter to open the Services window.
- Look for SysMain in the list of services, right-click on it, and select Properties.
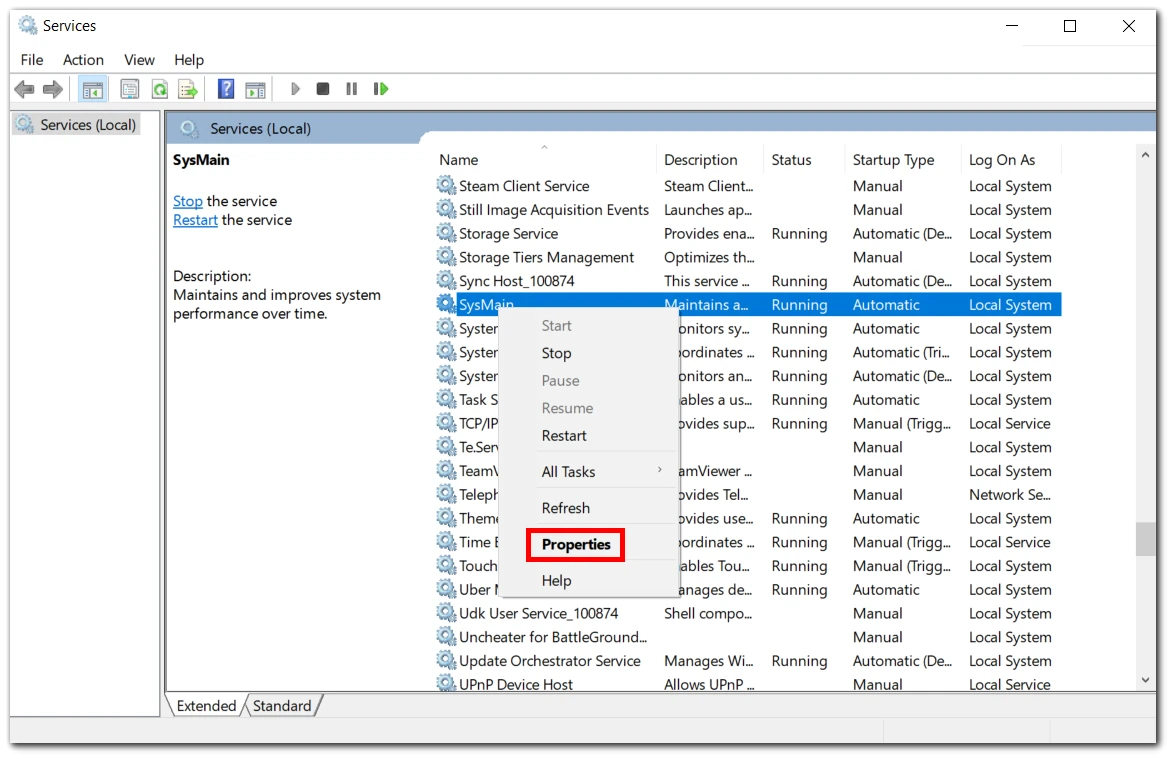
- Then set the Startup type to Disabled.
- Click Stop to stop the service immediately.
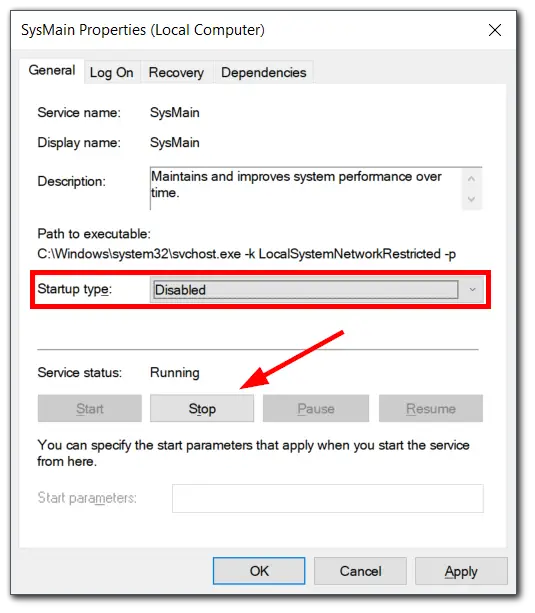
- Finally, click Apply and OK to confirm the changes.
Once you have completed these steps, restart your computer and check if the high disk load issue is resolved.
Solution 2: Disable SysMain using Command Prompt
As an option, you can also try disabling the SysMain service via the Command Prompt. Here’s what you should do:
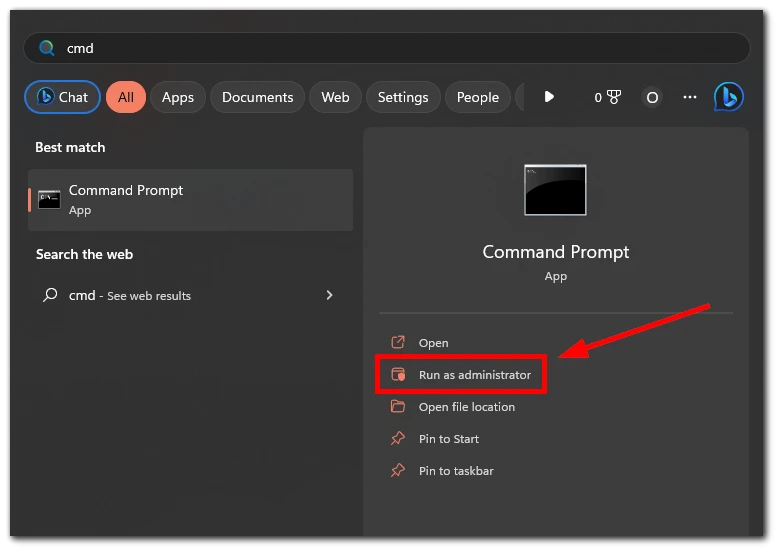
- Open the Start menu and type cmd.
- Click Run as administrator.
- In the Command Prompt, type the following:
sc stop "SysMain" & sc config "SysMain" start=disabled
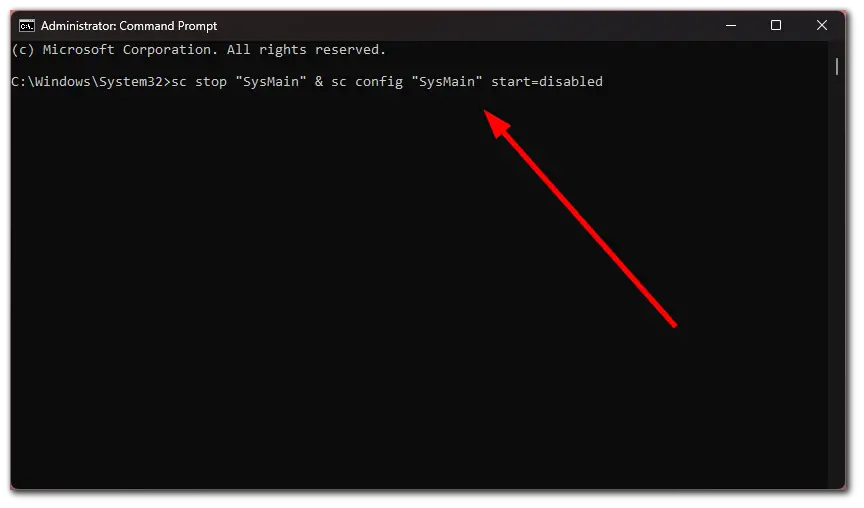
The message Change Service Config Success should appear in the window. The same thing you can do via PowerShell.
Solution 3: Edit the DWORD value in Registry Editor
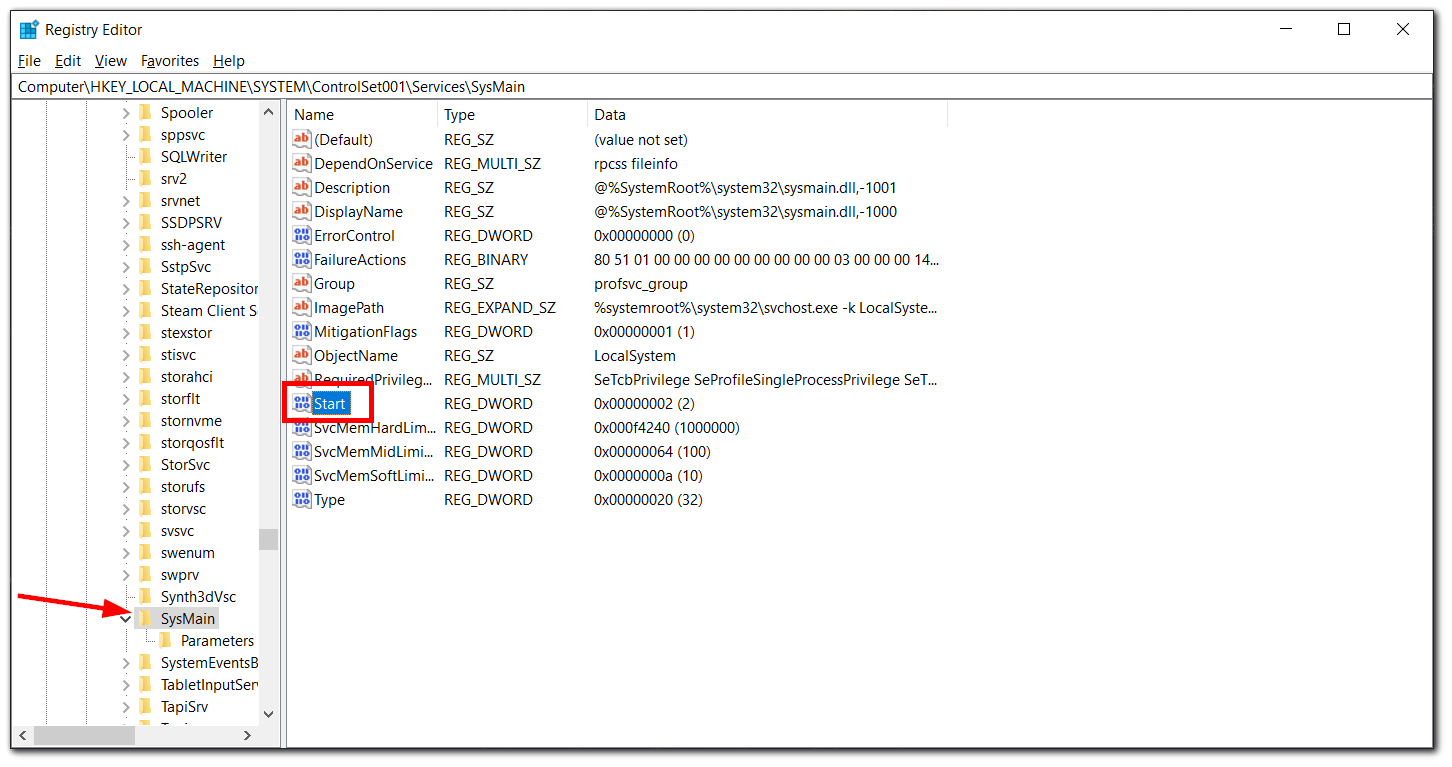
In the Windows Registry, DWORD values are widely used to store various settings and configurations for the operating system and programs. Here’s how to edit it:
- Press Win + R and type regedit. Press Enter.
- In the Registry Editor window, follow this path:
HKEY_LOCAL_MACHINE\SYSTEM\CurrentControlSet\Services\SysMain\
- After that, double-click on Start.
- Enter 4 in the Value Data field and click OK to save.
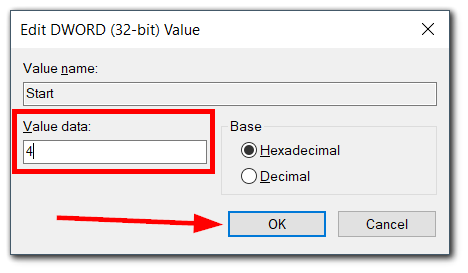
Restart your computer for the changes to take effect.
Note: Modifying the Registry can cause system instability if not done correctly. Before making any changes, it’s essential to back up your Registry and create a System Restore Point as a precautionary measure.
What can you also do?
Malware can cause excessive disk usage, leading to performance issues. So you can run a full system scan using a reliable antivirus or anti-malware program to detect and remove any potential threats.
Ensure that your Windows operating system and drivers are up-to-date. Microsoft frequently releases updates that include bug fixes and optimizations, which may resolve the high disk load issue caused by SysMain.
If your system is running on low memory or an older hard disk drive (HDD), upgrading to a solid-state drive (SSD) or adding more RAM can significantly improve overall performance and reduce disk load.
What are the benefits of upgrading to an SSD?
Upgrading to SSD offers numerous benefits, making it one of the most impactful hardware upgrades you can make to your PC or laptop. In my experience, when I put an SSD on my good old laptop, it was like it was reborn. Windows started booting up at least 3 times faster.
SSDs are much faster than traditional HDDs. They have significantly lower access times and faster read and write speeds, which lead to quicker boot times, faster program launches, and improved overall system responsiveness. Tasks that used to take minutes can be completed in seconds with an SSD.
What’s more, SSDs have no moving parts, unlike HDDs, which rely on spinning disks and read/write heads. As a result, they produce no noise during operation and consume less power, leading to improved energy efficiency and longer battery life in laptops.
I assure you SSD will give you a significant boost in overall system performance. So if you want a quick and practical solution to the high disk load problem, buy an SSD and install Windows on it.
Is the SysMain service a virus?
No, SysMain is not a virus. It is a legitimate Windows system service that helps improve system performance by preloading frequently used programs and data into RAM. However, there is one point you should keep in mind.
Although SysMain is not a virus, some viruses and malware can mimic this service. This is how they hide from users.
If you suspect that SysMain or any other process is behaving suspiciously or causing problems in your computer, you should perform a thorough scan with a reliable antivirus program. If scanning doesn’t help, then contact a service center.


