

You can restore network settings if you have network problems on your Windows PC. All you have to do is run a simple command from the command line.
What do you need to perform a netsh winsock reset on Windows
So, sometimes strange things can start happening to your PC, such as:
- No ping by IP address, but availability by name or vice versa. In this case, the default settings weren’t changed.
- Drop in the speed of downloading files from the Internet, as well as complete loss of connection after some time after turning on the PC.
- Inability to connect to the network with the IP settings manually, while in automatic mode everything works. Although, again, it may be the other way around.
- Failure to get an automatic IP address when the DHCP server is configured.
- Lack of any IP address, gateway, and subnet mask values when actively connected to the local network.
In general, when inexplicable glitches start to occur with the network settings of the machine, netsh winsock reset helps us. It’s with this command that you can reset the network settings to the defaults and get things back up and running again.
Well, here’s how to do a netsh winsock reset on Windows.
What does Winsock mean
Winsock (Windows Socket) is a term used by Windows to describe the data on a PC that programs use to access the network. For a program to work on the network, it must use Windows Socket.
This procedure is also called resetting the Winsock protocol stack and is almost always used in conjunction with resetting TCP/IP. In other words, the Windows components responsible for network connections are reset.
Netsh Winsock reset is a common troubleshooting step for network problems. For most people, resetting Winsock shouldn’t cause any additional problems, but before you get to the steps of Netsh Reset Winsock, let’s first look at when and why you do it, and what actually happens when you run the command.
When to do a Winsock reset
The most common reason to reset Winsock in Windows is when you can’t access websites that you may have accessed before. Your Internet connection may seem completely stable – the Wi-Fi is working strong or the cable is connected – but you can’t browse any web pages.
Resetting Winsock can also be useful if you’re having problems with your Internet connection in the following situations:
- After malware removal.
- You see pop-up errors related to the network.
- There are problems with DNS lookups.
- You just uninstalled network related software, such as a firewall or VPN.
- You see “limited or no connection” errors.
- Releasing and updating the IP address didn’t restore the connection.
- The Internet is working on other devices on the same network, but not on your Windows PC.
What does Netsh Winsock reset actually do
In short, a Winsock reset will undo configurations made in the Winsock directory in Windows. Changes can be made by network programs such as a web browser or VPN program.
Resetting Winsock returns the wsock32 DLL file to its default settings. When Winsock is reset, the programs that were using it and in which network errors were detected – such as your web browser or email client – begin to connect to the TCP/IP traffic from the beginning.
In other words, if the DLL is somehow deformed, resetting it to a clean version will also reset how those network programs reach the Internet, and you will regain access.
Thus, if malware, Windows failure, software, etc. hijack this mechanism, it can disrupt access to the Internet. Because it works by using a layered technique to place different providers (called Layered Service Providers or LSPs) on top of each other, the more you have, the more likely the problem will occur.
Resetting Winsock removes all layers of these custom providers and returns the Winsock directory to its default state. Because of this, it’s important to realize that resetting Netsh Winsock will break the functionality of some programs, so you may need to reconfigure some of your programs to make them work normally again after the reset.
How to reset netsh winsock on Windows 10
If you want to reset netsh Winsock on Windows 10, you have to follow these steps:
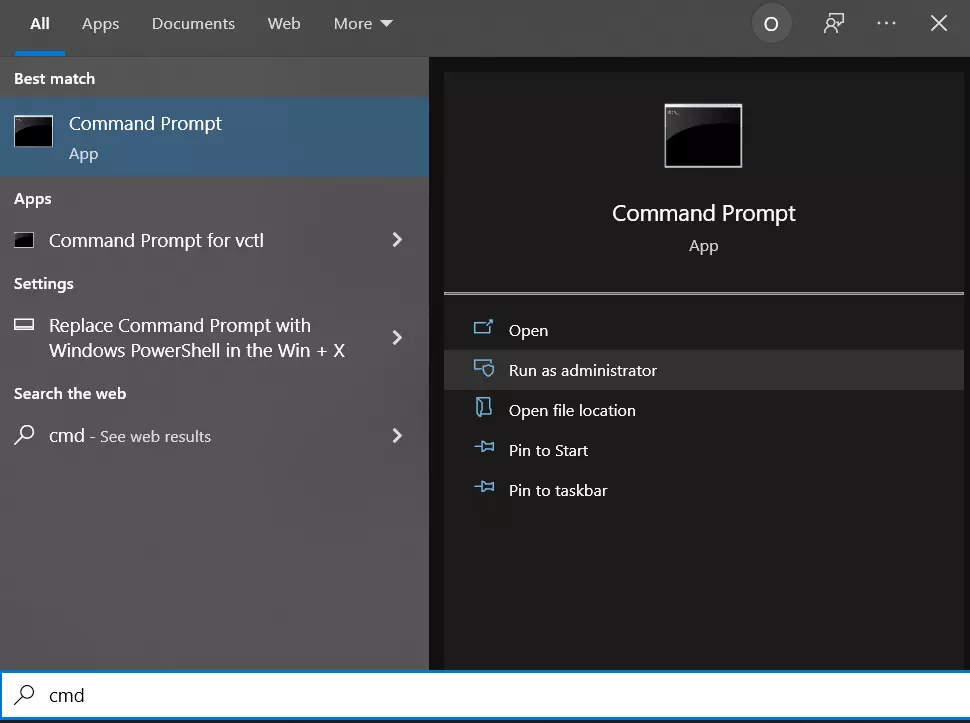
- First of all, click on the Start button and type “cmd”.
- After that, click “Run as administrator”.
- In the appearing command prompt, type “netsh winsock reset”.
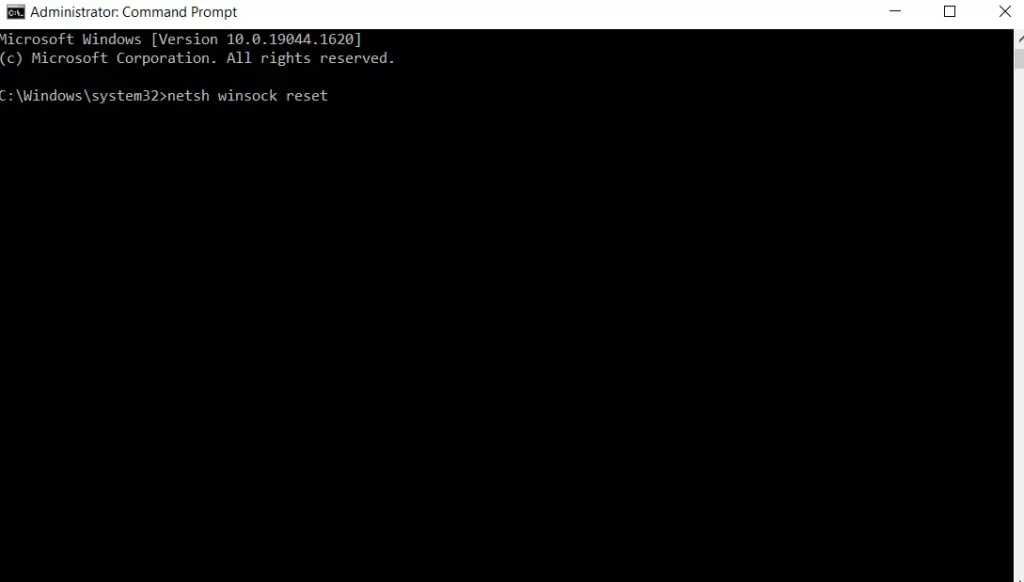
If it works, you’ll see the message “Successfully reset the Winsock Catalog. You must restart the PC in order to complete the reset”.
After restarting, make sure that the problem is gone.
How often can you do this kind of reset
There’s probably nothing wrong with running the Winsock reset command as often as you need, but it’s not okay to do it more than a few times over the life of your PC. Pay particular attention to what software you install and when you experience network errors. Knowing when you encounter a problem is very helpful in figuring out the cause.
It’s also very important to have an anti-virus program running on your PC at all times to detect infections that may be causing Winsock-related errors.
If nothing helps, a complete reinstallation of your system should help if you have nowhere else to turn to fix your networking problem. However, reinstalling Windows should definitely be the last step.


