

Like other online video conferencing apps, Webex has many built-in features. Among them, there’s, of course, an option to change your display name. You can customize and update this data at any time on any device. If your display name doesn’t show up correctly, or if you just want to change it to an alias, you can easily do this with the settings in the app on your PC and smartphone.
However, the first thing you should know is that you can’t change your display name during the meeting on Webex. I find it weird why this isn’t implemented in the same way as in Zoom. After all, honestly, it would be convenient. Perhaps the inability to do this during a meeting is somehow related to the Webex security policy.
Anyway, let’s take a closer look at how to change your name on Webex.
How to change your display name on the Webex PC app
If you want to change your display name in Webex on your PC, you can follow these steps:
- Open Webex and sign in to your account if needed.
- After that, click on your profile icon at the top left corner and select Edit profile.
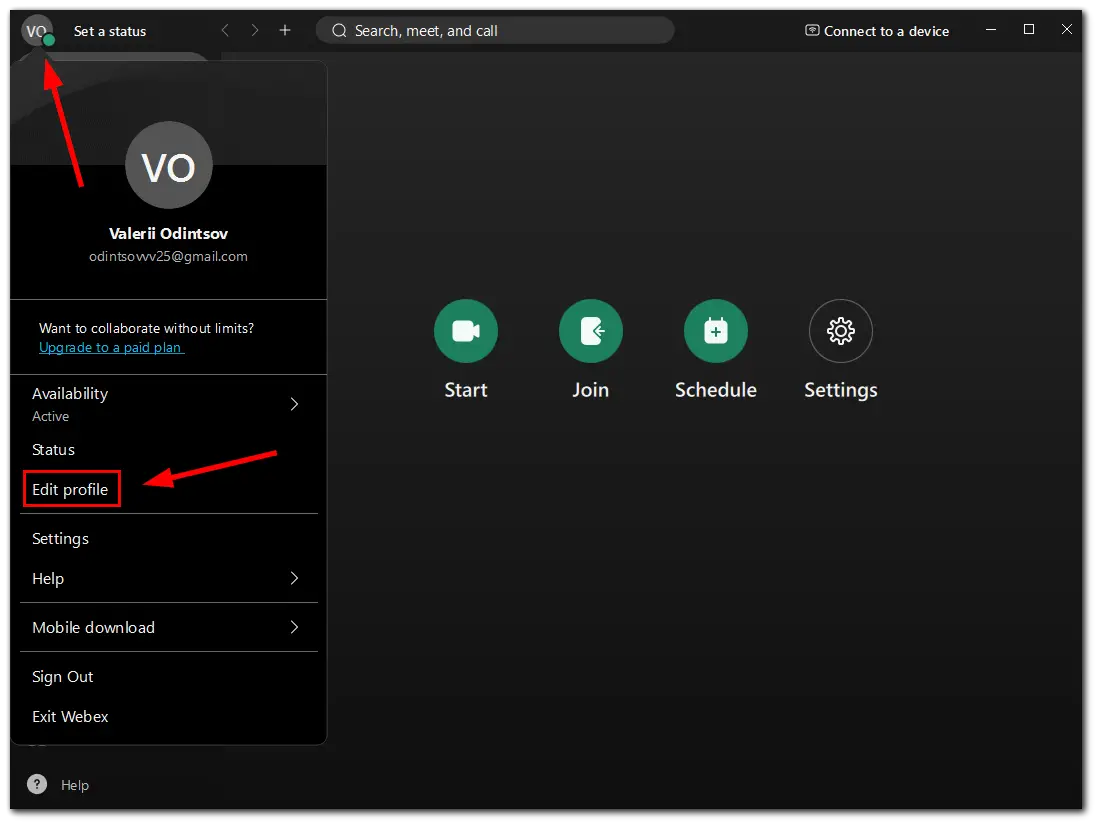
- Then enter your new display name and click Save.
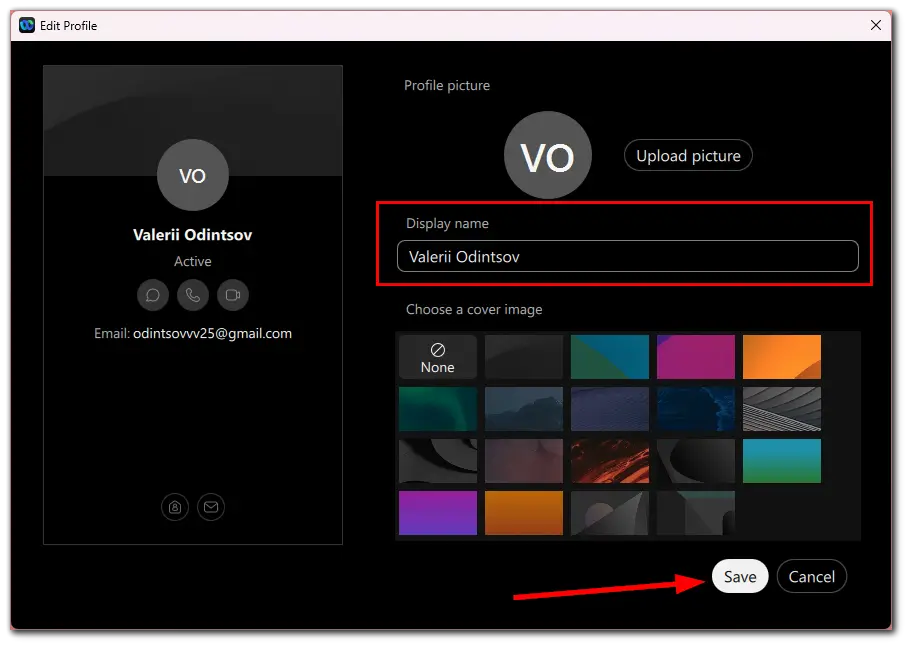
Moreover, in this menu, you can change the cover or upload a picture.
How to change your name on the Webex web app
You can easily change your display name using Webex in a browser. And here’s how:
- Visit Webex and sign in to your account.
- Then click on your name and select My profile.
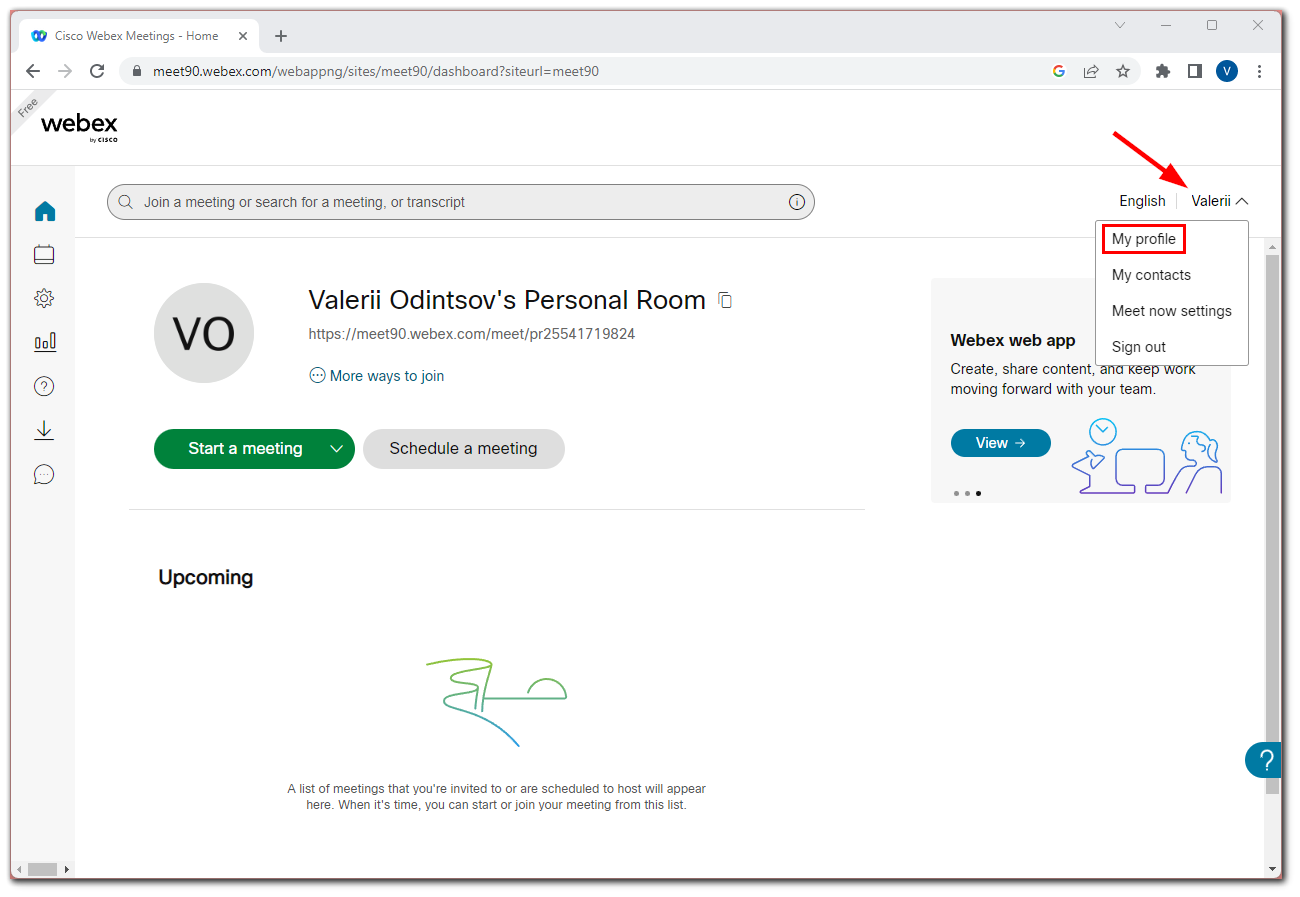
- After that, click Edit my profile.
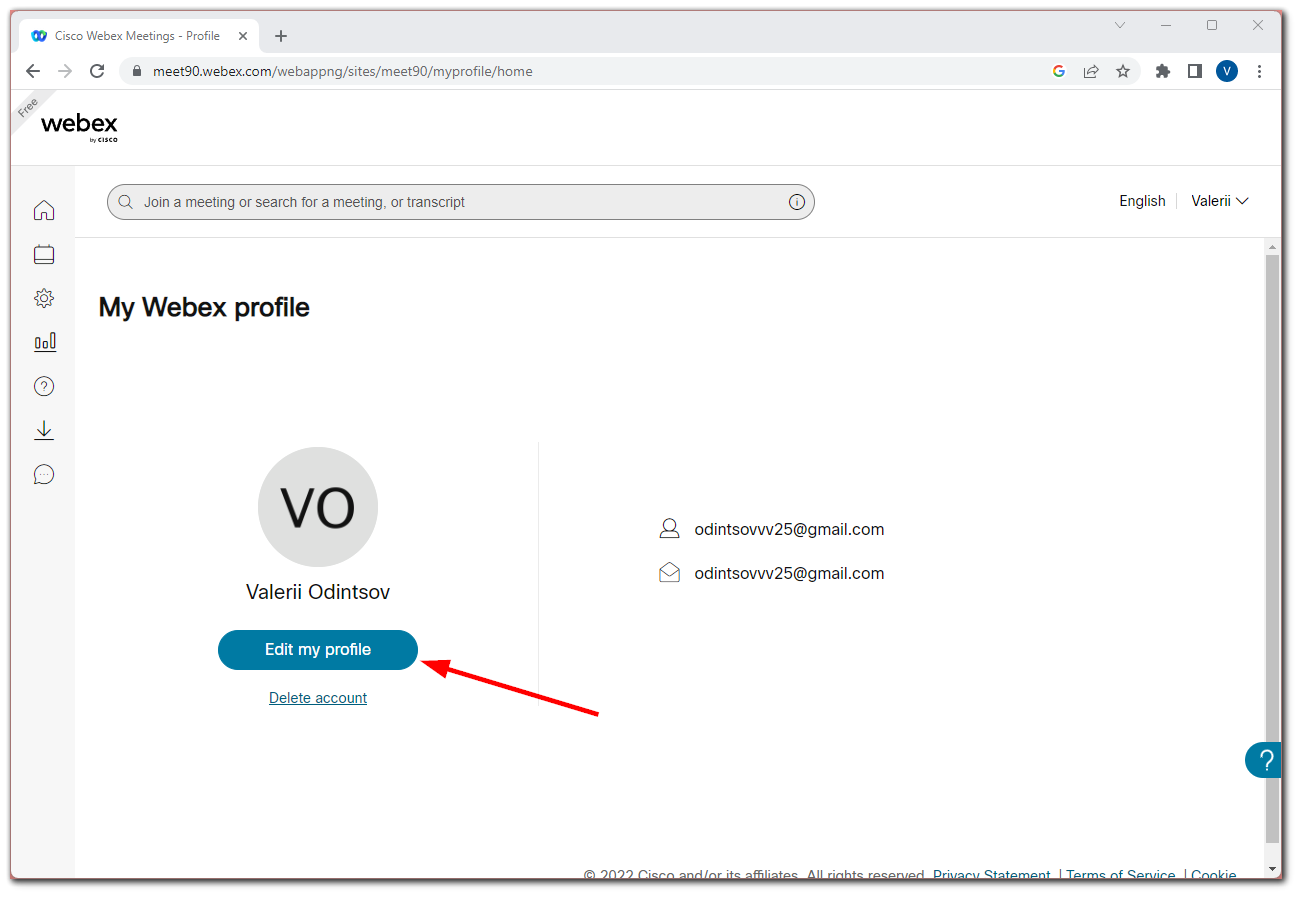
- In the opening window, select Display Name.
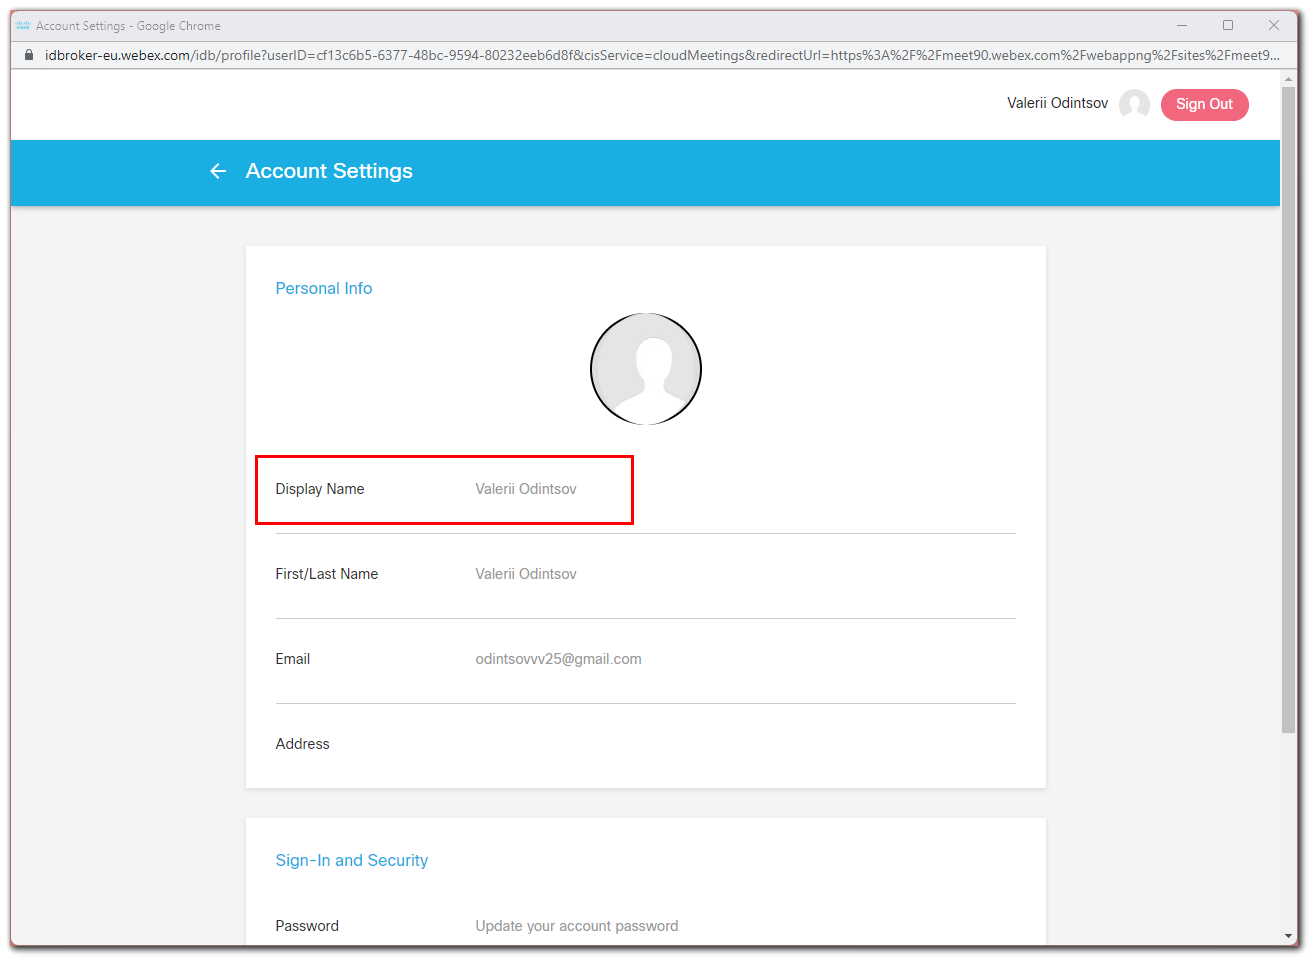
- Finally, change your name and click Save.
After completing these steps, you will see your updated name in your profile and during the meeting. In almost the same way, you can change other data such as an address, password, etc.
How to change the display name on Webex mobile app
If you want to upgrade your Webex name using your smartphone, you can follow these instructions:
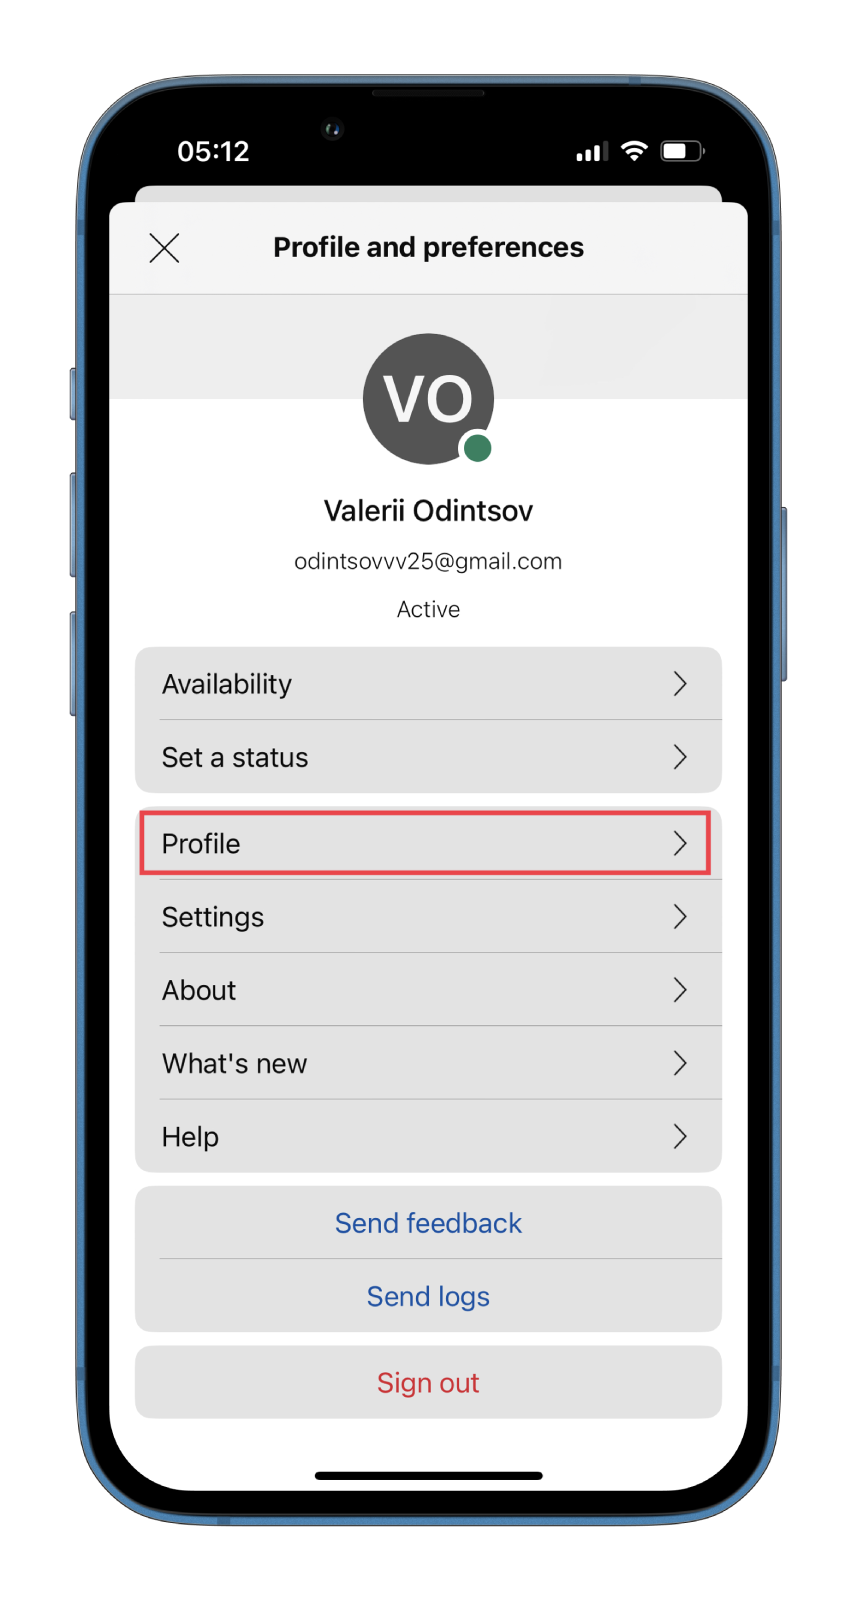
- Open Webex on your mobile device and sign in to your account if necessary.
- After that, tap on your profile icon at the top left corner of the screen.
- Then select Profile.
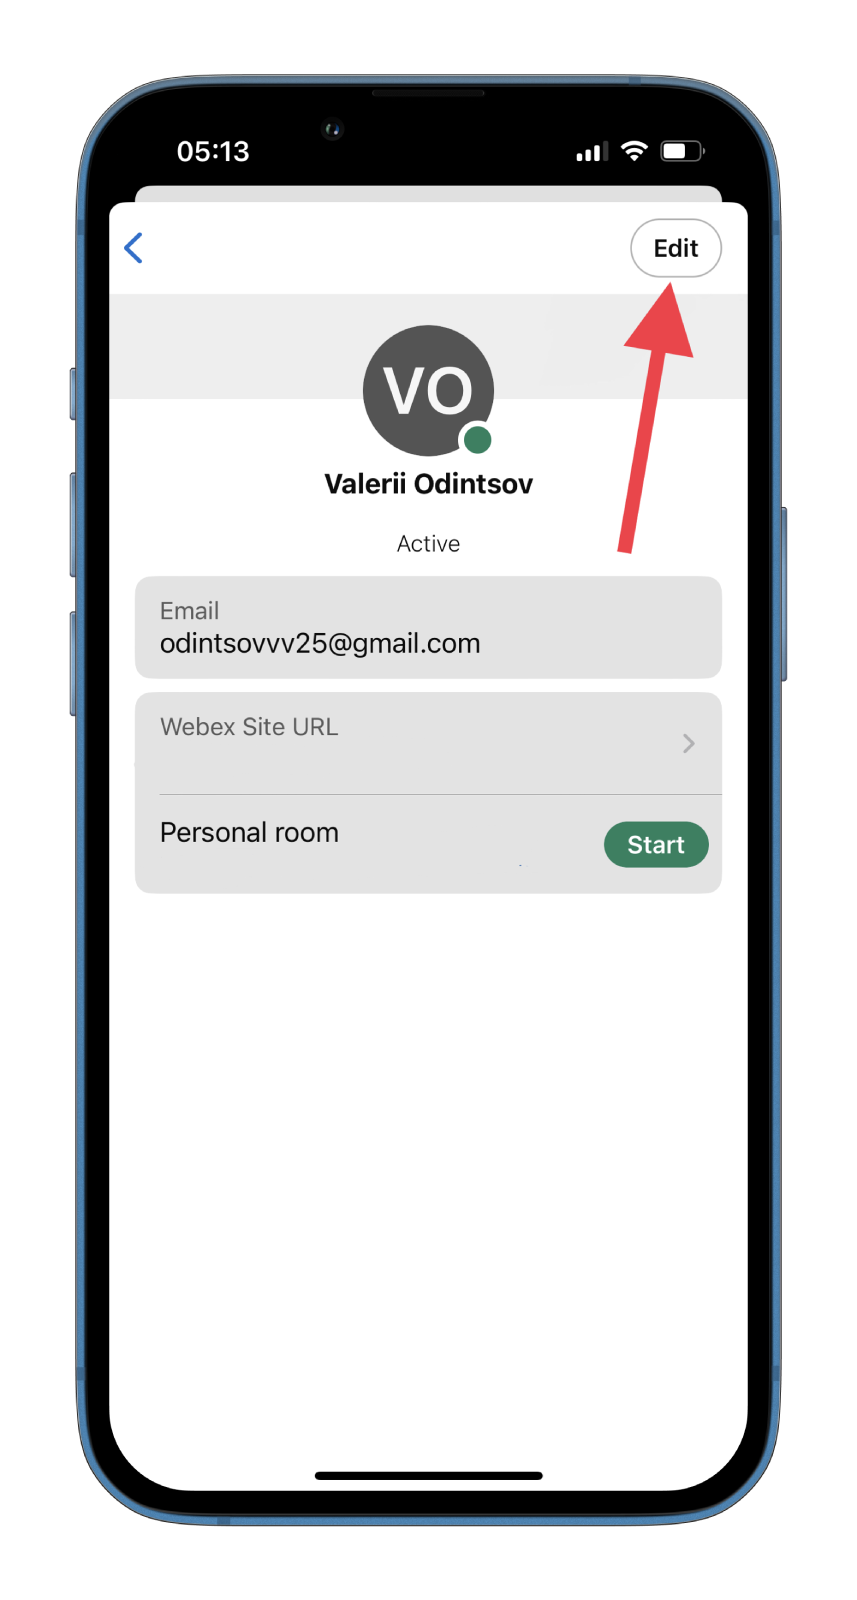
- Next, tap Edit at the top right corner.
- Finally, enter your new display name and tap Save to confirm.
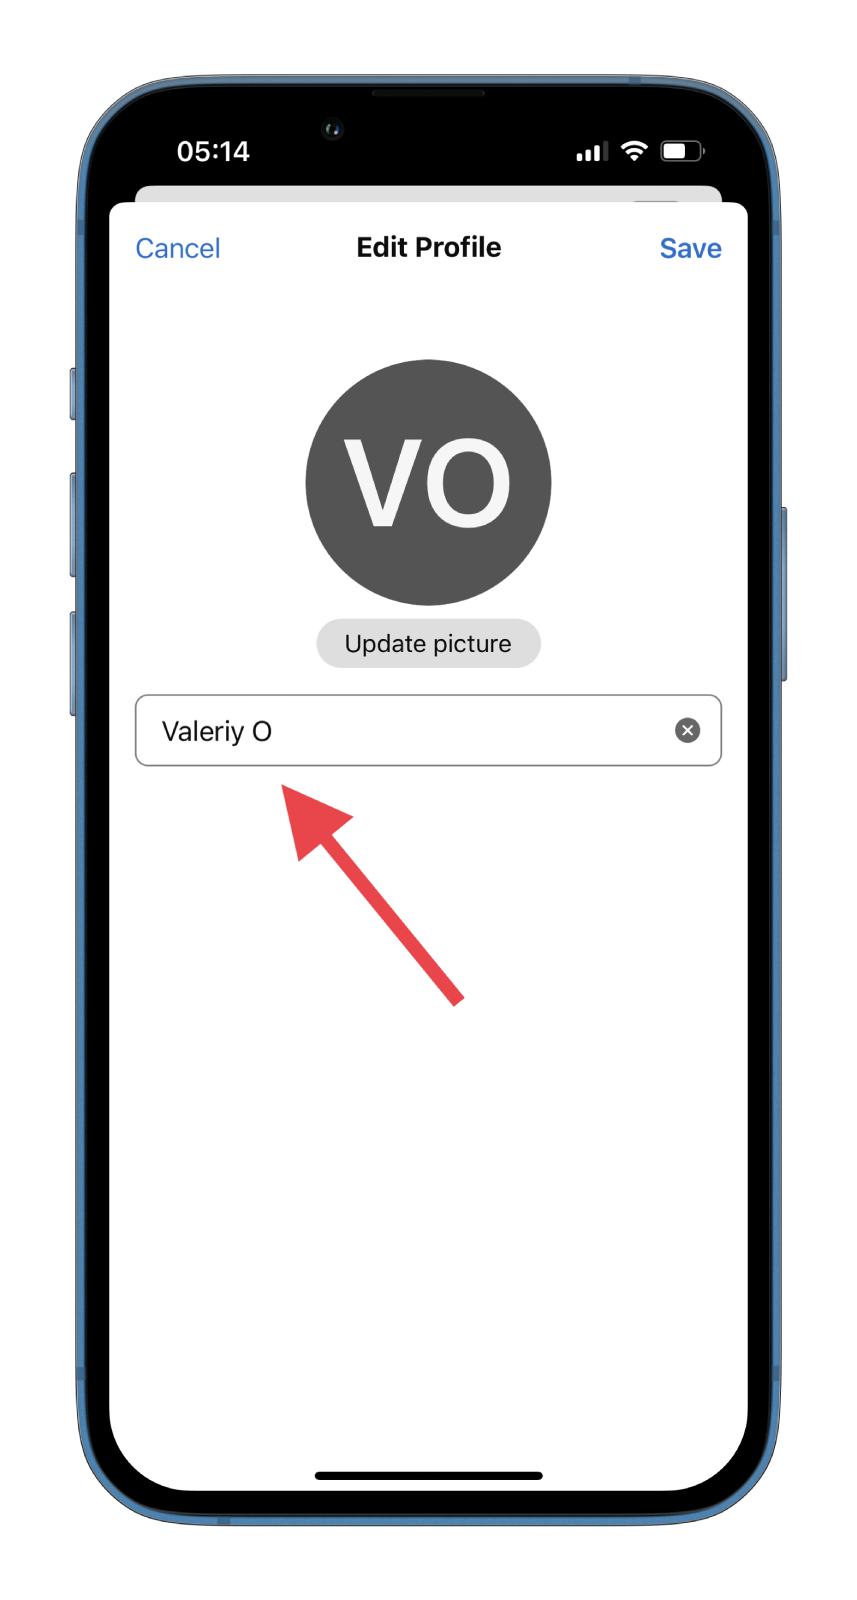
Once you have completed these steps, you will change your display name on Webex. You can also add a photo to your profile in the same menu.
That’s it. As you can see, there’s nothing complicated about changing your display name on Webex. What’s more, you can easily do this on all platforms.
How to set a status on Webex
Like most online video conferencing apps, Webex allows users to set a status. So let’s look at how to do this on a PC and mobile device.
PC
Here’s what you should do to set a status on the Webex PC app:
- Launch it and sign in to your account if needed.
- After that, click on your profile icon at the top left corner and select Status.
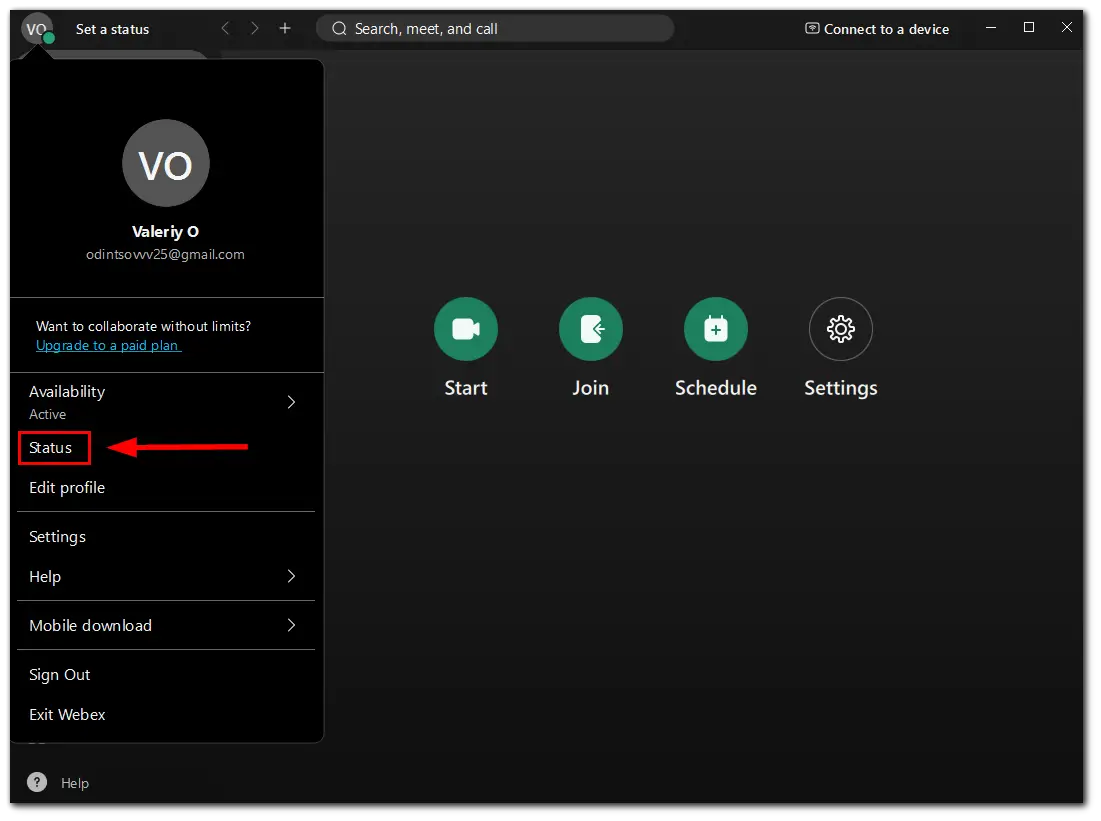
- Then you can create your own status or choose one from the available.
- Finally, click Save.
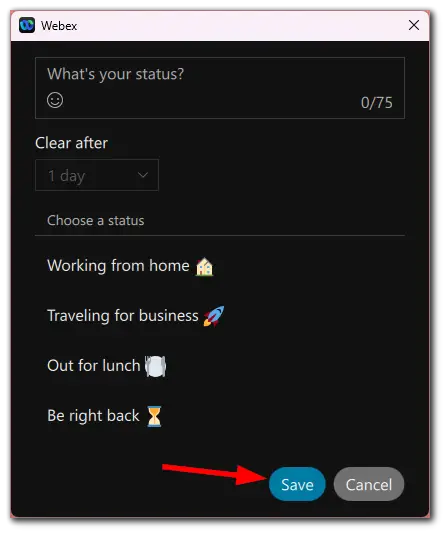
The status message will be displayed next to your profile icon. You can also set the time for which it will be available (Clear after). There is a similar feature in Microsoft Teams.
Mobile device
Here’s what you should do to set a status on Webex mobile app:
- Open Webex and sign in to your account if needed.
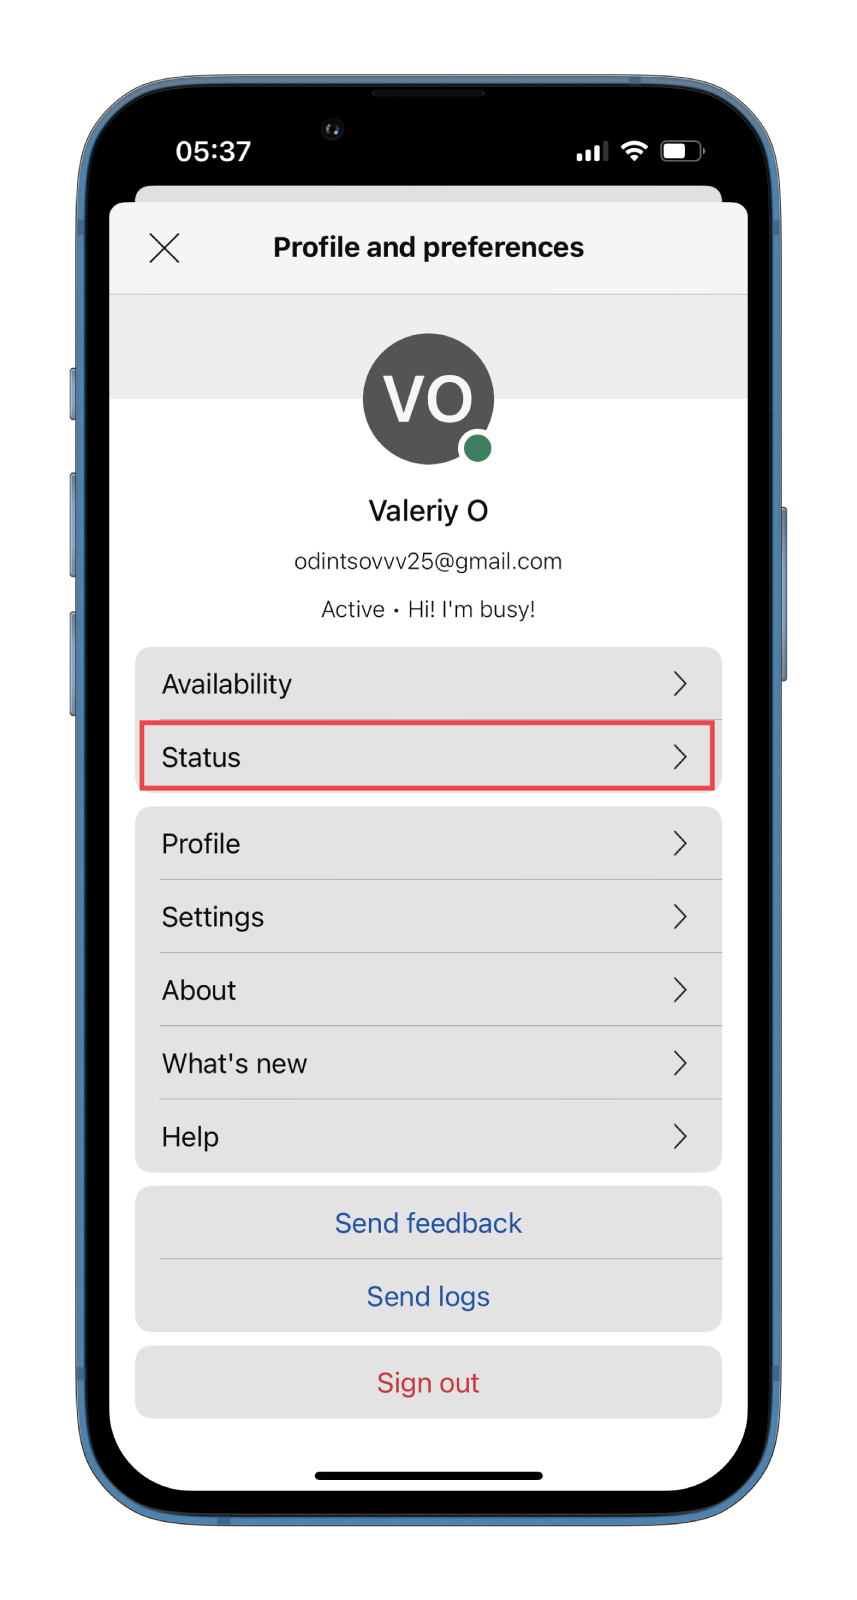
- Next, tap on your profile icon at the top left corner of the screen.
- After that, select Status.
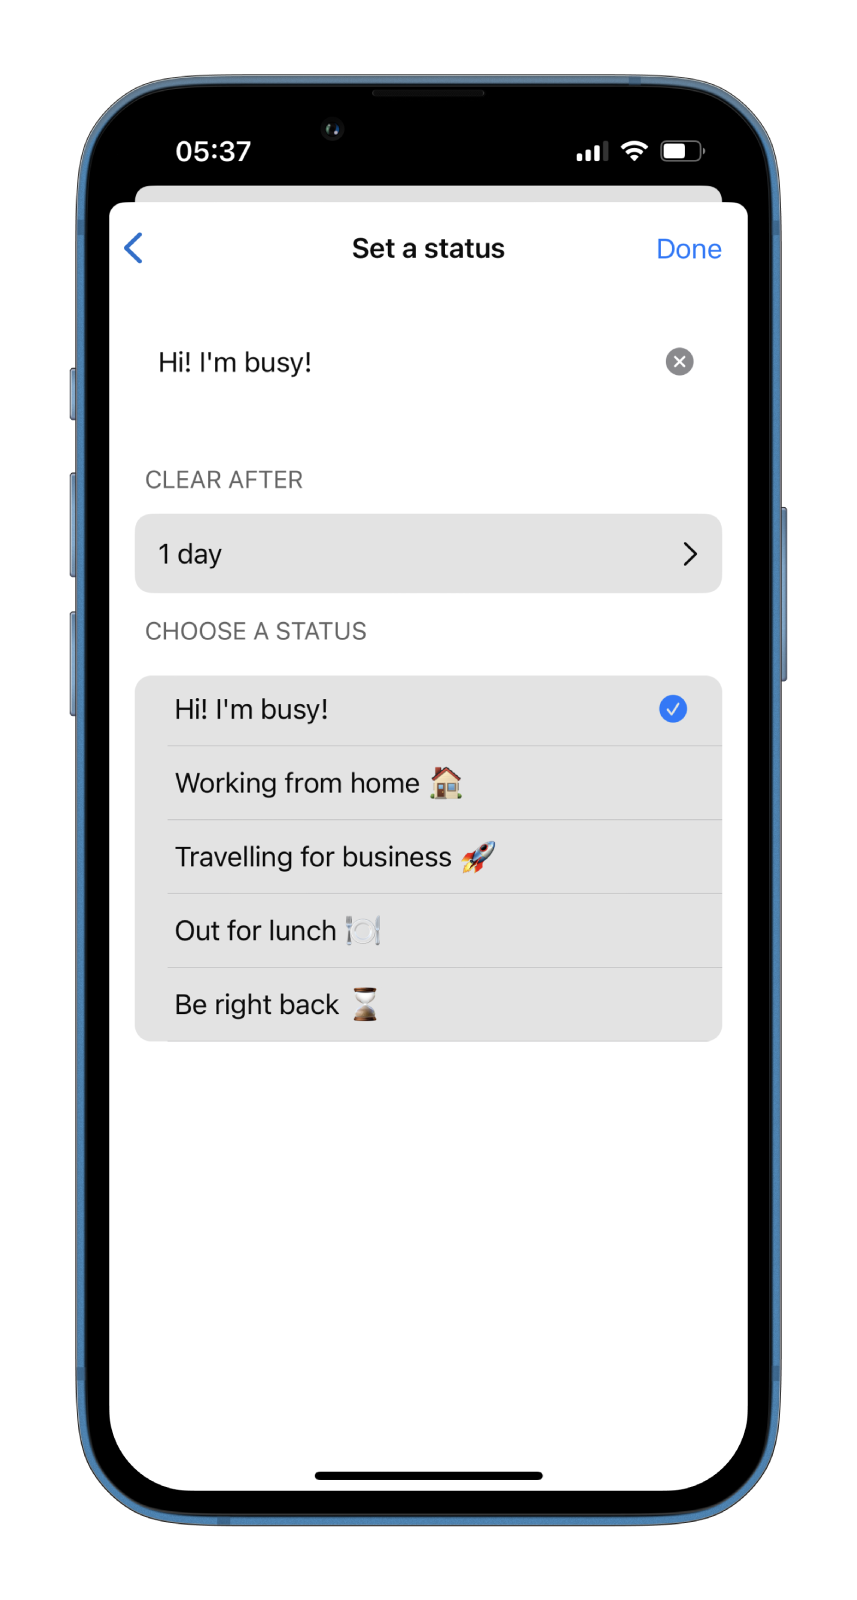
- Enter your message, select its Clear After and tap Done.
That’s how you can easily add a status to your Webex profile.


