Enhancing your Instagram stories with captions is a great way to engage your audience and make your content more accessible. Captions provide context and allow users to consume your stories even if they can’t listen to the audio. Instagram offers two kinds of subtitles. You can add subtitles to your stories or reels to translate your words into text, and you can also enable automatic subtitles in the Instagram settings to be added to other people’s videos and stories.
How to add auto-generated captions to your Instagram stories
Instagram offers a convenient feature that automatically generates captions for your stories based on speech recognition technology. These auto-generated captions save you time and effort, ensuring your content is accessible to a wider audience. Follow the steps below to add auto-generated captions to your Instagram stories:
- Tap the camera icon at the top-left corner of your Instagram home feed or swipe right to access the story camera.
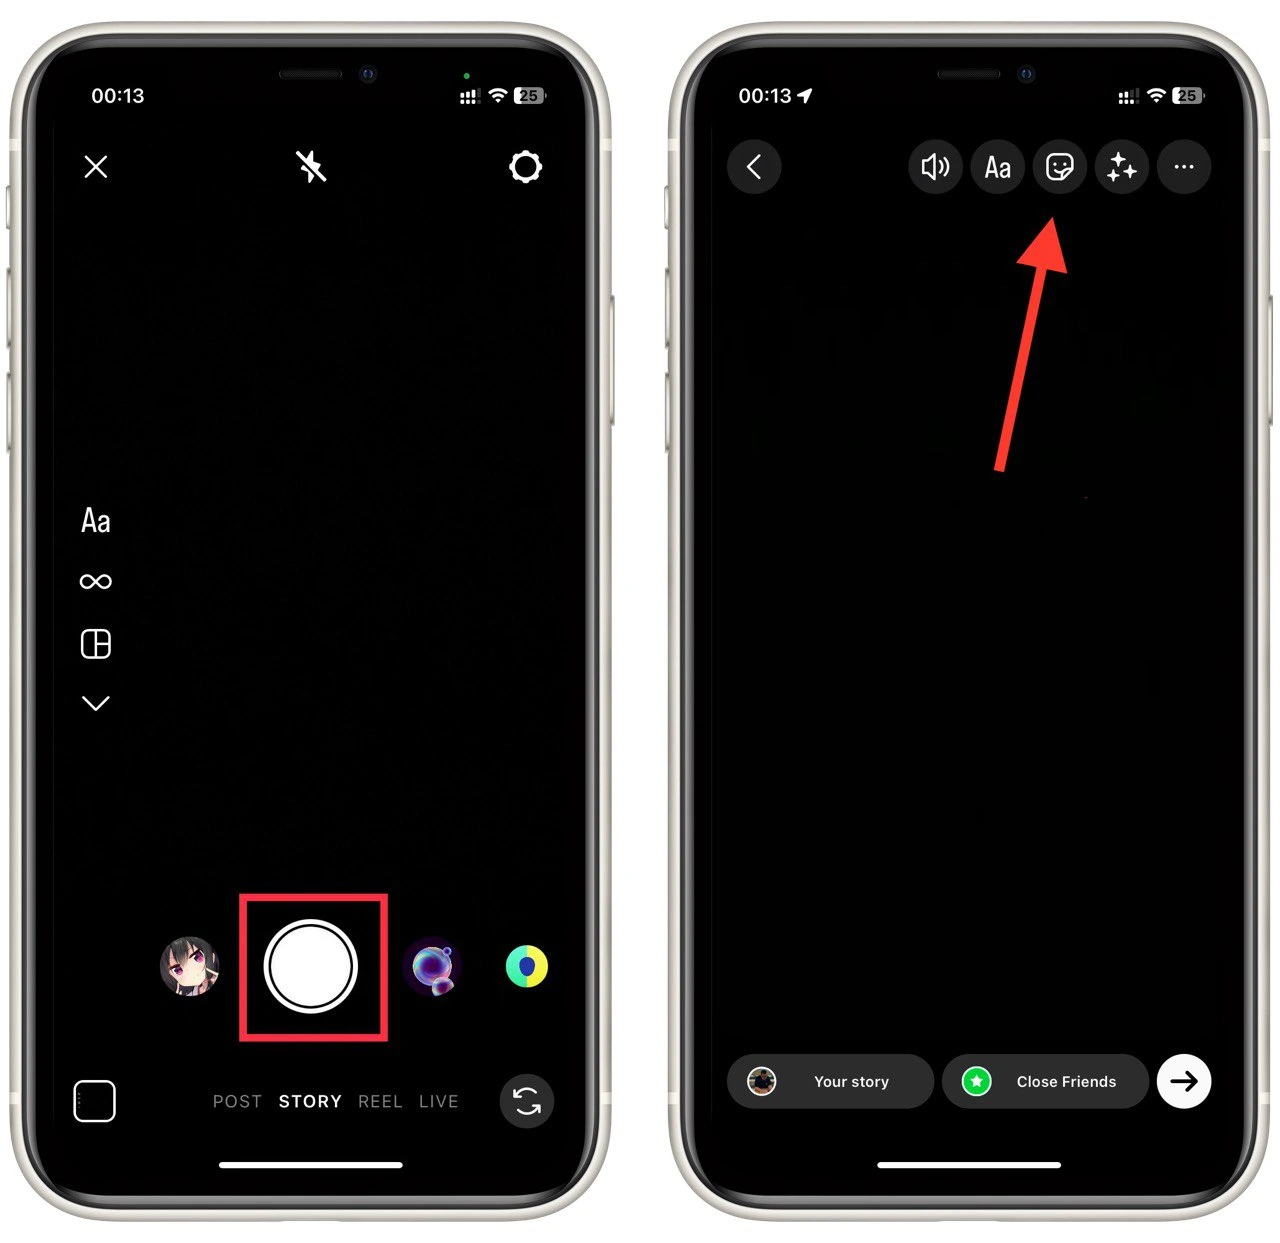
- Capture a photo or video by tapping the capture button (circle icon) at the bottom of the screen. Alternatively, swipe up to access your gallery and select the desired content from your device.
- Once you’ve captured or selected your content, you’ll notice a sticker icon (smiley face) at the top-right corner of the screen. Tap on it to open the sticker tray, where you’ll find various options to enhance your story.

- Look for the “Captions” option in the sticker tray and tap on it. This will initiate the automatic captioning feature in Instagram.
- Instagram will analyze the audio in your story and generate captions based on speech recognition technology. The captions will appear on your screen in a default style. Review the automatically generated captions for accuracy and make any necessary edits. To edit a caption, tap on it and use your device’s keyboard to make changes.
- You can further customize the appearance of the captions to make them visually appealing and consistent with your story’s theme. To do this, tap on a caption and select from the available style options, such as font, color, and background.
- Play your story to ensure the captions align with the audio and are displayed correctly. Make any additional adjustments if needed. Once you’re satisfied with the auto-generated captions, tap the “Your Story” button at the bottom of the screen to share your story with captions.
By following these steps, you can effortlessly add auto-generated captions to your Instagram stories, making them more inclusive and engaging for your audience. Remember to review the accuracy of the captions before publishing and make any necessary edits to ensure the captions correctly represent your content.
How to turn on captions for Instagram videos
Instagram allows you to enable captions for videos through the app’s settings. By doing so, you can ensure that captions are automatically displayed whenever you watch videos on your feed, making the content more accessible. Follow the detailed steps below to turn on captions for Instagram videos:
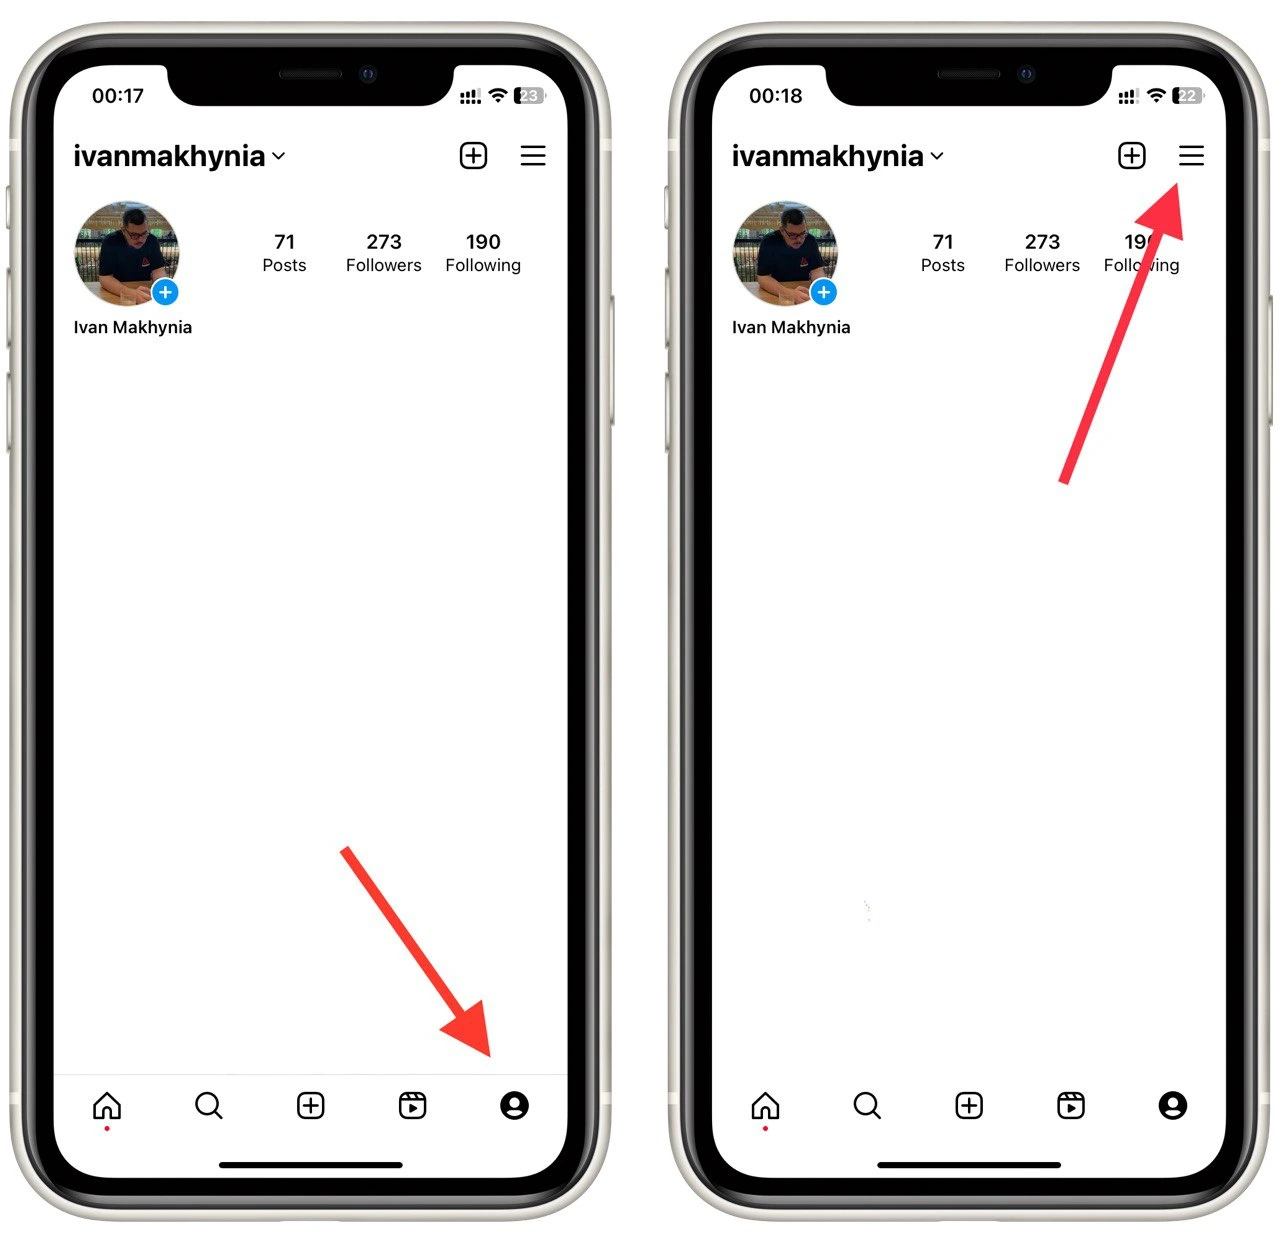
- Tap on the profile icon located at the bottom-right corner of the screen. This will take you to your Instagram profile.
- On your profile, tap the three horizontal lines icon (hamburger menu) at the top-right corner of the screen. This will open the menu.

- Scroll down the menu until you find the “Settings and Privacy” section.
- Within this section, locate and tap on “Accessibility.”
- In the Accessibility settings, look for the “Captions” option and tap on it. This will bring you to the caption settings page.
- You should see an option to enable video captions on the caption settings page. Toggle the switch or checkbox next to this option to turn it on. The switch or checkbox should change to indicate that captions are now enabled.
You have successfully turned on captions for Instagram videos via the app’s settings. From now on, captions will automatically be displayed whenever you watch videos on your Instagram feed, providing a more inclusive viewing experience. Remember to periodically check your caption settings and adjust any preferences to ensure they are still enabled and adjust any preferences.
How to manually add captions to Instagram story
If, for some reason, you can’t add automatic subtitles or they don’t suit you, you can create your own subtitles manually using the feature of overlaying text on Instagram stories. To do this, you need the following:
- Tap the camera icon at the top-left corner of your Instagram home feed, or swipe right to access the story camera.
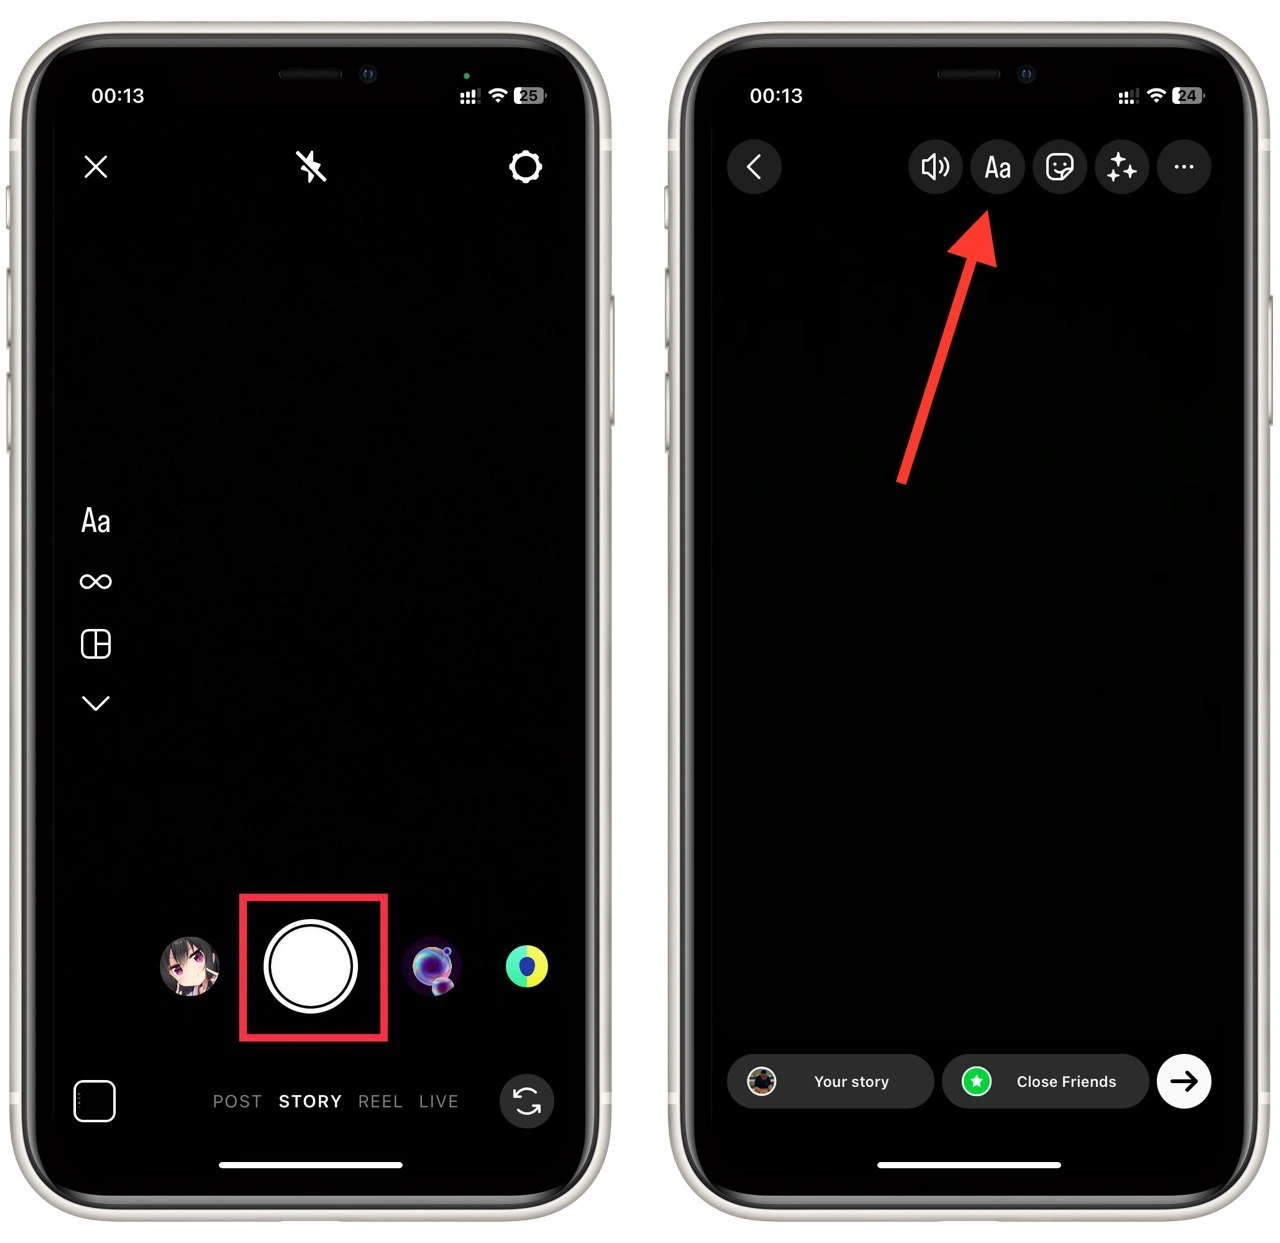
- Take a photo or record a video using the camera, or select existing photos or videos from your device’s gallery by swiping up on the screen. Choose the content that you want to use for your story.
- Once you have your desired content, tap the “Aa” icon at the screen’s top-right corner. This will open the text editor, where you can add captions to your story.

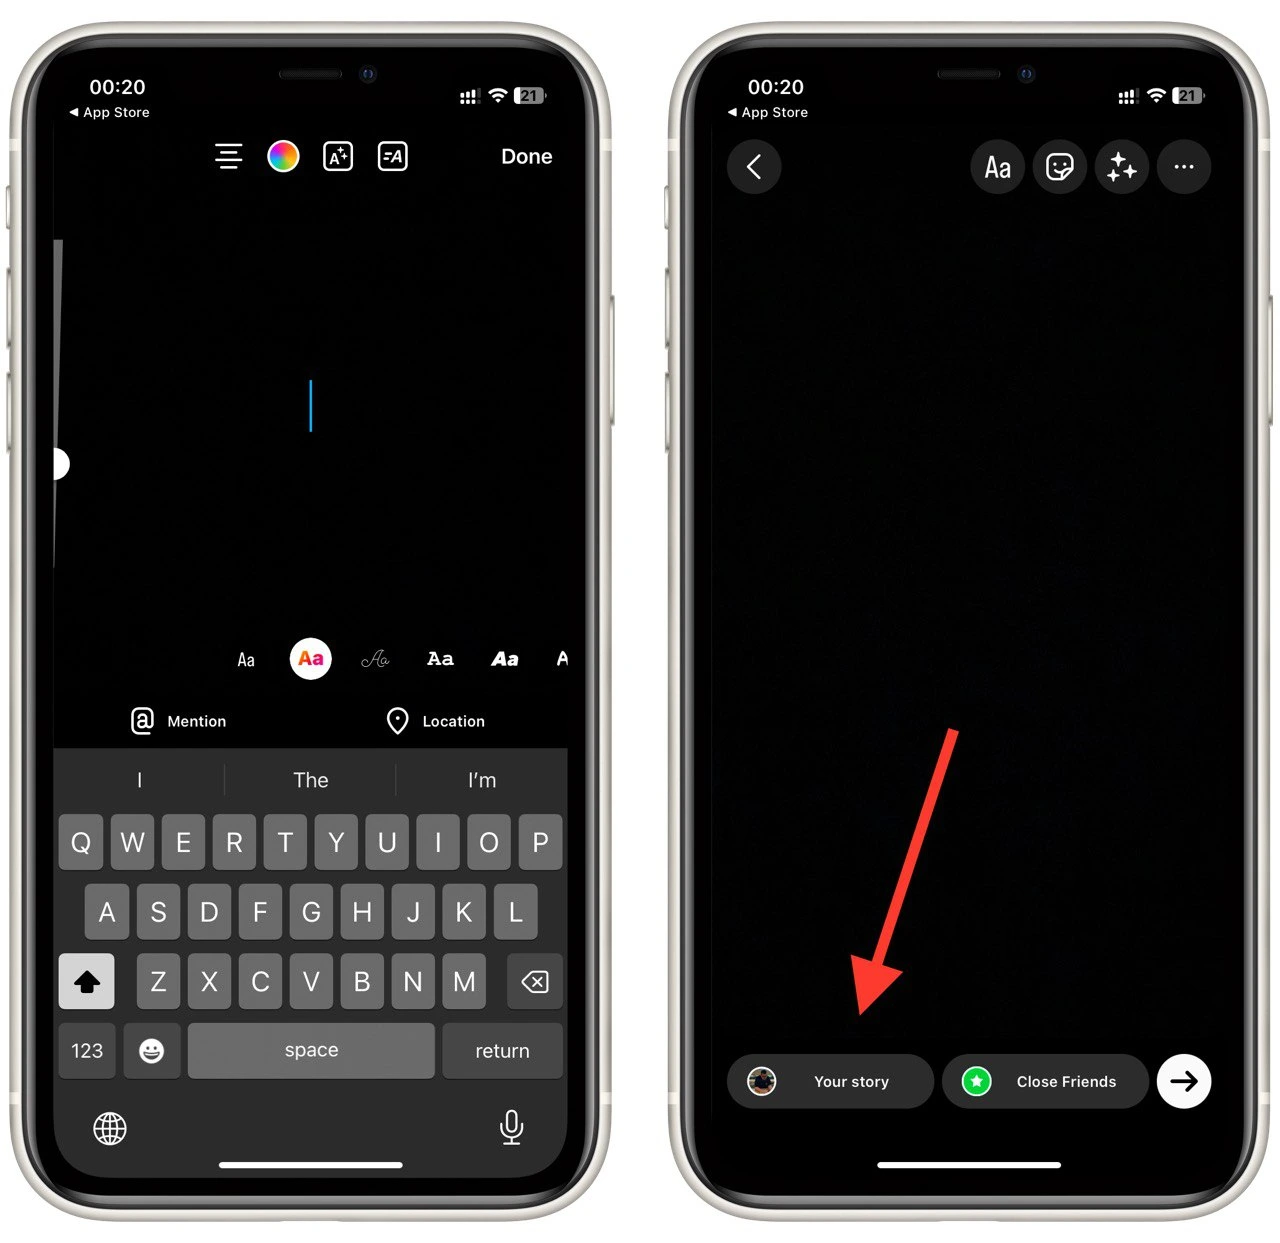
- Using the text editor, manually type the captions you want to include in your story. Use this opportunity to provide context and additional information or engage your audience with creative and compelling content. You can also use emojis or relevant hashtags to enhance your captions.
- Customize the appearance of your captions by selecting different font styles, colors, and backgrounds. Experiment with the available options to make your captions visually appealing and consistent with your story’s theme.
- You can create multiple text boxes if your captions are longer or if you want to format them differently. Use the “Text” tool in the text editor to add additional text boxes. Arrange and position them accordingly to maintain a logical flow of your captions.
- Preview your story by playing it to ensure the captions align with the audio and accurately convey your intended message.
- Once satisfied with the captions, tap the “Your Story” button at the bottom of the screen to share your story with the manually added captions.

Your followers can now view your story with the captions you have created. Experiment with different caption styles and content to create captivating stories that resonate with your followers.
Why you can’t add auto-captions to the Instagram story
If you tried looking for “Captions” while selecting stickers for your story and didn’t find it there, maybe your app doesn’t support it. There are three main reasons for this:
Language limitations: Instagram’s auto-captioning feature for stories is primarily designed for content created in English. While this feature is available in English, support for other languages may be limited. Instagram may expand language support in the future, so it’s advisable to stay updated with the latest app updates and official announcements to know if your preferred language becomes available.
Regional availability: Auto-captioning for Instagram stories can vary by region. Instagram often rolls out new features gradually, starting with specific regions before expanding to others. This means certain regions may have access to the auto-captioning feature sooner than others. Ensuring you have the latest version of the Instagram app installed can increase your chances of accessing the feature as soon as it becomes available in your region.
Outdated Instagram app: Using an outdated version of the Instagram app may impact your access to new features, including auto-captioning for stories. Instagram regularly releases updates to improve performance, add new features, and enhance user experience. You may miss out on new features like auto-captioning by not updating your app to the latest version. It’s essential to regularly check for updates through your device’s app store to ensure you have the latest version of the Instagram app installed.
Considering these factors, updating your Instagram app regularly is crucial to access the latest features and improvements. By staying informed about language support regional availability and using the most up-to-date app version, you can make the most of Instagram’s captioning capabilities and create inclusive stories that resonate with your audience.


