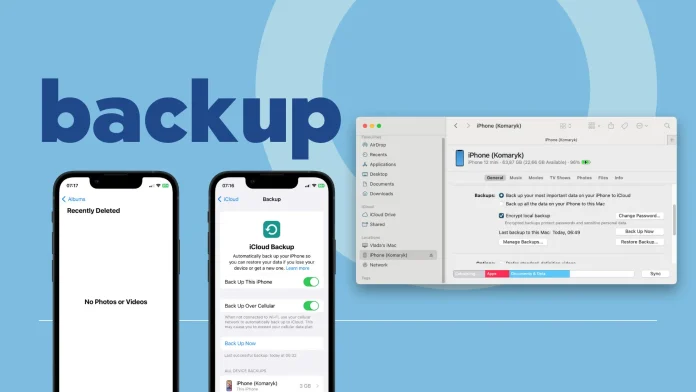
If your photos disappear after being deleted and 30 days have passed, making them vanish from the “Recently Deleted” folder, there’s still a chance to get them back. But it will require some effort. So, before you proceed, check the “Recently Deleted” folder to confirm it’s empty.
If the photos are gone from “Recently Deleted” as well, you can recover them from an iCloud backup, provided you’ve made one beforehand. Alternatively, you could use a backup from iTunes or Finder.
In reality, you don’t have many options if you’ve never backed up. You could try your luck with some online services, but that’s on you—I wouldn’t recommend them. I’ll describe why below.
So, let me walk you through the methods and give you detailed steps to recover your photos using a backup.
What are some methods to recover deleted photos on iPhone?
- Recover photos from iCloud backup
If you have iCloud backup enabled, this method is the most logical. You can restore your deleted photos using iCloud. However, this method isn’t perfect because it involves erasing all data on your iOS device and restoring from the backup. This means all the data on your device will be replaced with the data from the backup.
- Recover photos from iTunes or Finder local backup
This method, too, will only work if you have previously backed up in iTunes or Finder. The difference between iTunes and Finder is that iTunes is used on Windows and MacOS Mojave and older. Finder is used on MacOS Catalina and is newer. As with iCloud Backup, all current content on your iPhone will be replaced with the backup contents.
- Recovery using third-party apps or services
Honestly, this isn’t a good method. I won’t even detail the steps for third-party apps because it’s not a secure or 100% reliable method. You can try it at your own risk. Third-party tools don’t have “special access” to deleted data; they scan the device for traces of previously deleted files. It’s important to understand that the chance of successful data recovery depends on many factors, including the time since deletion and the amount of data written to the device since then. But, more often than not, it doesn’t end well. Plus, you might pay a significant amount, like around $50, for software like PhoneRescue by iMobie.
How to recover iPhone photos from an iCloud backup?
This method means you will need to erase data from your iPhone and restore it from the backup.
What you need for recovery:
- An iPhone device.
- Wi-Fi connection.
- The iCloud account where the backup was created.
Before the steps to restore, you need to make sure that the backup exists. But you can’t view all the backups made by your iPhone. It only shows you the time of the last backup.
To find out when your iPhone was last backed up, you need to:
- Open Settings on your iPhone.
- Select your Apple ID.
- Then select iCloud.
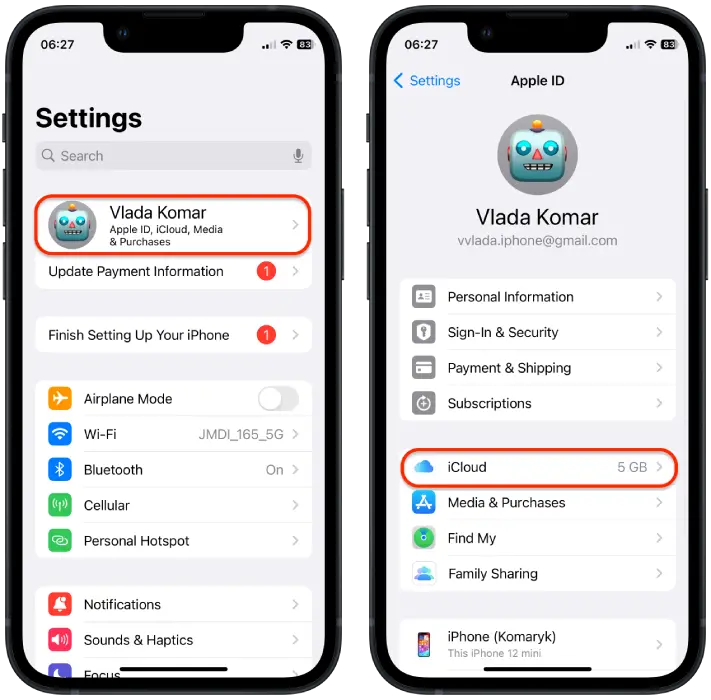
- Then tap iCloud Backup.
- If the slider is enabled, the “Back Up Now” option will show you when your phone was last backed up.
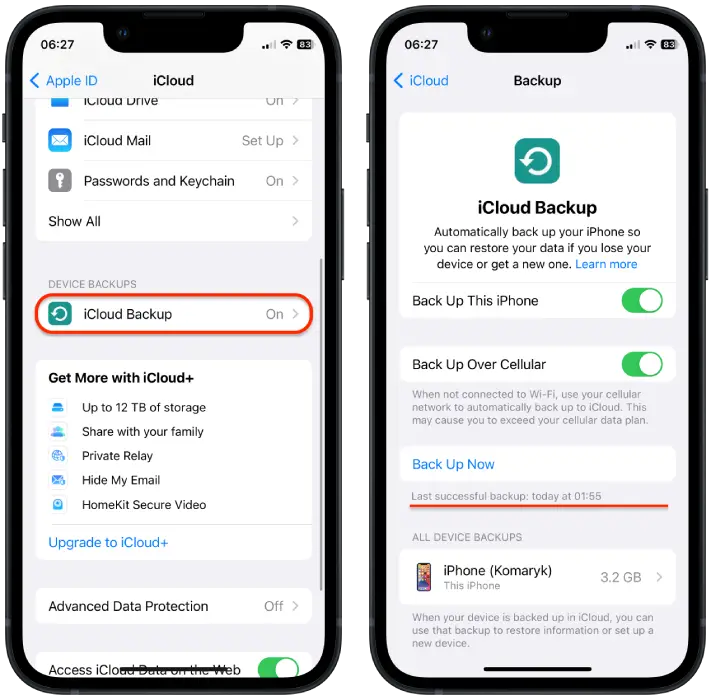
After ensuring the backup exists, you can decide whether to restore the old backup.
To recover iPhone photos from an iCloud backup, you need to follow these steps:
- Open Settings on your iPhone.
- Select the General.
- Tap Transfer or Reset iPhone.
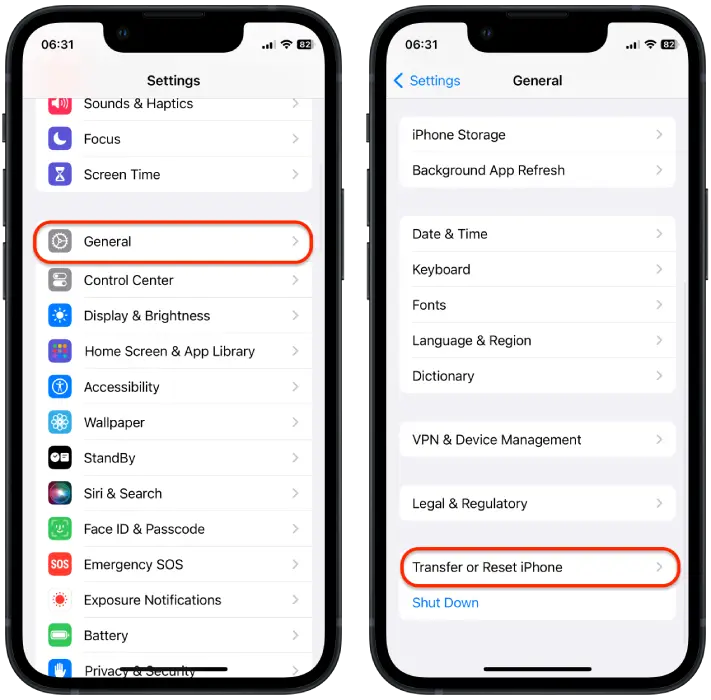
- Select Erase All Content and Settings.
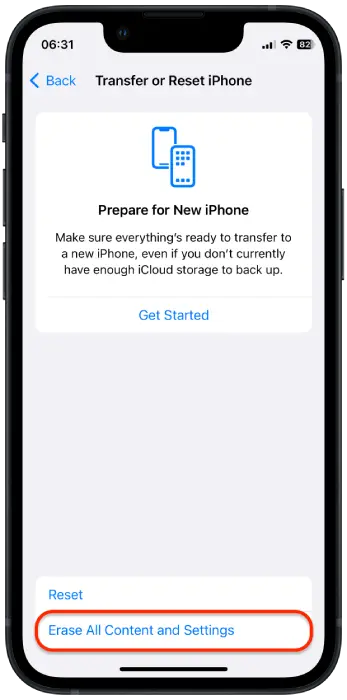
- After that, turn on your iPhone.
- Follow the on-screen setup instructions until you reach the “Apps & Data” screen.
- On the “Apps & Data” screen, select the option “Restore from iCloud Backup.”
- Enter your Apple ID and password to access your iCloud account.
- Choose the backup that contains the photos you want to restore.
The restoration process will start, and your iPhone will begin downloading all data from the selected iCloud backup, including your photos.
How to recover iPhone photos from a local backup using Finder?
This process will restore your iPhone to its state at the time of the backup, including all photos and other data.
What you need for recovery:
- Ensure your Mac is running macOS Catalina or later.
- Make sure you have a local backup of your iPhone on your Mac.
- Connect your iPhone to your Mac using a cable.
To recover iPhone photos local backup using Finder, you need to follow these steps:
- Open Finder on your Mac.

- Use a cable to connect your iPhone to your Mac.
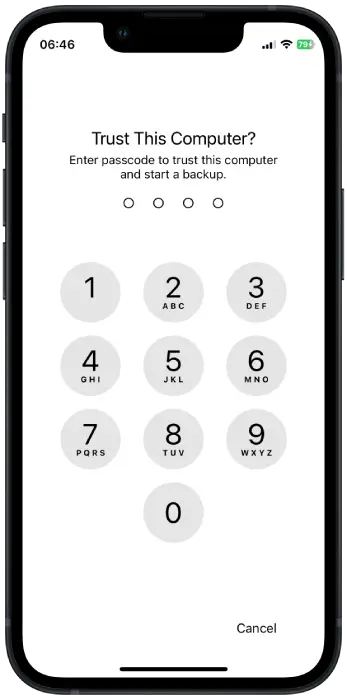
- You must unlock your iPhone and tap “Trust” to trust the computer.
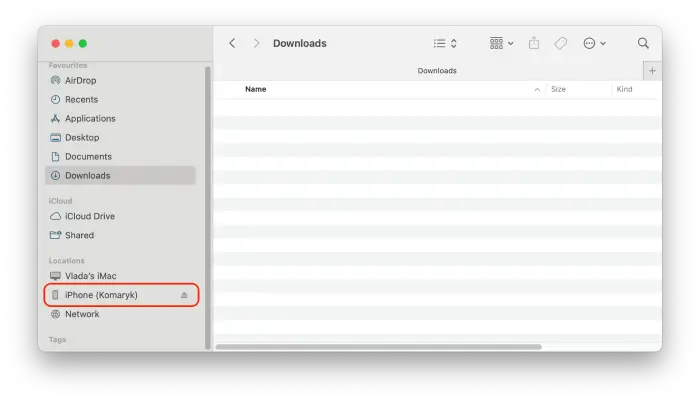
- In Finder, your iPhone appears in the sidebar under the “Locations” section. Click on your device to select it.
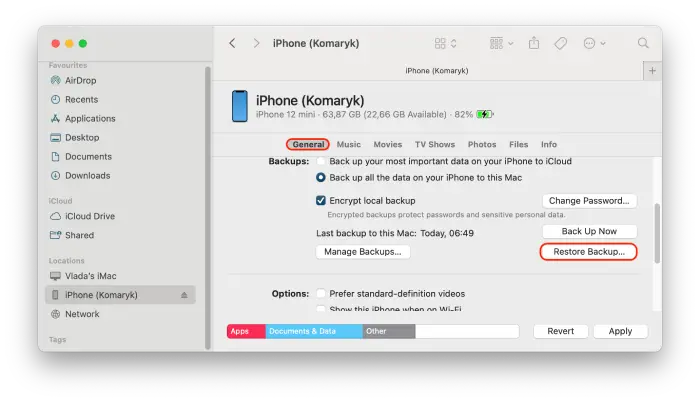
- Ensure you’re in the “General” tab, where you’ll see information about your iPhone and backup options.
- Click on the “Restore Backup” button.
- Choose the backup in a dialog box with a list of available backups.
- After selecting the desired backup, click “Restore” to start the process.
The restoration process will begin, and your iPhone will restart. Keep your device connected to your Mac until the restore is complete, and it syncs with your computer. The time it takes can vary based on the backup size and your Mac’s speed.
How to recover iPhone photos from a local backup using iTunes?
This method means you have previously backed up your iPhone to your computer via iTunes. iTunes is used on Windows, MacOS Mojave, and older versions. Restoring your device from this backup will allow you to get back deleted photos, provided they were saved at the time of backup.
What you need for recovery:
- Ensure you have a local backup of your iPhone on your iTunes app.
- Connect your iPhone to your Mac (if you use macOS Mojave) or Windows PC using a cable.
To recover iPhone photos local backup using iTunes, you need to follow these steps:
- Open iTunes on your Mac or Windows PC.
- Use a cable to connect your iPhone to your Mac or Windows PC.
- You must unlock your iPhone and tap “Trust” to trust the computer.

- Click on the iPhone icon in the top left corner of the iTunes window.

- Go to the “Summary” section and find the “Backup” section.
- Click on the “Restore Backup” button.
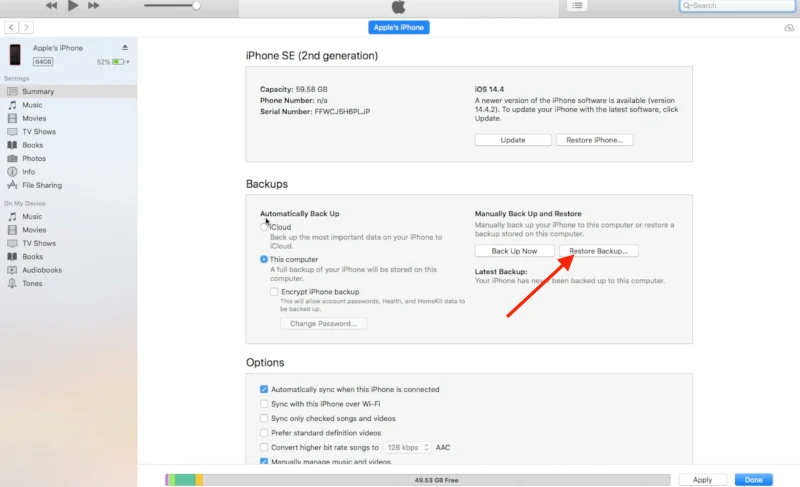
- Select the correct backup.
- Click “Restore” and wait for the process to complete.
Here’s a quick tip: If you use cloud services like Google Photos, Dropbox, or others, dig around in them. You might find the photos you’re looking for. I once found a needed photo in the Lightroom app (a photo editor that stores uploaded files). If you’ve ever uploaded a photo to Snapchat, try looking for it in the Memories section.
Of course, don’t forget about backing up your device data. Remember to do this from time to time, and you will always be able to restore any data on your iPhone.

