MSI M-Flash is a technology built into MSI motherboards that allows you to flash or update them easily. To do this, you will need to find a FAT32 formatted flash drive and download the driver from the official MSI website.
After that, restart your computer and enter the BIOS. There you start MSI M-Flash and easily update your motherboard firmware from the flash drive you prepared beforehand. Note that you need to ensure that your computer does not accidentally shut down during the update and should not interfere with the process. This can damage your motherboard and even kill it.
Let’s understand the process in more detail below with detailed instructions and screenshots.
What is MSI M-Flash mode?
MSI M-Flash is a technology developed by MSI (Micro-Star International) for their motherboards, and it is a utility that allows users to update or flash the BIOS (Basic Input/Output System) firmware of their MSI motherboards.
BIOS is a fundamental software component that is stored on a chip on the motherboard, and it is responsible for initializing and configuring hardware components during the boot-up process. M-Flash provides a convenient and user-friendly way to update or modify the BIOS version to improve system functionality and address various issues.
How to flash BIOS with M-Flash
Flashing the BIOS with M-Flash is a process used on MSI motherboards to update or revert the motherboard’s firmware. It’s essential to ensure you have a stable power source during the BIOS update process, as wrong or interrupted processes can lead to system instability or even permanent damage. Here’s a step-by-step instruction on how to flash BIOS with M-Flash:
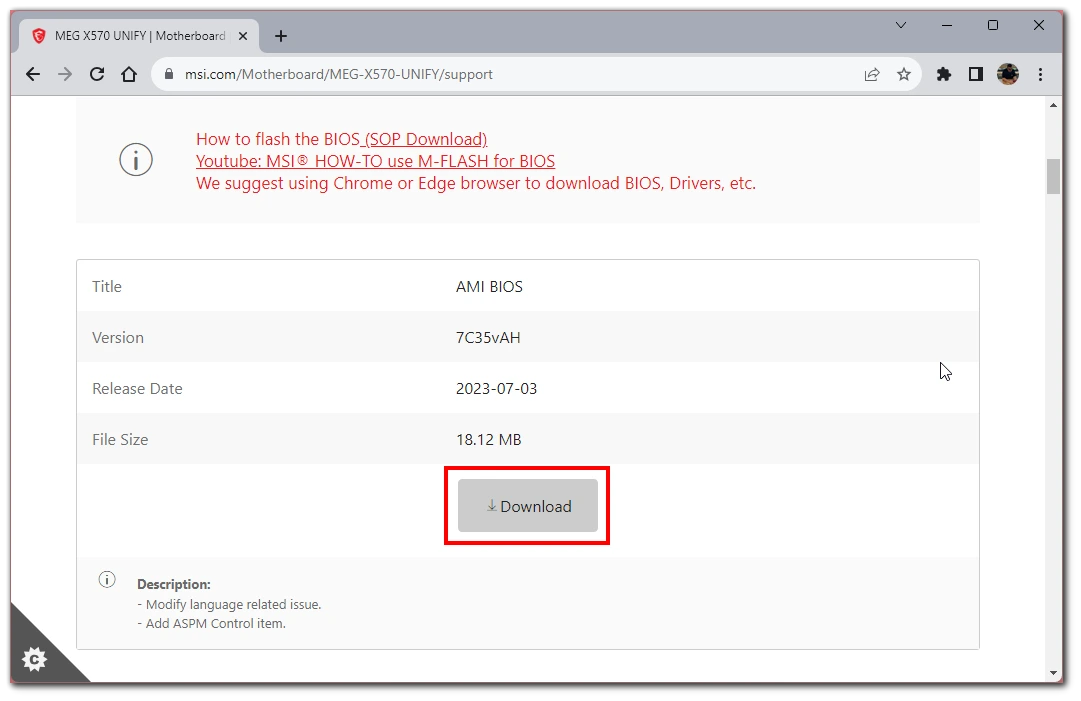
- Visit the official MSI website and navigate to the support page for your specific motherboard model.
- Download the latest BIOS version for your motherboard. Ensure that you download the correct BIOS version for your motherboard model. You will get a zip file from there.
- Format a USB flash drive as FAT32.
- Extract the downloaded ZIP file. It should have a .txt file and one more with .1BO or a similar extension. Place it in the flash drive.
- Restart your computer and access the BIOS by pressing the “Delete” or “F2” key (the key may vary depending on your motherboard model) during the boot process.

- Look for the M-Flash option in the BIOS settings and select it.
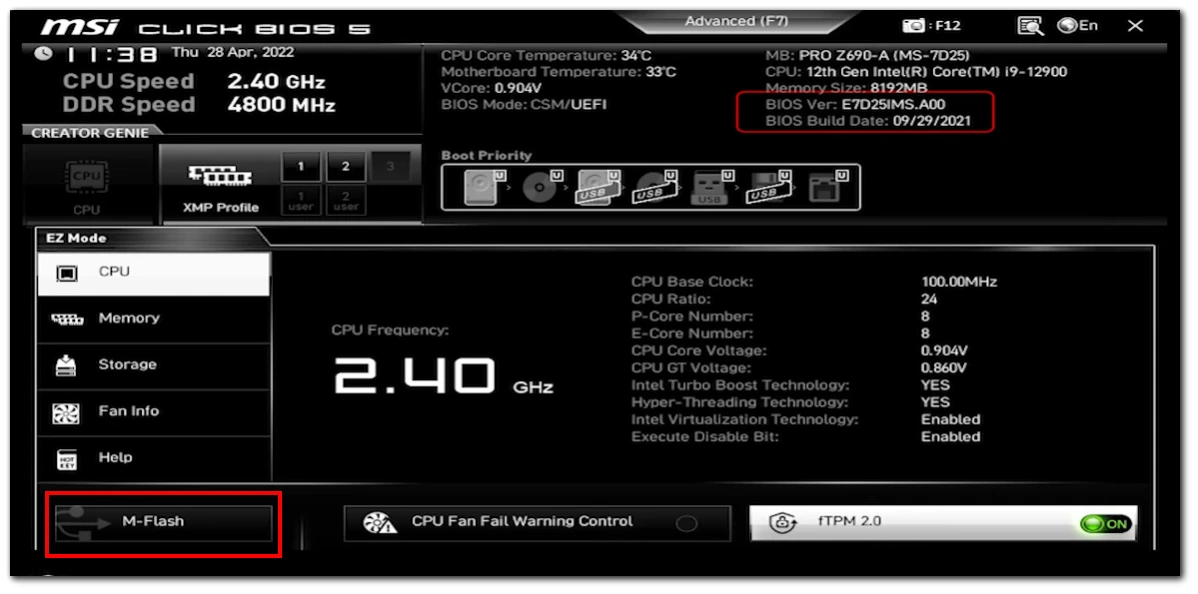
- You will be prompted to choose the BIOS file from the USB flash drive.
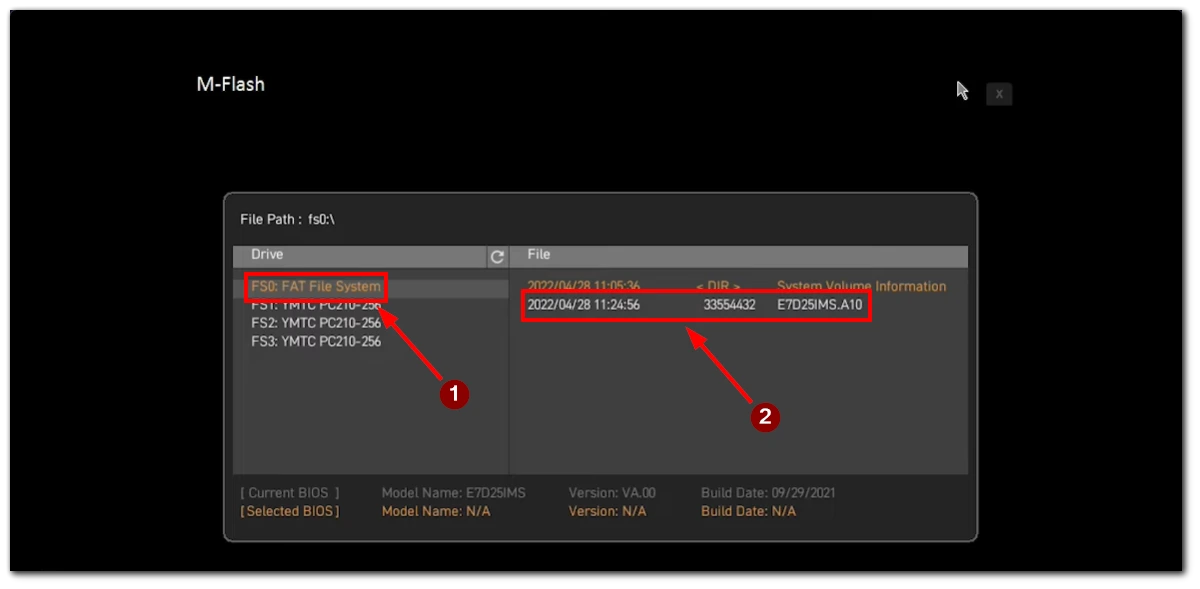
- Once you’ve selected the BIOS file, the flashing process will begin. Follow the on-screen instructions to proceed with the update.
- Do not interrupt or power off your computer during the BIOS flashing process. Let it complete, which may take a few minutes.
- After the flashing process is complete, the system will prompt you to restart your computer. Choose to restart, and the updated BIOS will take effect.
Video Tutorial:
Your BIOS is now updated, and your system should be running with the latest firmware. Remember that updating the BIOS carries a certain level of risk, so proceed with caution and ensure you have a stable system environment during the process.
How to backup BIOS with M-Flash
Imagine you reset your MSI motherboard BIOS and want to restore your system quickly or change computers but keep your BIOS settings. On MSI motherboards, it’s actually quite easy to do this. You can create a BIOS backup on a flash drive. To do this, you need to:
- Attach the flash drive to your computer. Make sure it is formatted in FAT32.
- Turn on your computer to BIOS, then to CMOS Setup Utility.
- Then use the arrow keys to select M-Flash and press Enter.
- The following menu will open, and you will need to select Save File to Selected Device.
- Then, select the desired folder on the flash drive using the “+” and “-” buttons.
- When you select the desired folder, press Enter and scroll to “Start to save the file.” At this point, press Enter again.
- Confirm your action with the OK button.
- If the error message “The filename already exists. Overwrite it?“. Press Enter.
- When the message “ROM Image has been saved to media successfully” appears. Press Enter.
- At the end, press ESC to exit from the BIOS.
This will allow you to backup the BIOS to your flash drive. Note that this only saves the settings and the Bios firmware. Your personal information and the system on your computer are not involved in this backup.
When you need to flash or update BIOS on MSI motherboards
I recommend you not update the BIOS on your motherboard if everything is working properly. The fact is that this is a process that requires caution, and inexperienced users can very easily cause permanent damage to their motherboards. I recommend updating the BIOS only for one of the following reasons:
- Hardware Compatibility: Upgrading or installing new hardware components, such as CPUs, memory modules, or graphics cards, might necessitate a BIOS update. The latest firmware ensures that the motherboard can fully support and interact with the new hardware, preventing potential compatibility issues.
- Bug Fixes and Security Patches: Motherboard manufacturers periodically release BIOS updates to address known bugs, errors, and security vulnerabilities that may have been discovered since the initial release of the motherboard. Keeping the BIOS up-to-date ensures a more secure and reliable computing experience.
- New Features and Functionality: BIOS updates can introduce new features and functionalities that were not available in the original firmware. These enhancements might offer additional customization options, better overclocking capabilities, or improved power management settings.
- Resolving BIOS-related Issues: In rare cases, the BIOS itself may encounter problems, leading to system instability or unresponsiveness. Flashing the BIOS can effectively address such issues, restoring the motherboard to its default and functional state.
While updating the BIOS can bring significant improvements to your system, it is essential to be cautious. Suppose you are uncertain about the necessity of a BIOS update or the correct procedure. In that case, seeking guidance from official MSI support or consulting the manufacturer’s community forums is advisable before proceeding.

