

Hey there! If you’ve ever encountered a situation where you’ve received interesting voice messages on Instagram and you’d like to save them to your iPhone, I have a couple of helpful ways I’d like to share with you.
Instagram doesn’t have a built-in feature to save voice messages. In this article, I will talk about two methods that will help you save them.
The first method is to use the screen recording feature. This method is very easy to use and allows you to capture everything that happens on your screen, including voice messages on Instagram. The disadvantage of this method is that you end up with video, not just audio.
The second method is to send a data upload request to Instagram. While this method may require a little more time and patience, it gives you full access to your entire Instagram account, including your voice messages. You can request a data upload directly from your Instagram app settings, and you will be sent a file of your data, including your voice messages, to the email address you specify.
So keep reading.
What are some methods to save Instagram audio messages on iPhone?
Two methods allow you to save Instagram audio messages on your iPhone. The first method is screen recording. The second method is downloading data on Instagram.
Screen recording is one of the easiest ways to save voice messages on Instagram. However, before using this method, you must add a Screen Recording button in Control Center. After that, you can swipe down to start screen recording. The recording will be saved in a photo album on your device. You can open it and crop or edit it as you see fit.
The Downloading Data function allows you to download all data related to your Instagram account, including voice messages. However, this method is not ideal, as it requires waiting time to receive the file via email. Before you send your request, you can choose to have a message-only file arrive. But nevertheless, you will have to find the one you need among others.
How to add a screen recording button to Control Centre?
The screen recording button in Control Center on your iPhone gives you the ability to record everything that happens on your device’s screen, including voice messages on Instagram.
To add the screen recording button to Control Centre on your iPhone, you can follow these steps:
- Open the Settings app on your iPhone.
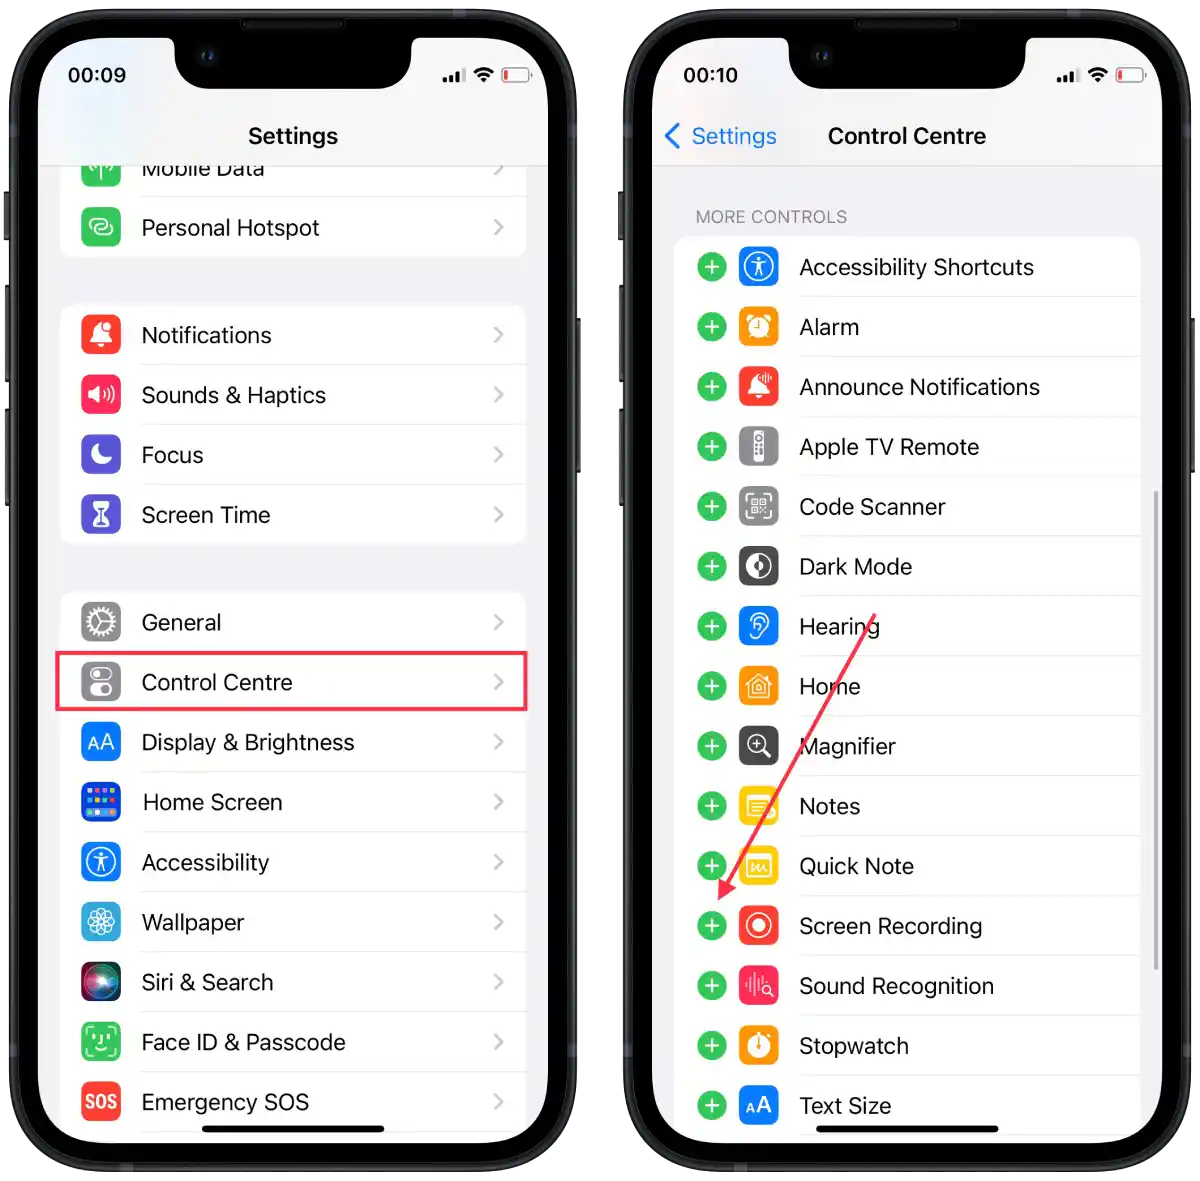
- Scroll down and tap on “Control Centre“.
- Tap the “+” icon of the screen recording option.
- Exit the Settings app.
After these steps, you can start recording the screen.
How to start screen recording?
To start screen recording and record a voice message on Instagram, follow these steps:
- Open the Control Center on your iPhone to do this swipe down from the top right corner.
- Then press the screen record button.
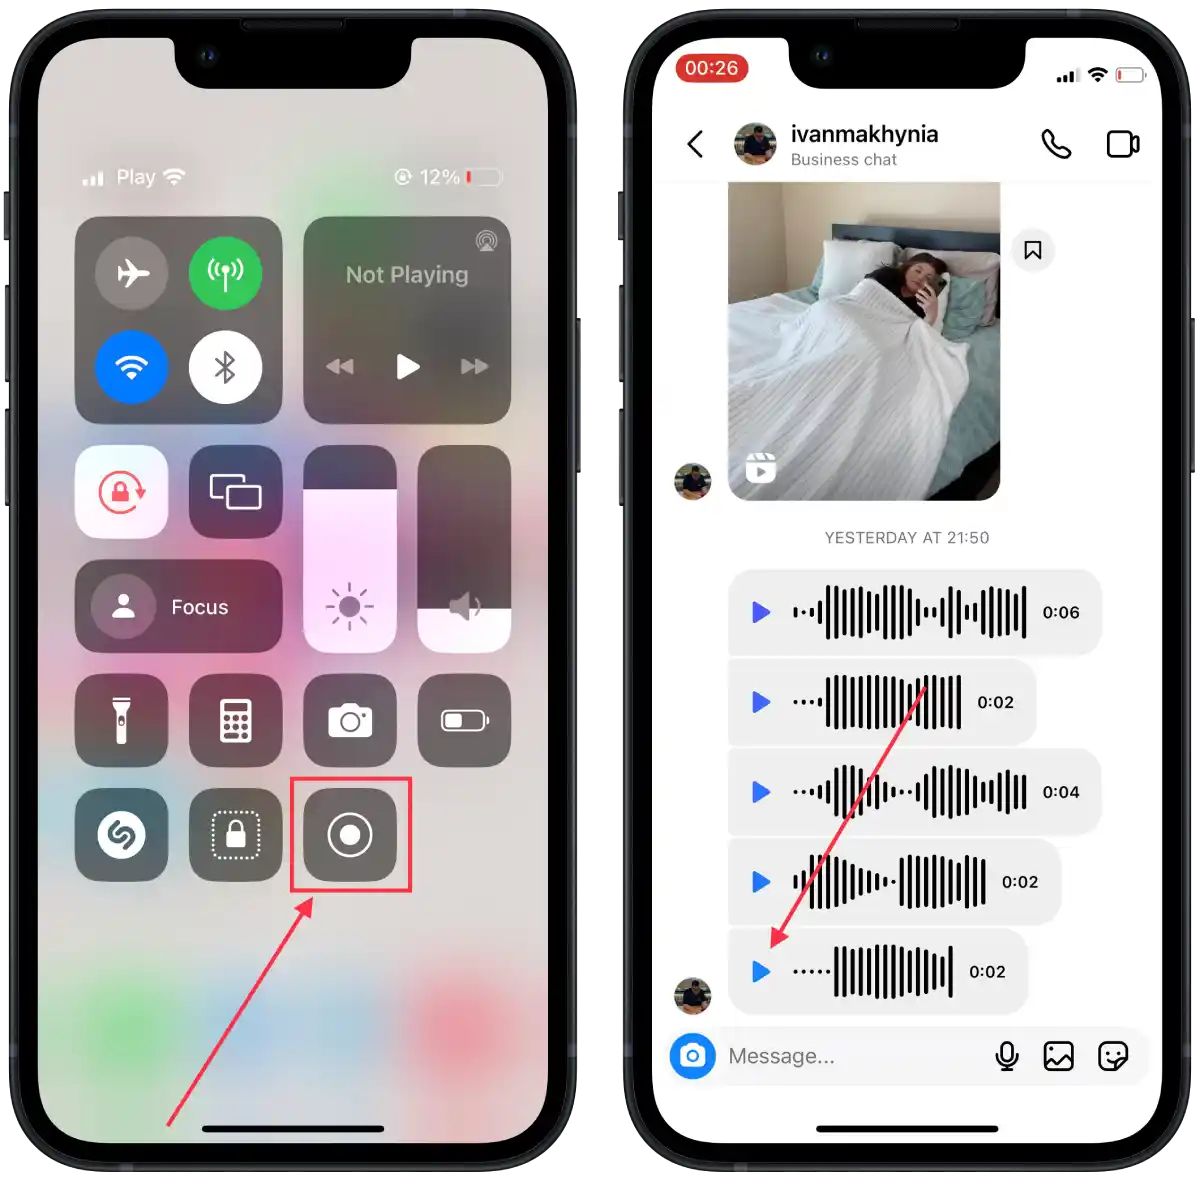
- Launch Instagram and navigate to the voice message chat.
- Play the voice message you want to record.
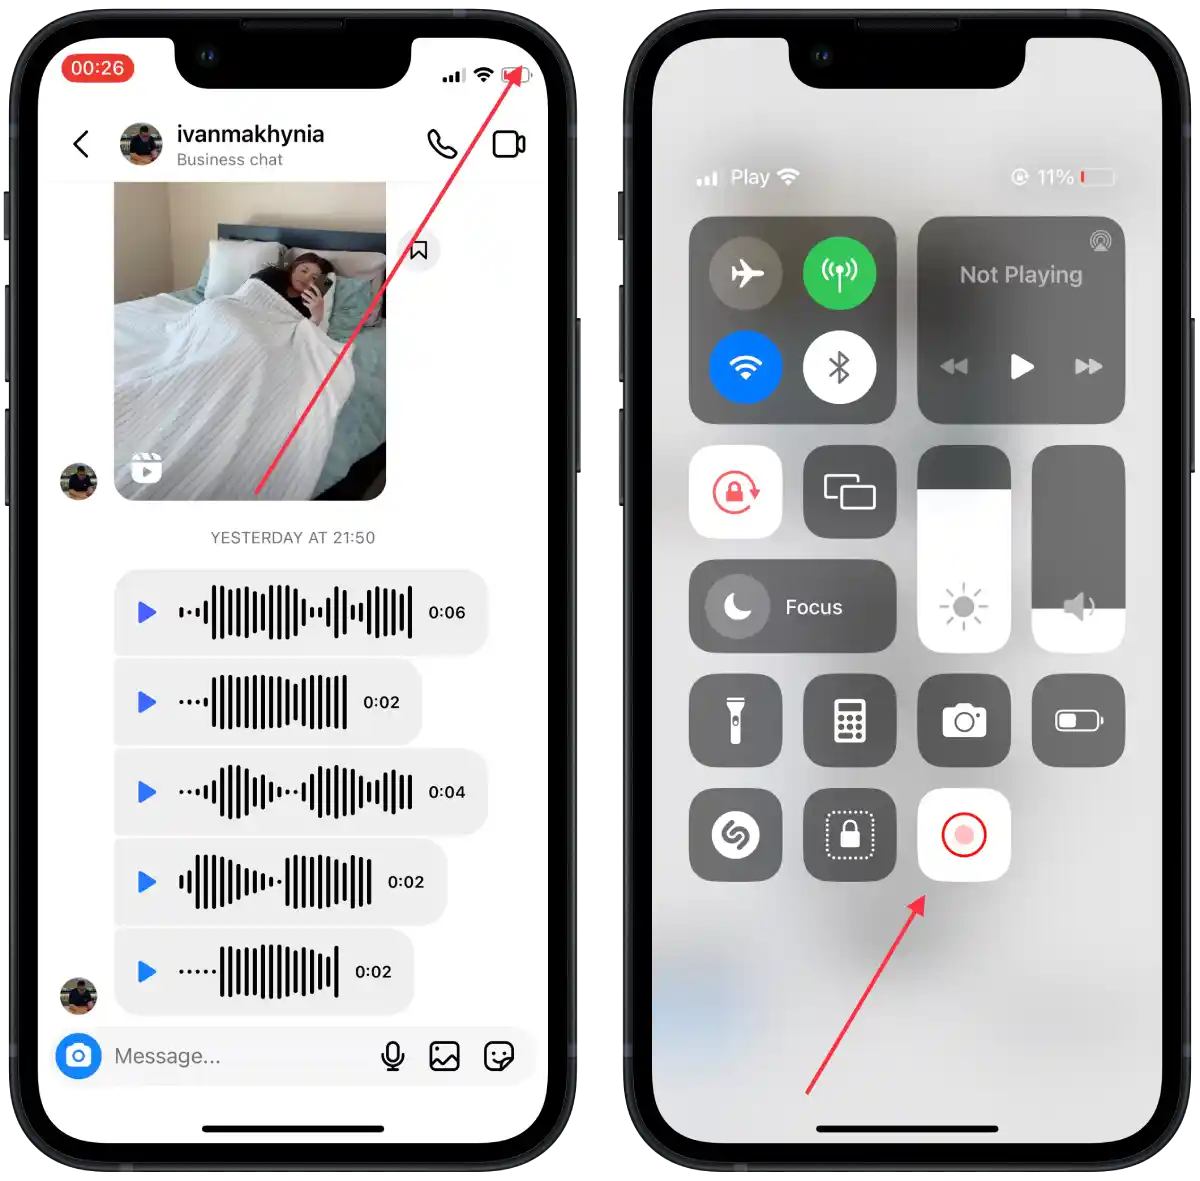
- When you’re finished recording, go back to Control Center and press the screen recording button to stop recording.
This way, you can record a voice message on Instagram using the screen recording feature on your iPhone. Your video will be saved in Gallery.
How to trim and edit a video?
You can trim the video to remove the parts where you open Instagram and scroll to the audio message. This will get rid of unnecessary content and focus on saving the specific chunk containing the Instagram audio message. You can also shrink the video around the edges to keep the whole screen out of the video.
Once you have recorded the screen to save an Instagram audio message, you can trim and edit the video using the following steps:
- Open the Photos app on your iPhone.
- Find and select the recorded screen video that contains the Instagram audio message.
- Tap on the “Edit” button located at the top-right corner of the screen.
- Drag the yellow handles on either end of the timeline to adjust the start and end points of the video, excluding the parts where you open Instagram and scroll to the audio message.
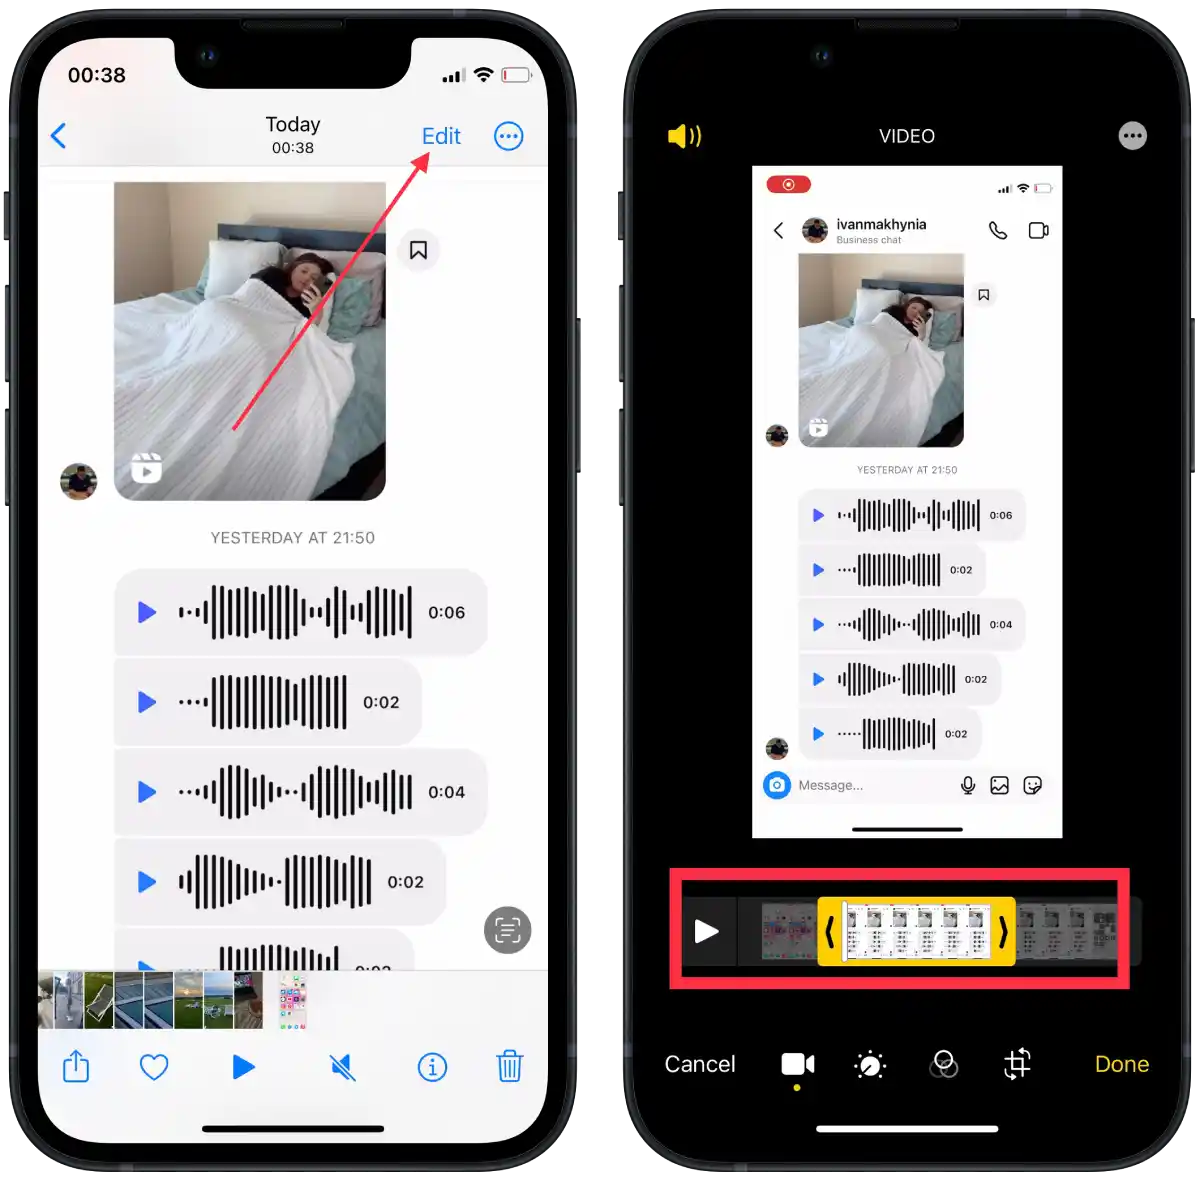
- Then tap the cropping icon.
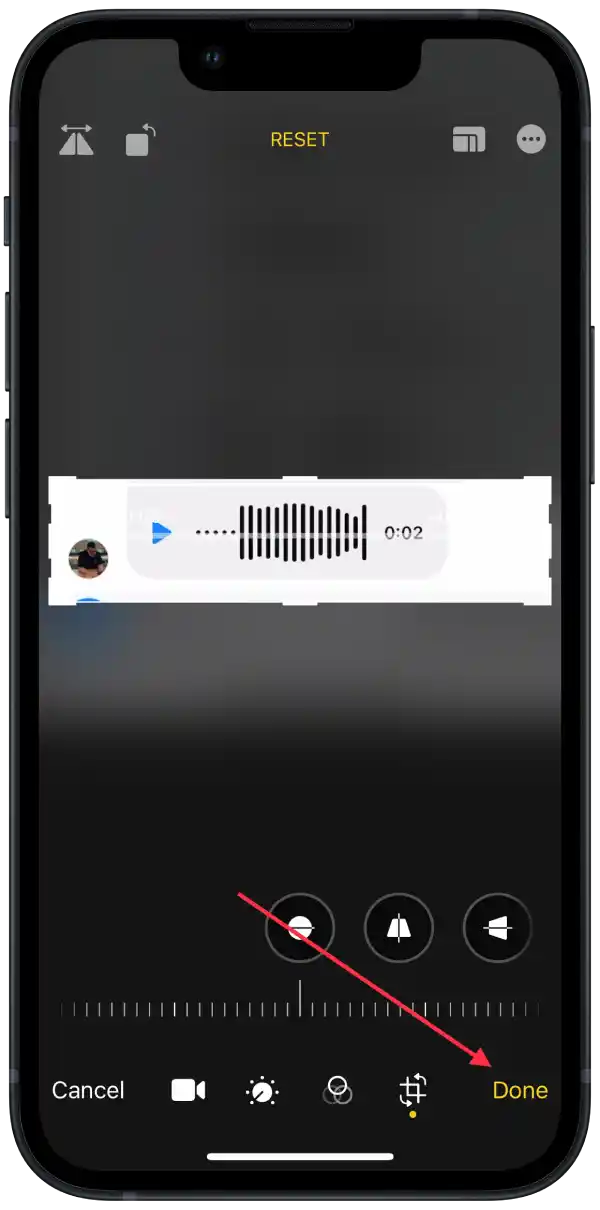
- Move it to the size you want.
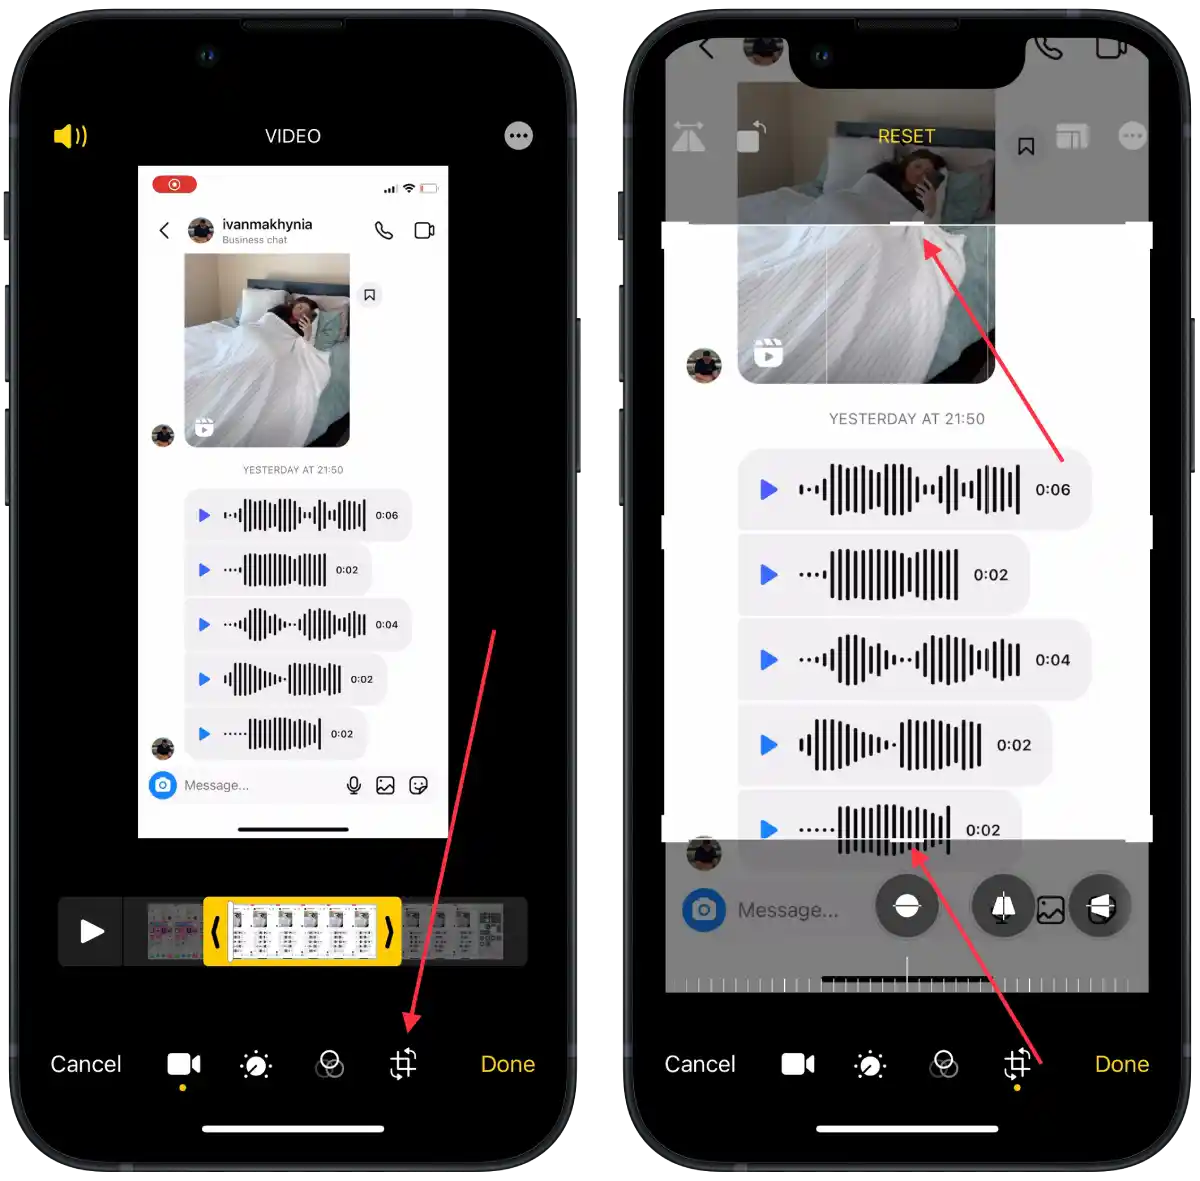
- Then tap on “Done“.
How to send a request for Downloading Data on Instagram?
At the outset, I will say that this method is not ideal for several reasons. First, it takes up to 30 days. When you request “Downloading Data,” Instagram collects all the data associated with your account and creates an archive file that you can download to your device.
The second reason why this method is bad for me is that you have to spend quite a bit of time finding the voice message you want. You will get an HTML or JSON file that contains a lot of data.
In general, this is like an alternative method but it’s better to use screen recording for this
To send a request for Downloading Data to Instagram, you need to follow these steps:
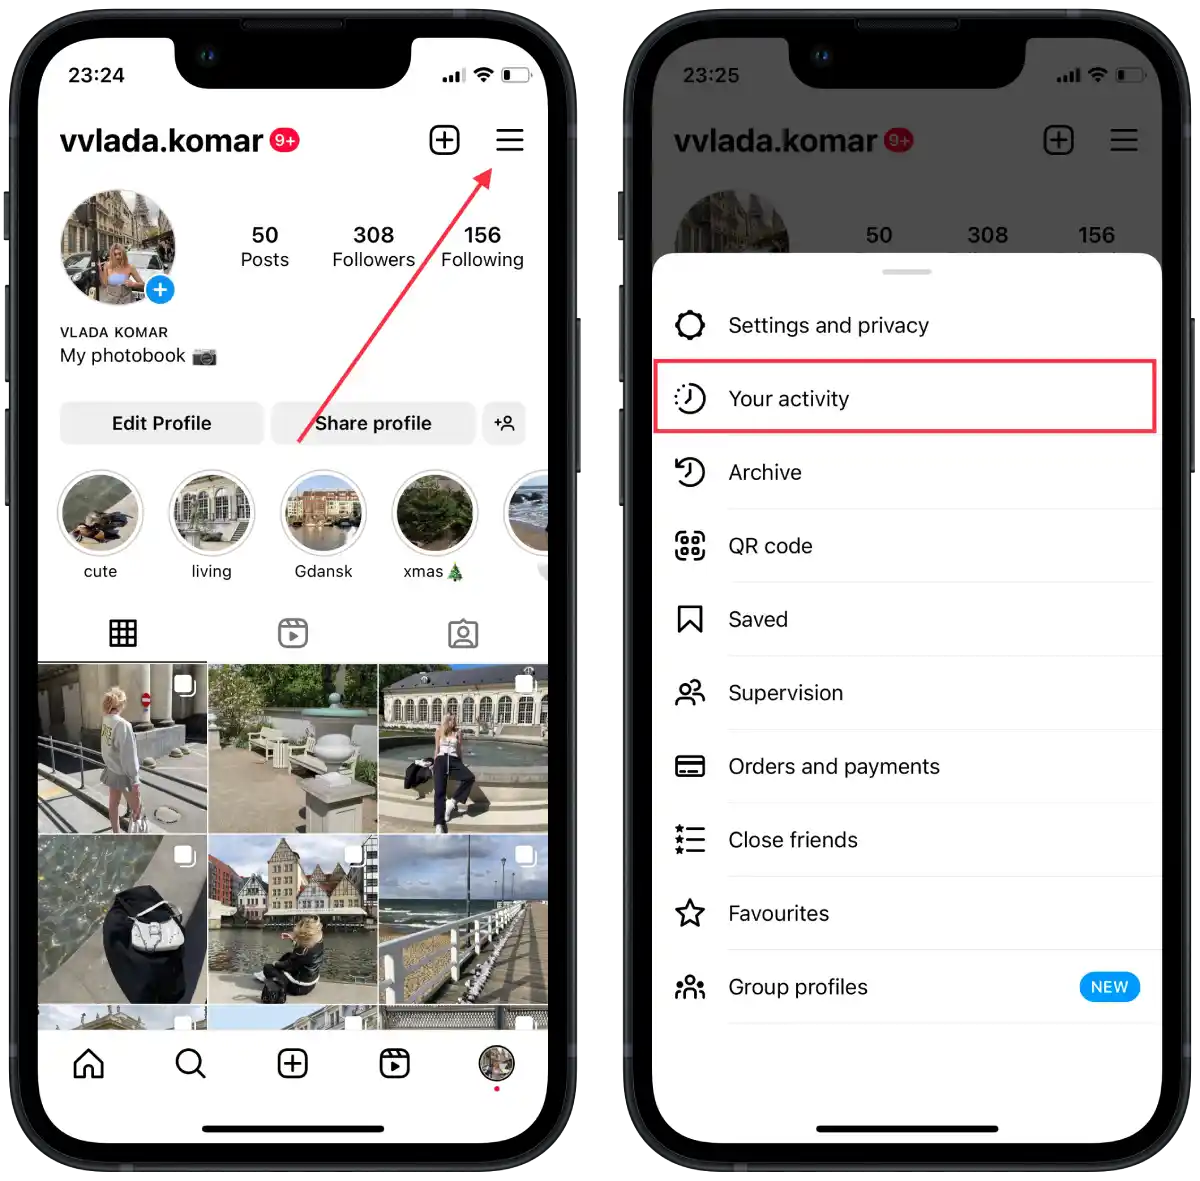
- Open the Instagram app on your device and go to your profile.
- Tap on the menu icon (three horizontal lines) in the top right corner of the screen.
- Select “Your activity” from the menu options.
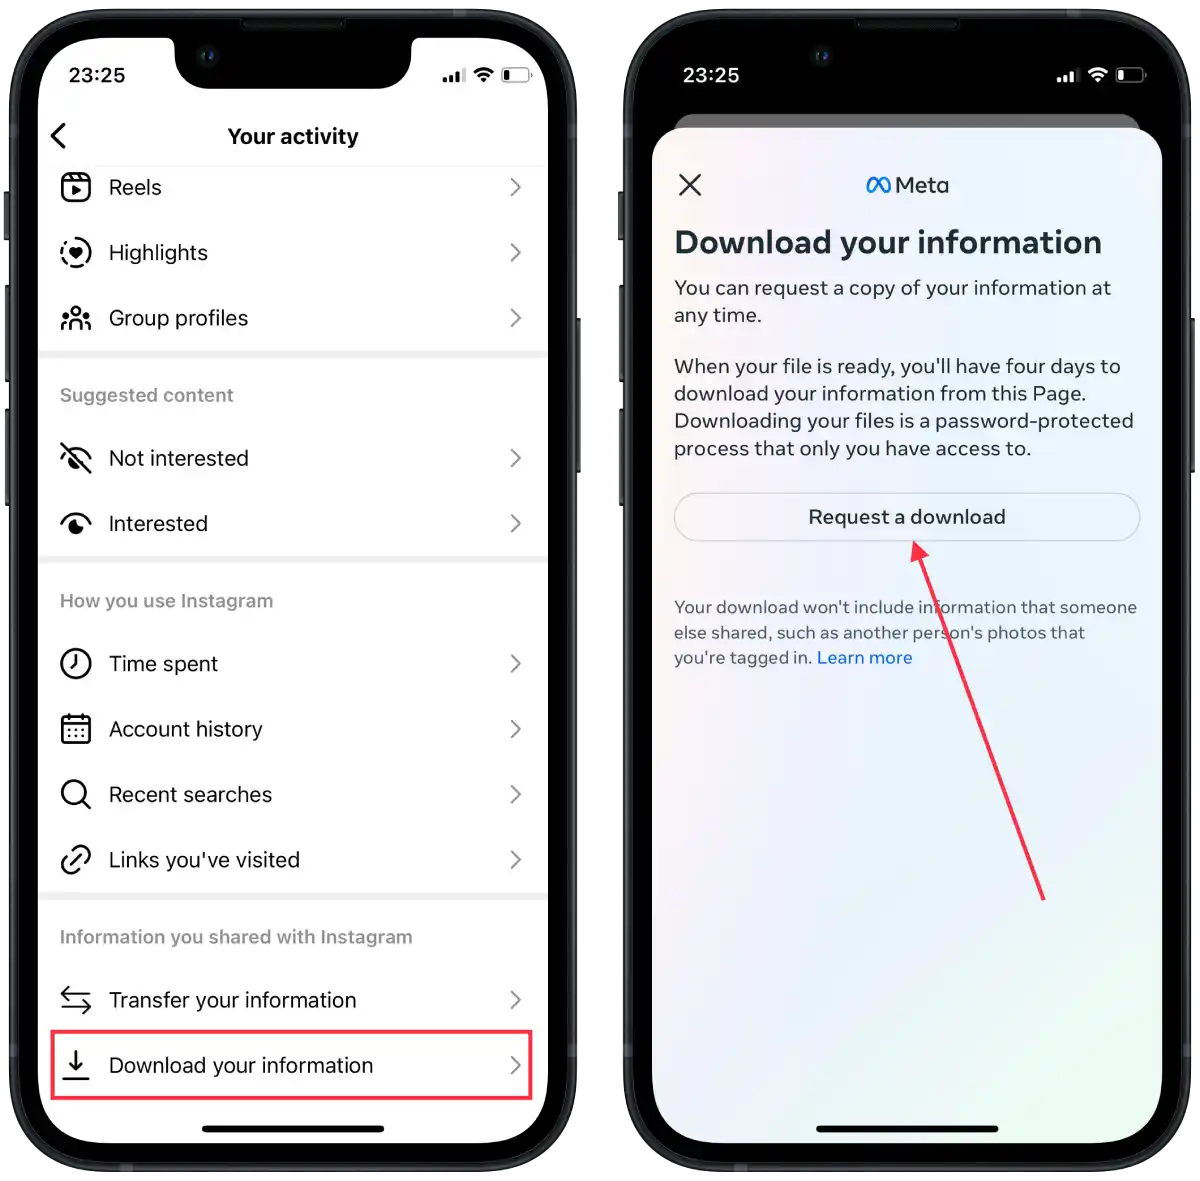
- Then scroll down and tap on “Download your information“.
- Tap on “Request a download“.
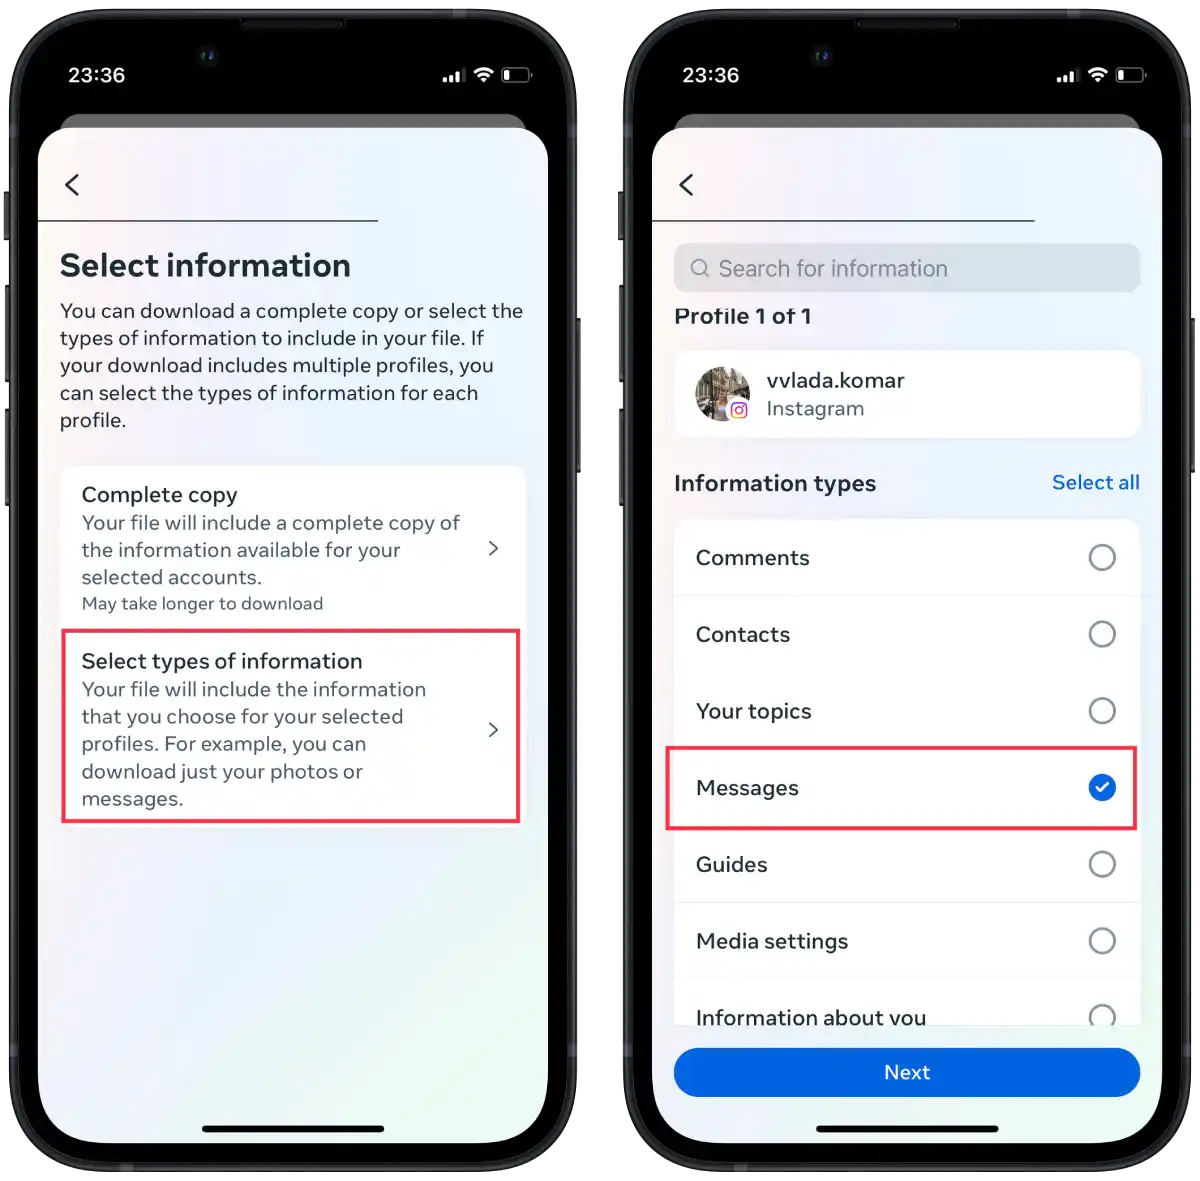
- Select an account and tap on “Next”.
- Tap on “Select types of information” and select Messages.
- Then specify the mail, format, quality and time range.
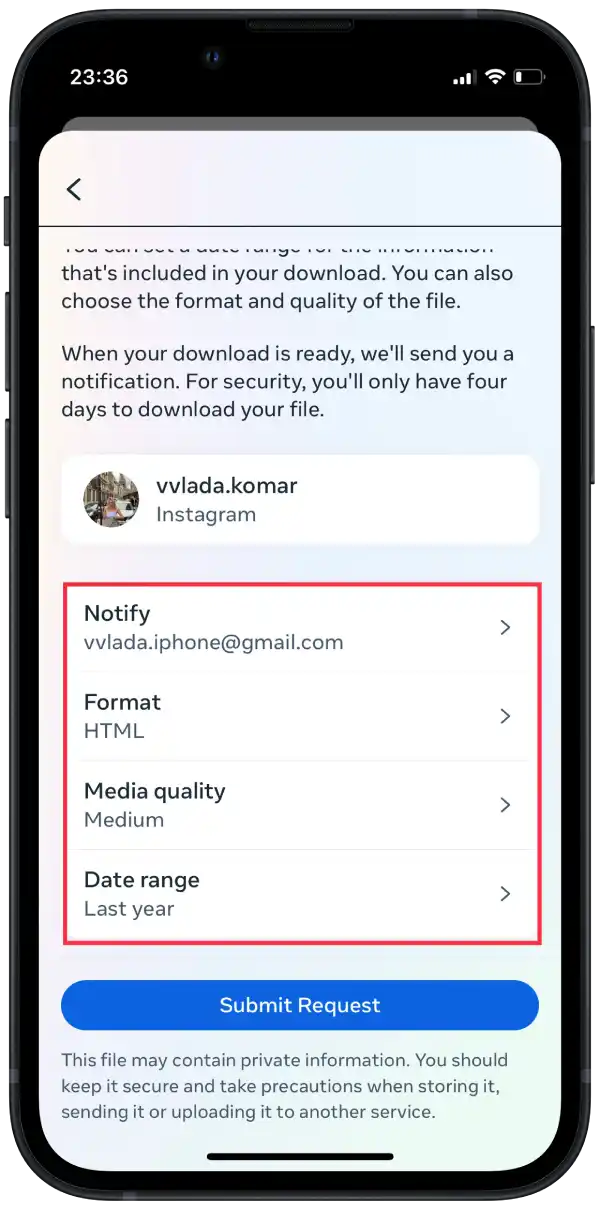
If you follow these steps you can get a file in the mail with only the necessary data. So you won’t have to search too long for that voice message among other data. But if you choose the “Complete copy” option instead of “Select types of information” it will make the process much more difficult. Because you will get a file with all possible data in the mail.


