

Windows 11 is the latest and one of the most powerful operating systems for regular users. Windows control almost all modern PCs. This is because it is compatible with most necessary programs, such as various office applications or video games. Most companies that produce software adapt it for Windows. In addition, the operating system has many features and capabilities through its services that help you with many different tasks. However, there are so many Windows services that some can be more of a hindrance than a help.
In this case, users may wonder how they can disable various services in Windows. There are several ways, but you should be aware that disabling any of the built-in Windows features may affect its operation or the operation of some third-party applications. All these methods also mean you will have to change the Registry or your system using the Command Prompt. I do not recommend doing this to people who do not understand how these tools work. Let’s take a closer look at what you need to do to do this.
What are Windows services?
Let me begin by explaining what Windows services are and why you might want to disable them. The fact is that in addition to the programs you see and work in, there are also many programs and applications that run in the background and provide your stable system operation and a lot of functions that run simultaneously, this is Windows services.
These services can be system services, which are built into Windows, and your operating system cannot run without them, and third-party services, which run only when you use third-party programs which are not preinstalled in Windows. If you have been using your computer for a long time and haven’t reinstalled Windows, you probably have so many services already running in the background that they might start bothering you.
Many users find that too many services and programs that run in the background can slow down their computers. And in fact, this is partly true. If you have too many different programs installed or haven’t checked the Task Manager for a long time, you can notice that hundreds of services and tasks are running in parallel with your browser or game.
However, you should understand before uninstalling them that some services are vital for your system. If you uninstall them, your Windows 11 will worsen, or some of its tools will stop working. If you remove a service used by a third-party application for its purposes, it will simply stop working. So you should ensure you know exactly what a service is doing before uninstalling it.
How to remove services in Windows 11 using the Registry
There are several ways you can use to remove services from Windows 11. Let’s start by looking at how you can do it through the Registry. A Registry is a tool that allows you to manage various items on your system. The Registry is complicated and intricate, so if you don’t know how to use it, be careful not to click on anything unnecessary beyond the steps listed in the instructions below. For this, you will need the following:
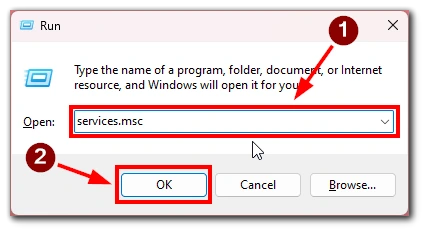
- First, start the Services App using the Run window. To do this, press Win + R and type
services.mscin the text box. In the end, click Ok.
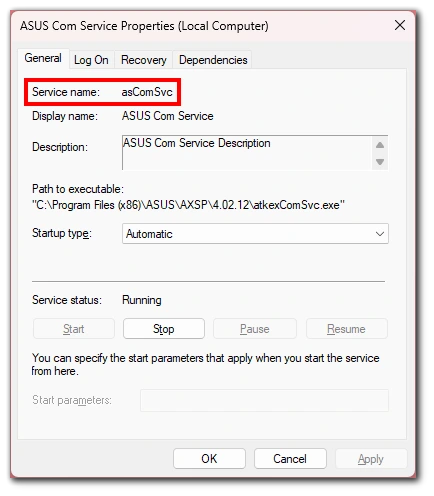
- Next, find the service you want to remove from the list and double-click on it.
- You will see the Properties window in front of you. Go to the General tab and look at what is written in the Service name field.
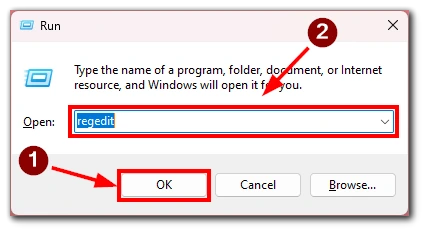
- Remember that name, open the Registry with Win + R, and type
regedit.
- In the registry, you have to go to the following path
Computer\HKEY_LOCAL_MACHINE\SYSTEM\CurrentControlSet\Services
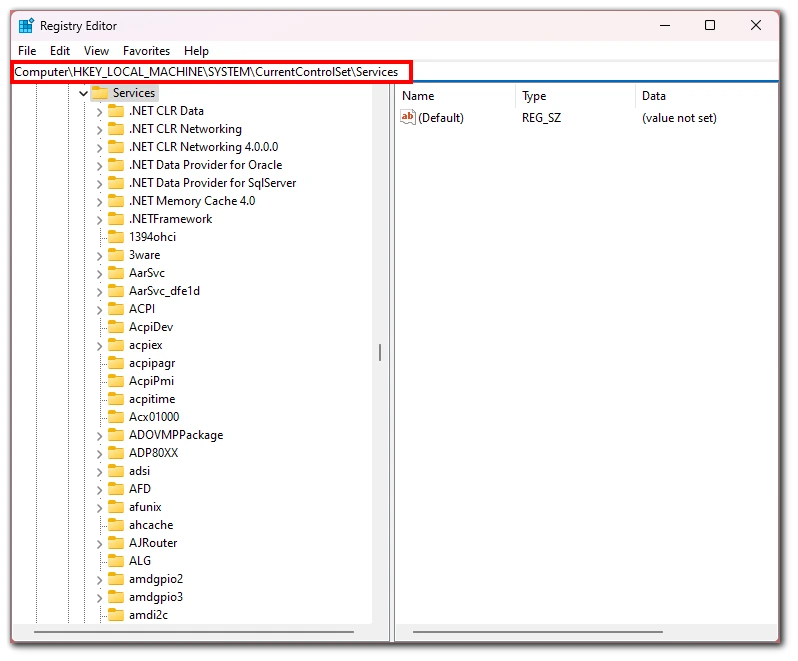
- Find the service name you recognized earlier in the list and right-click on it.
- In the drop-down list, click Delete.
Please note that after deleting the service, it will disappear from your system forever. If you need it in the future, you will need to reinstall the program that installed the service or even restore Windows to factory defaults to reinstall the system. So be very careful when you uninstall another service.
How to remove services in Windows 11 using Command Prompt
Another way to remove services from Windows 11 is to use Command Prompt. This tool allows you to control your Windows 11 with a command prompt and the appropriate commands. In this case, you also need the name of the service, so you need to use the first steps of the previous instruction to get the name of the service. After that, you need to:
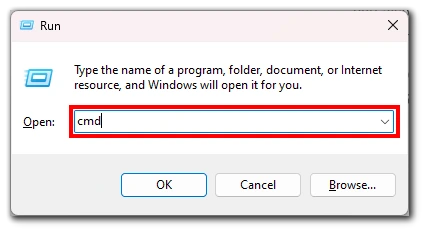
- Open the Command Prompt. To do this, press Win + R and type
cmdinto the text box. Then press Ctrl + Shift + Enter to open Command Prompt with the admin access.
- After that, you must type the command
sc delete [Service_name]. (instead of [Service_name], enter the name of the service you found out from the instructions above)
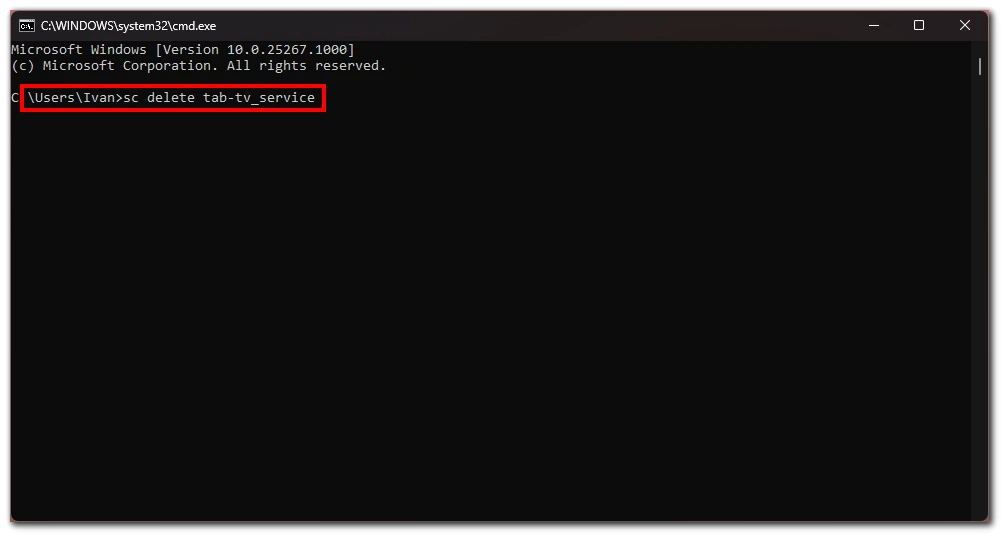
- Press Enter to run the command.
- You will need to restart your computer to complete the process.
Note that this also wholly removes the service from your computer. You should enter the service name very carefully so you don’t accidentally mix up or remove any other service that might be important. And if you failed to remove it, you most likely entered Command Prompt without administrative rights. Try to restart it.


