

Live Photo is a feature on the iPhone that allows you to save a photo and a small video captured when it was taken. When you take Live Photo, your iPhone captures 1.5 seconds of video along with the photo, which is automatically put together to create a moving image.
Live Photo is displayed like other pictures in the gallery. You can click and hold on to it to see a small snippet of video that allows you to replay the moment captured on the frame.
When you upload a Live Photo to an Instagram post, it automatically converts to a regular photo. Live Photo will appear as a video if you add it to your Instagram Story. Next, I will describe how to make a Live Photo and then the steps to upload it to Instagram.
How to take a Live Photo?
The first step is to create a Live Photo. To do so, you need to follow these steps:
- Open the Camera app on your iPhone.
- Tap the arrow at the top to open the panel.
- Tap the Live Photo icon.
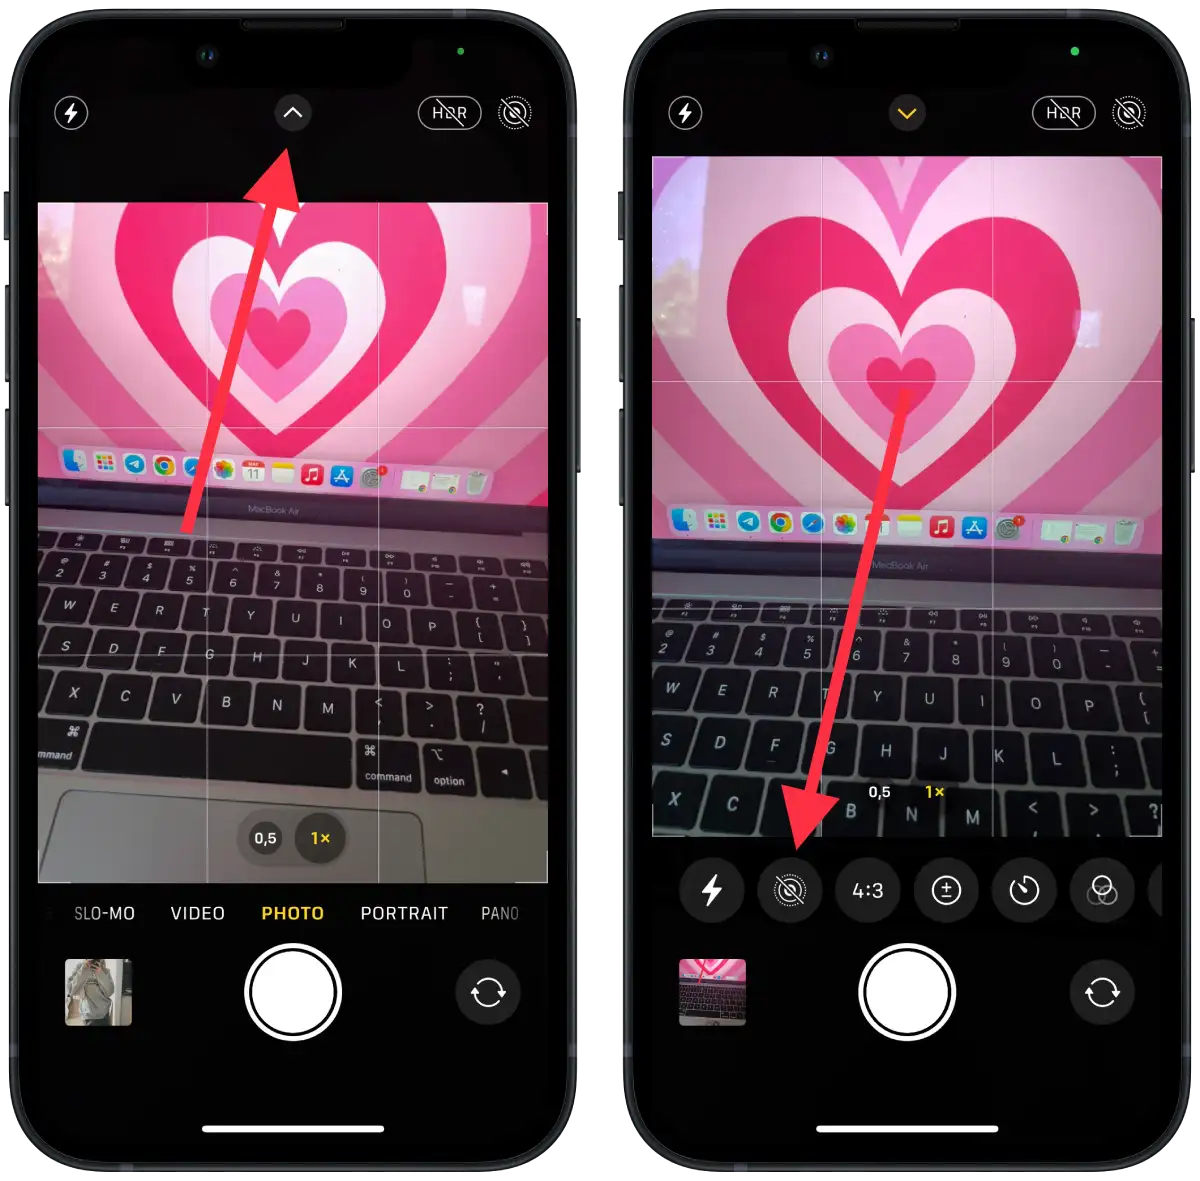
- Select “Live on” to display the icon in yellow.
- Take your photo as you usually do, just press the shutter button.
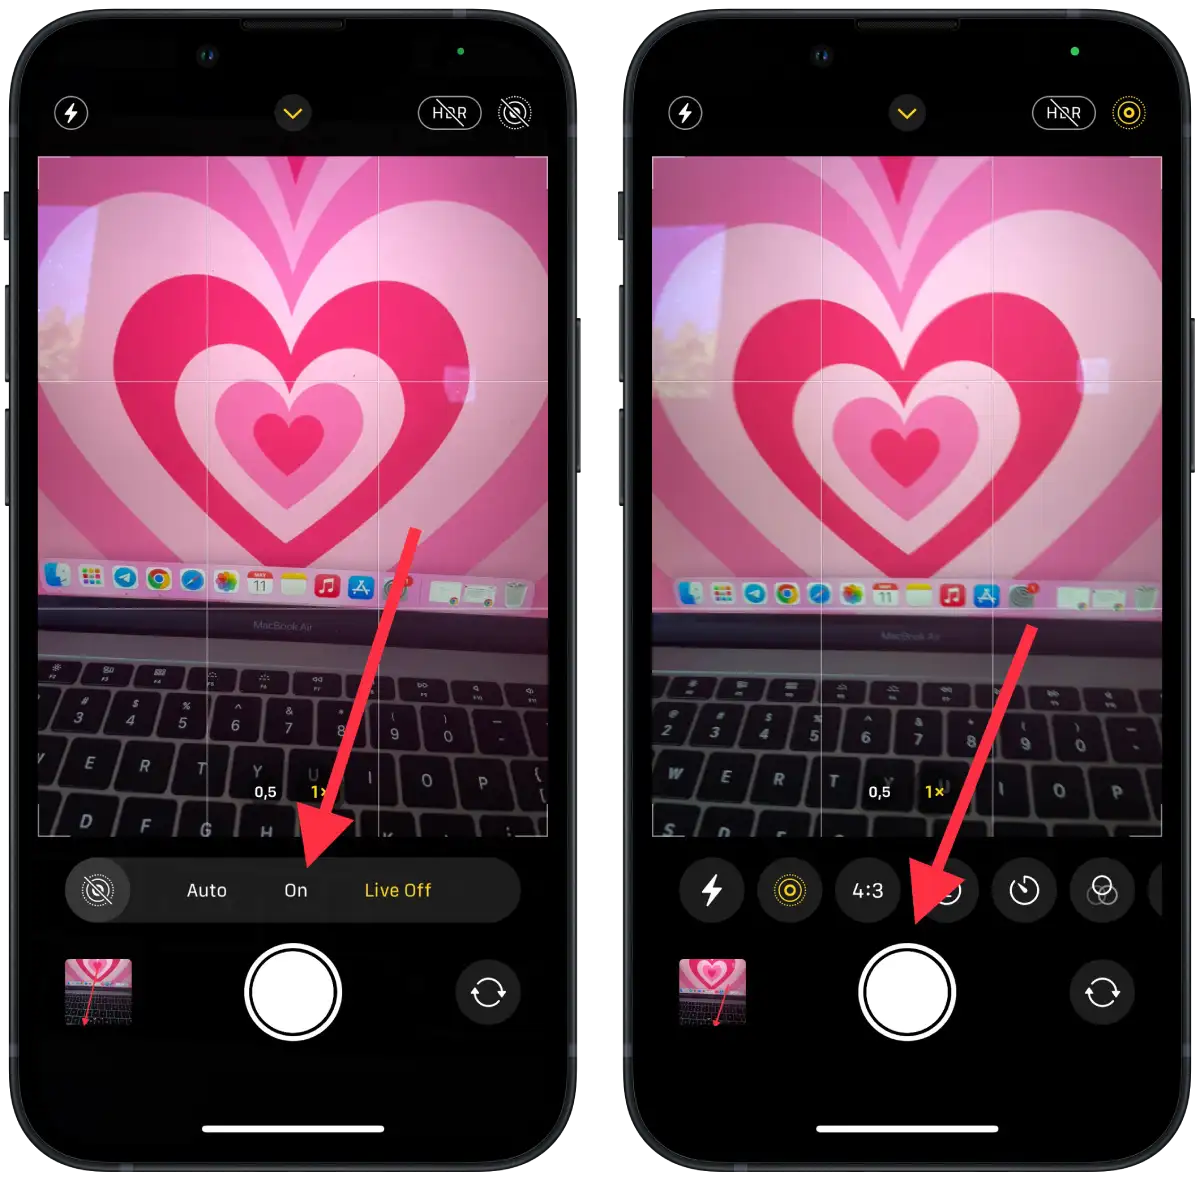
You can also click the “Live on” icon in the upper right corner if it is displayed. Your Live Photo is now saved on your iPhone and ready to use on Instagram or other social media.
It is important to note that Live Photo takes up more space on your device than regular photos because they include a video clip. If you use this feature frequently, you may need to regularly free up space on your iPhone.
What to do to post Instagram Story as a Live photo?
If you upload a Live Photo as a regular post on Instagram, it will only appear as a static photo with no dynamic effect. This is because Instagram does not support directly uploading a Live Photo in .MOV format.
To have your Live Photo displayed as a video with a dynamic effect, you can upload it as an Instagram story. To do this, you need to select the “Boomerang” effect. This will convert your Live Photo into a .MP4 video, which will be displayed as a motion-activated story.
Boomerang is a feature in the Instagram app that allows you to create short videos repeated in a loop. Unlike a normal video that plays from start to finish and then stops, boomerang repeats in reverse, creating a “going back” effect.
To add Live Photo to your Story, you need to follow these steps:
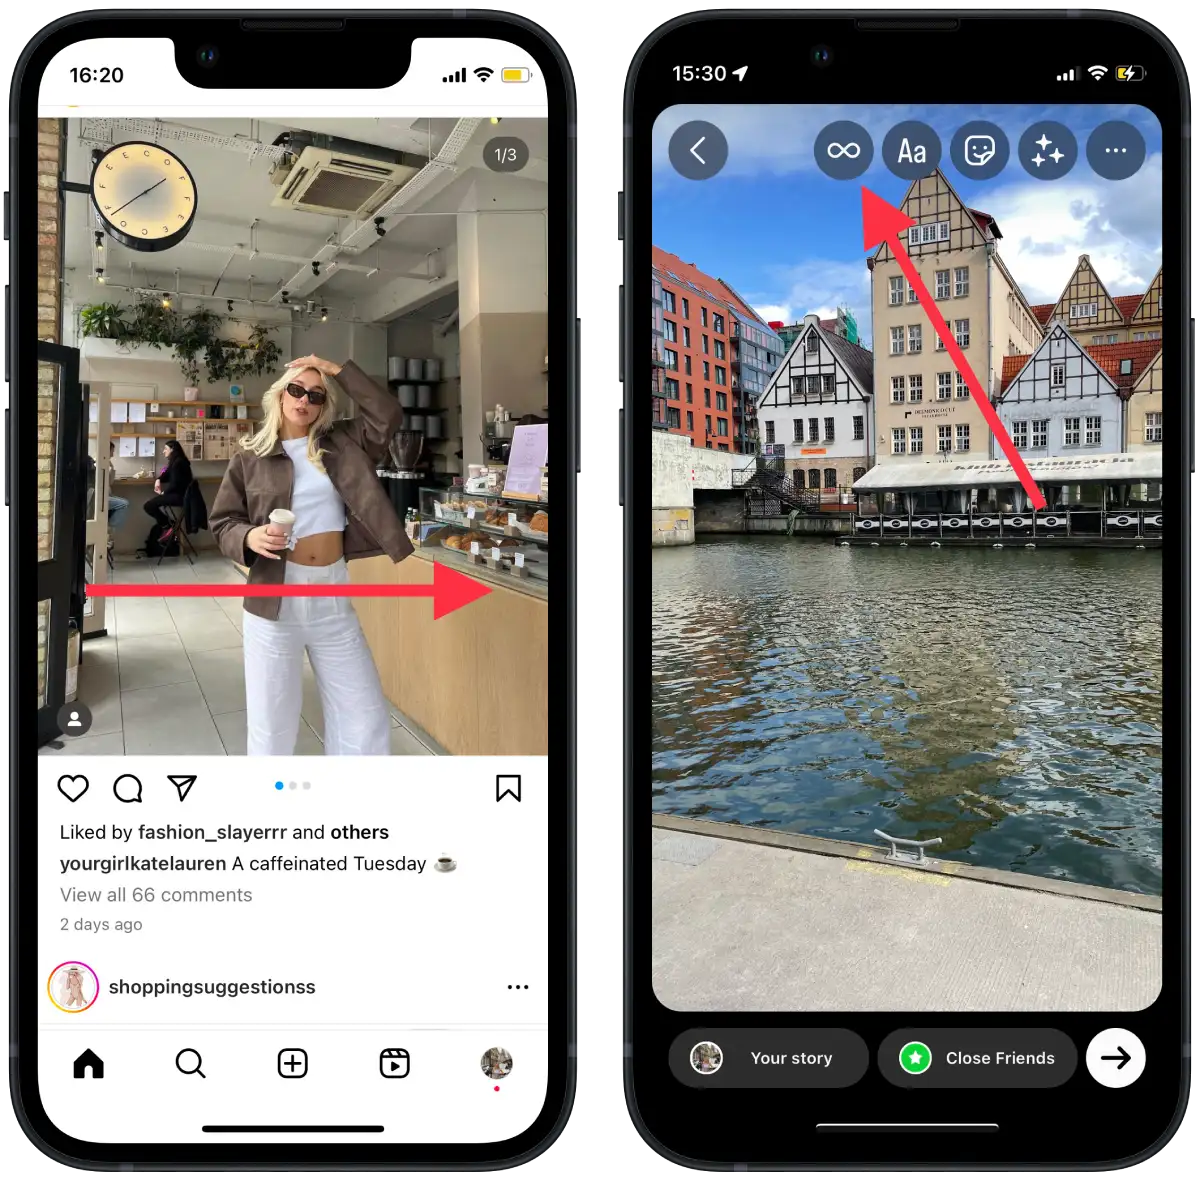
- Open the Instagram app.
- Swipe to the right to open the Story window.
- Then select the desired Live Photo.
- Next, click the Boomerang icon.
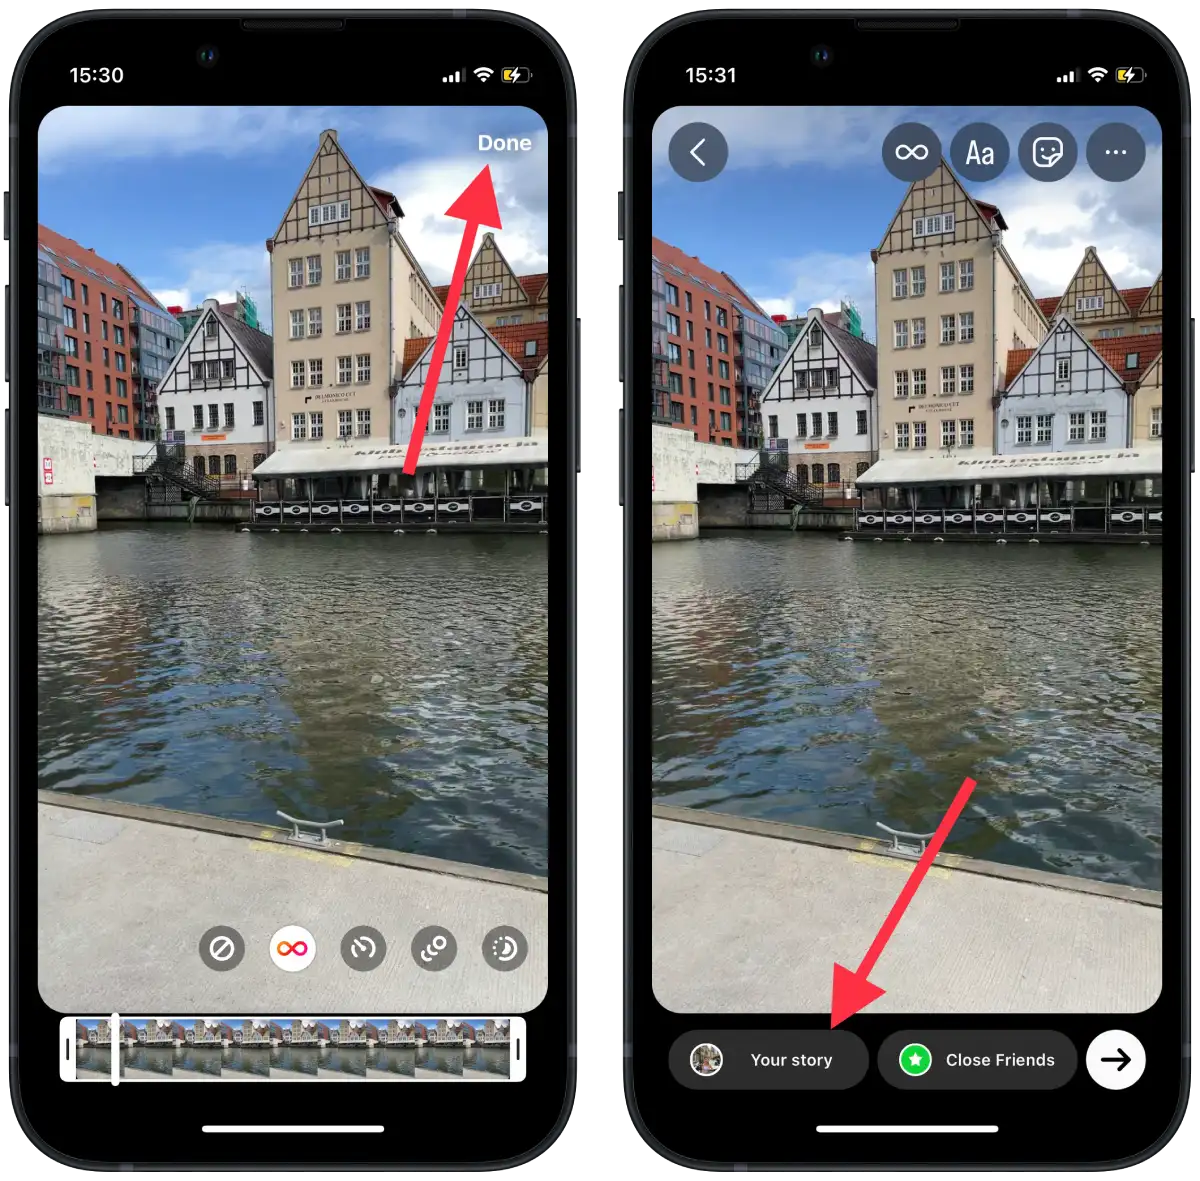
- At the bottom, you have a slider. You can change the duration of the Live Photo and then click on Done.
- Then click on the “Your Story” icon to publish it.
So, uploading your Live Photo as an Instagram story using the Boomerang feature is the most effective way to share the dynamic effect of your Live Photo with your followers.
How to set Live Photo to be on by default at any time?
If you always turn Live Photo on when taking photos, you can also make it the default in the camera settings. This allows you to save more Live Photo moments and easily edit them in the future by adding additional effects and animations.
If you want Live Photo always to be enabled by default when you take photos on your iPhone device, you can set it up in the Camera Settings menu. Follow these steps:
- Open the Settings app on your iPhone.
- Scroll down and tap on “Camera“.
- Select the “Preserve Settings” option.
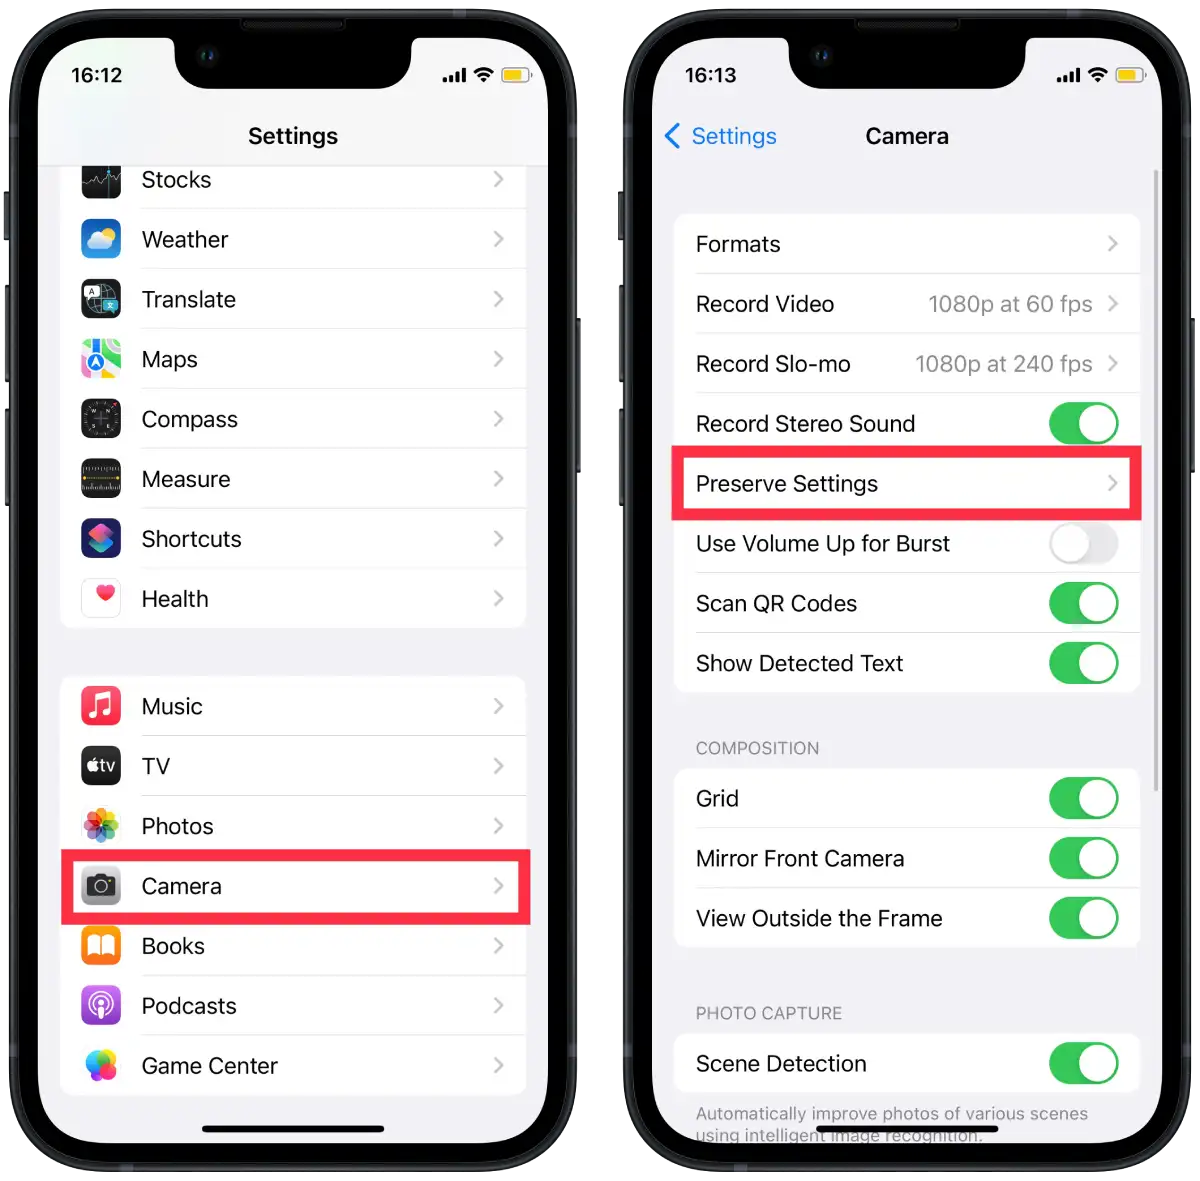
- Then activate the “Live Photo” section.
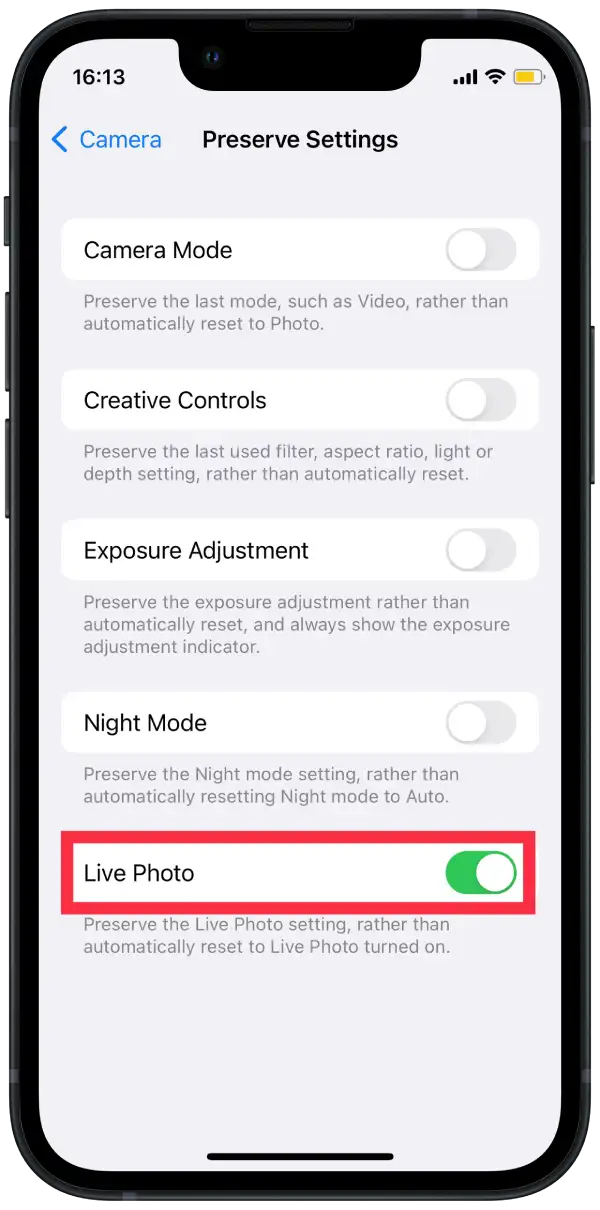
Once you’ve set up these options, Live Photo will turn on automatically whenever you open the camera on your iPhone device. This allows you to save more moments with your friends and family in a Live Photo format that brings your photos to life and adds extra impact and soulfulness.
Because if this option wasn’t turned on when you took the photo, you couldn’t add the Live Photo effect afterward. But you can take a normal photo with Live Photo, so it’s best to activate this option.


