

The Windows operating system is one of the newest and most advanced. Virtually all the PCs you can buy today come with Windows 11 or 10. This is because Windows is the operating system that is compatible with most software. It is also the most popular operating system, so many people use it, and most software and game manufacturers make their products for vindows. Among the operating system’s many features is the ability to edit videos. For example, you can separate the Audio from the video.
Although this is not a built-in feature of Windows itself, you will not find this tool among the standard applications of Windows 10 or Windows 11. However, many free applications can help you with this task. I can recommend you one of them – Clipchamp. It is a free utility from Microsoft that allows you to do the most straightforward editing of your videos. Among other things, one of the Clipchamp tools allows you to separate Audio and video. Let’s take a closer look at how it works and what you need to do.
How to detach Audio from video with Clipchamp on Windows 10 or 11
As I described above, no built-in tools allow you to separate Audio from video in Windows 10 or 11. However, you can download the free application Clipchamp from Microsoft Store. It allows you to use simple editing tools with your videos. Including you will be able to separate Audio from video using this utility. To do this, you need to:
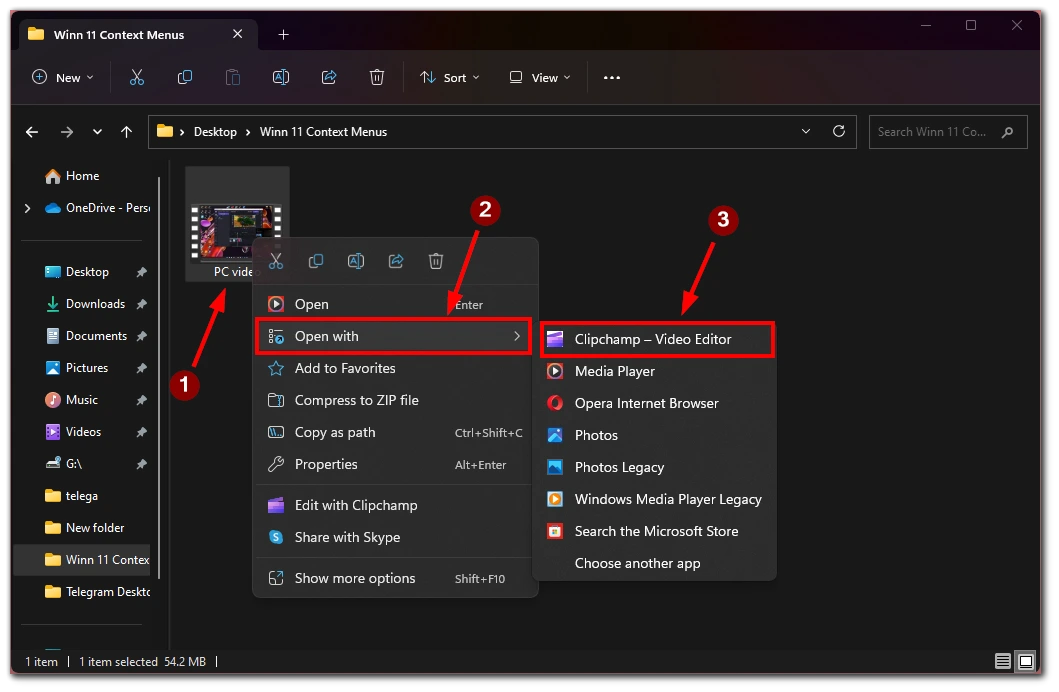
- Open your video with Clipchamp.
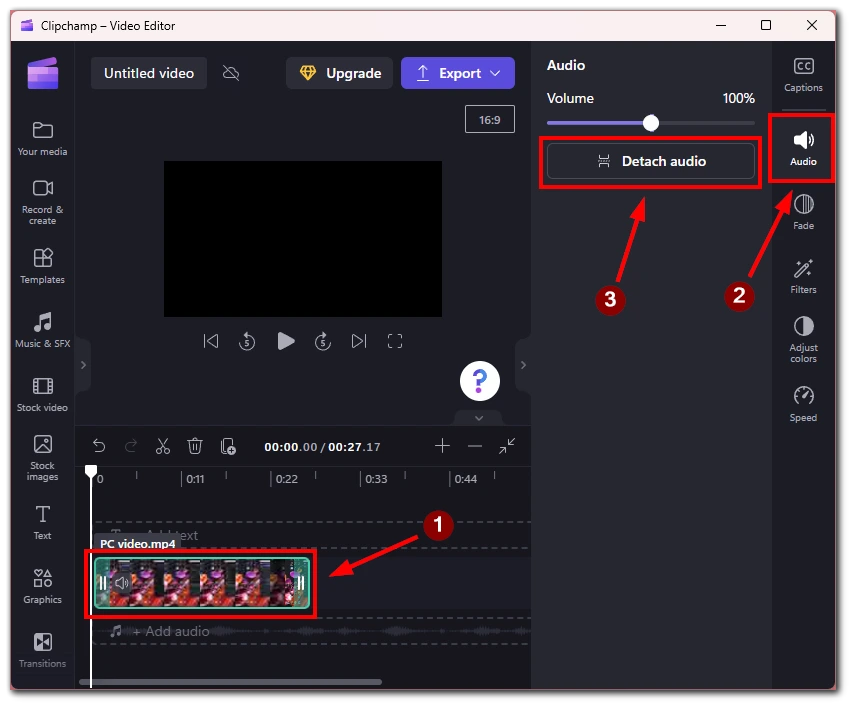
- You need to click on the video in the area with the timeline.
- After that, select Audio on the right side of the screen.
- You must click the Detach Audio button to separate it from the video.
- After that, you can delete the video sequence by right-clicking on it in the timeline and saving the file with the Export button in the upper right corner.
Note that the Clipchamp application is available on Microsoft Store for both Windows 10 and Windows 11. You need at least 8 gigabytes on your system drive to install it. Please note that in the case of Clipchamp, you can’t install the application to any other non-system drive.
How to separate Audio and video using online tools on Windows 10 or Windows 11
Suppose you do not want to install additional applications on your Windows 10 or 11 or dislike the Clipchamp application. In that case, you can use the online service to split video and audio sequences into files similarly. However, you should note that this method is more suitable for small video files. You can use the Audio Extractor online service. To do this, you will need the following:
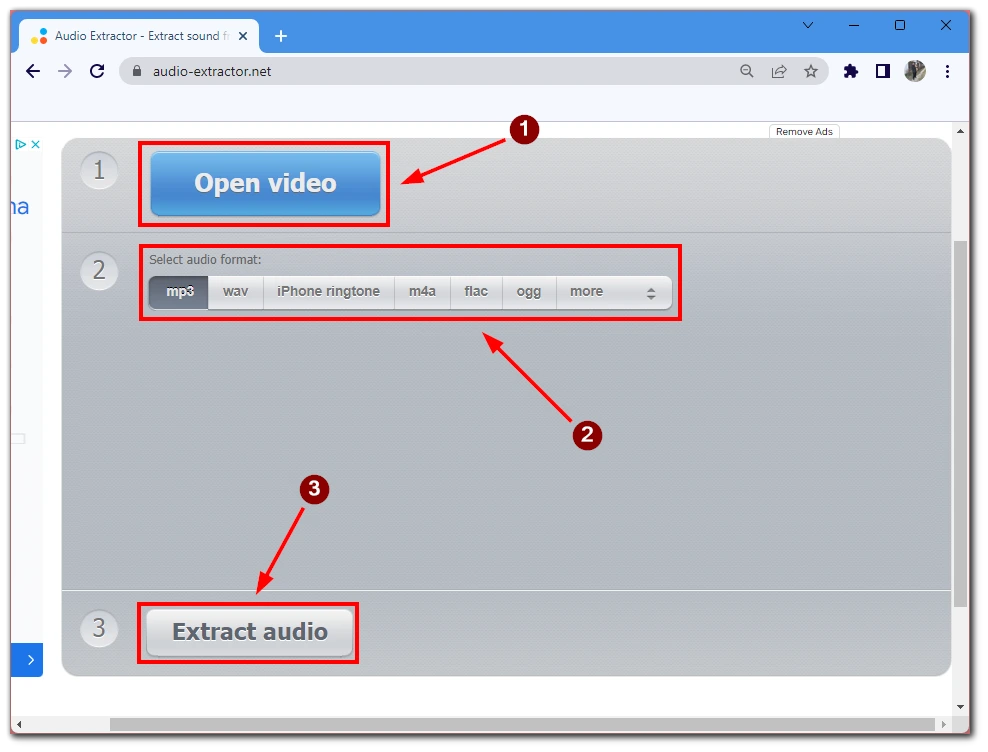
- Go to the Audio Extractor online page.
- Click the Open Video button and select the video file from your computer.
- Next, select the audio format you want to save the future audio file.
- Click Extract Audio and wait until the audio is separated, and you can download the finished file with the audio track.
As I mentioned, this method is more suitable for small video files. Since you will need to upload your video file to the site, if it is, for example, a long movie or 4K video, it might get corrupted or fail to upload, and you will waste a lot of time. In this case, it is better to use the software installed on your device.
How to add Audio to video using Clipchamp on Windows 10 or 11
Let’s also find out how to add audio files to your video with Clipchamp. For example, you can cut audio from one video file and paste it into another. Or you can add music or other effects to your video from the Clipchamp library of free sounds. To do this, you need to:
- Open your video with Clipchamp.
- After that, you will find the Add Audio button below the video. Click it.

- A drop-down menu with available free music and other sounds will open on the left side.
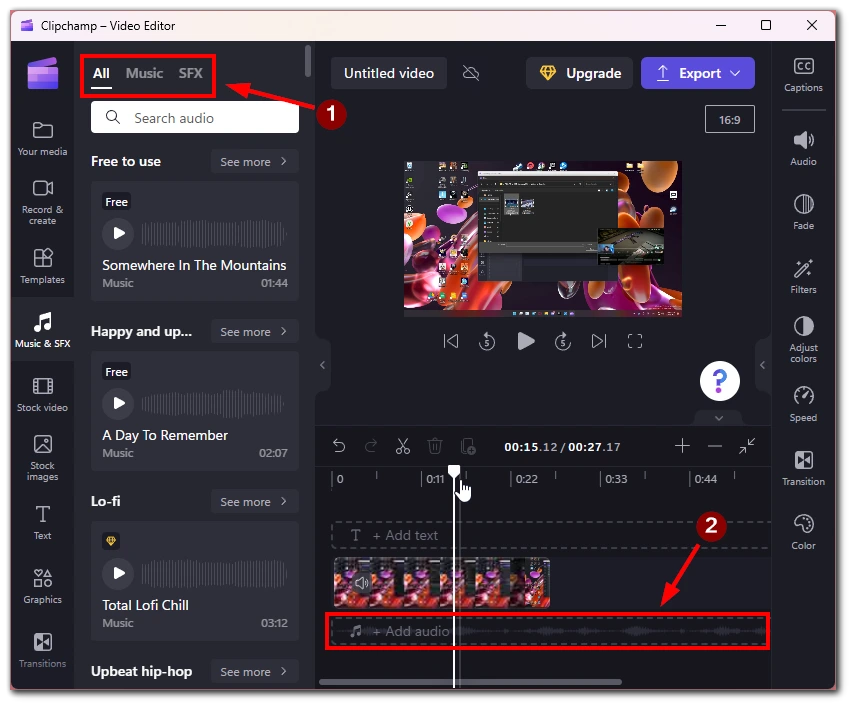
- If you need to add your audio file to the video, you can drag and drop it right into the timeline of your video.
As you can see, it’s pretty easy to do. And you can drag and drop or trim the audio in the app. All of this can be done directly from the timeline of your video file. Once everything is ready, you need to click Export and save the resulting project. I advise you to explore the Clipchamp library of unlocked sounds and music because you can find many exciting things there.


