

Making a GIF from a YouTube video is easier than it might seem. Loads of online services can turn a YouTube video link into a GIF for you. Some are super simple but might not keep the video quality top-notch, while others might be more complex. Also, there’s this handy browser extension that I find super cool.
I’ve picked out three options that, in my opinion, do a great job of making GIFs from YouTube videos. GifRun is the easiest for me; just paste the YouTube video link and choose the moment for the GIF. GifRun is very fast at processing requests. Another service like GifRun is Giphy. It handles links from YouTube and Vimeo, and you can even make manual GIFs from pictures.
Many people recommend the service Gifs, let me give you a heads-up: don’t even waste your time. It takes forever to load, and you might be unable to download your GIF at all.
Another method I like is GIFit. It’s a free browser extension. With the extension, a GIFit button pops up at the bottom of any YouTube video you watch. So, if you need to make GIFs from YouTube videos often, this is the best way because it’s quick and easy.
Making GIFs from a YouTube video using GifRun
This method is the easiest and most convenient for me, so let’s start with it. This tool is perfect for users who want to turn specific video moments into short animated images without downloading specialized software. GifRun offers extra settings like adding text, changing size, and GIF frame rate. I also put it at the top because GifRun was the fastest to upload the video and make the GIF.
To make a GIF from a YouTube video using GifRun, follow these steps:
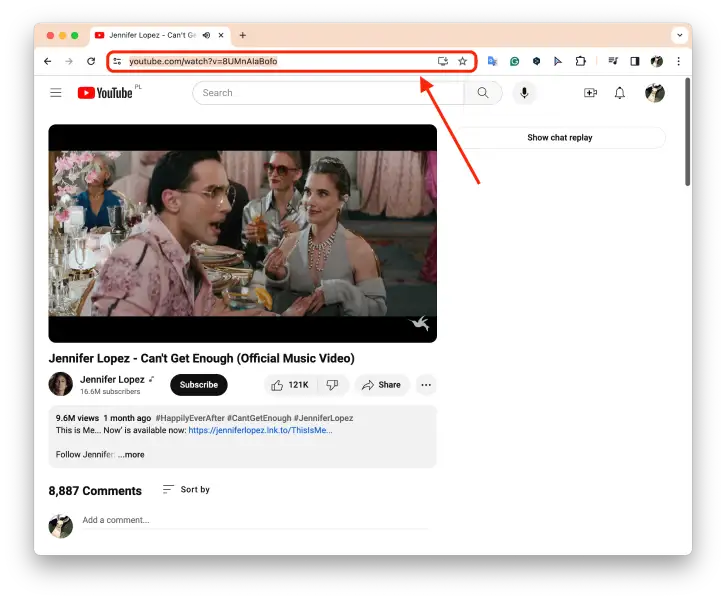
- Open the YouTube video and copy the URL.
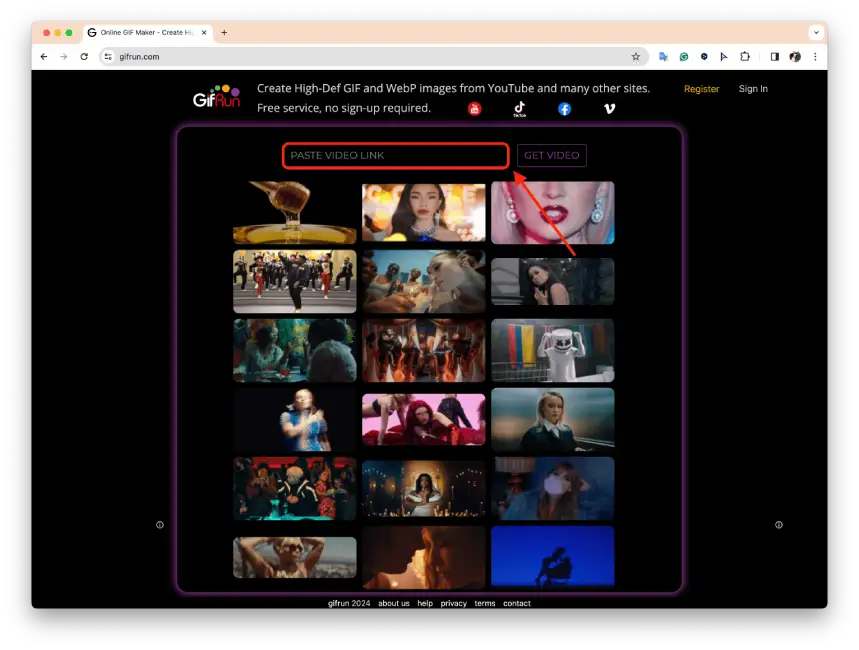
- Then open GifRun.
- Paste the YouTube video link.
- The video will automatically upload.
- On the left side of the screen, you have two sliders:
- The top one is a slider that lets you choose how many seconds the GIF lasts.
- The bottom one is for picking the moment you want to turn into a GIF in the YouTube video.
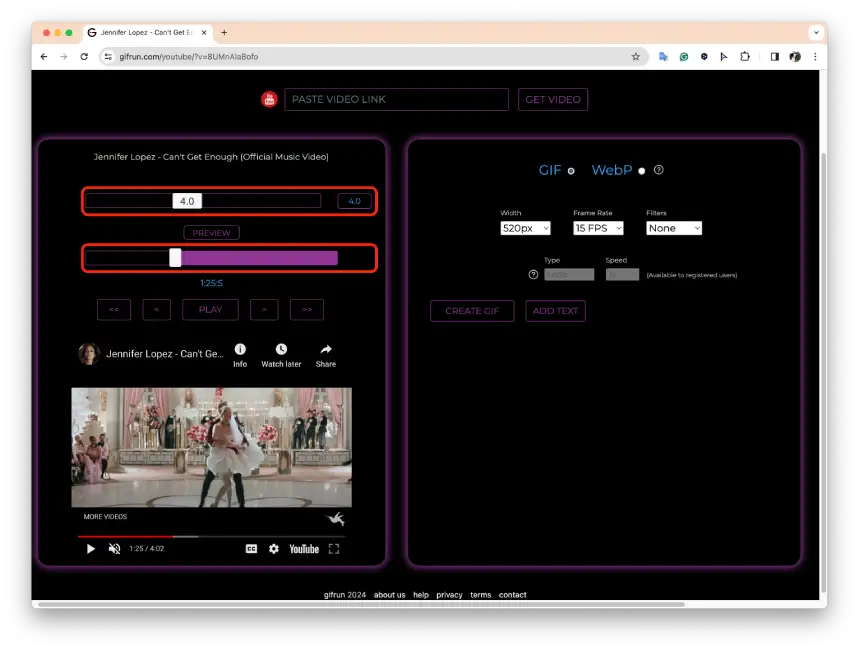
- You can also use arrows to rewind the video.
- You can choose the width, frame rate, and GIF filters on the right side of the screen.
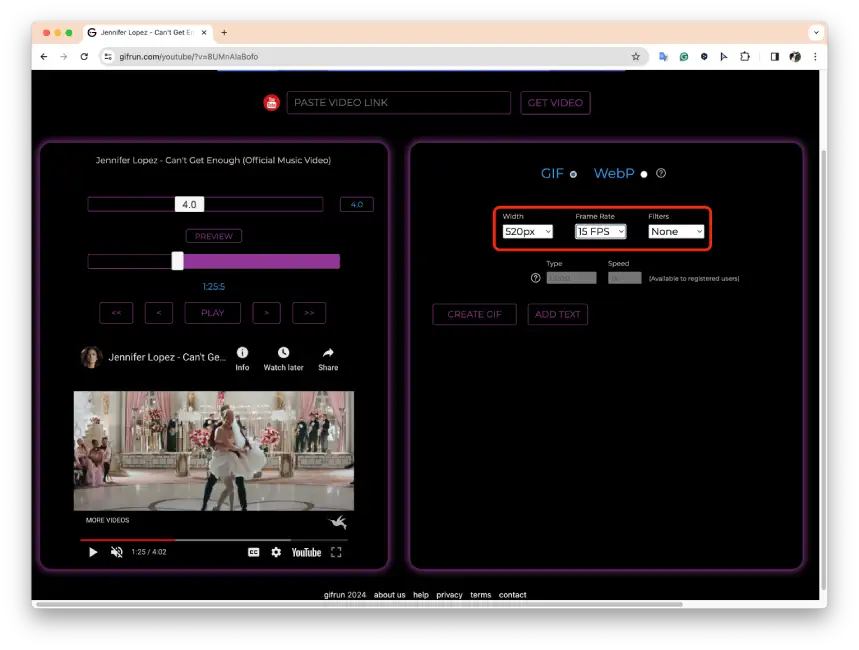
- If needed, you can add text: choose the font, size, placement, and even color.
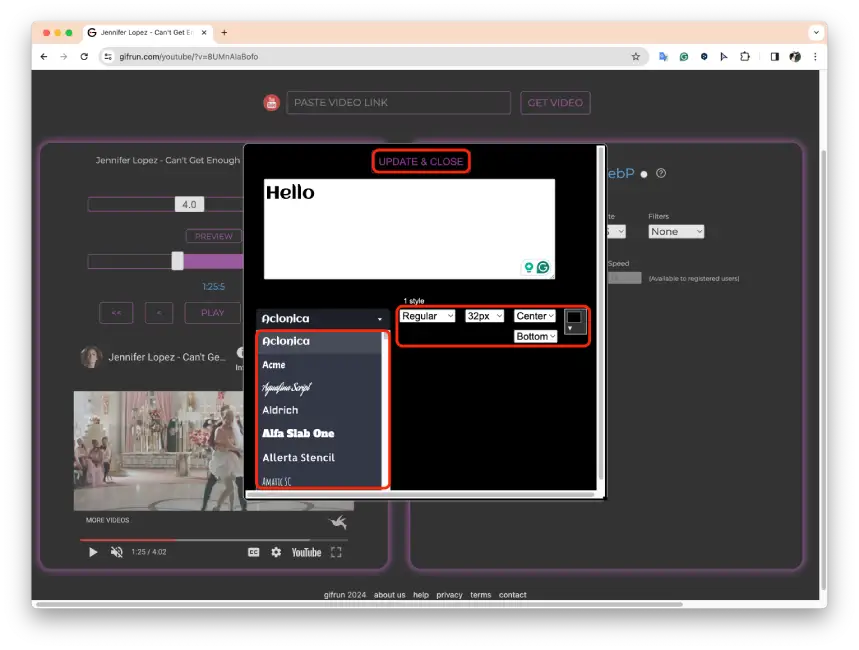
- Then click “Create GIF“.
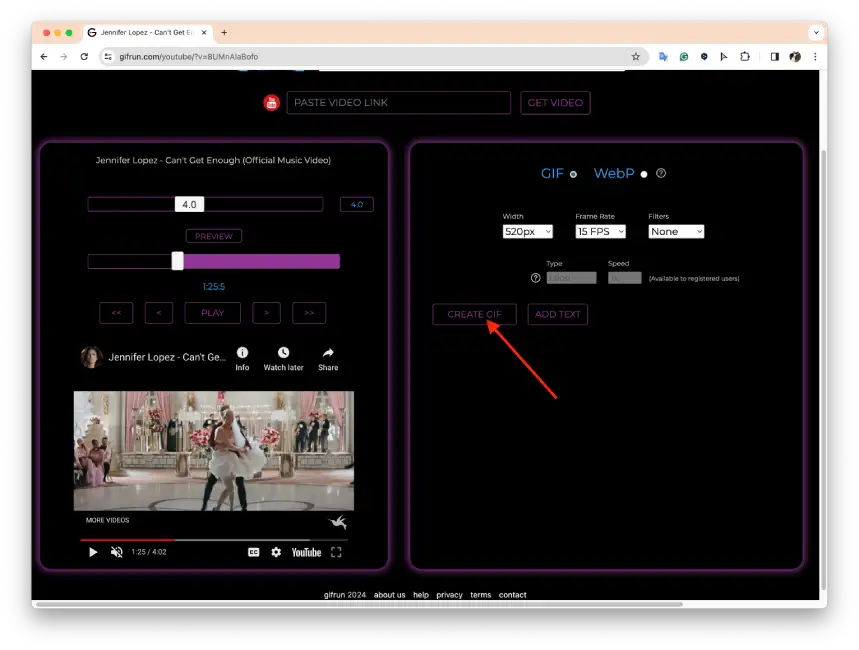
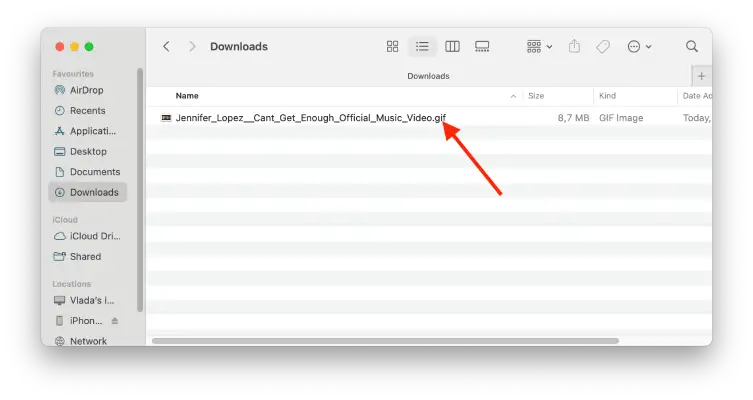
After these steps, your GIF will download to the default folder on your PC.
Making GIFs from a YouTube video using GIFit
GIFit is a browser extension that’s free and super easy to use. It’s perfect if you need to make GIFs from YouTube videos often. The cool part is that it converts videos to GIFs right on YouTube.
The downside is it only works on Google Chrome. So, it might not be your thing if you’re all about Safari. But that’s up to you.
To make a GIF from a YouTube video using the GIFit extension, here’s what you do:
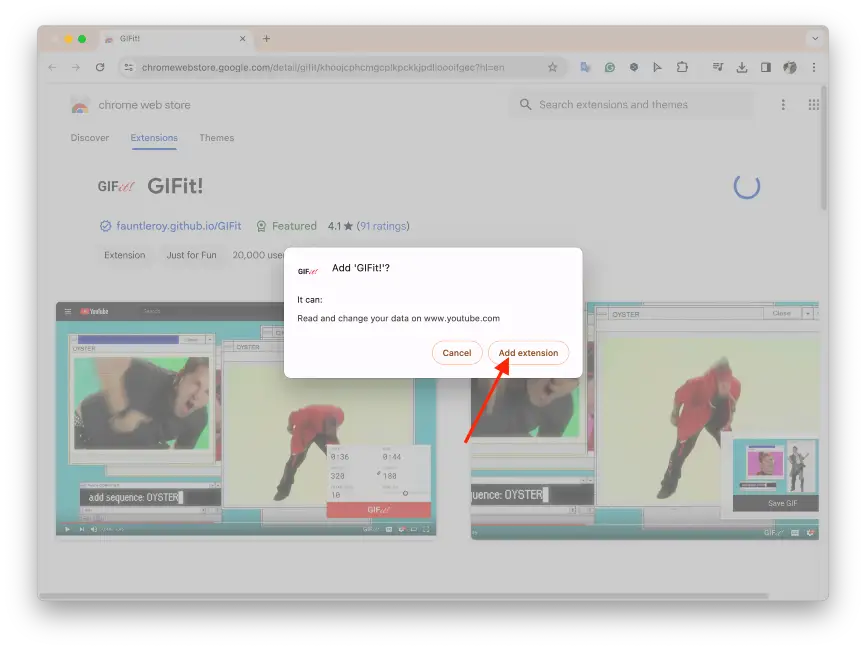
- Open Google Chrome.
- Go to the GIFit extension page.
- Click “Add to Chrome.”
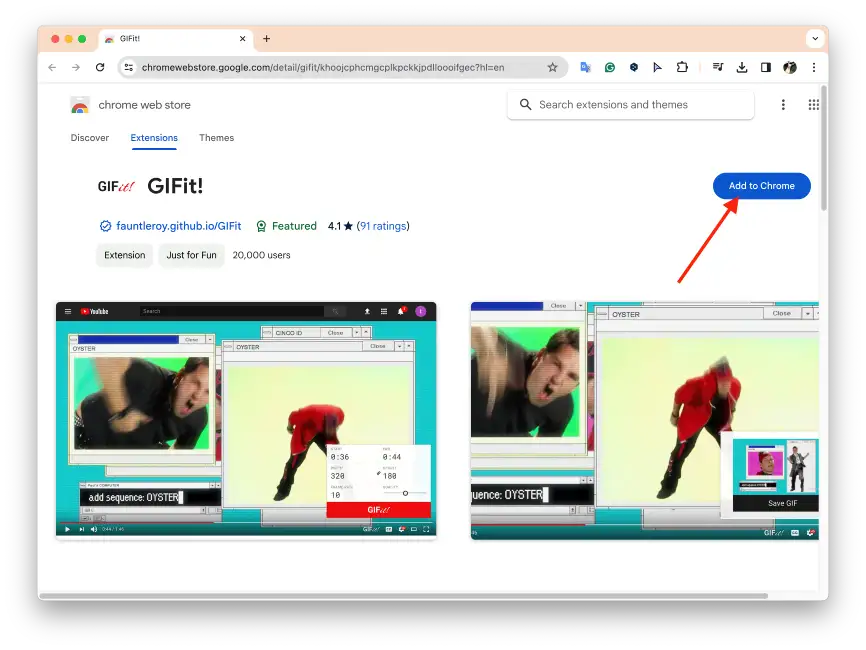
- In the pop-up, choose “Add extension.”
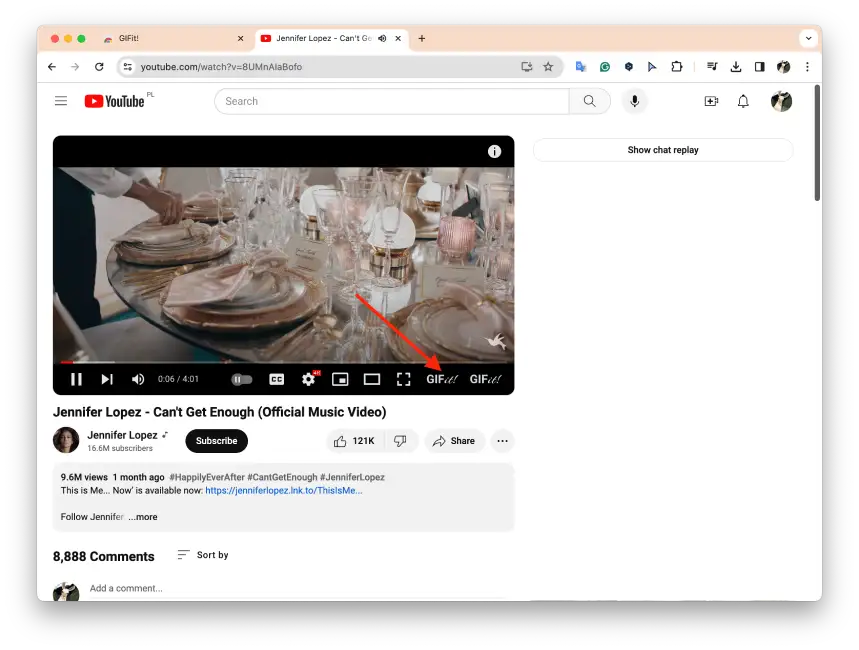
- After installing, head over to YouTube and find the video you want.
- You’ll see a new “GIFit!” button on every video.
- Click “GIFit!” on the video you want to GIF.
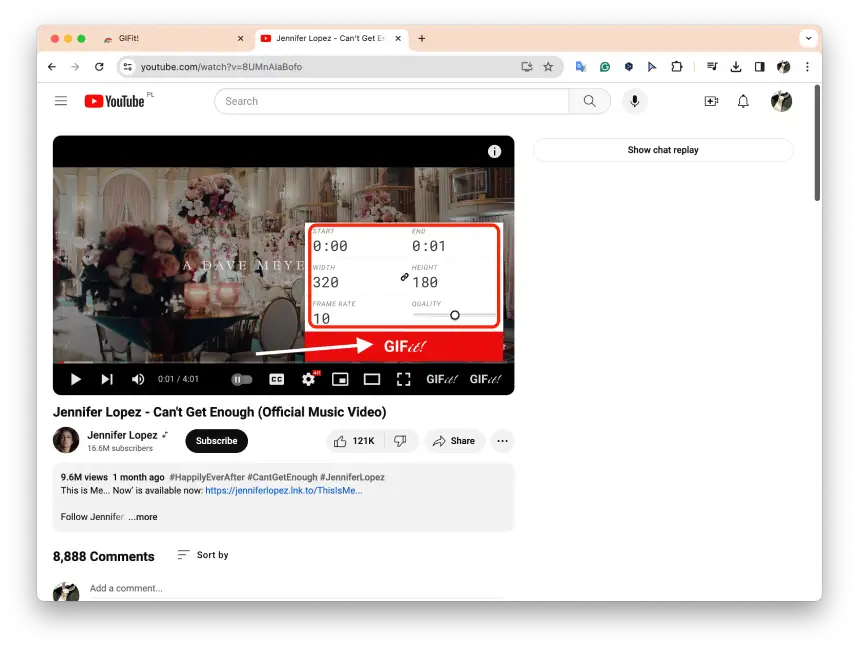
- Set the start and end times, the height and width, and the frame rate.
- Slide to the right to increase the GIF quality and click “GIFit!” again.
- Click “Save GIF.”
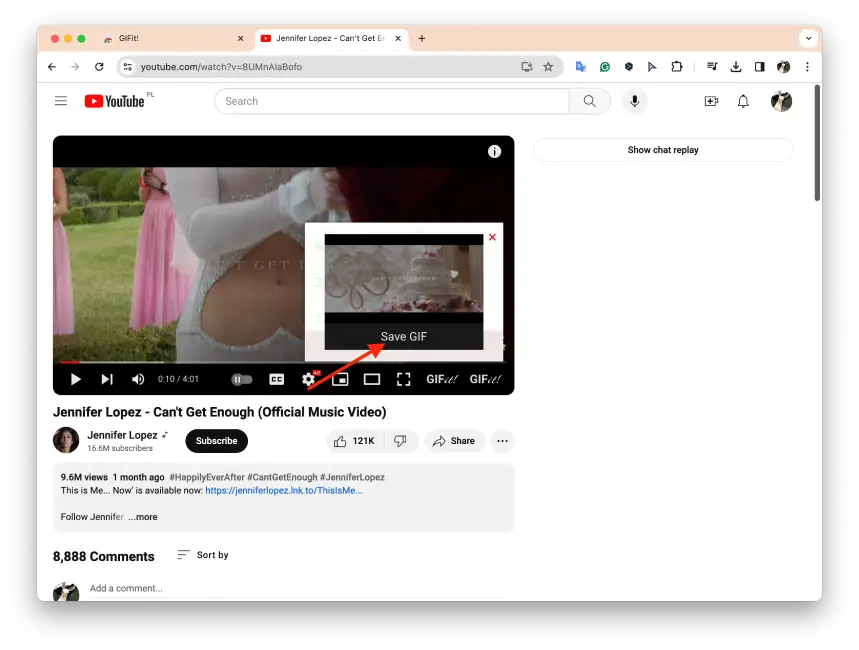
And boom, the GIF file will download to your PC. Check your default downloads folder to find it.
Making GIF from a YouTube video using Giphy
Making a GIF from a YouTube video using Giphy is pretty straightforward. Giphy is an online tool that converts YouTube videos to GIFs. Just like other converters, you paste the YouTube video link and then download your GIF. The interface is slicker than GifRun, and there are more editing tools. But it takes longer to process the GIFs, which is a bit of a downside for me.
To make a GIF with Giphy, here’s what you do:
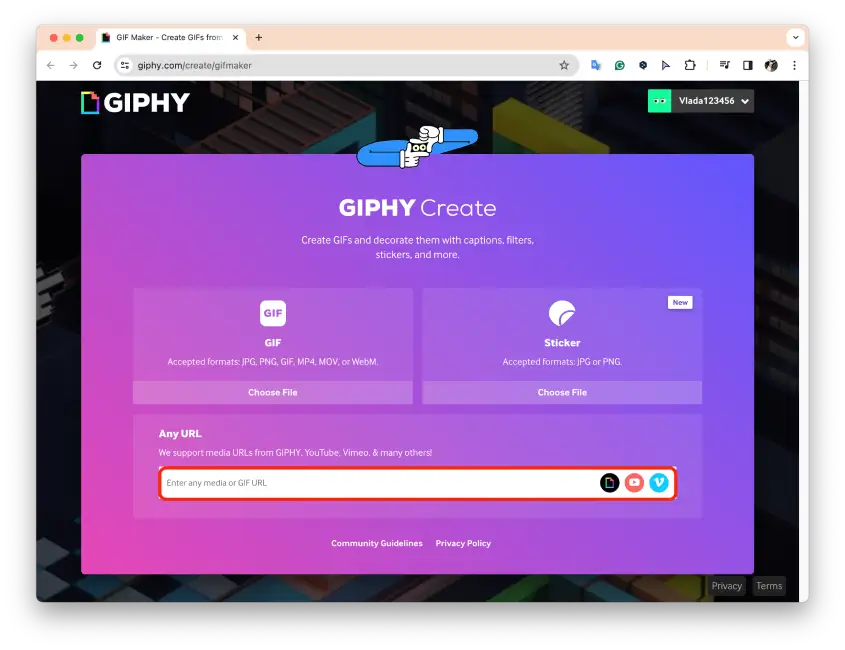
- Open the YouTube video and copy the URL.
- Then open Giphy.com’s GIF maker.
- Paste the YouTube video link.
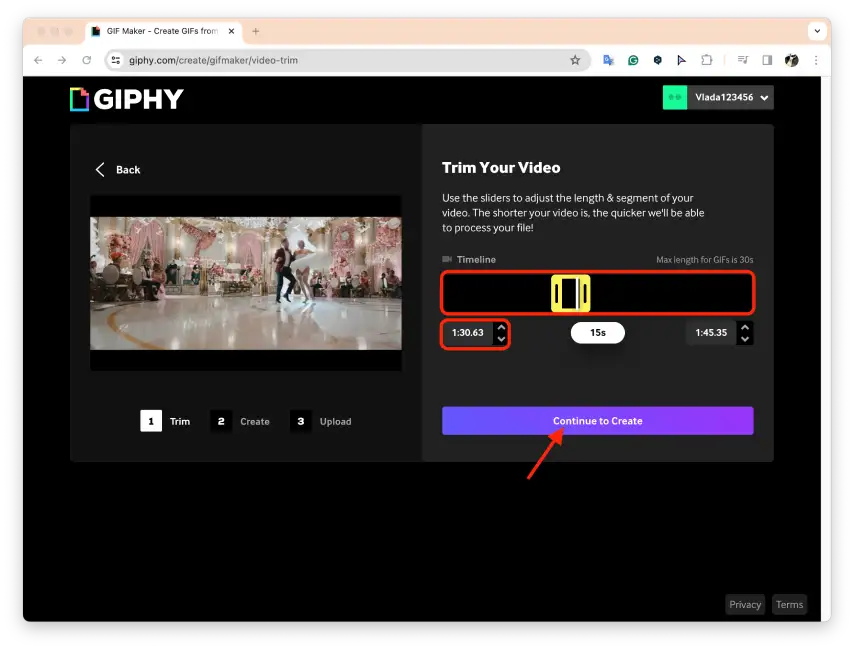
- You use the timeline to pick how long your GIF will be. You can go up to 30 seconds. Make sure the part you pick turns yellow, not red.
- Then, at the bottom, you set the exact start time.
- Click “Continue to create.”
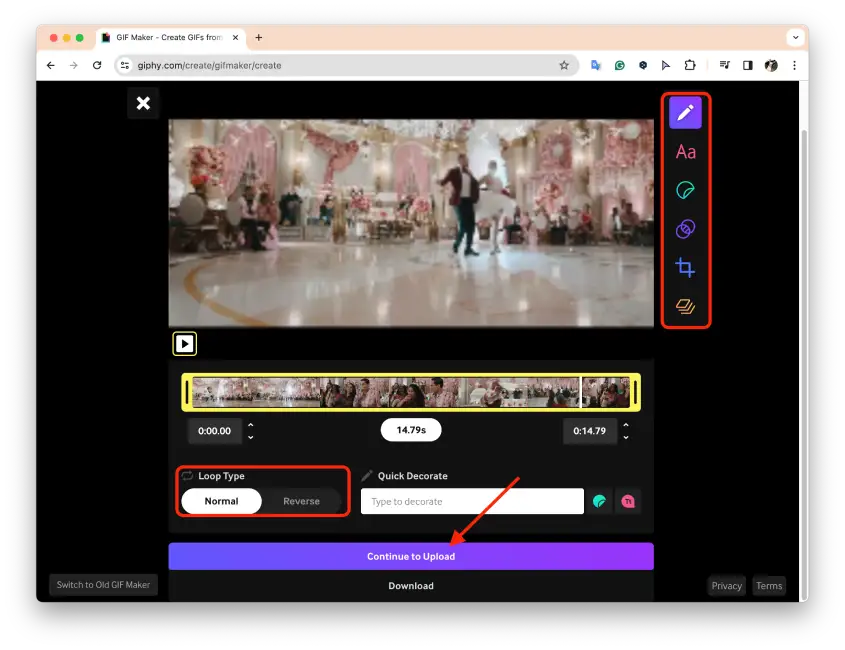
- In the next window, you’ll see options to add text, stickers, filters, and to crop your GIF.
- You can still tweak the timeline here and choose a loop type for your GIF.
- Click “Continue to Upload.”
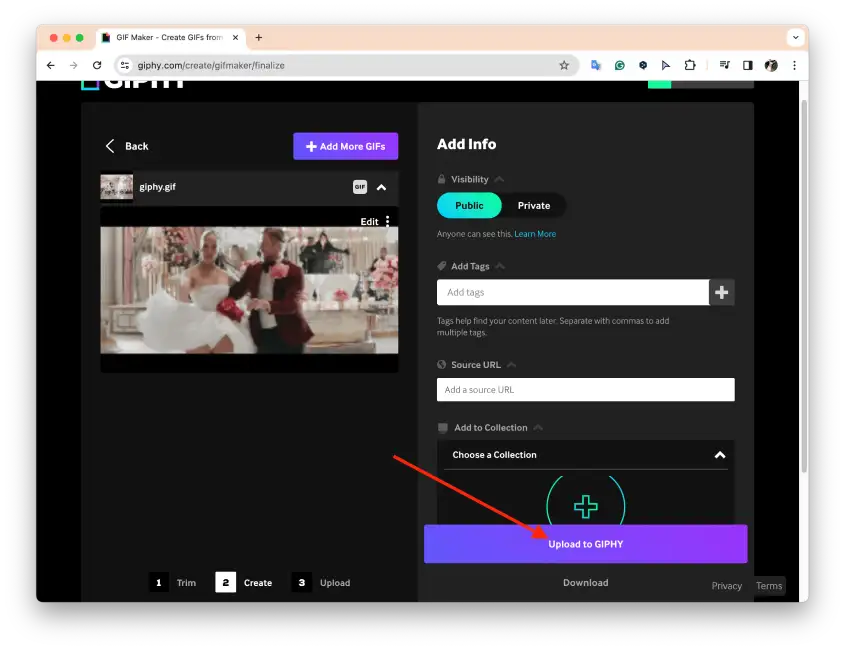
- You can tag your GIF or decide if you want it to be public for others to see.
- Then, “Upload to GIPHY.”
- Click “Media” and pick the version you want, then click the download button.
After these steps, your new GIF will be in the default folder on PC. You can use it like any other GIF file.


