

When you connect to a Wi-Fi network on your Windows 11 PC, the network is automatically saved, and the computer will automatically connect to it when it’s in range. This feature is great for convenience but can also be a security risk if you connect to a public or unsecured network. Forgetting a saved Wi-Fi network on Windows 11 is a simple process preventing your computer from automatically connecting to that network. This article will guide you through the steps to forget a saved Wi-Fi network on Windows 11.
How to forget a saved network in Windows 11 in two ways
Forgetting a saved Wi-Fi network in Windows 11 can be done in multiple ways. In this section, I will provide step-by-step instructions on forgetting a saved network in Windows 11: using the Settings app and the Quick Settings menu.
Using the Quick Settings menu
This is a quick way that allows you to forget in a couple of clicks the network you are connected to or the network within reach of your computer’s receiver. To do this, you need to:
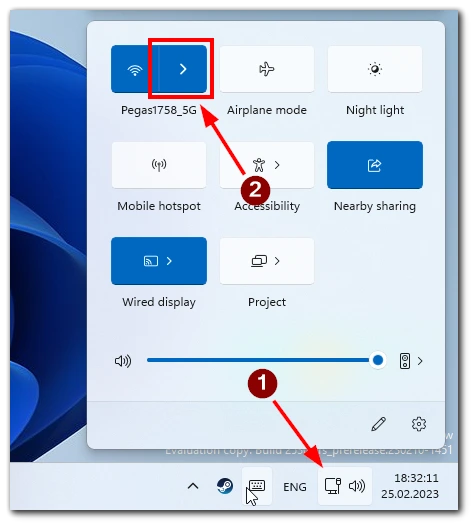
- Click on the Wi-Fi icon in the bottom right corner of the taskbar.
- Next, click the arrow next to the Wi-Fi button to open a list of available networks.
- Right-click on the network that you want to forget.
- Click on the “Forget” button.
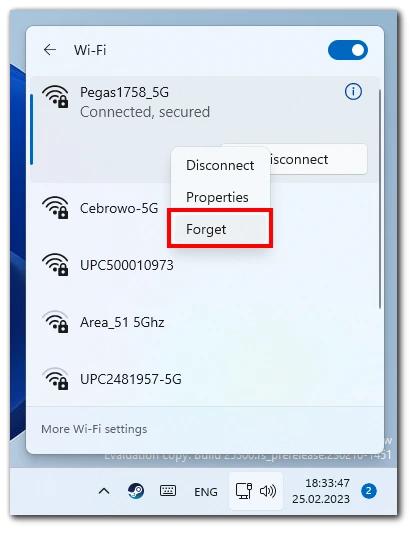
- A confirmation message will appear asking if you want to forget the selected network. Click on “Forget” again to confirm.
- The selected network will now be removed from your list of saved Wi-Fi networks.
Remember that this method will not help you remove networks far away from you, but they saved in your computer’s memory.
Using the Settings app
This method will help you to view all saved Wi-Fi-networks and delete them quickly. To do this, you need to:
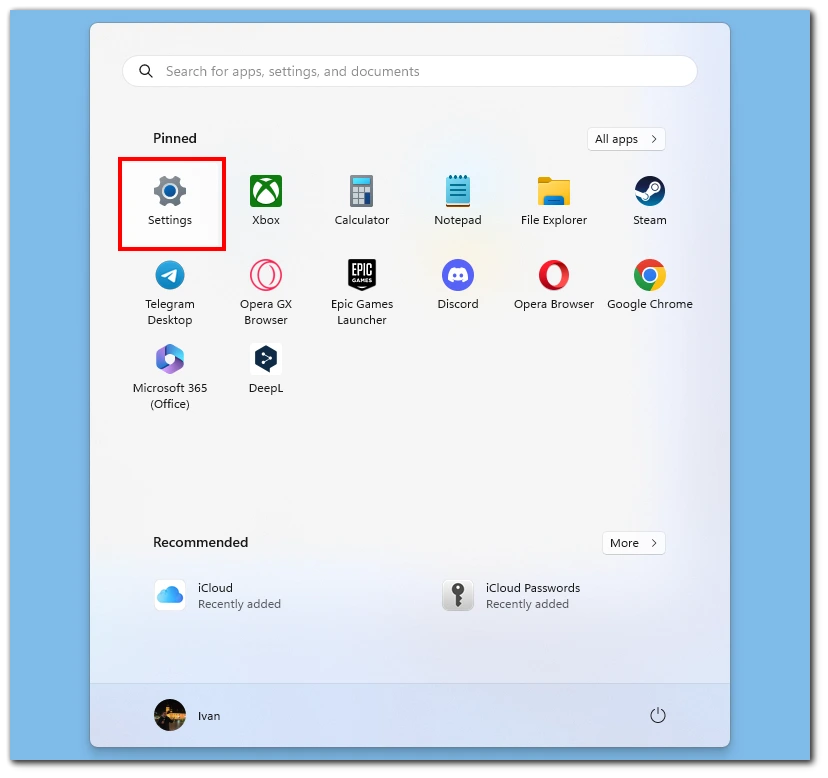
- Click on the Windows Start button and the Settings icon (gear icon) to open the Windows Settings.
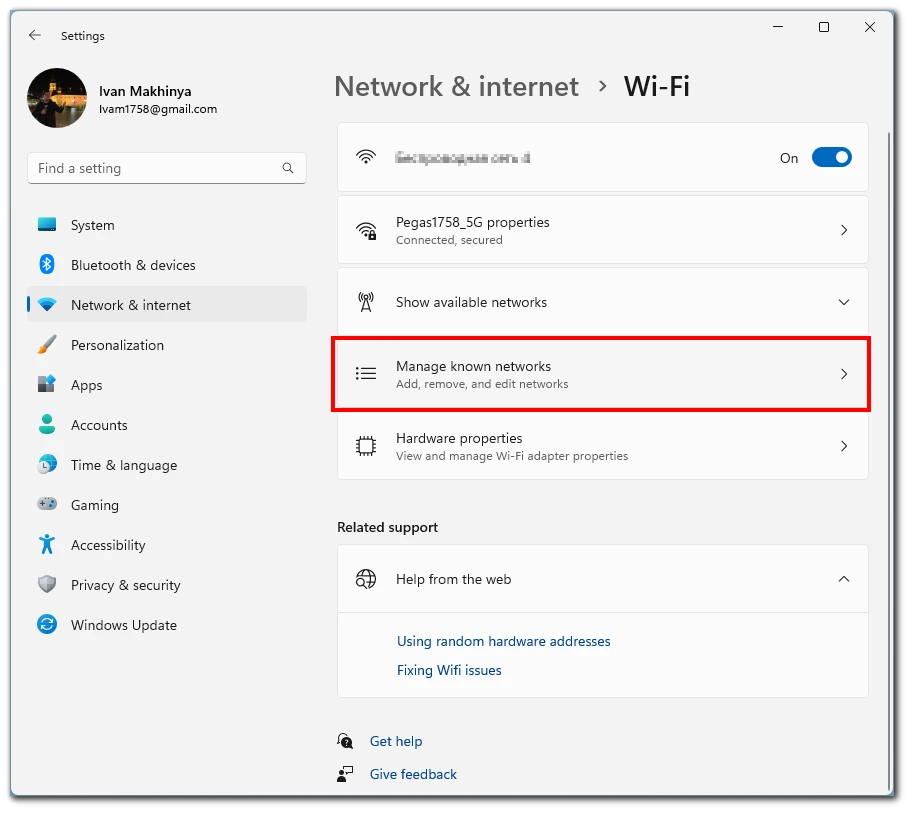
- In the Windows Settings, click on Network & Internet.
- Next, click on Wi-Fi.
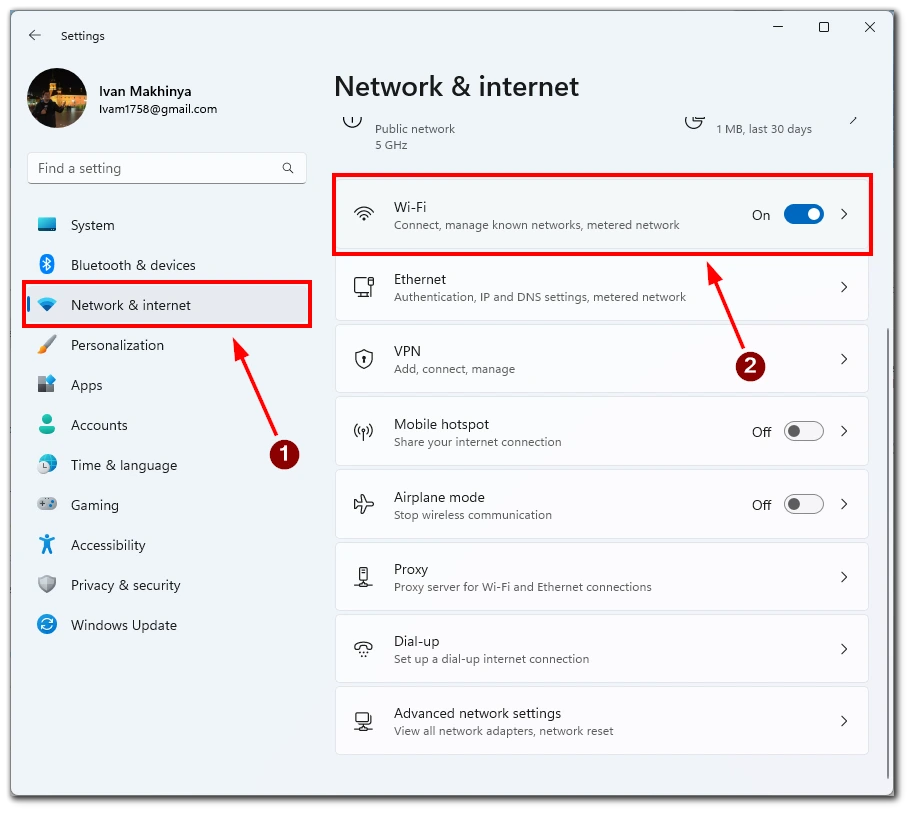
- Here, click on Manage known networks.
- A list of all saved Wi-Fi networks will appear. Find the network you want to forget, and click the Forget button.
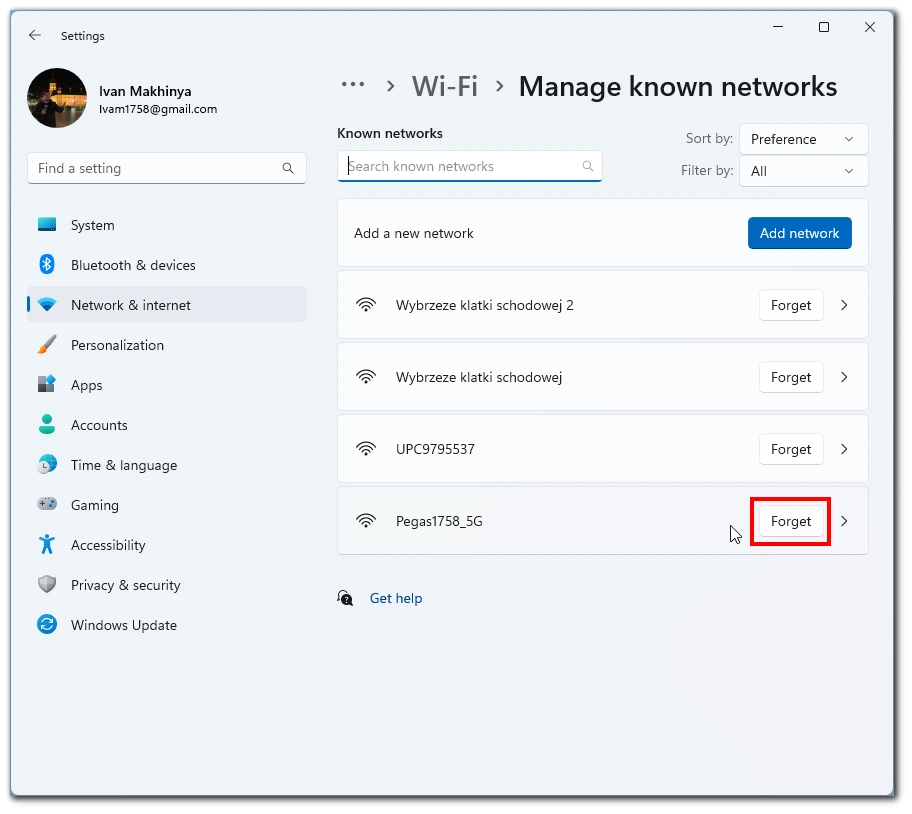
- A confirmation message will appear asking if you want to forget the selected network. Click on “Forget” again to confirm.
- The selected network will now be removed from your list of saved Wi-Fi networks.
Remember that it will be impossible to undo this action. This means that you will have to re-enter the password for this network to connect to it. So you should be careful not to delete the network you want accidentally.
How to remove multiple saved Wi-Fi networks on Windows 11
Removing multiple saved Wi-Fi networks on Windows 11 is useful when you want to clear your computer’s list of saved networks or when you have many saved networks that are no longer in use. This section will provide step-by-step instructions on removing multiple saved Wi-Fi networks on Windows 11 using Command Prompt.
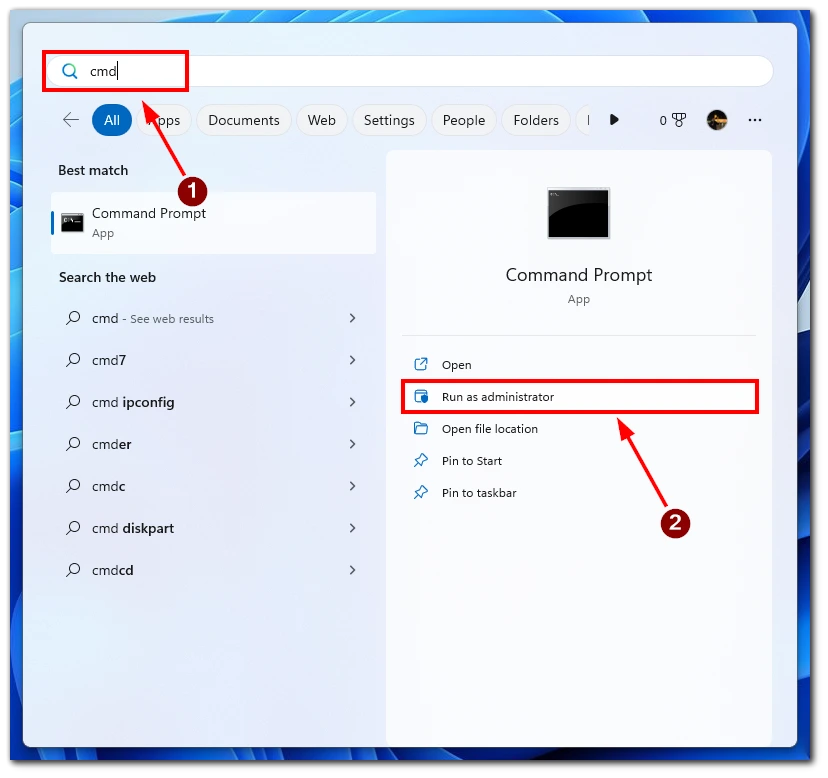
- Open the Command Prompt as an administrator. To do this, type “cmd” in the Windows search bar, right-click on Command Prompt, and select “Run as administrator.”
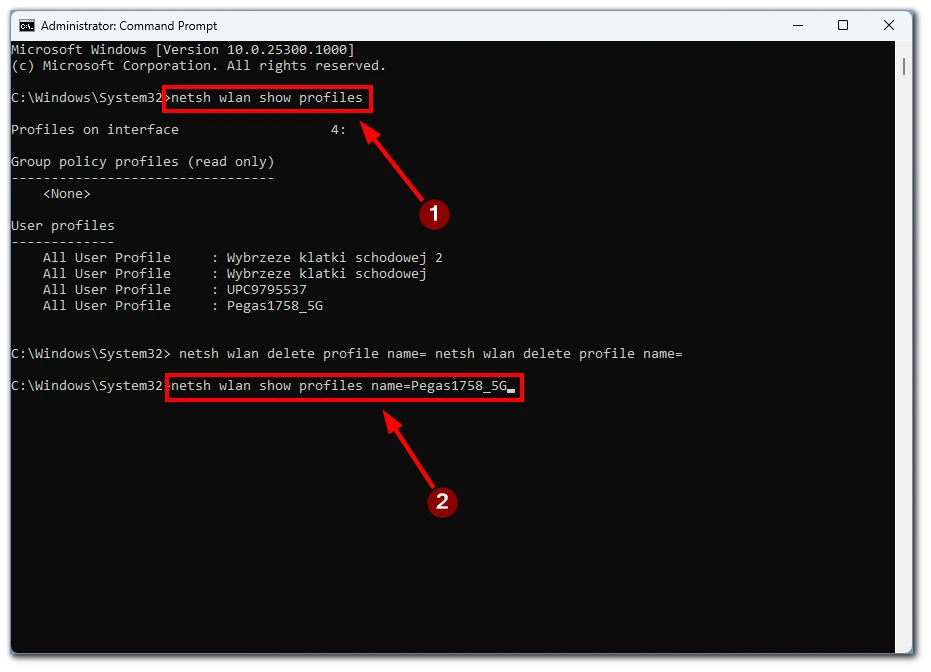
- Type the following command and press Enter:
netsh wlan show profilesThis command will list all the Wi-Fi networks your computer has ever connected to. - Find the name of the Wi-Fi network that you want to remove and copy its name (including the quotation marks).
- Type the following command and replace “Wi-Fi Network Name” with the name of the Wi-Fi network that you want to remove (including the quotation marks):
netsh wlan delete profile name="Wi-Fi Network Name"This command will remove the selected Wi-Fi network from your computer’s saved network list.
- Repeat steps 3-4 for each Wi-Fi network you want to remove.
Note: If you want to remove all saved Wi-Fi networks at once, you can use the following command in Command Prompt or PowerShell: netsh wlan delete profile name=* i=* This command will remove all saved Wi-Fi networks from your computer’s list of saved networks.
Removing multiple saved Wi-Fi networks on Windows 11 can be a helpful way to clear out old or unused networks, improving the performance of your computer’s network connections. Following the step-by-step instructions outlined above, you can easily remove one or more saved Wi-Fi networks using Command Prompt or PowerShell.
Why it is important to remove networks on Windows 11
It is important to remove saved Wi-Fi networks on Windows 11 for several reasons, including security, privacy, and performance. Let’s take a closer look at each of these reasons in detail.
- Security: By removing saved networks, you reduce the risk of someone gaining unauthorized access to your computer or network. If you have saved networks that you no longer use or trust, they may still be accessible to others if they are within range of your computer. Removing these networks can prevent unauthorized access and protect your data.
- Privacy: Saved networks can also pose a threat to your privacy. When you connect to a network, your computer may automatically share data with other devices on the network, such as printers or other computers. If you have connected to a public network or an untrusted network, it is possible that your personal information could be shared with others on the network without your knowledge. By removing saved networks, you can ensure that your computer is not automatically connecting to these networks and sharing your personal information.
- Performance: Over time, your computer can accumulate many saved networks, slowing down your computer’s performance. This is because your computer must scan through all the saved networks to find the one it needs to connect to. By removing saved networks you no longer use, you can speed up your computer’s performance and reduce the time it takes to connect to a network.
In addition to these reasons, removing saved networks can also help declutter your network list and make it easier to find the networks you use regularly. It is important to note that removing a network does not prevent you from connecting to it again in the future. If you need to connect to a network again, enter the network’s password and connect as usual.
Overall, it is important to regularly review and remove saved networks on Windows 11 to ensure that your computer is secure, your privacy is protected, and your performance is optimized.


