Presets in Snapseed are pre-configured sets of adjustments and effects that can be saved and applied to photos with a single touch. This allows users to achieve the same and desired look on multiple images, making editing more efficient.
When you create a preset in Snapseed, you save a combination of the editing settings and effects you applied to the photo. When you apply that preset to other images, any saved settings are automatically applied to new photos.
Creating and saving a preset in Snapseed involves selecting tools and settings, applying effects and filters, and then saving the combination for future use.
What to do to create and save a preset in Snapseed?
The Snapseed preset creation and saving feature allows you to quickly save editing and effect settings to apply them to other photos. First, you need to create and then save a preset and follow these steps:
- Launch the Snapseed app on your device.
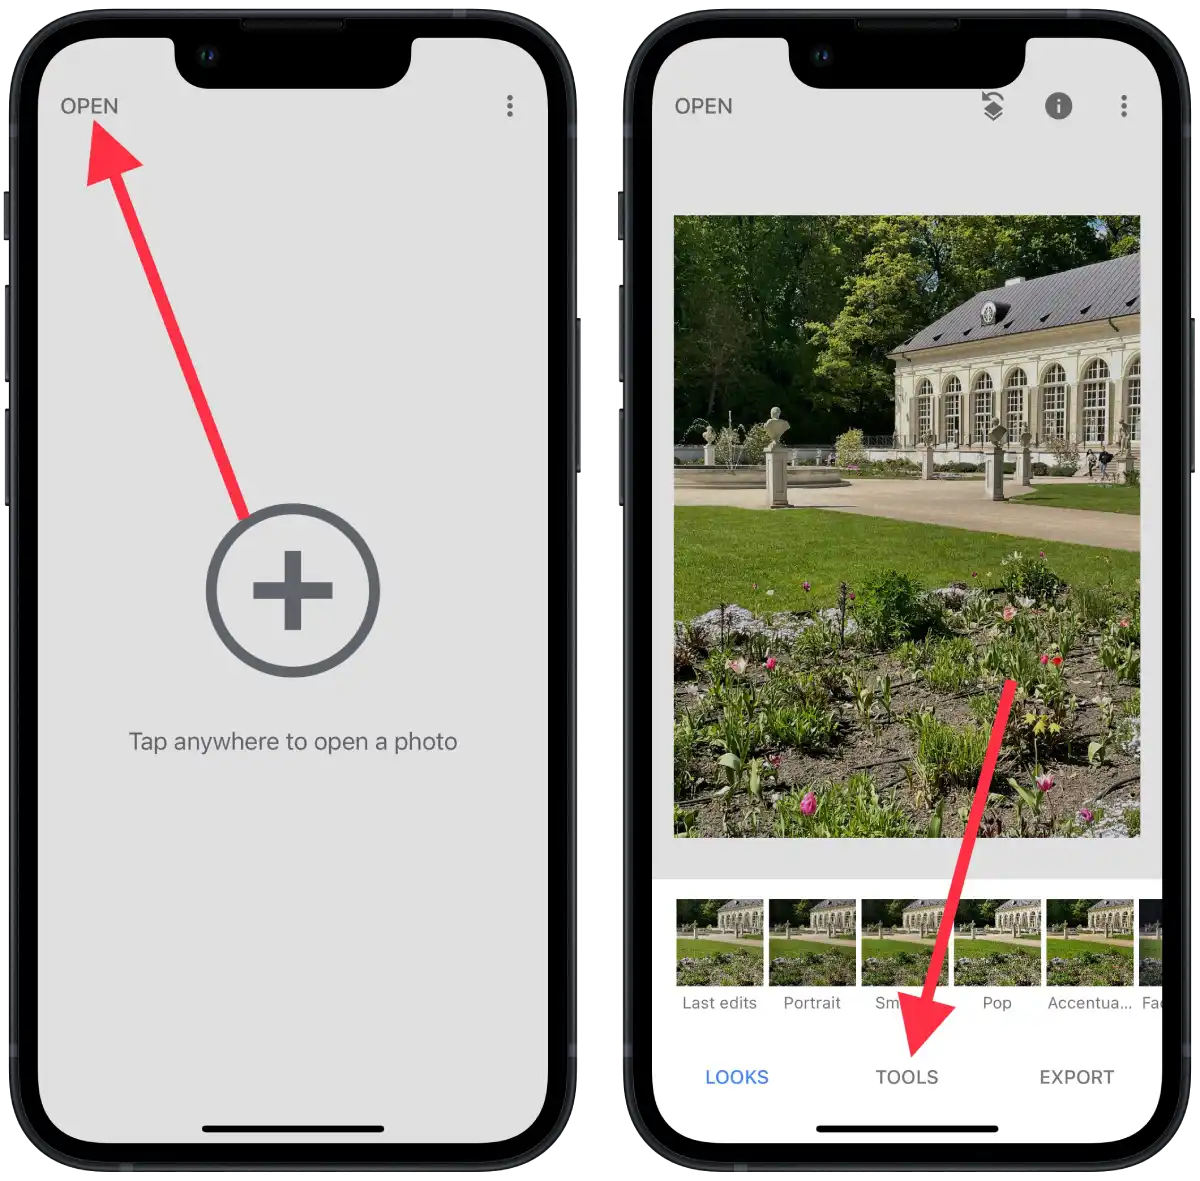
- Tap the “Open” button to select the photo you want to edit.
- Then tap on “Tools” and apply any desired edits to the photo using the various editing tools available in Snapseed. Adjust the brightness, contrast, saturation, apply filters, etc., until you achieve the desired look.
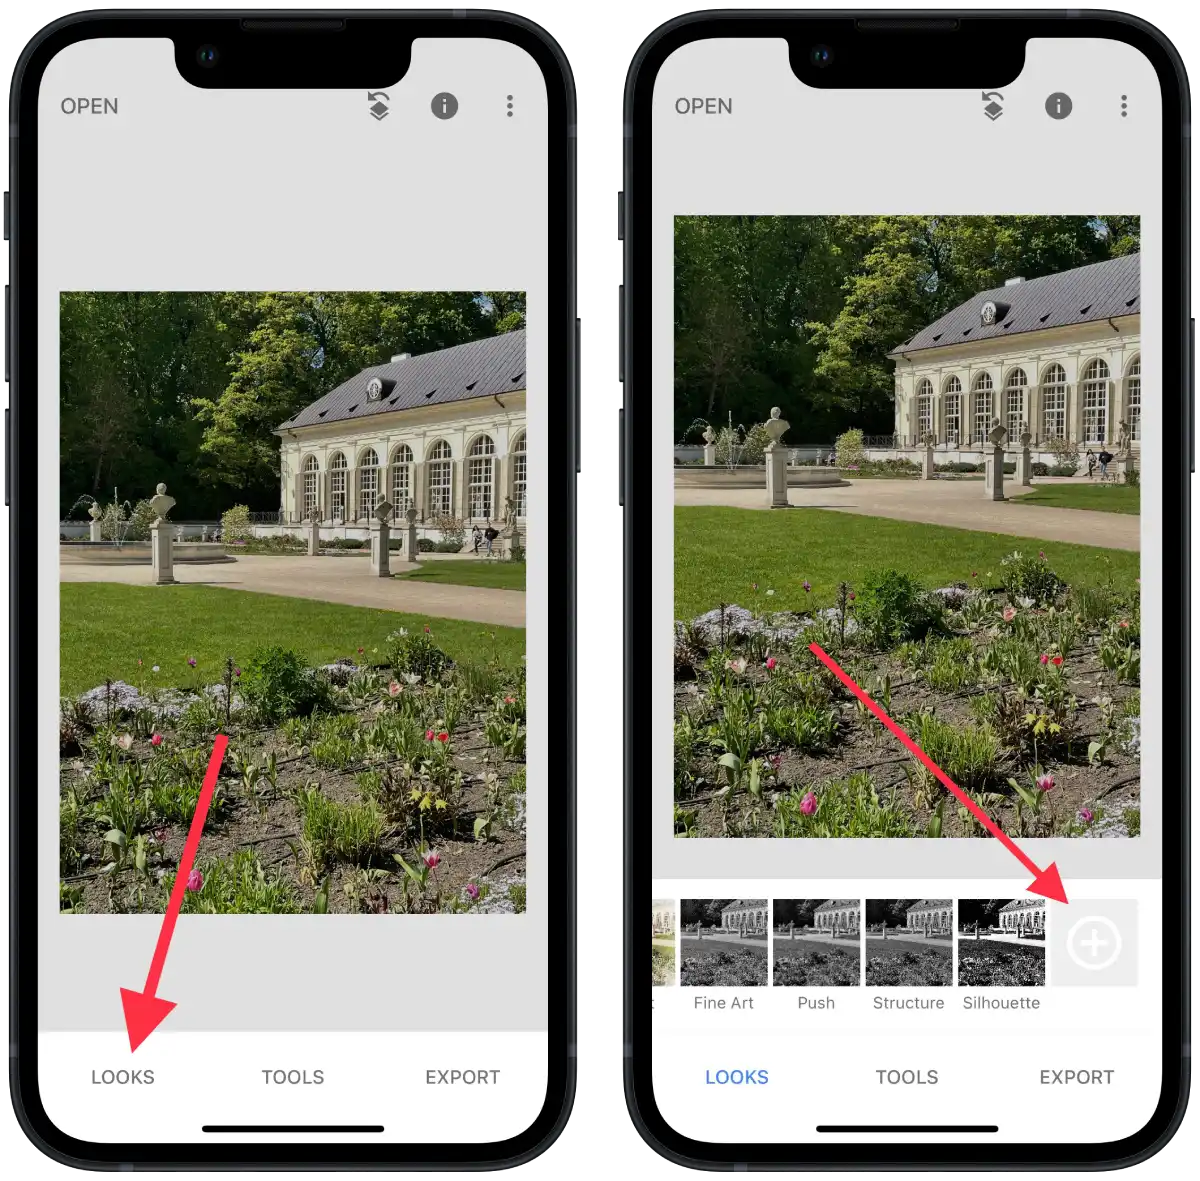
- Next, you need to tap “Looks“.
- Then, scroll to the right and click the “+” icon.
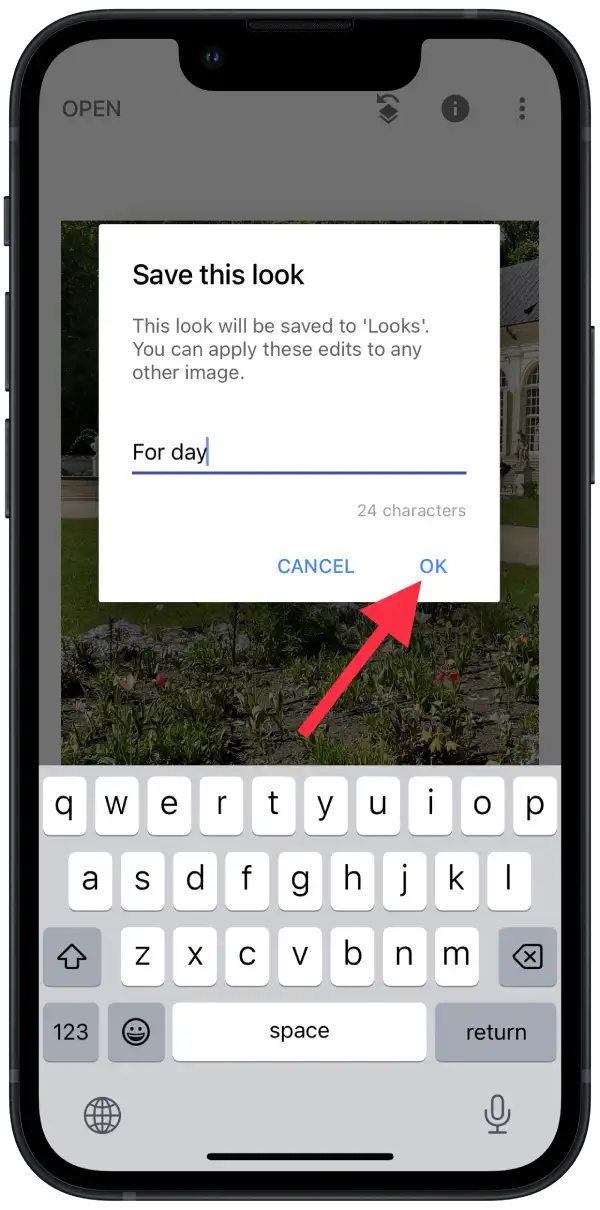
- Enter a name in the box and click on “OK“.
This allows you to quickly and consistently apply specific styles and effects to different photos without re-editing each setting. Presets in Snapseed greatly simplify the editing process and help you create a consistent and professional look for your photos.
What to do to use saved a preset in Snapseed?
Saved presets allow you to apply specific styles and effects to your photos quickly. Instead of manually adjusting each editing setting, you can apply a preset with pre-saved settings with a single click. This saves a lot of time, especially when processing multiple photos with the same or similar styles. To do so, you need to follow these steps:
- Launch the Snapseed app on your device.
- Tap the “Open” button to select the photo you want to edit.
- Select “Looks” from the menu at the bottom of the screen.
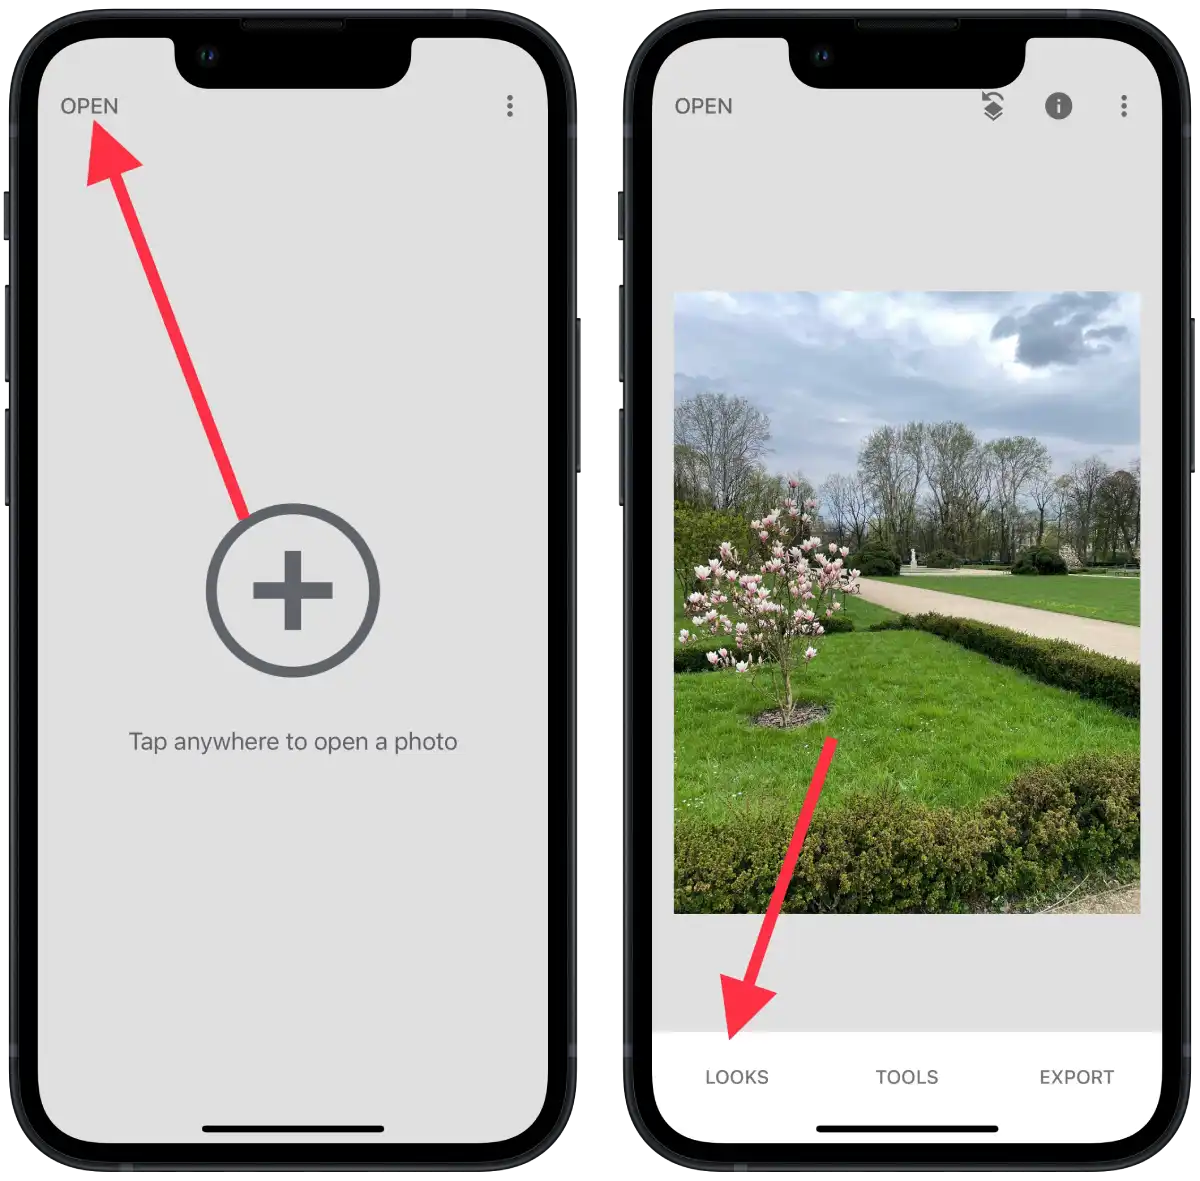
- Then swipe to the right side and select your saved look.
- After the set is saved, tap on “Export.”
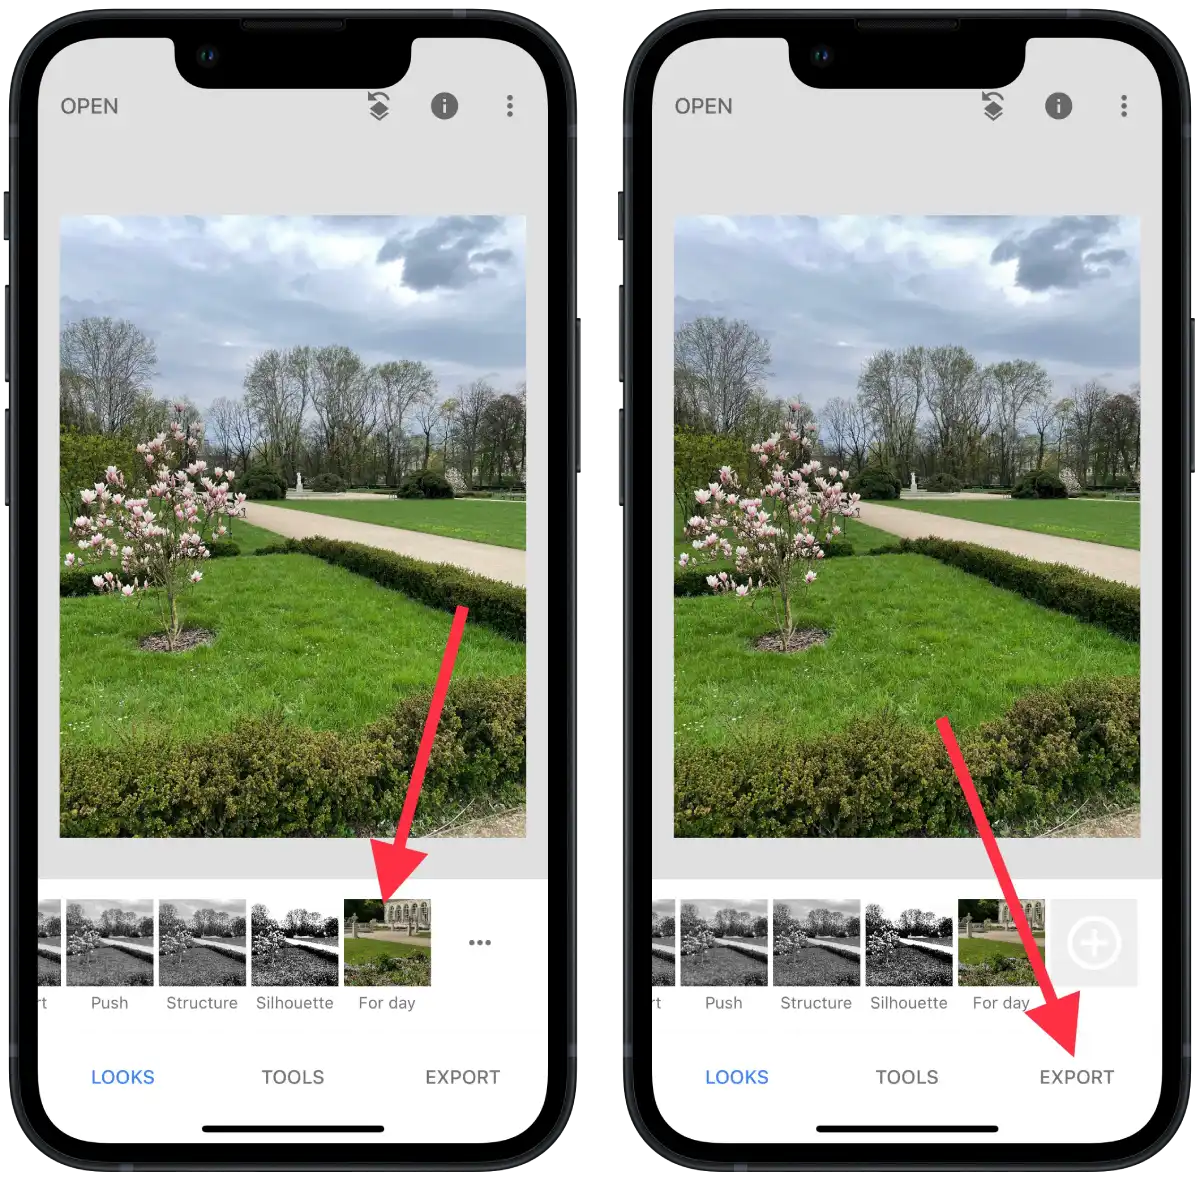
- Then choose a convenient way to save it.
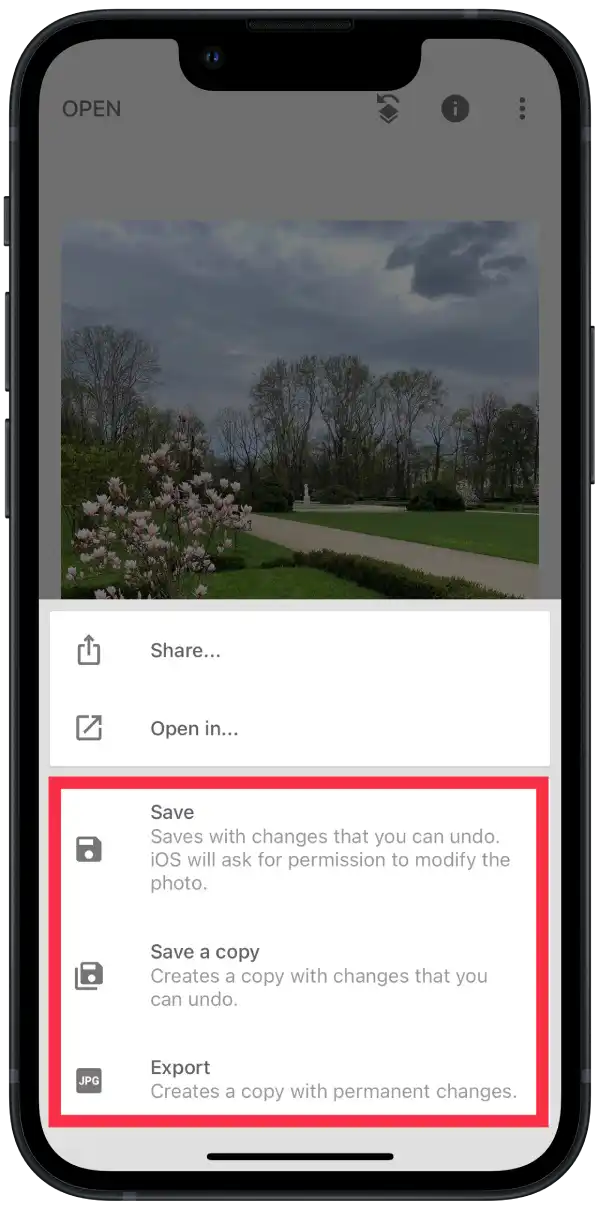
After editing a photo in Snapseed, you can save it directly to your device’s gallery. To do this, simply click the “Save” or “Export” button at the bottom of the editing screen.
Snapseed also allows you to export your photo to other apps. Click the “Save” or “Export” button and select the “Send” option. Then select the app you want to export the photo to, such as social media, messengers, or cloud storage.
What to do to share your preset in Snapseed?
Snapseed has the option to share a preset using a QR code. This feature allows you to share a preset with another user scanning a specially generated QR code from their device.
Before sharing a preset via QR code, ensure you have a saved preset in Snapseed. The other user you want to share the preset with should point their camera at the QR code, and then the Snapseed app will automatically open.
To share your preset in Snapseed, you need to follow these steps:
- Open the desired photo and add a preset.
- Then tap on the edit icon in the top right.
- Next, select “QR look” from the list.
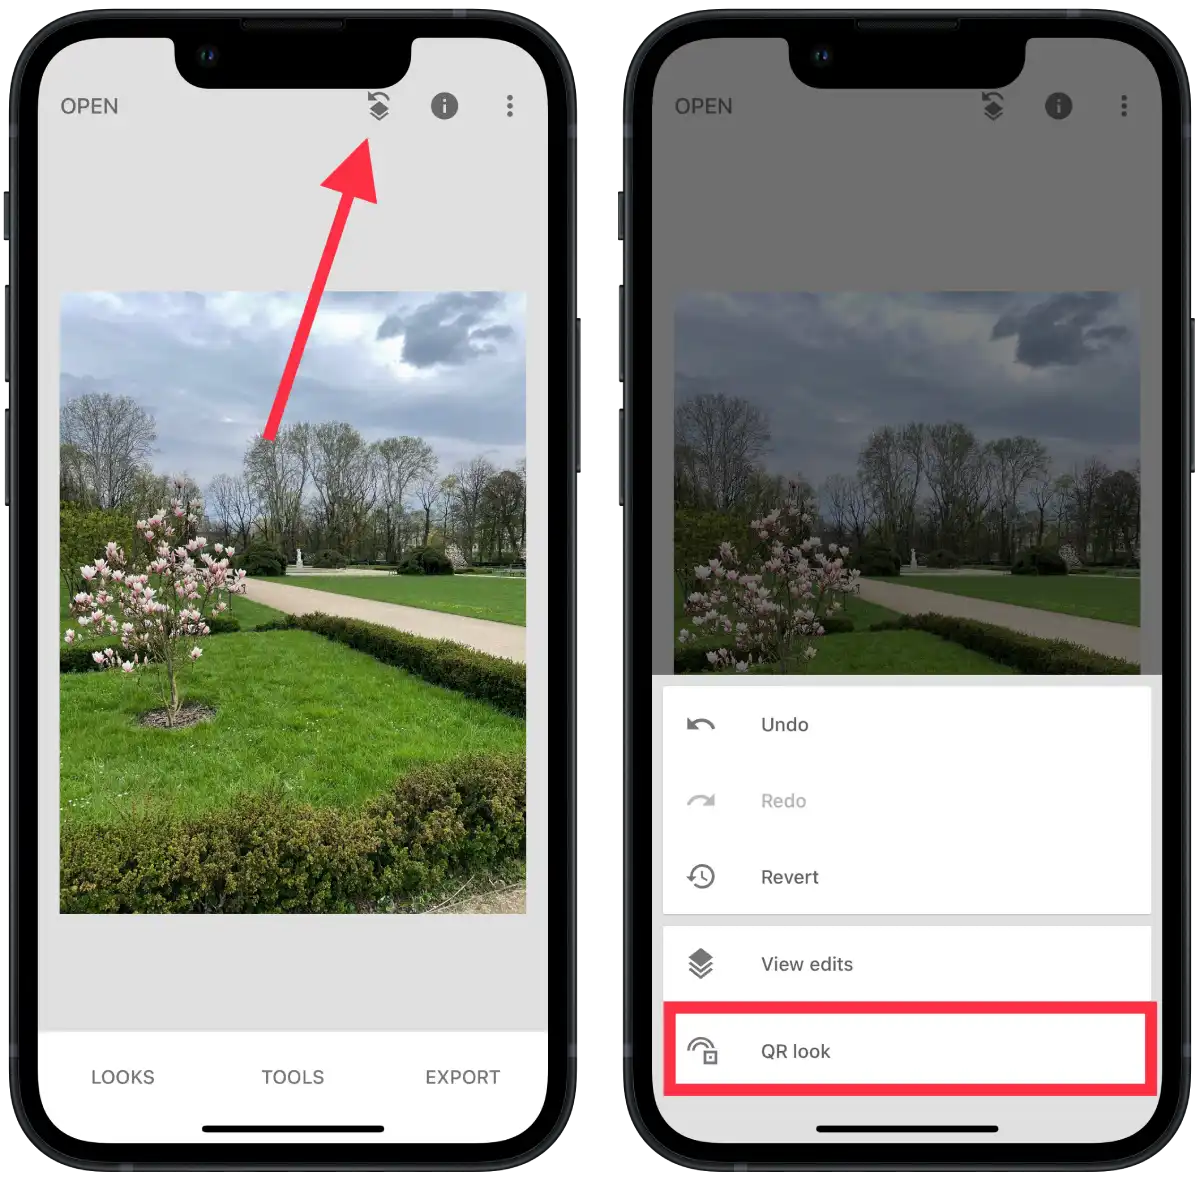
- Tap “Create QR look.”
- Then click on “Share.”
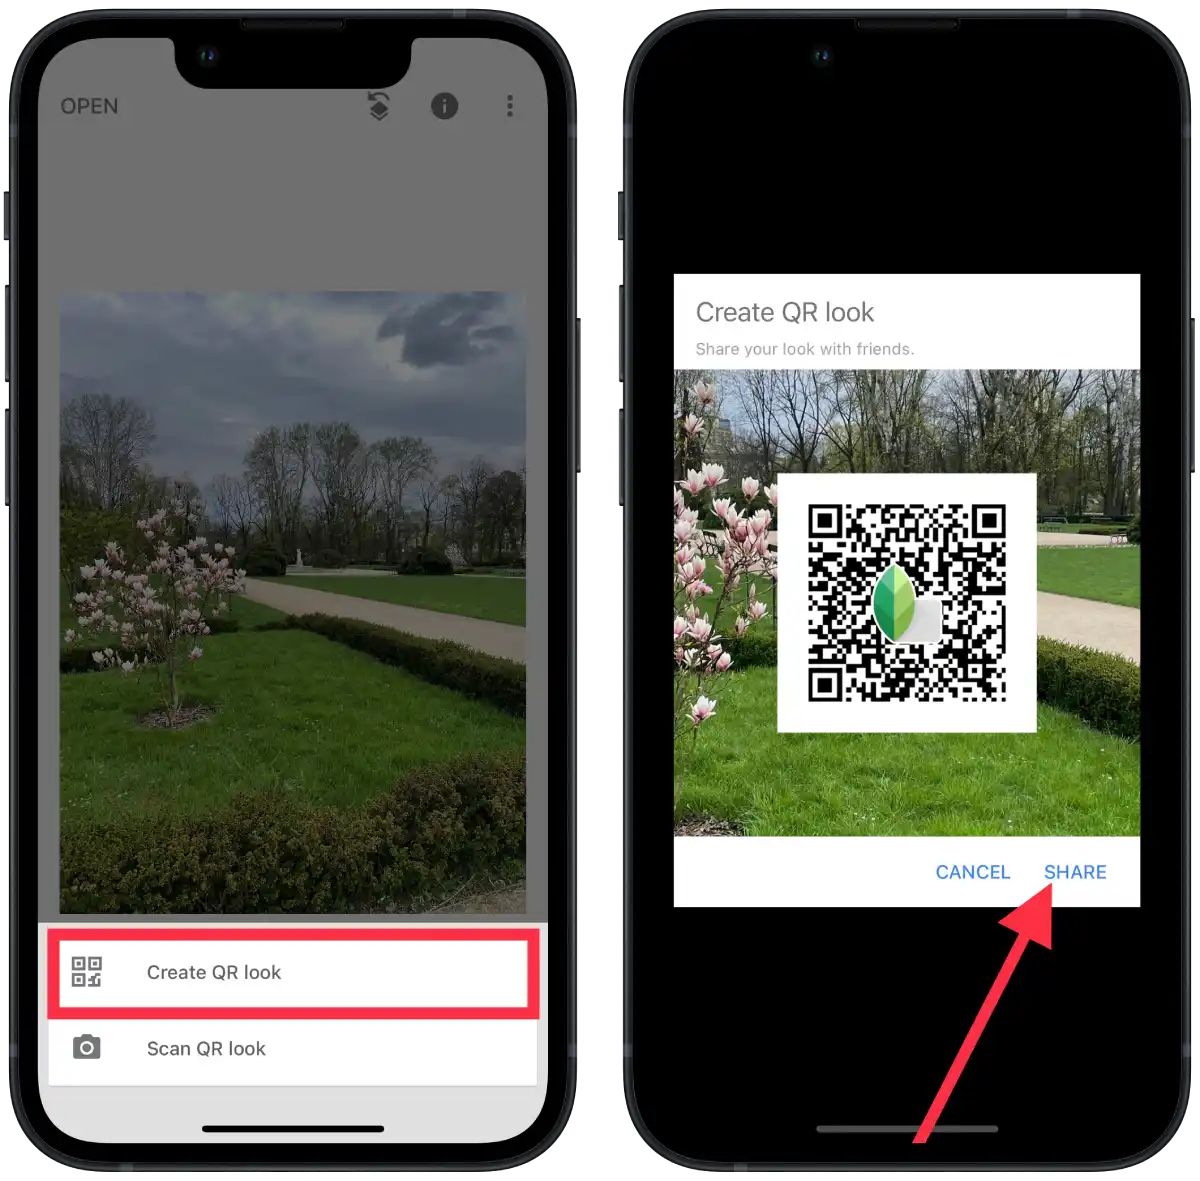
After successfully scanning the QR code, another user will receive information about the preset and be prompted to import it into their Snapseed. They can choose to import the preset and save it to their device.
The preset will now be available for other Snapseed users to use, which they can apply to their photos.
This feature is handy when you want to quickly and easily share your presets with other Snapseed users with the settings you need for certain processing styles or effects.


