

Although Meta Quest 2 is a fully self-contained device, you can connect it to your PC using a wire or using Wi-Fi via AirLink wireless technology. You can run more demanding games and programs on your VR headset.
You’ll need a long USB-C to USB-C or USB-C to USB-A with USB 3.0 technology or better. Once you connect the device to your PC with the cable, you will need to download and install the Oculus app on your computer. After that, just select Devices in the Oculus app and add Meta Quest 2 to your PC there.
In the case of Air Link wireless technology, you need your PC and Meta Quest 2 to be connected to the same Wi-Fi network. After that, install the Oculus app on your PC. In the Settings of the VR headset, select Oculus Link and enable Air Link. There you will find a list of available devices for connection. Select your PC and connect them using the unique code.
Let’s take a closer look at all these methods with screenshots below.
What do you need to set up Oculus Link?
You will need a USB-C cable for the Oculus Link to connect the Quest 2 to your computer. The USB-C cord included will work with Link (for any headset). If your computer has a USB-C port, you can plug it directly into it. If not, you’ll need a USB-C to A adapter.
Meta sells the official cable for $79, which is a thin, flexible optical cable 5 meters long. Despite the higher price, the official cord guarantees reliability.
Alternatively, any USB-C cable that meets at least the USB 3.0 specification should work (or you can use USB-A with an A-C adapter, both of which must be at least USB 3.0). The cable should be at least 3 meters long, ideally 5 if you need maximum range.
You will also need to download the official Oculus Quest app, which will run Oculus Link and allow you to play VR computer games on the headset. You can get it here as an Oculus Link installer.
Oculus Link also works with SteamVR, so be sure to download Steam and install SteamVR if you want to play games from there.
PC requirements for Oculus Link
Here’s a table outlining the recommended PC requirements for using Oculus Link:
| Requirement | Minimum Specification | Recommended Specification |
|---|---|---|
| Graphics Card | NVIDIA GTX 970 / AMD R9 290 | NVIDIA GTX 1060 / AMD RX 480 |
| CPU | Intel i5-4590 / AMD Ryzen 5 1500X | Intel i5-8600K / AMD Ryzen 5 3600 |
| Memory (RAM) | 8 GB | 16 GB |
| USB Port | USB 3.0 Type-A or Type-C | USB 3.0 Type-C |
| Operating System | Windows 10 or Windows 11 | Windows 10 or Windows 11 |
| Available Storage | At least 10 GB of free space | SSD with ample storage |
Please note that while the minimum specifications allow you to use Oculus Link, the recommended specifications provide a more optimal experience with better performance and visual quality. Additionally, individual game requirements may vary, so it’s a good idea to check the specific system requirements for the VR games you intend to play.
How to download and install the Oculus PC app
Downloading and installing the Oculus PC app is a straightforward process. Here’s a step-by-step guide:
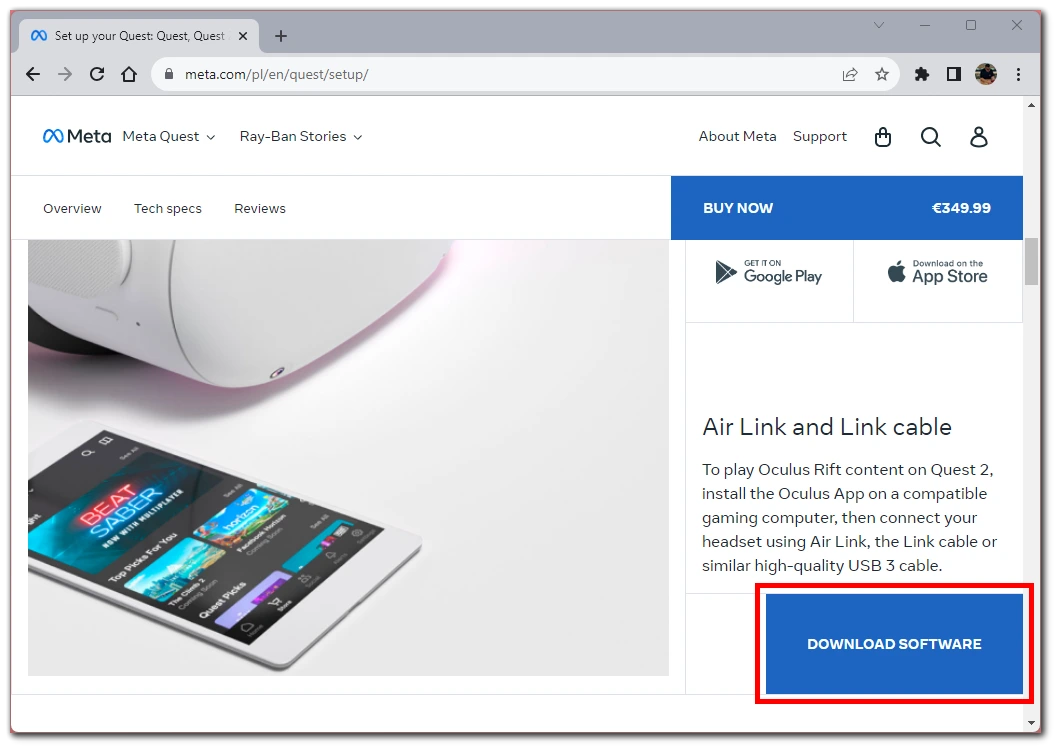
- Open your web browser and navigate to the official Meta website.
- Once on the Meta website, look for the “Quest 2” section. You will find there a “DOWNLOAD SOFTWARE” button. Click on it.
- Once the download is complete, locate the downloaded installer file (usually with a .exe extension) on your computer. Double-click the installer file to run it.
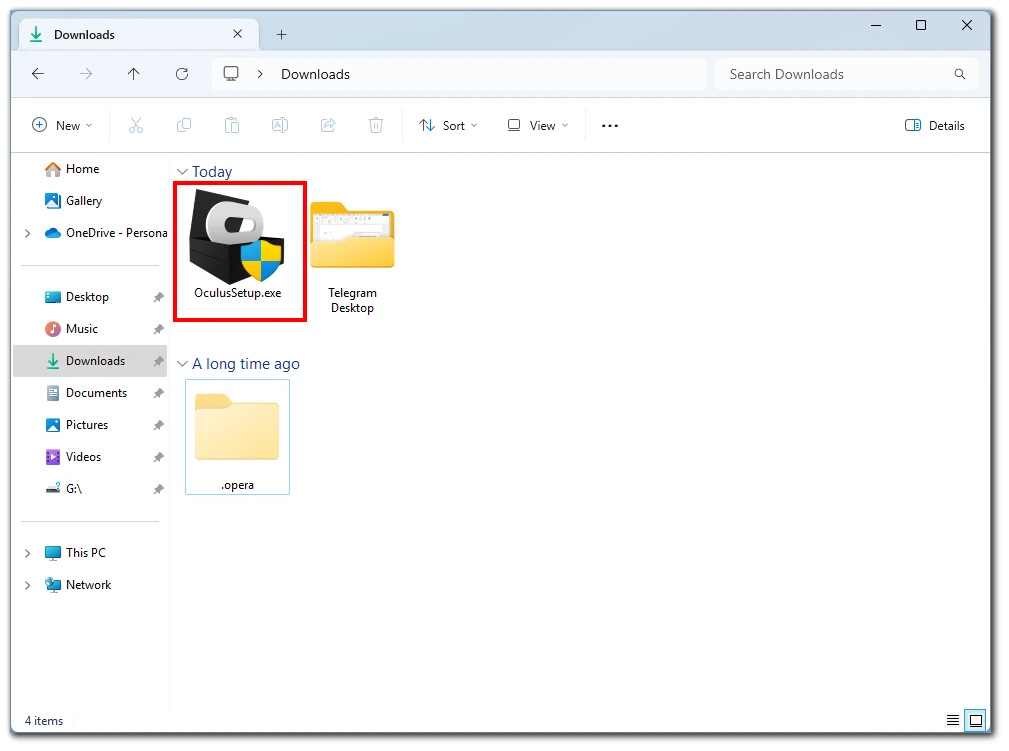
- The installer will launch. Follow the on-screen instructions to begin the installation process.

Please note that the Oculus for PC application is installed on your system drive “C.” You will not be able to select the installation location manually. So you need to have at least 10 GB of free space on your “C” drive
Also, the installer will additionally download some files from the network, so you will need an internet connection to complete the installation.
How to set up Oculus Link on a PC
You must perform an initial setup before using the Oculus Link feature and connecting your Quest 2 headset to your computer. To do so, follow these steps:
- Turn on your Quest 2 headset and connect it to your computer using the USB-C cable.
- Open the Oculus PC app on your computer.
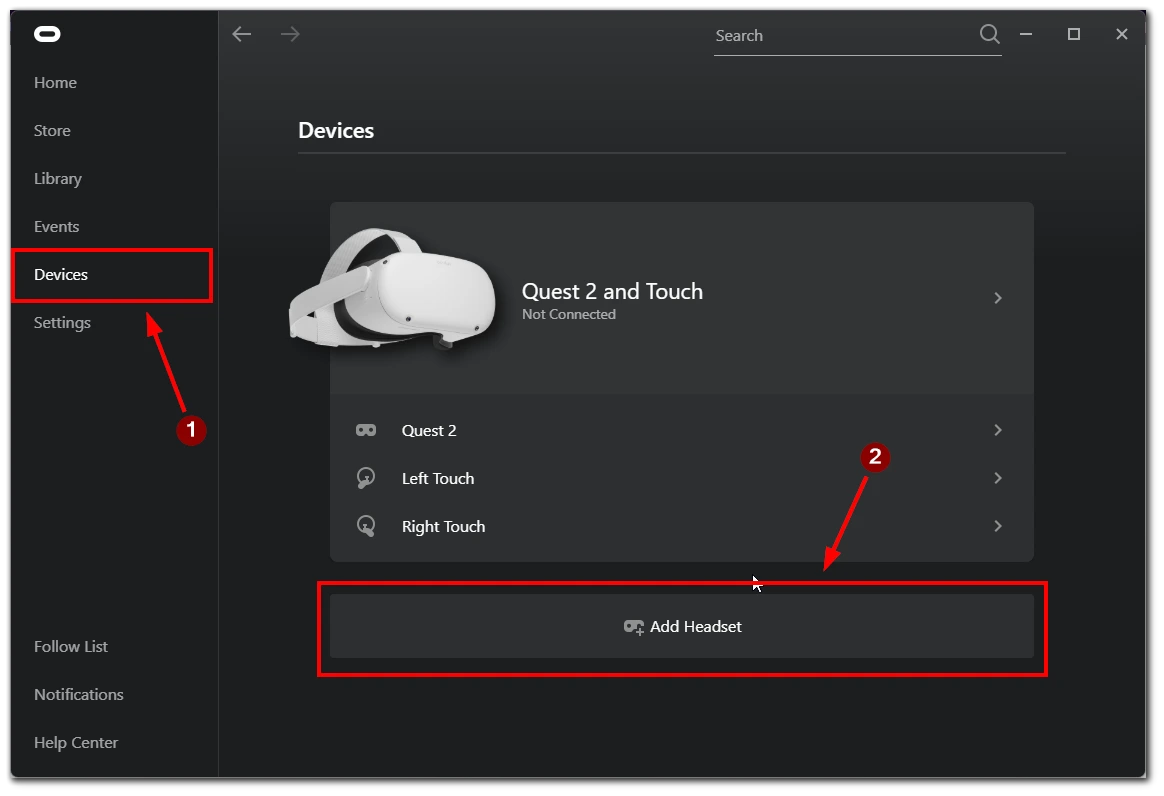
- On the left side, go to the Devices menu.
- From the Devices menu, locate and select Add Headset.
- A list of compatible headsets will appear. Select “Meta Quest 2” from this list.
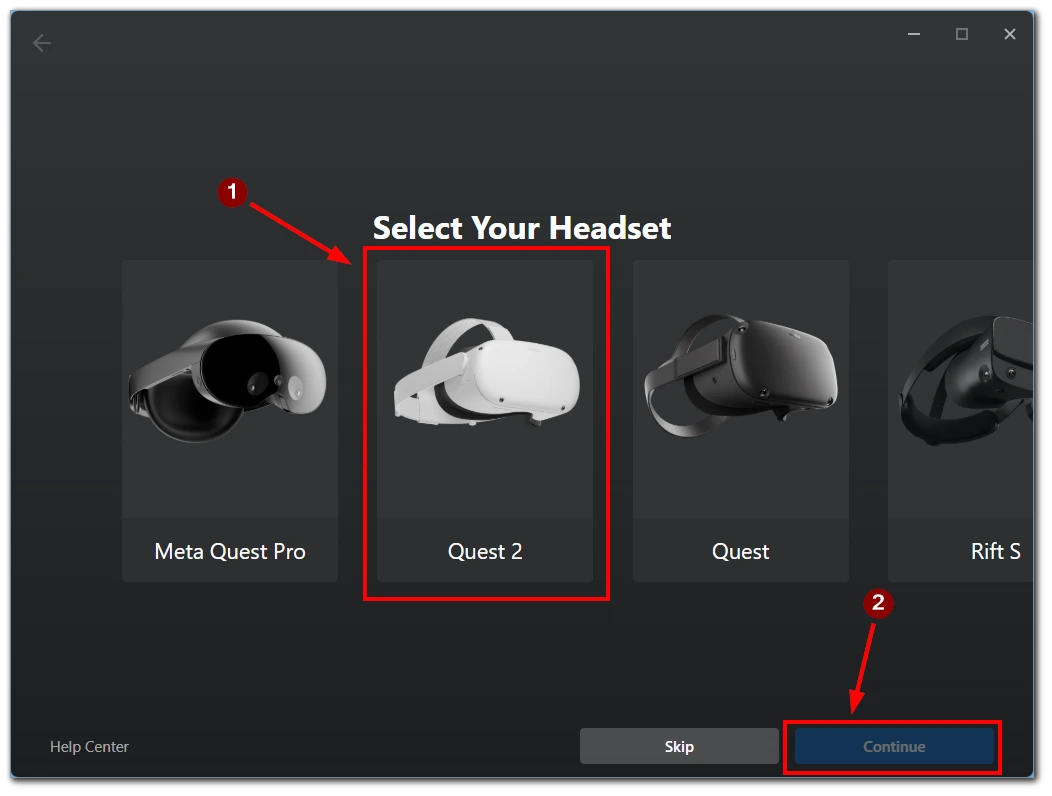
- The Oculus PC app will now guide you through a convenient setup process to establish a connection.
Once the initial setup is complete, the Oculus Link will be ready to use. Whenever you connect your Quest 2 headset to your computer, your virtual reality system automatically prompts you to turn on Oculus Link.
By enabling Oculus Link, you can directly access Oculus games on a PC with a connected headset. You can also run SteamVR on your PC through the Oculus Link connection. This will allow you to immerse yourself in the wide range of games available on the Steam platform.
How to connect Meta Quest 2 to your PC via Air Link
If you don’t want to tangle with wires, you can use AirLink technology to connect the headset to your PC via Wi-Fi. However, you should be aware that, in this case, there may be higher latency and poorer image quality. To establish a connection between your Oculus Quest 2 and your PC using Air Link, follow these steps:
- Download and install the Oculus app on your PC if you haven’t already.
- Ensure you’re logged into the Meta Quest app using the same Facebook, Meta, or Oculus account that you use with your Oculus Quest 2 headset. Also, ensure that your VR Headset is connected to your PC’s Wi-Fi network.
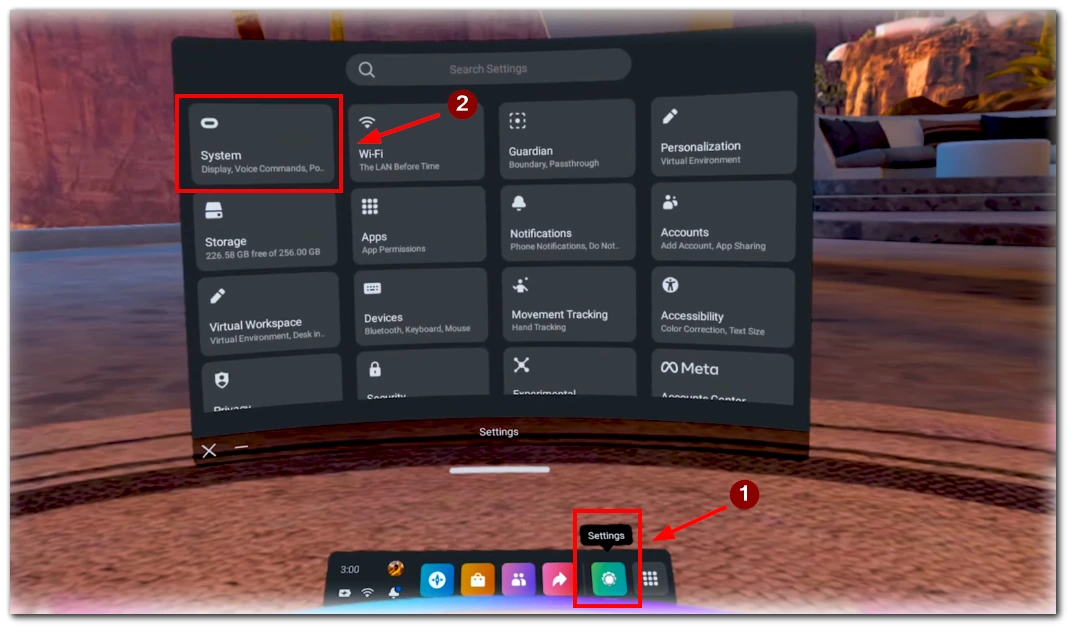
- While in VR, press the Oculus button located on your right touch controller. This action opens the VR toolbar.

- From the Quick Settings menu, proceed to select “Settings.”
- Within the Settings menu, choose “System.”
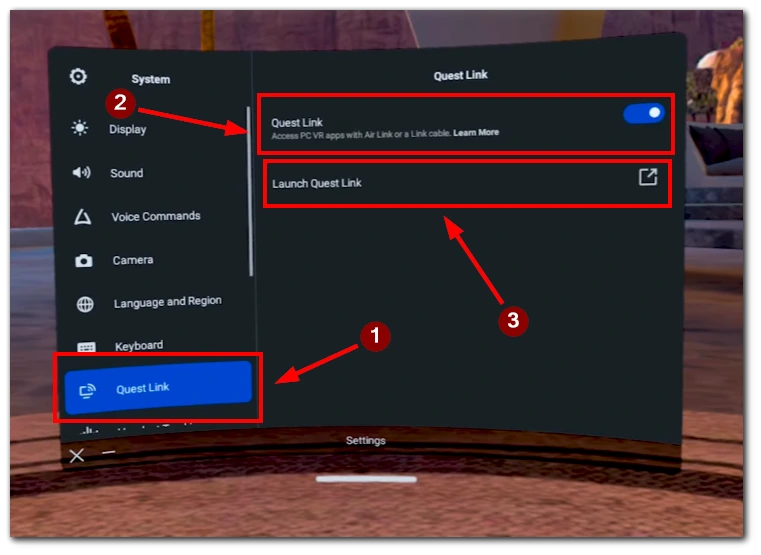
- Under System settings, find and click on “Quest Link.”
- Toggle the Quest Link option to the “on” position.
- Continue by selecting “Launch Quest Link.”
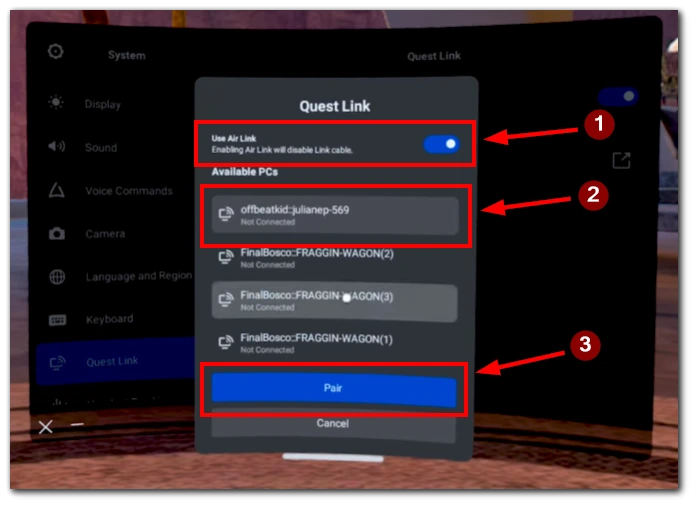
- Next, activate Air Link by toggling the corresponding “Use Air Link” option to the “on” position.
- Choose your PC from the list of available devices. Proceed to select the “Pair” option.
- If you encounter any issues, such as not seeing your PC or the absence of the pairing option, ensure that the Meta Quest app is actively running on your PC and you’re signed in. Confirm that you’ve designated Oculus Quest 2 as your selected device.
- On your PC, confirm the pairing code and click “Continue.”
Your Oculus Quest 2 is now successfully connected to your PC through Air Link.
By meticulously following these steps, you can establish a seamless connection between your Oculus Quest 2 headset and your PC using Air Link. This connection facilitates a wireless experience that allows you to access content and engage in immersive virtual reality.
How to connect Meta Quest 2 to Wi-Fi
As mentioned above, to connect a VR Headset to a PC without a wire, you need them to be connected to the same Wi-Fi hotspot. Here’s how you can do it:
- Turn on your Oculus Quest 2 headset by pressing and holding the power button located on the right side.
- Press the Oculus button on your right controller to bring up the Universal Menu.
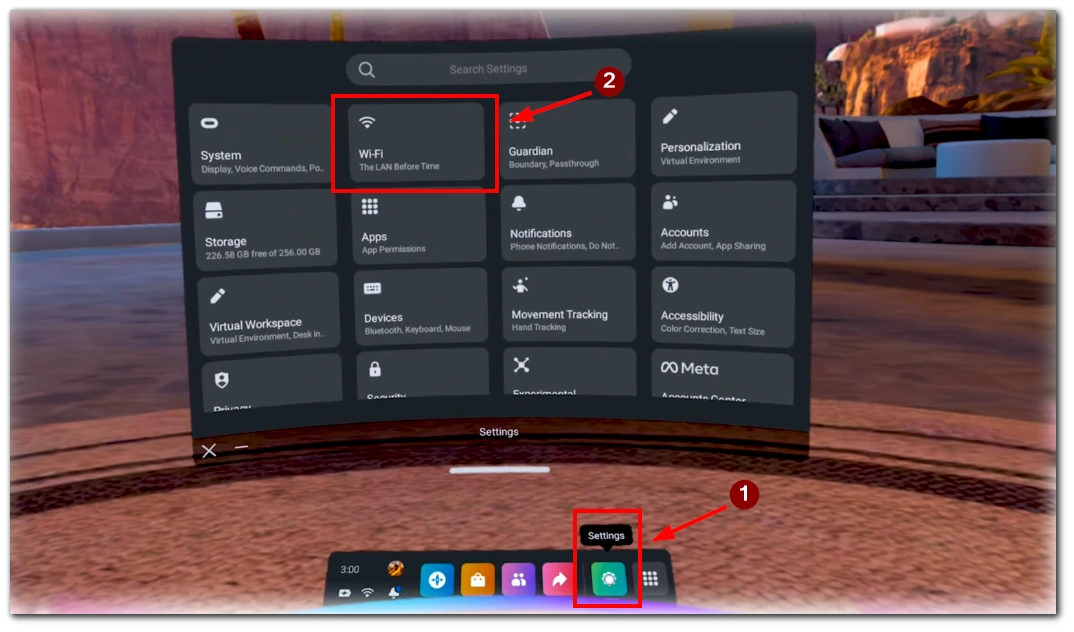
- Use the controller to navigate to the “Settings” tab in the Universal Menu.
- In the “Settings” tab, select “Wi-Fi” from the list of options.
- Your Oculus Quest 2 will automatically scan for available Wi-Fi networks. Wait for the list to populate.
- Select the Wi-Fi network you want to connect to from the list. You may need to use the controller to scroll through the options. If the selected Wi-Fi network is password-protected, a virtual keyboard will appear. Use the controller to enter the network password.
Your Oculus Quest 2 will attempt to connect to the selected Wi-Fi network. Once successfully connected, you’ll see a confirmation message. Once you’ve successfully connected your Oculus Quest 2 to Wi-Fi, your headset will remember the network for future use.
How to fix Oculus Quest 2 can’t connect to the PC
If you’re facing issues with your Oculus Quest 2 not connecting to your PC, you can take several troubleshooting steps to resolve the problem. Here’s a step-by-step guide to help you fix this issue:
Verify hardware connections
Ensure that your Oculus Quest 2 is properly connected to your PC through a compatible USB cable (for Oculus Link) or that both your PC and Quest 2 are on the same Wi-Fi network (for Air Link).
Restart devices
Restart both your Oculus Quest 2 headset and your PC. Sometimes, a simple restart can resolve connectivity issues.
Check USB cable
If you’re using Oculus Link, ensure that you’re using a high-quality USB cable that supports data transfer. Some cables might only support charging.
Make sure Oculus Link enabled
On your Oculus Quest 2 headset, navigate to “Settings” > “Experimental Features” > “Oculus Link” and toggle between “Enable” and “Disable” to refresh the connection.
Disable VPN
Enabled VPN on your computer or router may prevent the signal from your PC from reaching the VR headset. So try disabling the VPN and then reconnecting the devices.
Reinstall Oculus software
Uninstall the Oculus software from your PC and then reinstall it. This might help if there’s a software glitch causing the connectivity issue.
Restart router
If you’re using Air Link, ensure that both your PC and Quest 2 are on the same Wi-Fi network. Restart your router if needed.
Contact support
If none of the above steps resolve the issue, consider reaching out to Oculus support for further assistance. They might be able to provide specific troubleshooting steps based on your situation.
Remember that technology can sometimes be finicky and might take a few tries to get everything working smoothly. Be patient and methodical in your troubleshooting process.
How to manage your PC VR app library from Windows
To manage your PC VR app collection through the Oculus PC app on Windows, start by launching the app and logging in with your Oculus account. Navigate to the “Library” tab, where your installed VR apps and games are displayed.
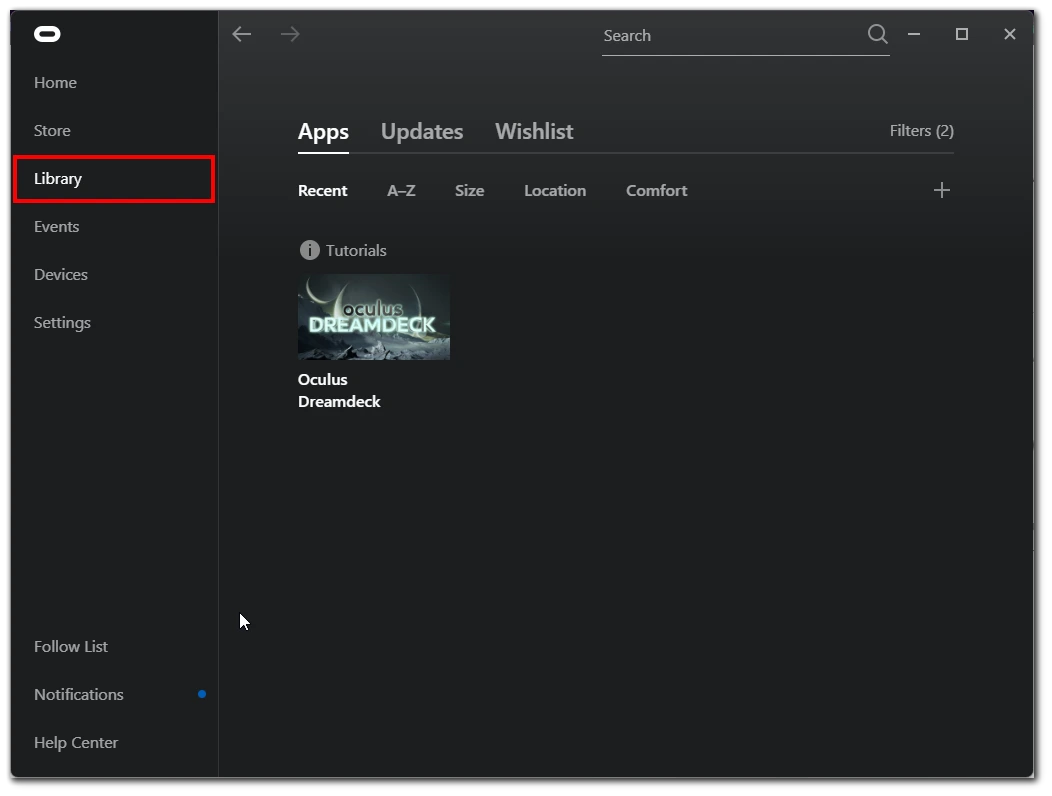
From here, you can organize, sort, and filter your apps based on various criteria like recently played or alphabetical order.
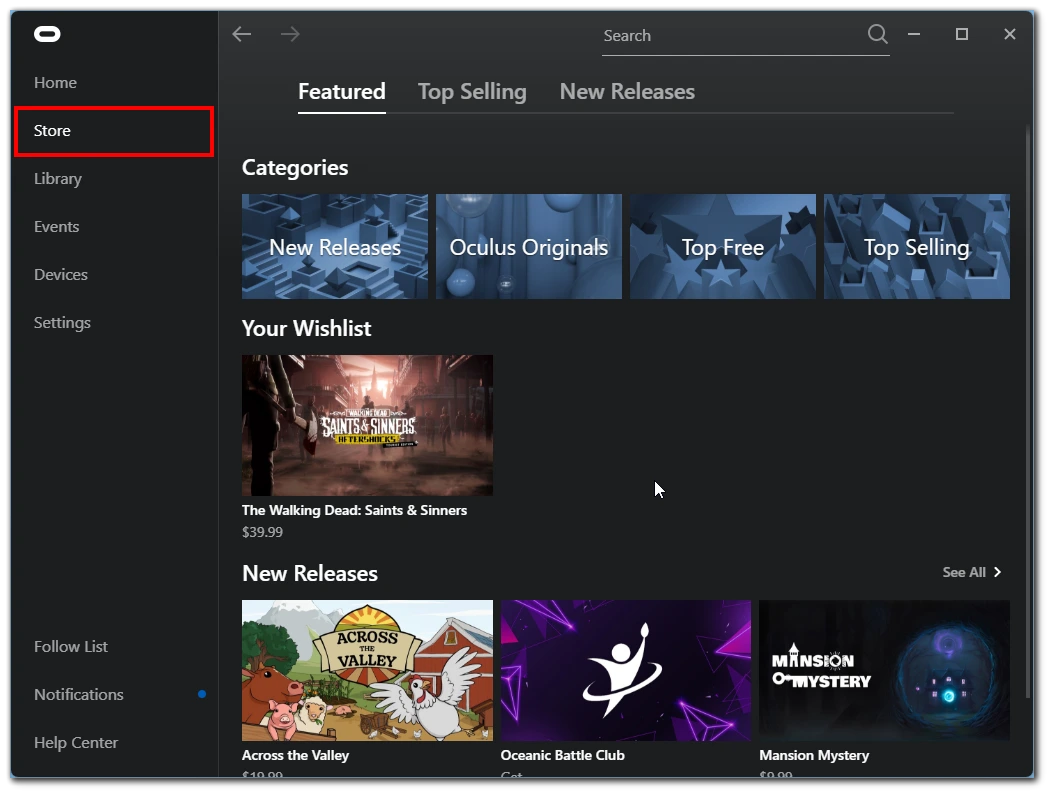
To install new apps, visit the “Store” tab, select the desired apps, and follow the installation prompts. You can launch, uninstall, or check for updates for existing apps by clicking on their thumbnails within the Library. Additionally, you can fine-tune settings, access categories or collections, and even manage non-Oculus Store apps from the app’s settings.
Virtual desktop setup on Meta Quest 2
Once you connect your Meta Quest 2 to your PC using cable or Air Link technology, you will be able to create a virtual desktop. In fact, it will be just a window with your computer’s desktop projected in virtual space.

To start the desktop in your VR headset, press the Oculus button on the controller and select the Desktop option in the universal menu. Then the desktop will appear in front of you, and you can launch any application. Just use the controller of your MetaQuest as a cursor.
How to play Steam games on Quest 2
You can use Steam if you want to play games like Half-Life Alyx or Boneworks on your VR headset. To do this, you will need to install SteamVR.
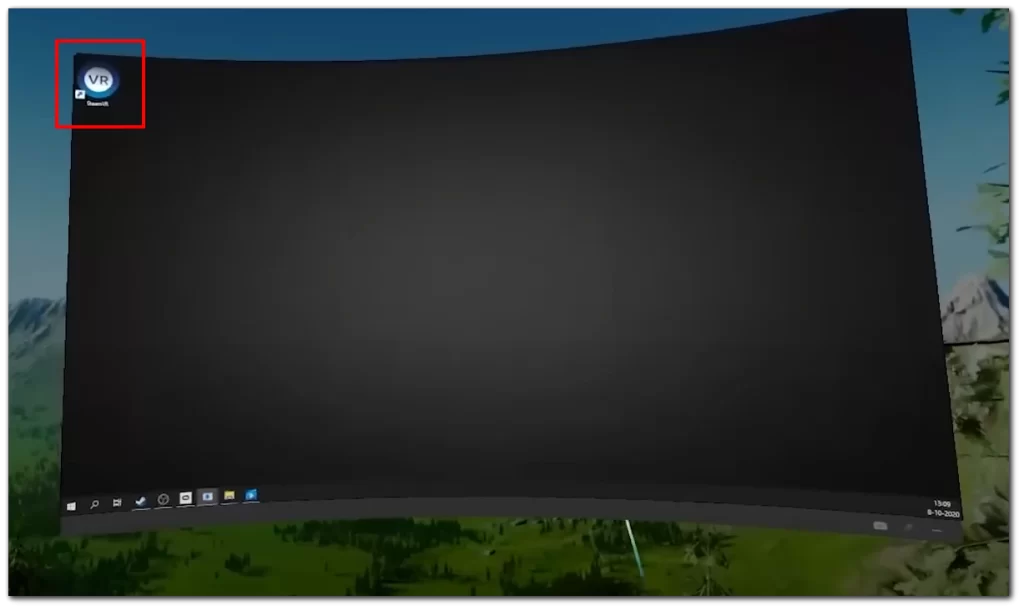
After that, connect your VR headset to your PC and start the virtual desktop. With the help of your controller on the desktop, open SteamVR, and you will get into the Steam virtual space. From here, you will be able to launch and buy any VR games that will be available on the site.
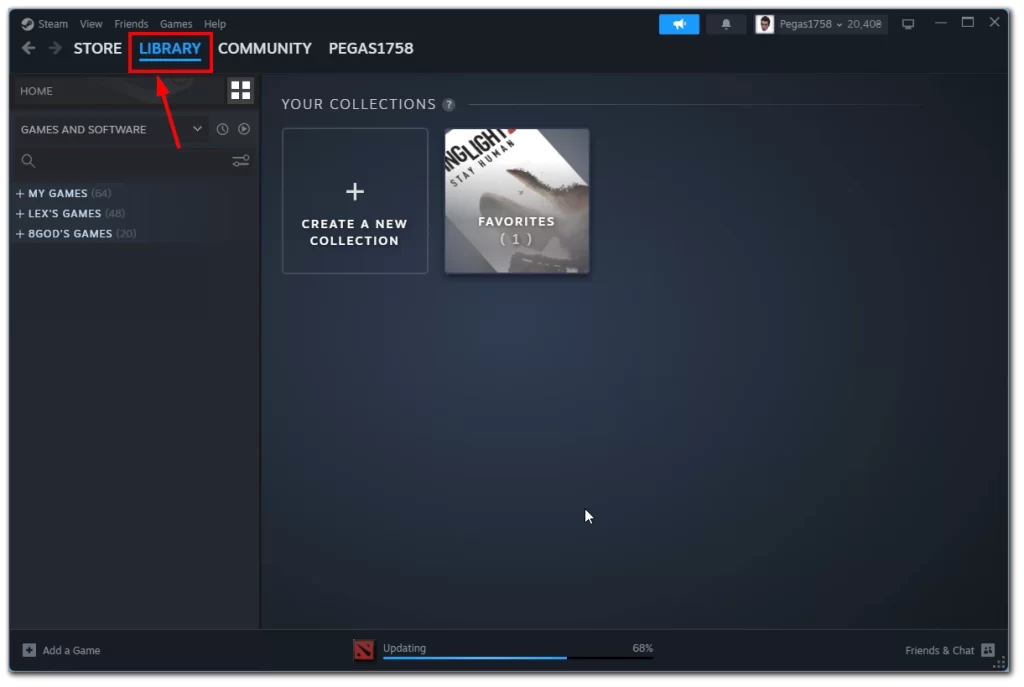
Alternatively, you can just open Steam as a normal window on your virtual desktop. Then go to the Library and double-click to launch the game you want.


