

By default, most printers are automatically assigned IP addresses when first connected to the network. However, in some cases, you may need to change the IP address manually. And it’s pretty simple to do.
There are actually two ways to change the printer IP address: via Control Panel/System Settings on Windows/Mac and by accessing the printer’s configuration page using a web browser.
In the first case, you’ll need to go to the printer properties and add a new, unused IP. As for the second way, you’ll need to open a web browser and enter the current IP address of the printer in the address bar. You will find an option to change the IP address on the printer configuration page.
For a more detailed guide, check it out below.
How to change the printer IP address on Mac
If you want to change the printer IP address on your Mac, follow these steps:
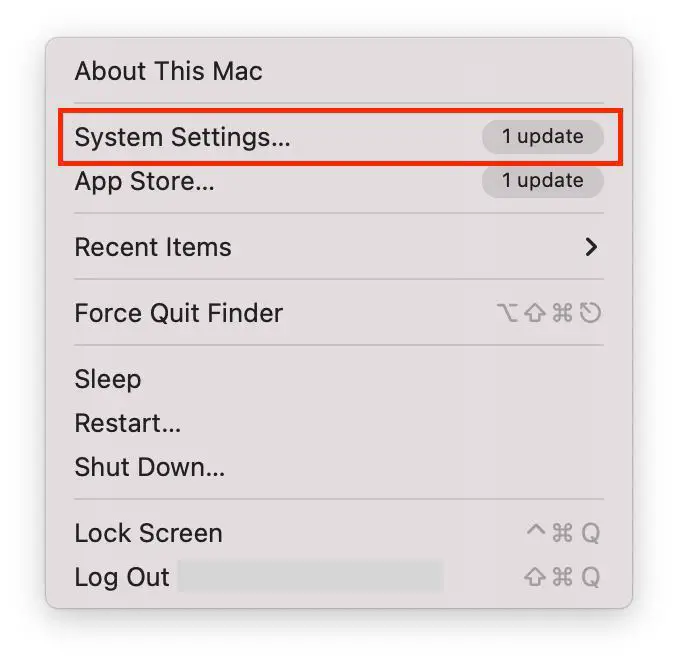
- First, click on the Apple icon in the upper left corner of the screen.
- After that, choose the System Settings option from the drop-down menu.
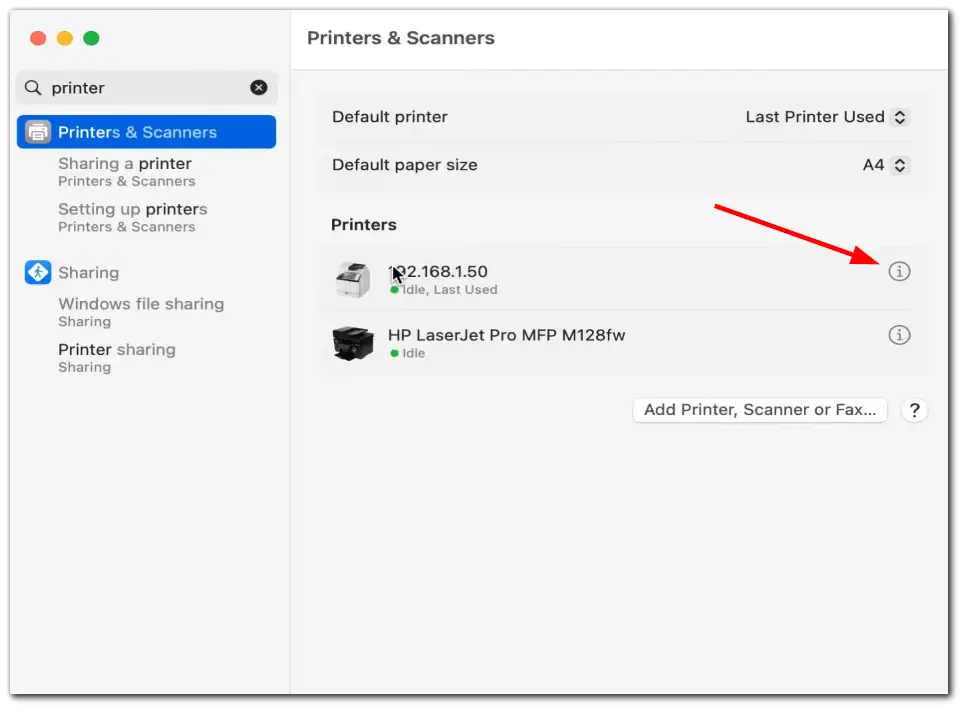
- Find the Printers & Scanners tab and click on it. You can use the search bar for this.
- Click on the (i) icon next to your printer.
- Then go to Options & Supplies.
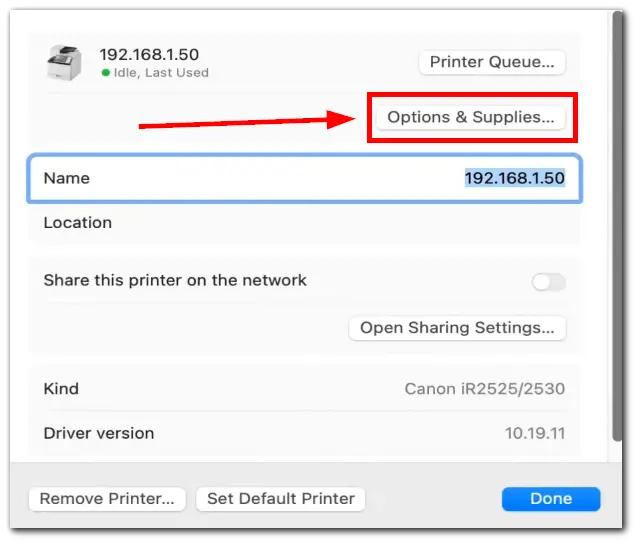
- Finally, change your printer IP address and click OK.
Remember that the new IP address should be in the same subnet as the rest of your network devices and should NOT be already used by another device on your network.
How to change the printer IP address on Windows 11
If you want to change your printer IP address on your Windows 11 computer, do the following:
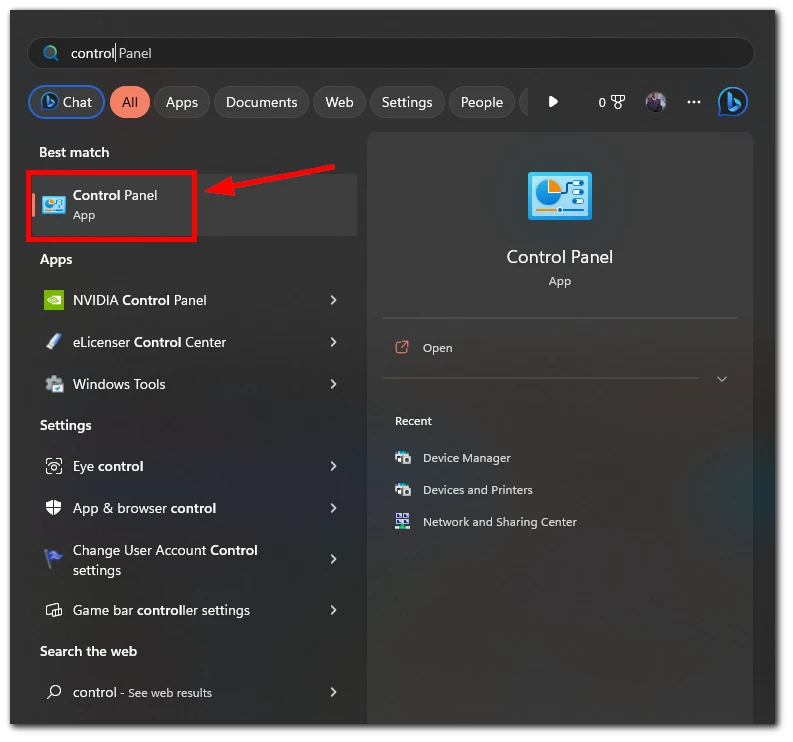
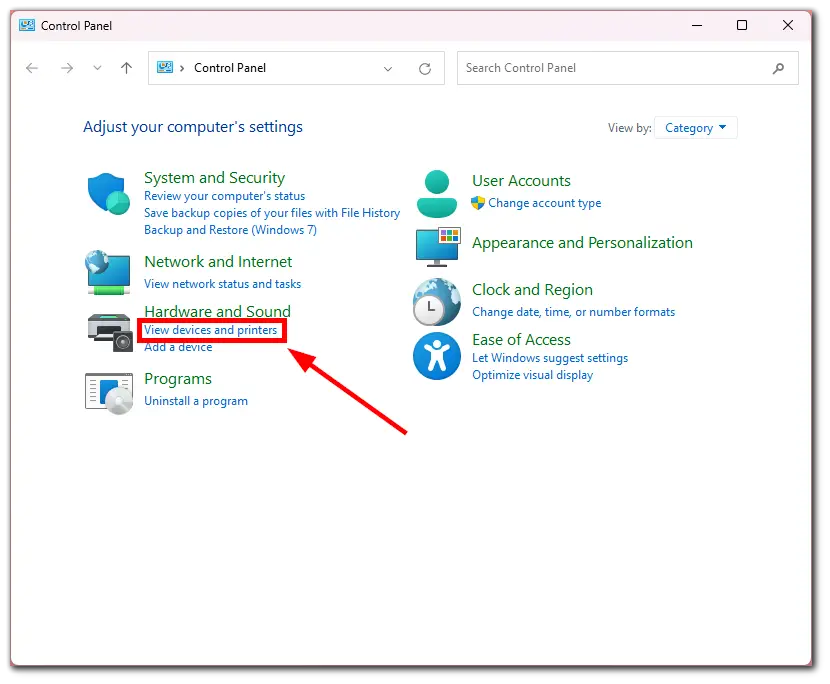
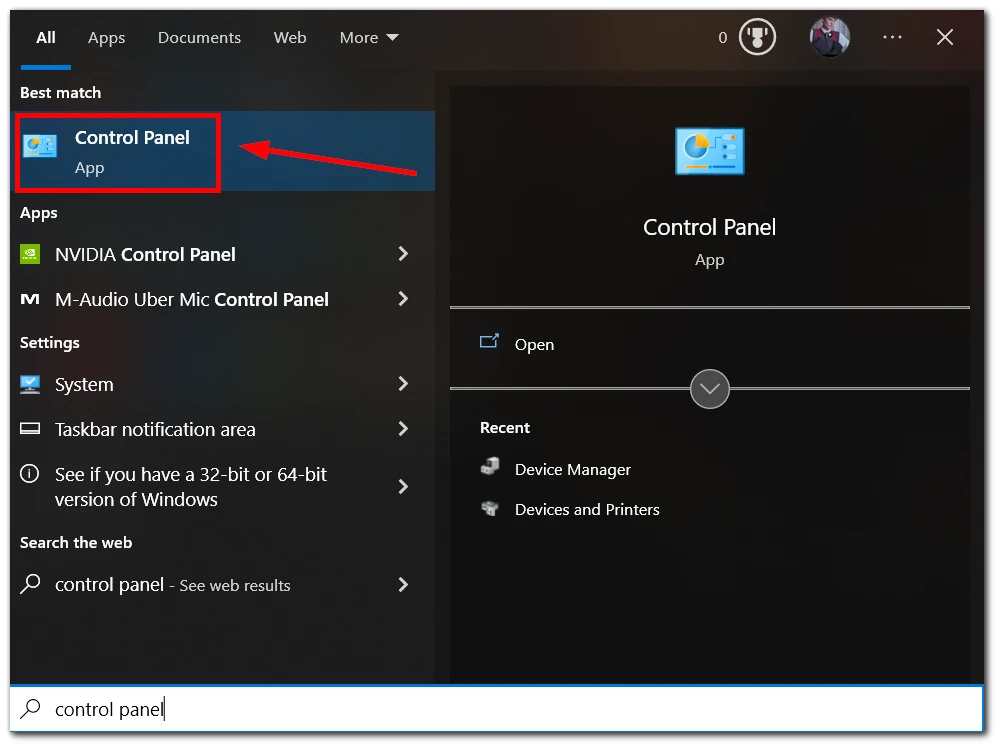
- Open the Start menu and type “Control Panel” in the search box.
- Select Control Panel from the search results to open it.
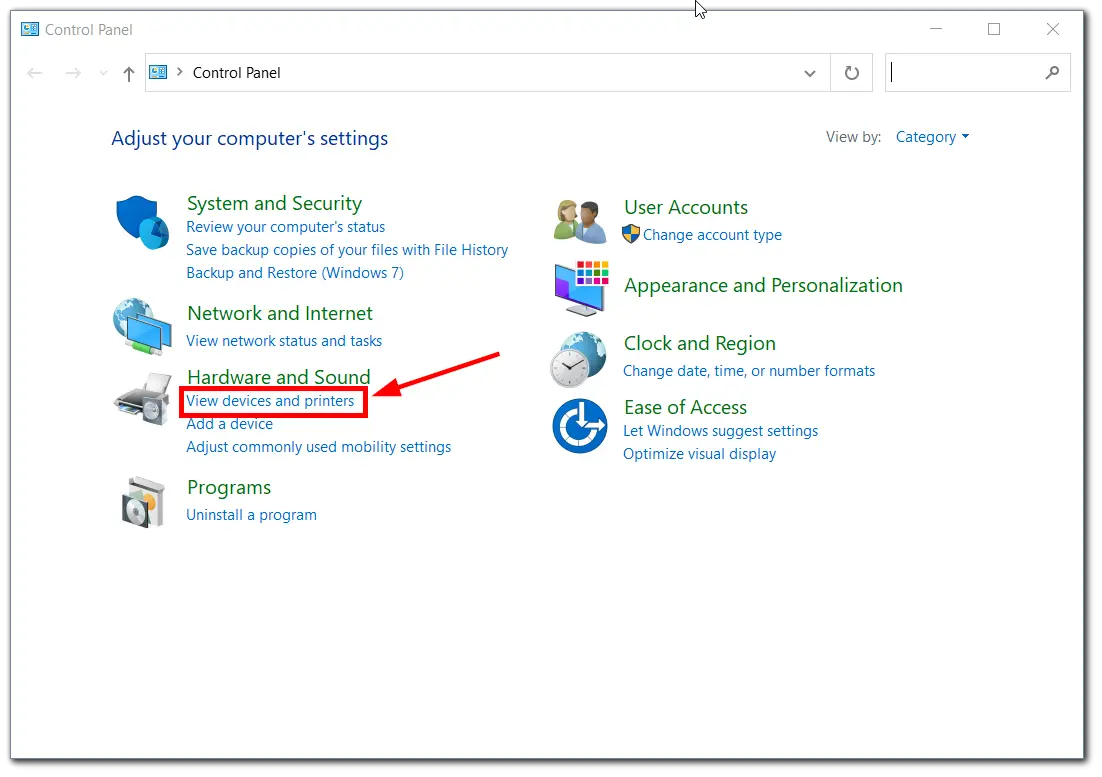
- Click View devices and printers under Hardware and Sound.
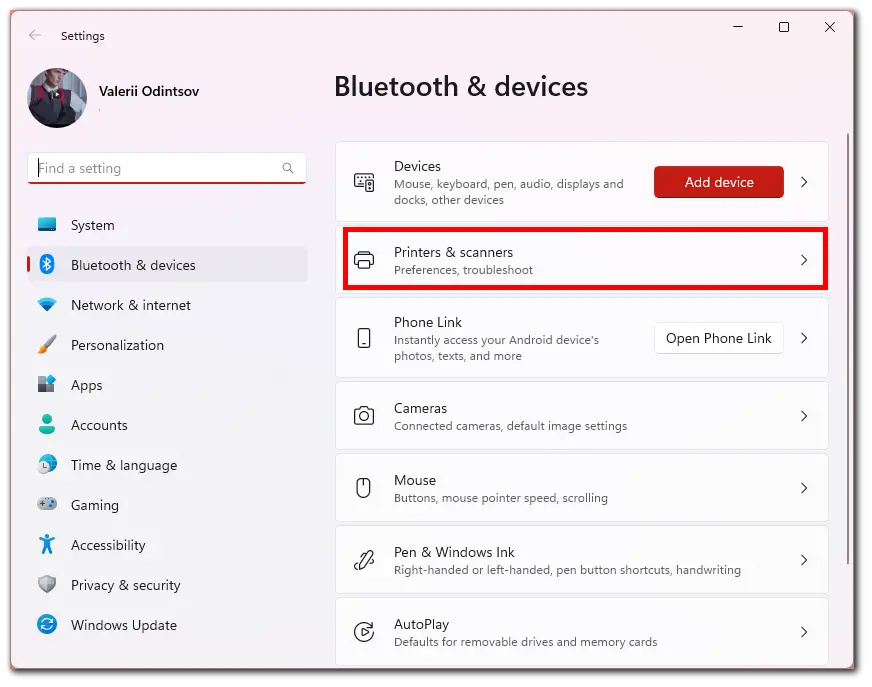
- In the Settings window, select Printers & scanners.
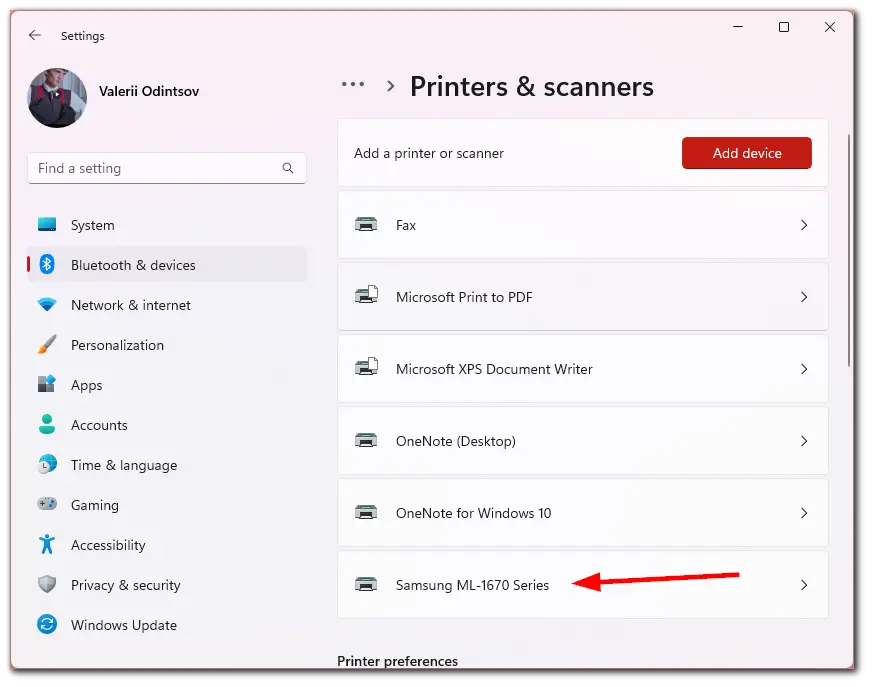
- Click on your printer.
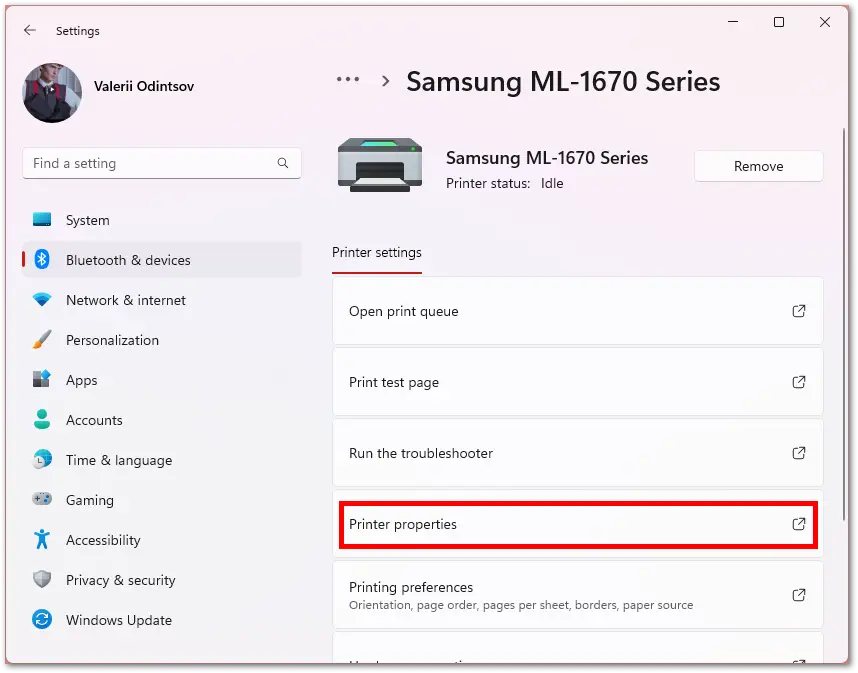
- Click Printer properties.
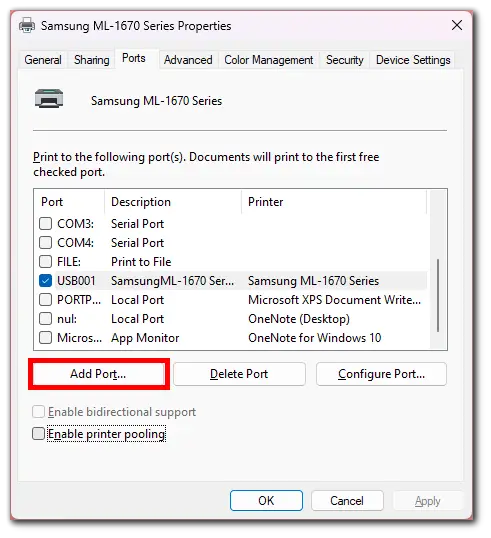
- Go to the Ports tab and then click Add Port.
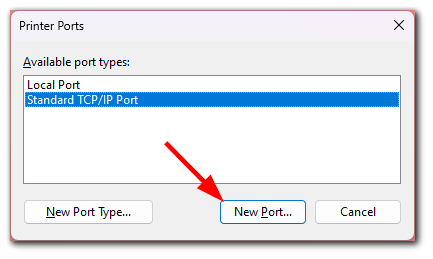
- Select the Standard TCP/IP Port option and click New Port.
- Next, the Add Port Wizard will open. Follow all the prompts and add a new port with a new IP. Click Finish.
- Finally, just check (enable) the new port in the Ports list, uncheck the old one, and click Apply.
How to change the printer IP address on Windows 10
Follow the instructions below to change the IP address of your printer on Windows 10:
- Open the Start menu and type “Control Panel” in the search box.
- Now, select Control Panel from the search results to open it.
- Click View devices and printers under Hardware and Sound.
- All printers and devices connected to your Windows 10 computer should be seen.
- Right-click on the printer whose IP address you want to change and select Properties.
- Go to the Ports tab and select the port for which the checkbox is enabled.
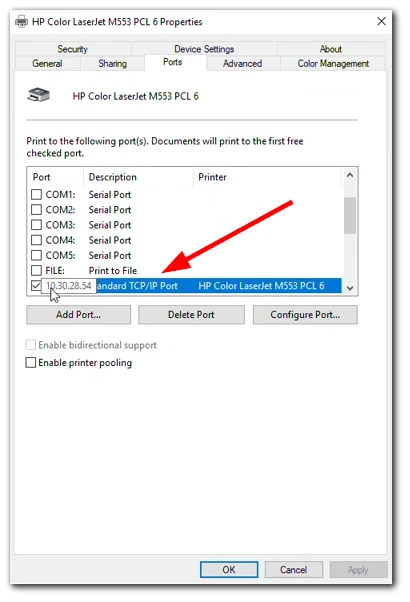
- Then click Add Port.
- Select Standard TCP/IP Port and click New Port.
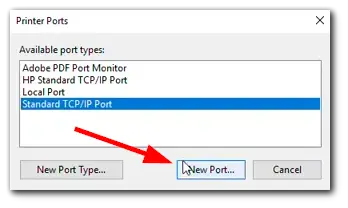
- Next, the Add Port Wizard will open. Follow all the prompts and add a new port with a new IP. Click Finish.
- Finally, just check (enable) the new port in the Ports list, uncheck the old one, and click Apply.
Once done, you can ensure it’s working correctly. Try to ping this IP using the command prompt. Just open it and enter this command:
ping [your printer's new IP]For example:
ping 192.168.0.77Press Enter and wait for the command prompt to give you such data as in the screenshot below.
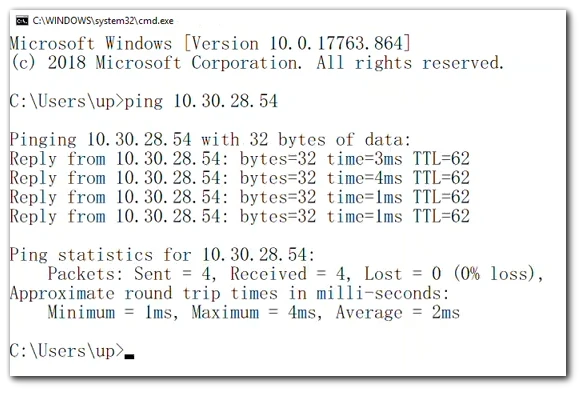
If there is a response, then you can try to print something.
How to change the printer IP address using a web browser
If you can’t change the IP of your printer through the Windows or Mac naysayers, you can try doing it through the printer’s configuration panel. Here’s how it works:
- Open your web browser and enter your printer IP address into the address bar. Of course, you have to ensure that your printer is connected to the same network as your computer.
- Next, type in your printer’s username and password, if necessary. If you haven’t set a password for your printer, you can enter admin in the Username field and leave the Password field blank. Alternatively, try a combination of admin/admin (username/password).
- Find the option to change the IP address. This option may be called Network Settings, TCP/IP Settings, or something similar.
- After that, change your network from Automatic/Dynamic to Static/Manual IP.
- Enter the new IP address.
- Finally, save the changes and exit the printer’s configuration page.
This IP address will automatically be assigned when the printer is connected to your computer.
Note: If you are using a DHCP server, you will need to update the DHCP server’s configuration to reflect the new IP address for the printer.


How to choose the new IP for a new port? The article is INCOMPLETE!
[…] Read More […]