

Another new feature in iOS 16 is the ability to transfer changes from one photo to another photos in the Photos app. So you can edit a group of photos in a short amount of time. This will be useful for batch processing of shots from the same location and similar shooting parameters.
It works in such a way that you only need to make the necessary adjustments on one photo. Then copy them and apply them to another photo or group of photos.
How to edit multiple photos at once
Using this feature won’t require much time, as the goal of the creation was to save time with basic photo enhancements on your smartphone. All the actions to edit group photos on iPhone need to be done only in the default Photos app. In order to edit multiple photos at once, you need to follow these steps:
- The first step to editing multiple photos at once is to open the Photos app.
- Then select the photo you want to edit.
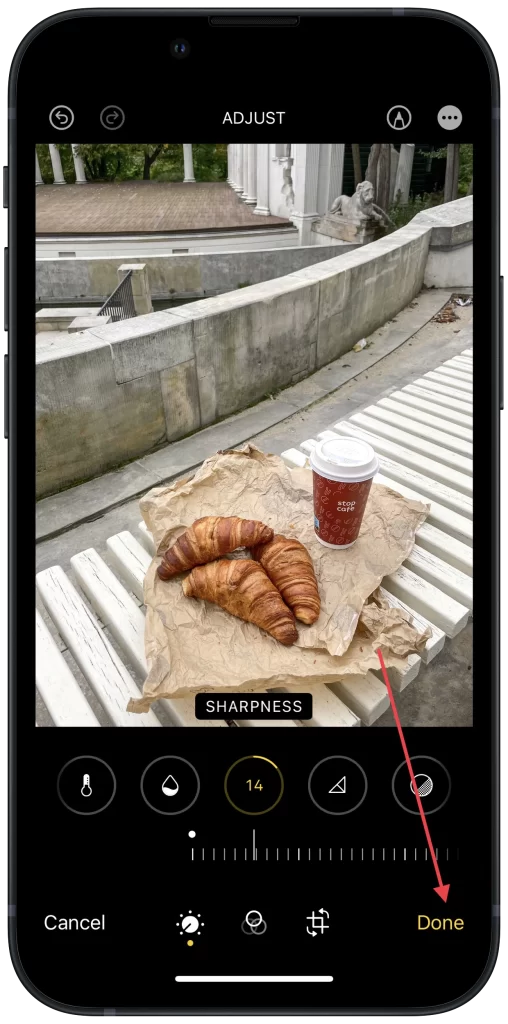
- Next, click on the Edit button at the top right corner.
- Then add some effects to your photo and select Done at the bottom right corner to confirm.
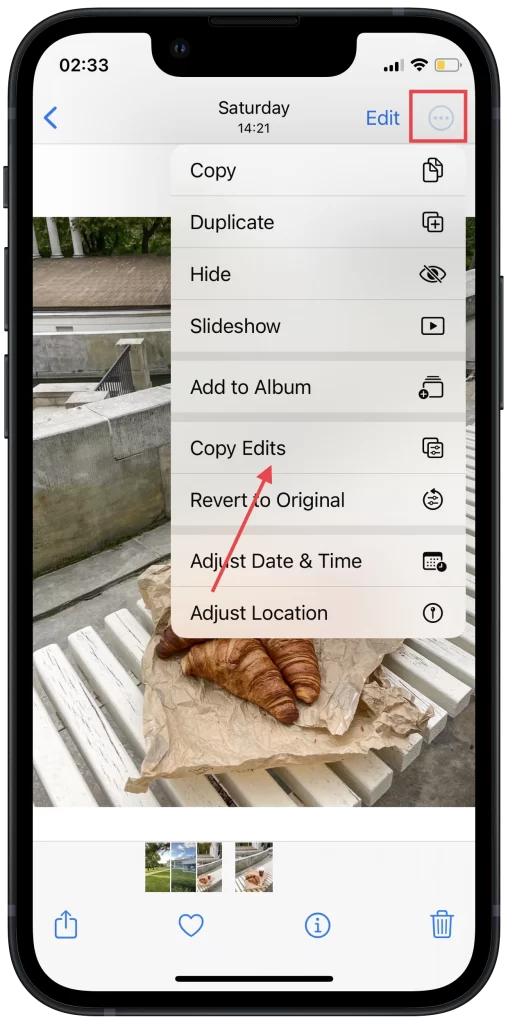
- After that, you have to click on the three dots button at the top right corner and select Copy Edits.
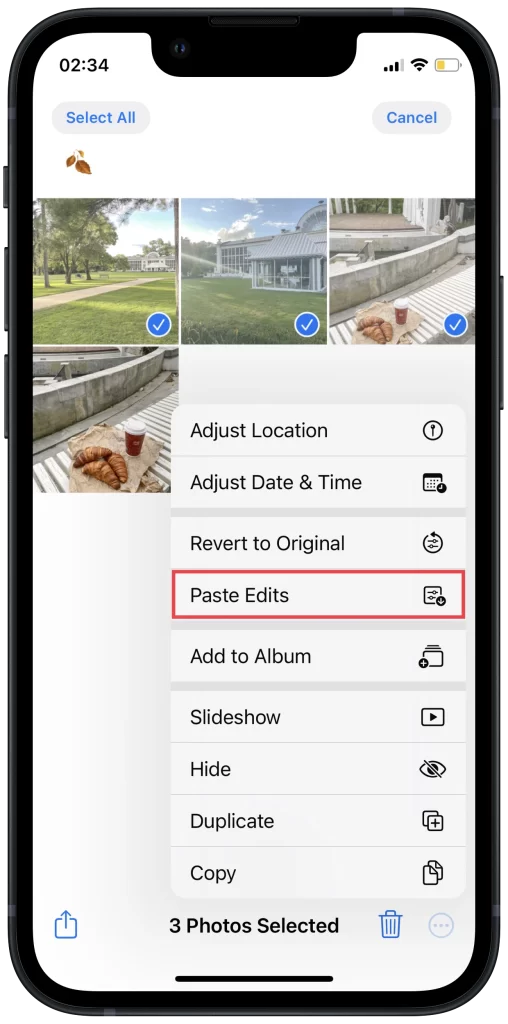
- Next, open your album and select all the photos you want to edit with the same filter.
- Then click on the three dots and select Paste Edits.
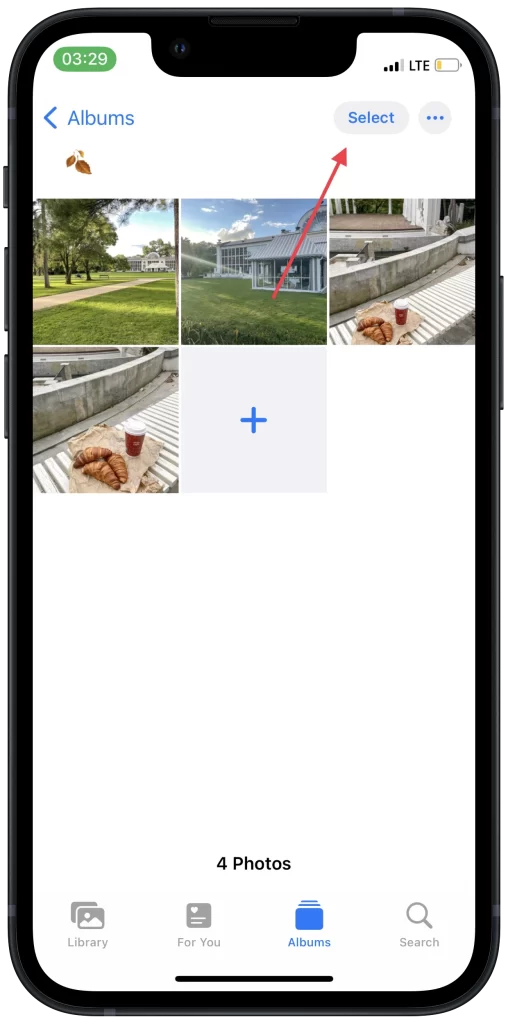
After these steps, all filters will automatically apply, but it will take about 2 seconds. You will see a small popup window with a progress bar at the bottom. When the process is complete, the pop-up window will disappear.
The standard photo editing function of the iPhone has everything necessary for any user to improve a picture. If you don’t need to replace some objects or cut something out of the picture, those functions are enough.
Many users are more likely to use sharpening and exposure during editing. So using the new feature in iOS 16 will speed things up.
Read also:
- How to use widgets on the lock screen on iPhone
- How to turn on the battery charge indicator on iPhone
- How to use video text recognition on iPhone
How to revert edits to the original on an iPhone
At the same time, there may be situations when a filter that has been applied to the rest of the photo doesn’t fit one photo in particular. Sometimes this can be important. At the same time, you can go to the settings of the desired photo and manually correct the necessary filters. If some filter doesn’t work for one photo or you have decided to edit a photo differently, you can always restore the original look.
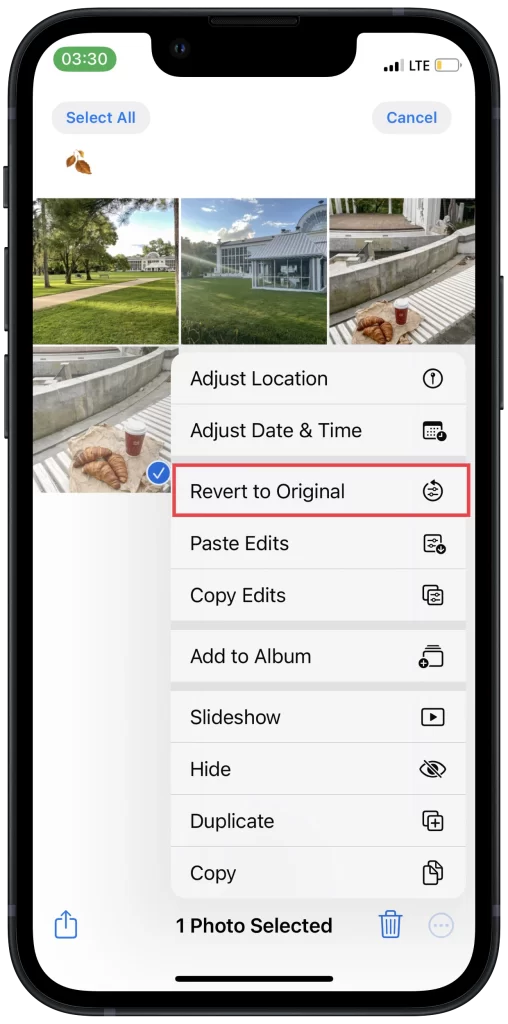
In order to revert edits to the original on an iPhone you need to follow these steps:
- The first step to revert edits to the original you need to select the necessary album in the Photos app.
- After that, click on the Select button.
- Then select the necessary photos that you want to revert back to the original.
- Next, click on the three dots in the bottom right corner.
- Select Revet to original.
Using a photo editing tool can completely replace many third-party apps if you prefer a natural style of photo editing. In that case, you can easily use just one default Photos app on your device.
However, if you need more, you can use Snepseed, Lightroom on your iPhone. For example, Lightroom has a similar feature of adding already existing filters to a photo. Only in that app, it’s called presets.


