

When you create a workflow app in Automator, you create a program that combines multiple actions into a single entity that you can launch from Launchpad or Dock on your Mac.
Once you’ve created an “Application” in Automator, you can select and add different actions from the action library to build your app workflow logic. For example, you can add actions to send emails, open and close an Automator workflow, and more.
Each action has settings that you can configure to define its behavior. For example, when you add a “schedule emails” action, you can write the email and the time to send it.
Below I will describe step by step how you can create a workflow app on Automator, schedule emails from Mac and create calendar events to open and close an Automator workflow.
How to create a workflow app on Automator?
The Mac has built-in support that allows you to schedule apps to start and close at a particular time. To set this up, you need to use Automator.
Creating a workflow app in Automator allows you to combine multiple actions into one program that you can run from Launchpad or Dock.
Once you have created a new “Application” document in Automator, you can select and add different actions from the action library to build the logic of your workflow app.
To create a workflow app on Automator, follow these steps:
- Open Automator using Launchpad or using Spotlight.
- Click on the ‘New Document’ button. This button is located at the bottom left.
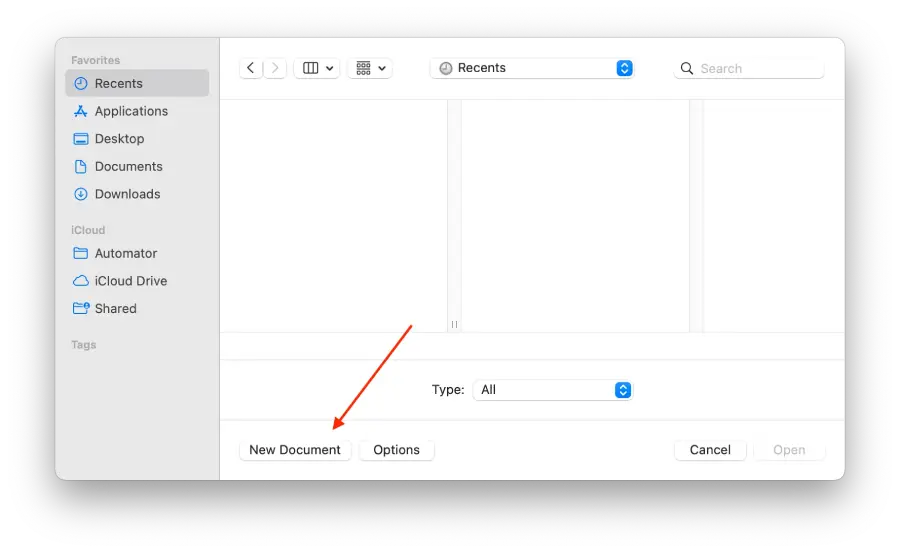
- Select the ‘App’ option and then click ‘Choose”.
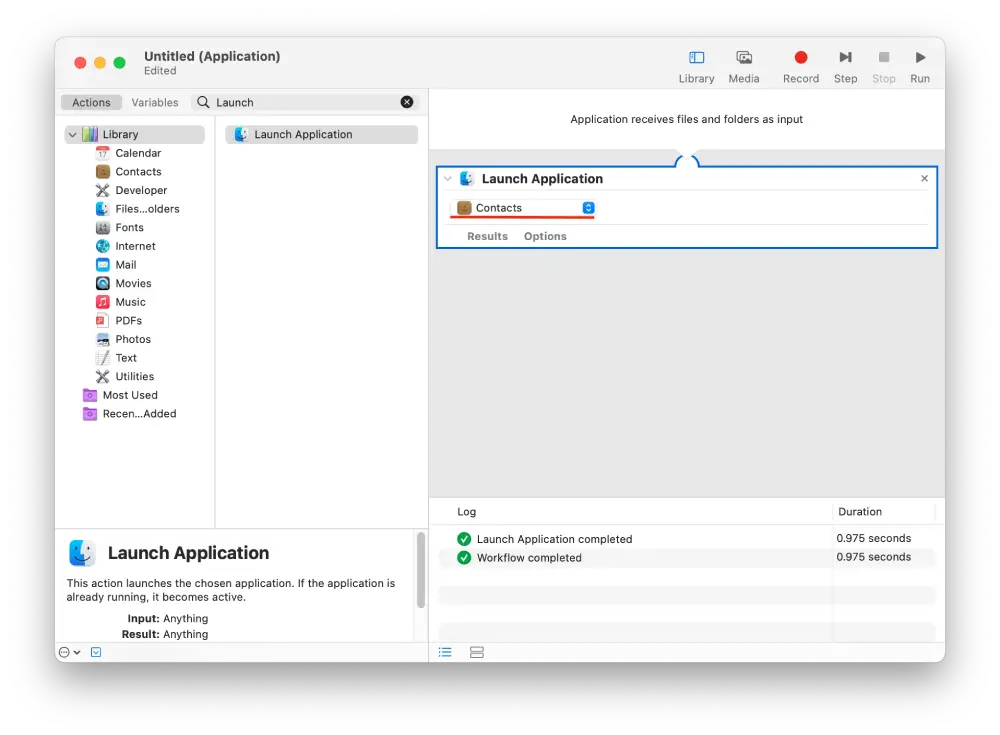
- Select ‘Launch App,‘ located in the search bar on the left side of the screen.
- After that, you need to select the app from the drop-down menu.
- Use the search bar and find ‘Pause’.
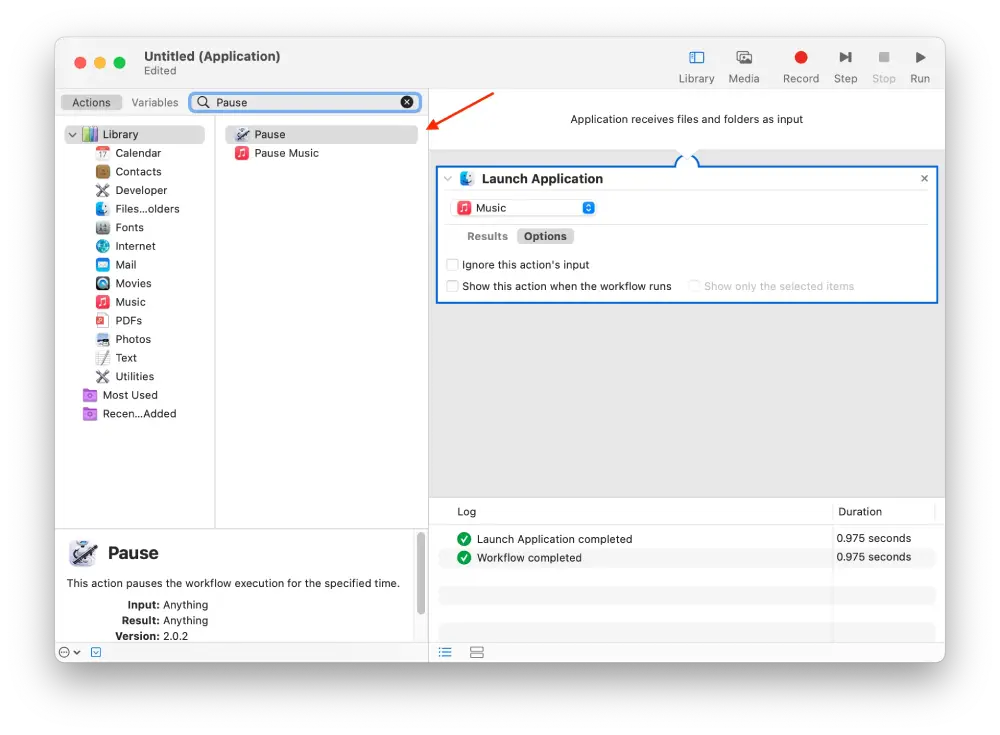
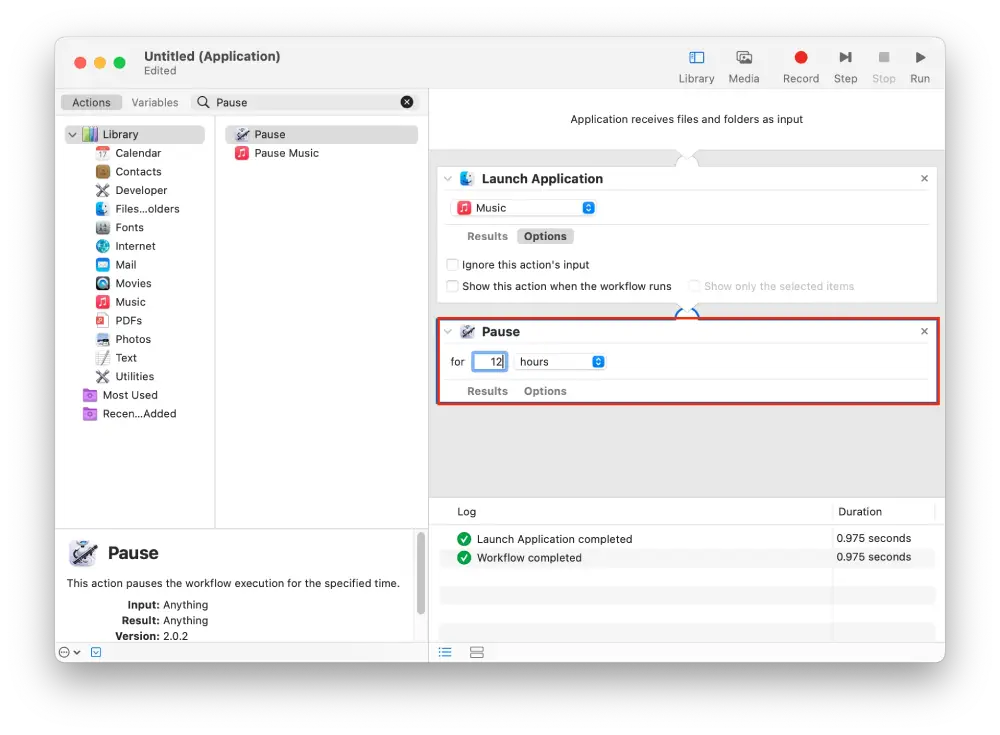
- Then you need to fill in the fields and specify the duration. Specify it in hours, minutes, and seconds.
- Specify in the line ‘Quit Application’ and double-click on it.
- Select from the drop-down menu the app you selected in the ‘Launch Application‘ step.
- Then go to the ‘Files’ tab and select the ‘Save’ option. Or press Command+S.
After these steps, Automator will start the app at a specific time. More precisely, Automator will execute what you choose.
To create a task for Automator to close, you must follow these steps but select Close App instead of Launch App. Only this task isn’t available for every app. However, there are others because each app has a different script. It’s best to flip through the list and pick the one that works best for you. Maybe you will find some new features.
How to schedule emails from Mac with Automator?
To schedule emails from Mac using Automator, you can create a custom workflow that utilizes the “Mail” actions in Automator and the Calendar app.
First, you create a workflow in Automator that consists of the actions required to send an email, such as creating and sending a new one. Then you set up an event in the Calendar app, specifying the date and time when you want the email to be sent. When the set time arrives, Calendar activates your Automator workflow.
Here’s a step-by-step guide on how to do it:
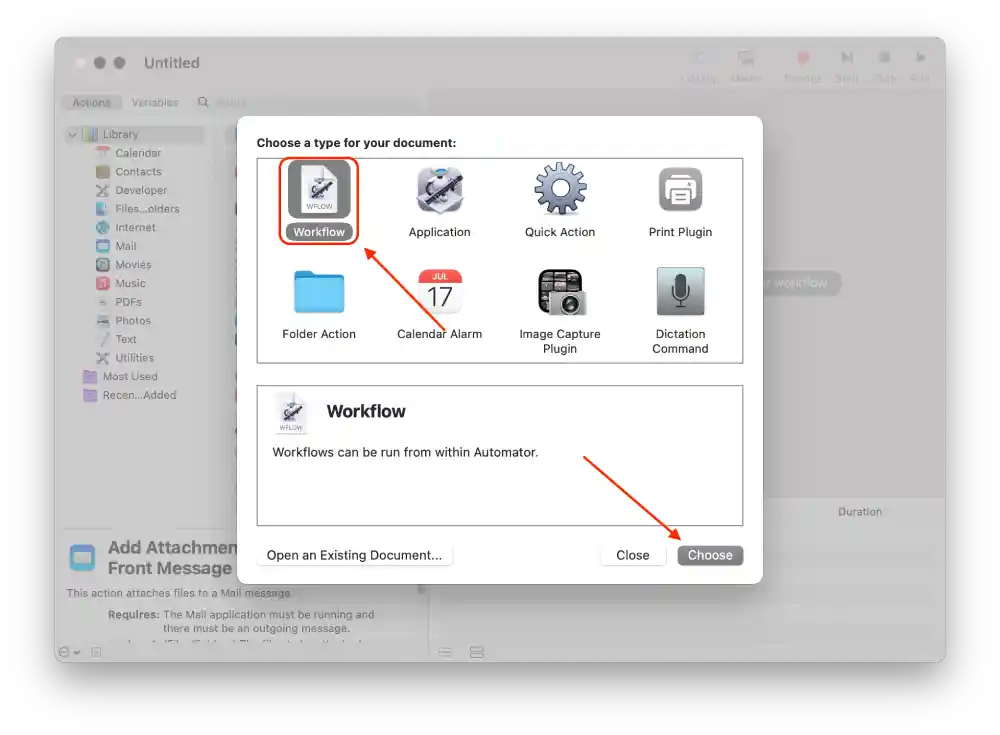
- Open the “Automator” app on your Mac.
- You will see a window in which you need to click on “Workflow” and “Choose“.
- Select “Mail” and also click on “New Mail Message“.
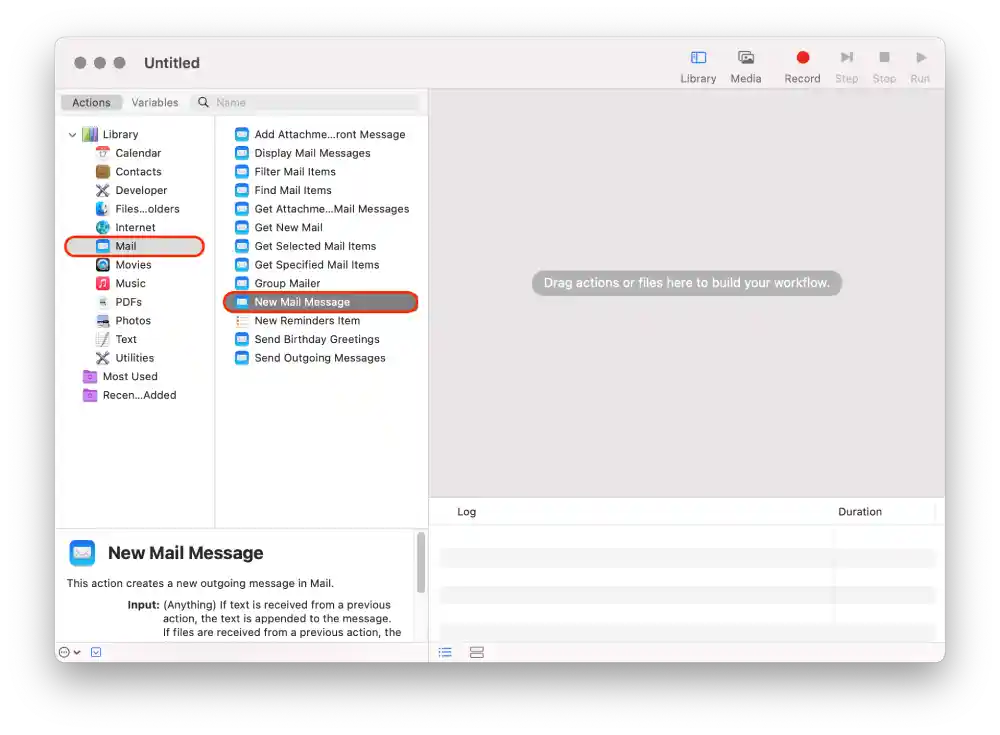
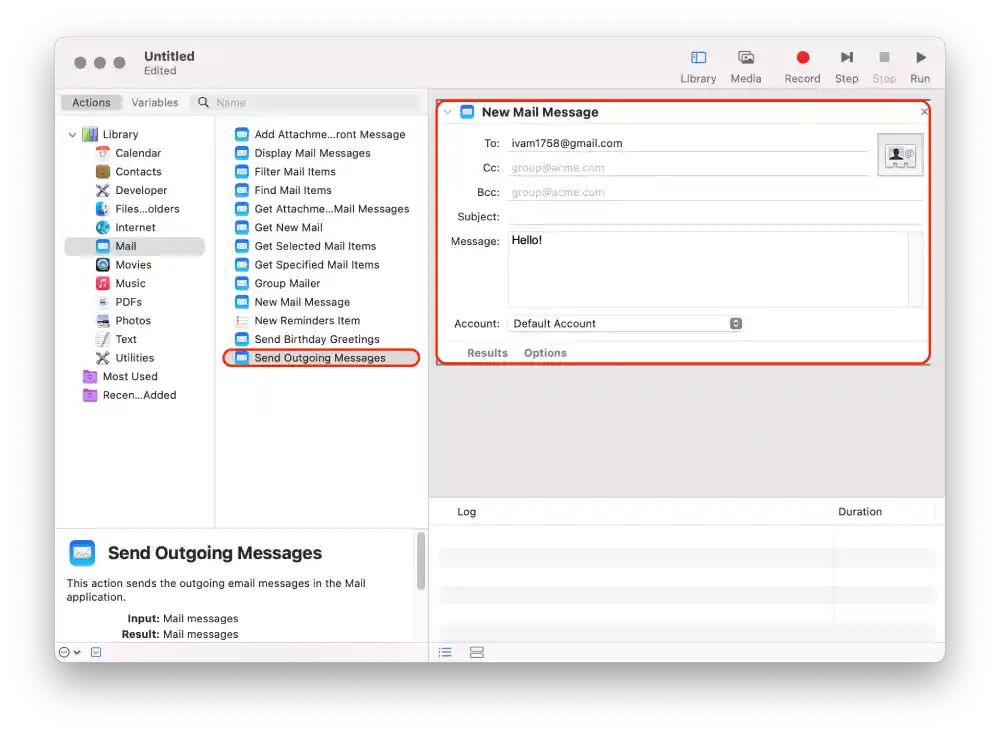
- Then enter the message and the recipient.
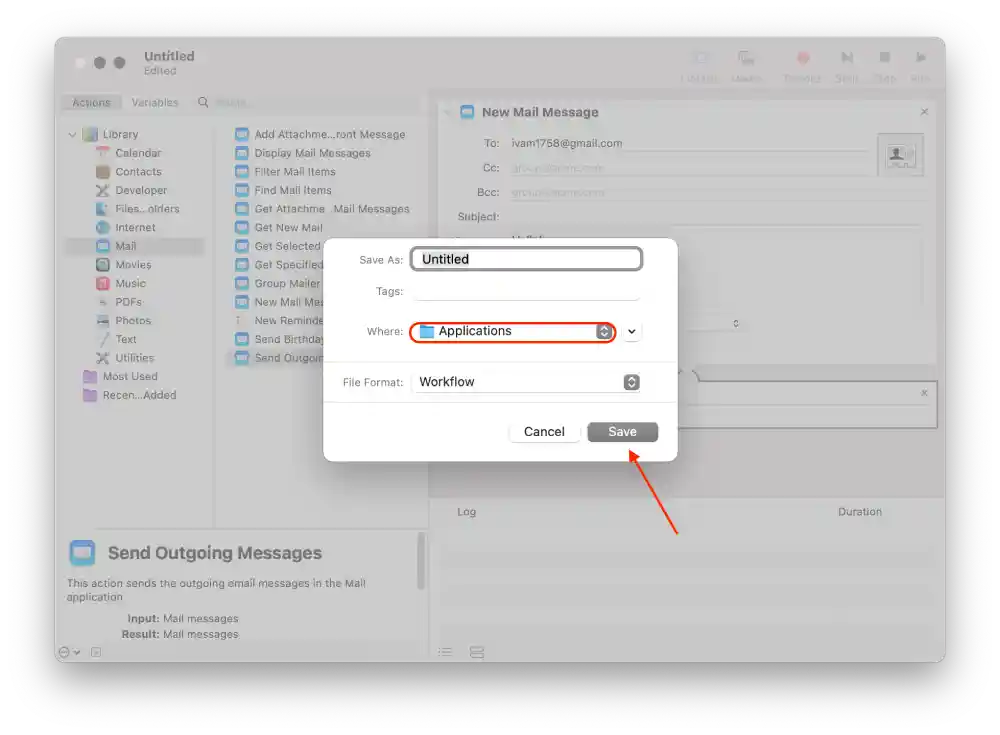
- Click on “Send Outgoing Messages” from the left pane to add it to the workflow.
- Click on File at the top and choose Save from the list.
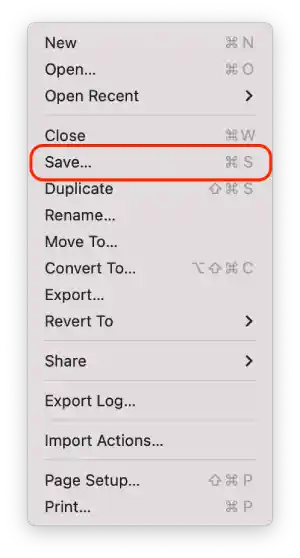
- Save it to the Applications folder and click on Save.
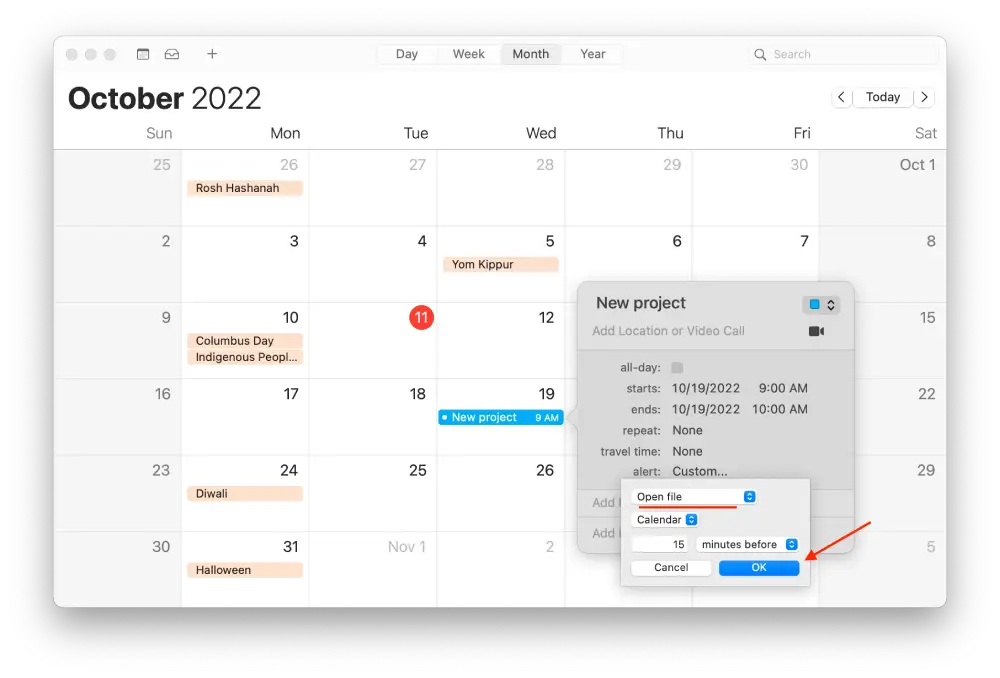
- Open Calendar and click on the date where you want to schedule the email.
- Then click on the “Add Alert” option.
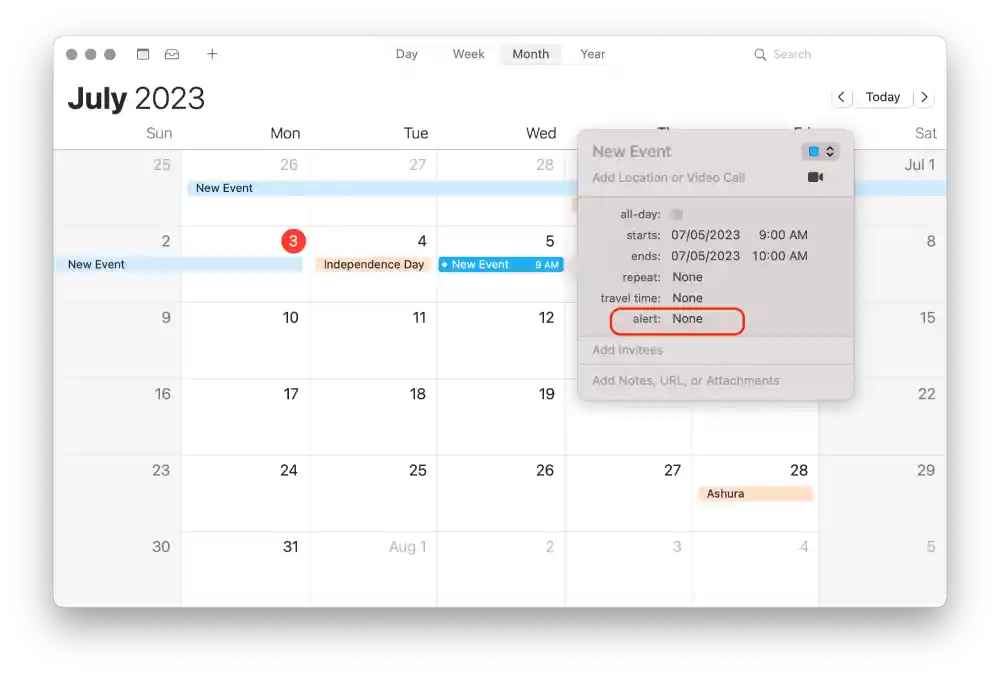
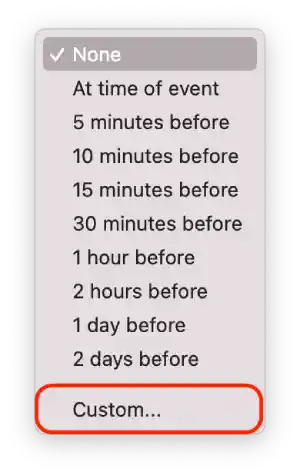
- In the alert section, select “Custom“.
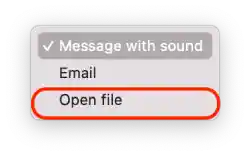
- Click on “Message with sound” to open the list. In the list, click on “Open file“.
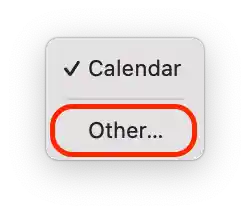
- Click on the “Calendar” and select “Other“.
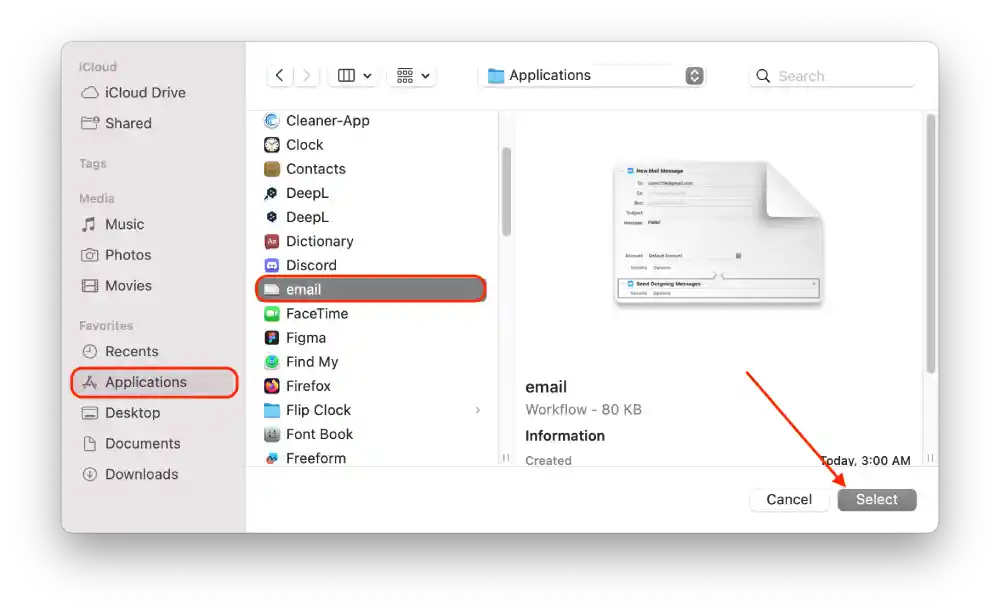
- First, select the “Applications” folder and then click on the saved “Email” file.
- Click on “OK“.
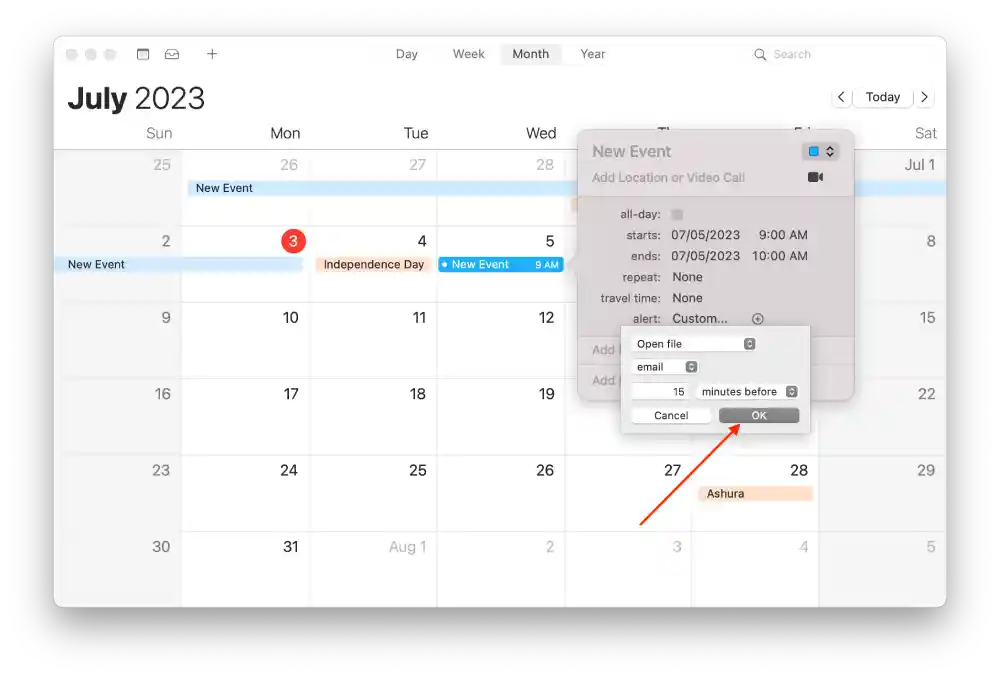
When the set time arrives, the Calendar app will start the Automator workflow, automatically creating and sending the email.
How to create calendar events to open and close an Automator workflow?
Creating events in the calendar to open and close a workflow Automator allows you to start and stop automated activities on a preset schedule.
You can also create calendar events on your Mac to start and close your Automator workflow. To do so, follow these steps:
- Open the Calendar app on your Mac.
- Then you need to double-click to create an event on the day. You need to specify a day you want to schedule the app to start and close.
- Then fill in the fields, give the event a name, and choose a start time.
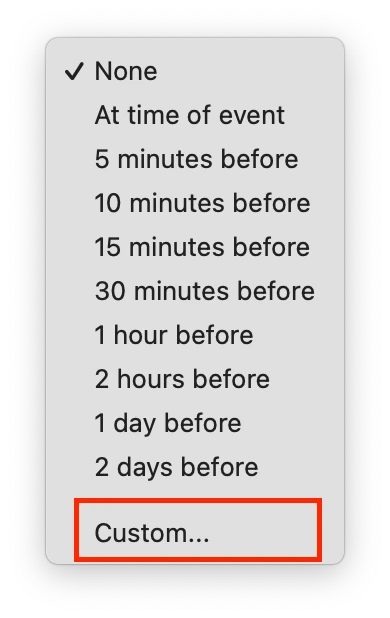
- Select how often the app was started in the “Notification” option.
- Next, select the “Custom…” option from the drop-down list of the “Notification” option.
- Select ‘Open File‘ from the drop-down list.
- Then select the ‘Other‘ option to view and select the Automator file you have created and confirm your actions.
Thus, creating events in the calendar allows you to set a schedule for starting and stopping Automator workflows. This is convenient when you must automatically perform certain tasks at a certain time or date.
That’s not all you can start doing with Automator, as it comes with many possible actions. You can work with files, search and process images, work with email, and much more. While setting up, following these steps, you can scroll through the list of actions to find something interesting for you because these settings are quite an individual process and will suit everyone differently.


