

If you have a photo, video, document, or other file on your iPhone, you can use AirDrop to send it to your Mac. The same thing works the other way around – you can send files from your Mac to your iPhone using AirDrop.
It’s convenient because you don’t need to use cables or send files via email or messengers.
First, you need to enable AirDrop on your devices. Then select the file, find the AirDrop option, select the device you want to send the file to, and confirm the transfer. Your file will be sent wirelessly and become available on the other device.
If you use the same Apple ID on your iPhone and Mac, you don’t need to confirm that you accept the file. Any file will automatically be saved.
How to turn on AirDrop on your iPhone?
To send and receive files using AirDrop, you must first enable this feature. To turn on AirDrop on your iPhone, follow these simple steps:
- Open the Settings app.
- Then select the General section.
- Tap on AirDrop.
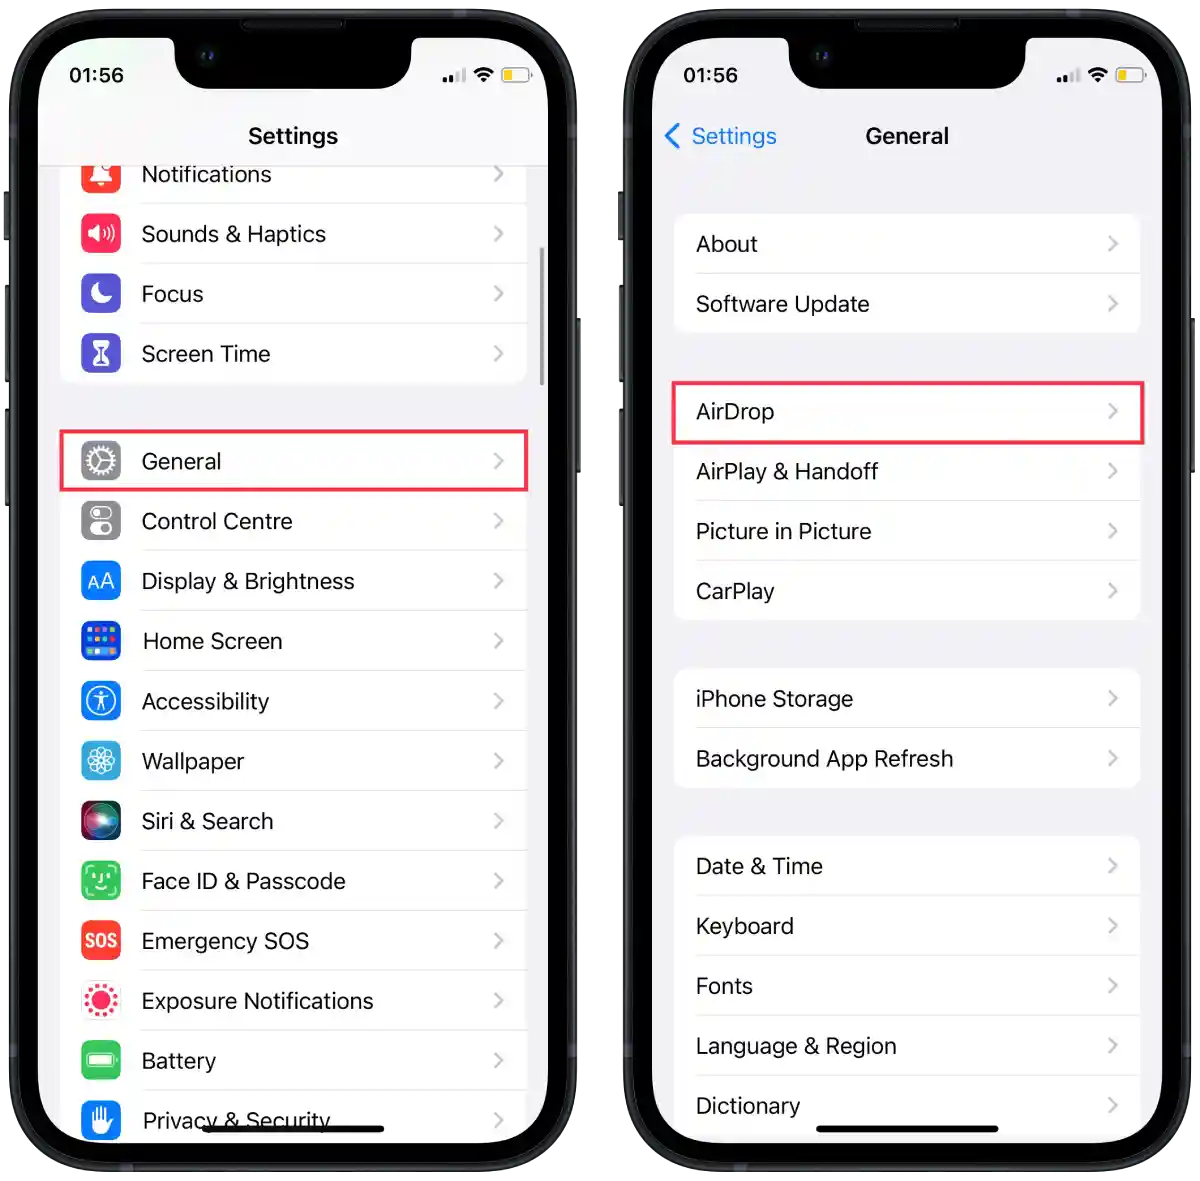
- Select Contacts onle or everyone for 10 minutes.

For AirDrop to work properly, Bluetooth and Wi-Fi must be turned on on your iPhone. In addition, your iPhone and the recipient’s device must be within Bluetooth and Wi-Fi range for AirDrop to work properly.
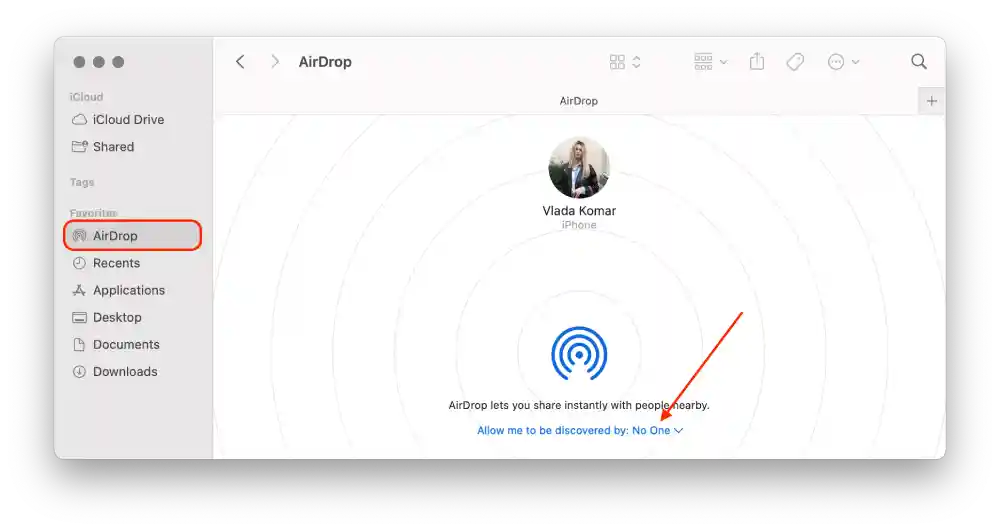
How to turn on AirDrop on your Mac?
To turn on AirDrop on your Mac, please follow these steps:
- Open Finder on your Mac.
- Click on the AirDrop section.
- Click the down arrow on the “Allow me to be discovered by” section.
- Select “Contacts only” or “Everyone“.
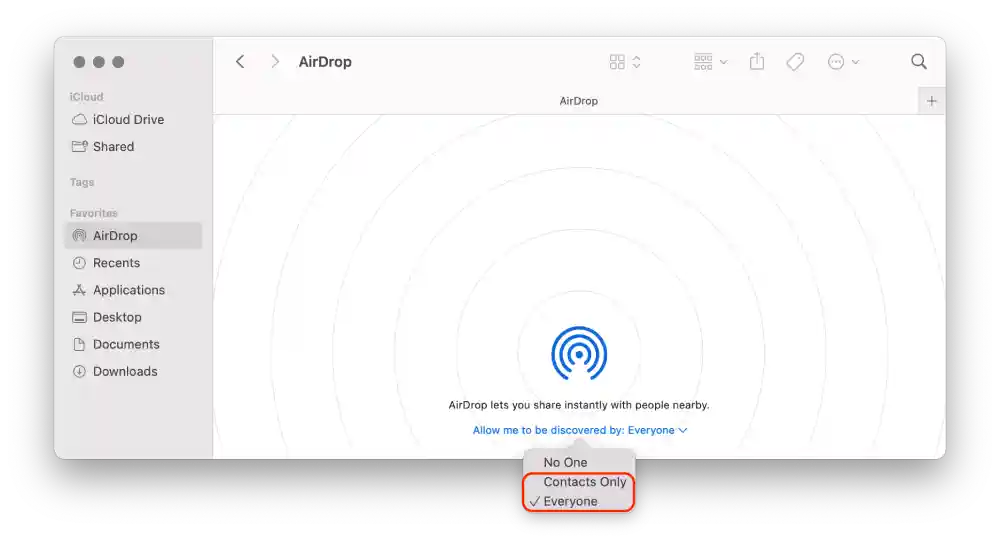
Once you’ve completed these steps, you can easily enable AirDrop on your Mac and begin sharing files wirelessly with other Apple devices.
How to AirDrop photos from iPhone to Mac?
To AirDrop photos from your iPhone to your Mac, follow these steps:
- Open the photo on your iPhone in the Photos app.
- Tap the “Share” icon in the lower left corner.
- Tap the AirDrop icon.
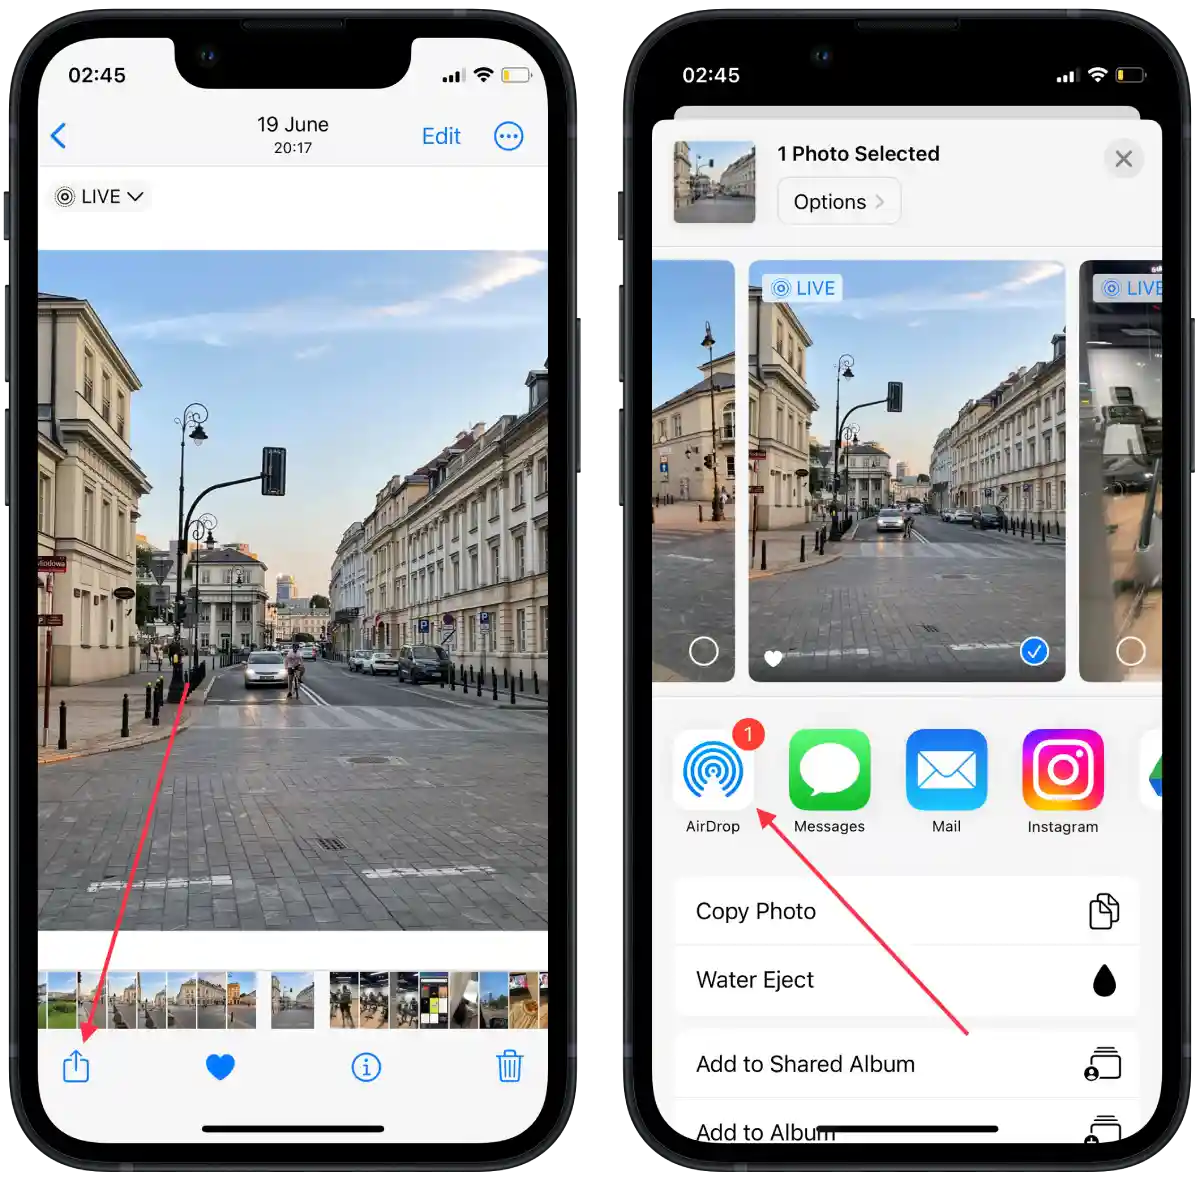
- Select your Mac from the list of AirDrop devices.
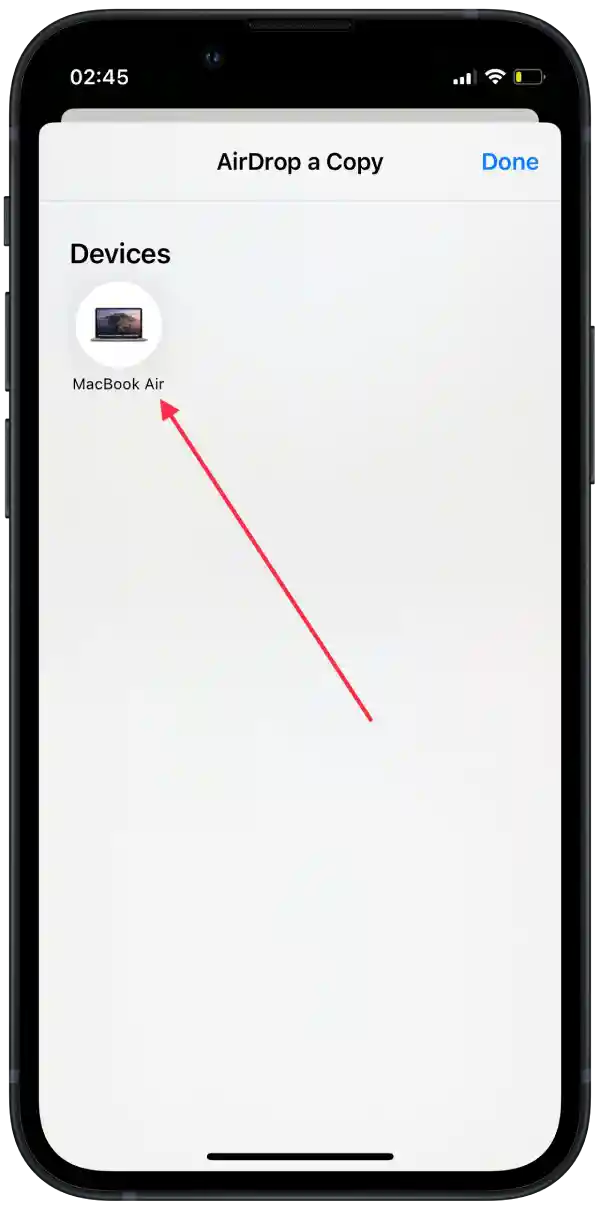
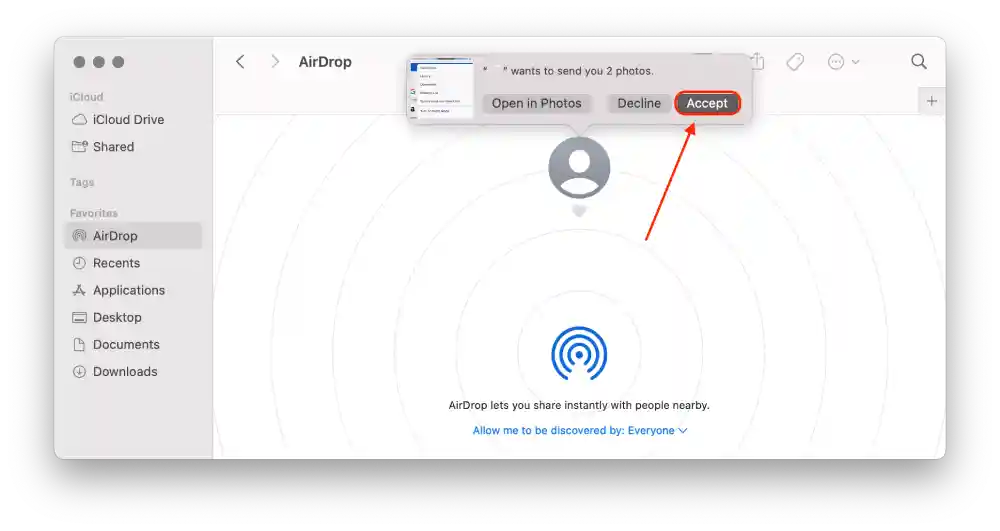
- Your Mac will prompt you to accept the photo. Click Accept.
Once the transfer is complete, the photo will be saved on your Mac. You can find it in the Downloads folder by default.
How to AirDrop files from iPhone to Mac?
To AirDrop files from your iPhone to your Mac, follow these simple steps:
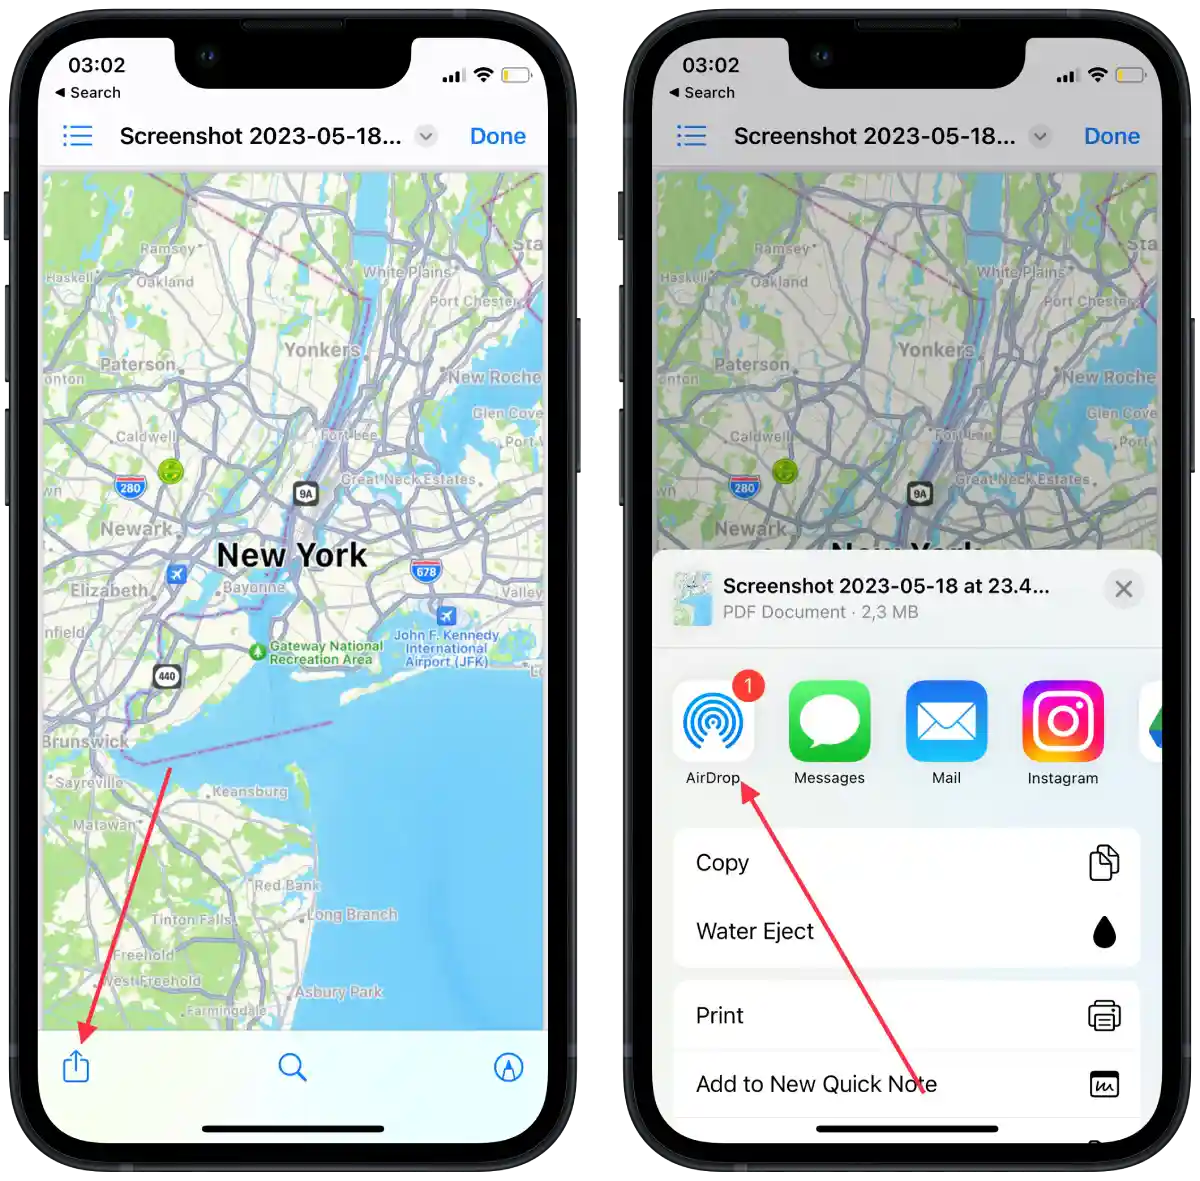
- Open the Files app on your iPhone.
- On your iPhone, locate the file you want to AirDrop.
- Tap the file to open it.
- Locate the Share icon.
- Tap the AirDrop icon.
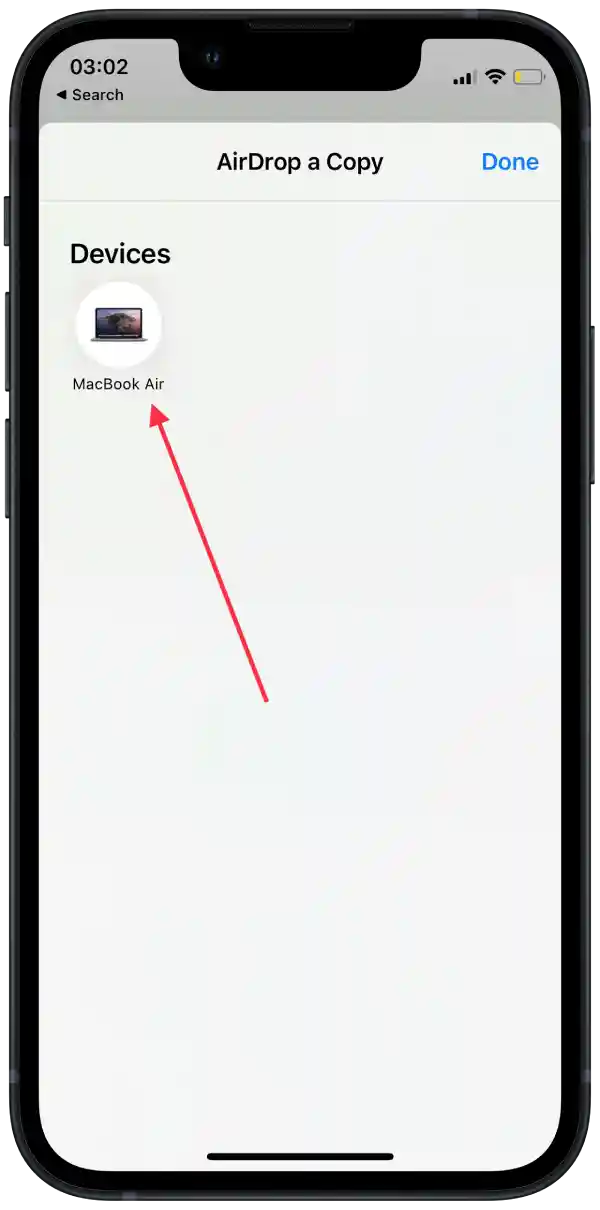
- Select your Mac from the list of AirDrop devices.

- Your Mac will prompt you to accept the file. Click Accept.

Once the transfer is complete, the file will be saved on your Mac. You can find it in the default “Downloads” folder and move it to another folder.
How to AirDrop notes from iPhone to Mac?
To AirDrop notes from your iPhone to your Mac, follow these steps:
- On your iPhone, open the Notes app.
- Find the note you want to AirDrop and tap it to open it.
- Locate the Share icon.
- Tap the AirDrop icon.

- Select your Mac from the list of AirDrop devices.
- Your Mac will prompt you to accept the file. Click Accept.
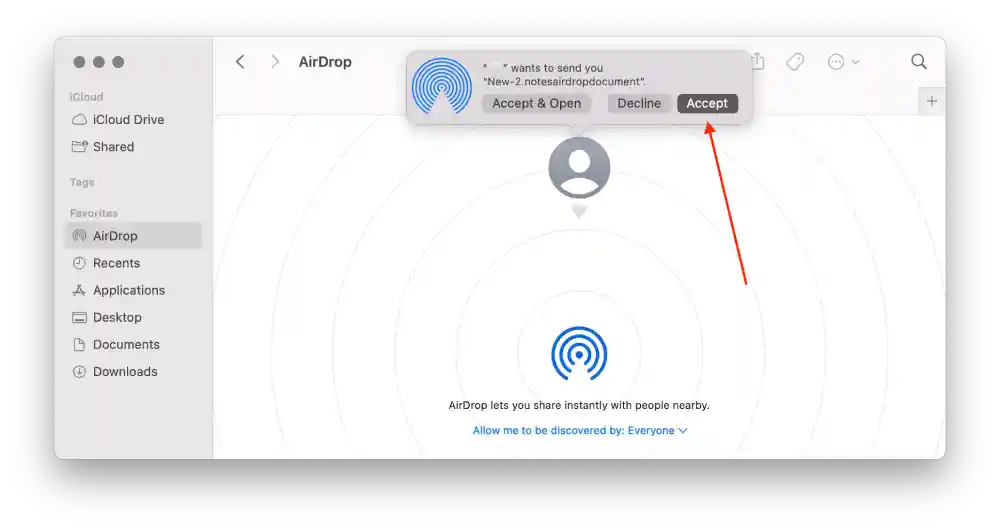
After the transfer is complete, the note is saved on your Mac. You can find it in the Notes app.
Why can’t you AirDrop from iPhone to Mac?
Sometimes, you may encounter issues when trying to AirDrop from your iPhone to your Mac. To fix AirDrop not working from your iPhone to your Mac, you can try the following steps:
- Make sure AirDrop is enabled on both devices
On your iPhone, open the settings and select General, then AirDrop. On the Mac, you need to open the Finder and select the AirDrop section. Follow the detailed steps in the top two sections of this article.
- Ensure that your Mac is unlocked
Your Mac needs to be unlocked and active for AirDrop to work. Make sure you’re on the Mac’s home screen and not on the login screen or screensaver.
- Accept the incoming file on your Mac
After initiating the AirDrop transfer from your iPhone, your Mac will display a notification with the option to “Accept” the incoming file. Click on “Accept” to begin the transfer. If you don’t see the notification, check the AirDrop window on your Mac to see if your iPhone is listed as a nearby device.
- Enable Bluetooth and Wi-Fi
AirDrop uses Wi-Fi and Bluetooth to transfer files. Once you have enabled AirDrop on your devices, Wi-Fi and Bluetooth are turned on automatically, but you should check it.
If Wi-Fi and Bluetooth are turned on, then turn them off and on again. This is an easy way to resolve any potential issues quickly.
- Restart your devices
Try restarting both your iPhone and Mac to refresh their connections and settings. After the restart, attempt the AirDrop transfer again.
- Update your software
Ensure that your iPhone and Mac have the latest software updates installed. Outdated software versions can sometimes cause compatibility issues with AirDrop. Check for updates in the Settings app on your iPhone and in the System Settings on your Mac.
