

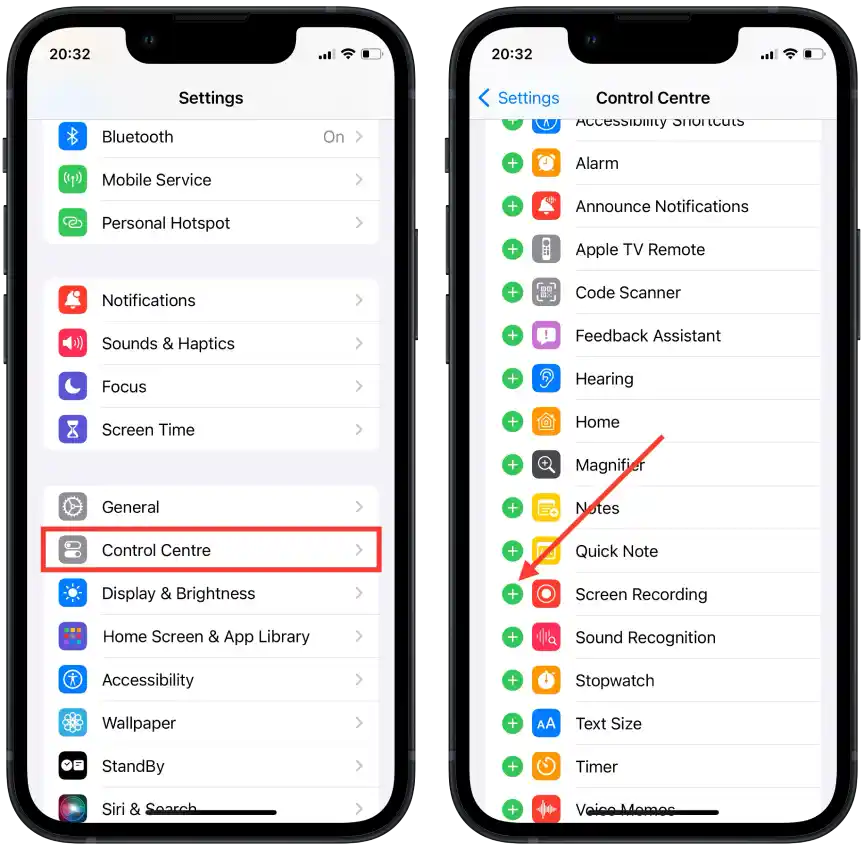
In order to start recording the screen on your iPhone, you need to first add the Record button to Control Center. To do this, you need to open the Settings app and then go to Control Center. Then tap on the “+” icon next to Screen Recording.
Then open Control Center, tap and hold the Screen Recording button. Turn on the microphone and tap Start Recording. The screen recording will start after 3 seconds.
If you tap the Screen Recording button in Control Center without holding it, the recording will start without sound. By default, no sound is enabled. Unless you have previously activated it.
By default, the recording is saved to Photos. There you can edit the video, crop it and apply filters.
How to turn on your iPhone’s screen recording feature?
First, in order to do screen recording you need to add this option to Control Center. Once you add this option to the Control Center, you can swipe down and make a couple of taps to start recording.
To add Screen Recording to Control Center, you need to follow these steps:
- Open the Settings app on your iPhone.
- Scroll down and select “Control Center.”
- Under “Control Center”, find “Screen Recording” and tap the plus sign “+” next to it to add this option to Control Center.
You can then proceed to record your screen with or without sound.
How to screen record with audio on an iPhone?
When you record a screen with sound on your iPhone, the recording includes two sources of audio – the system sound and the microphone sound.
System sound is the audio that plays on your device, such as sounds from apps, media, notifications, and other sounds.
Microphone sound – If you allow audio to be recorded from your microphone when you start recording your screen, your microphone will also record sounds from the environment. This can include your voice, conversations, noises, and other sounds that are happening around you.
So in order to screen record with audio on an iPhone, you need to follow these steps:
- On an iPhone with Touch ID, swipe up from the bottom of the screen.
- On an iPhone with Face ID, swipe down from the top right corner of the screen.
- Tap and hold the “Screen Recording” button.

- At the bottom of the screen, tap on Microphone off.
- Tap on Start Recording and make sure the microphone button is on and red.
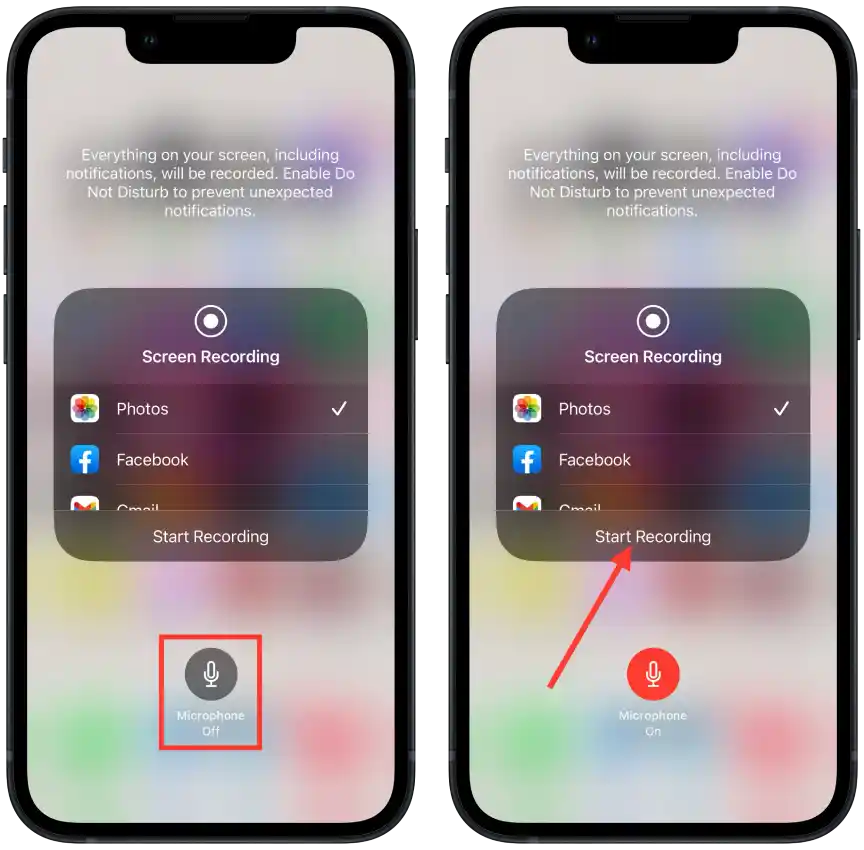
- After 3 seconds, the screen recording will start.
When you enable screen recording and allow audio recording from the microphone, the result will be a combination of the system sound and the sound recorded from the microphone.
How to screen record without audio on an iPhone?
In order to record the screen without sound on iPhone, you need to follow these steps:
- On an iPhone with Touch ID, swipe up from the bottom of the screen.
- On an iPhone with Face ID, swipe down from the top right corner of the screen.
- Tap and hold the “Screen Recording” button.

- At the bottom of the screen, tap on Microphone (so it’s grayed out).
- Tap on Start Recording and make sure the microphone button is off and grayed out.

- After 3 seconds, the screen recording will start.
After these steps, the recording of the screen without sound will begin.
If you have never turned on the sound for screen recording, all you need to do is tap the Screen Recording icon in the Control Center. The microphone is off by default, but it’s best to make sure so you don’t have to record again later.
How to stop screen record on an iPhone?
When you need to stop recording the screen, follow these steps:
- Tap the red icon in the left corner.
- Then select “Stop“.
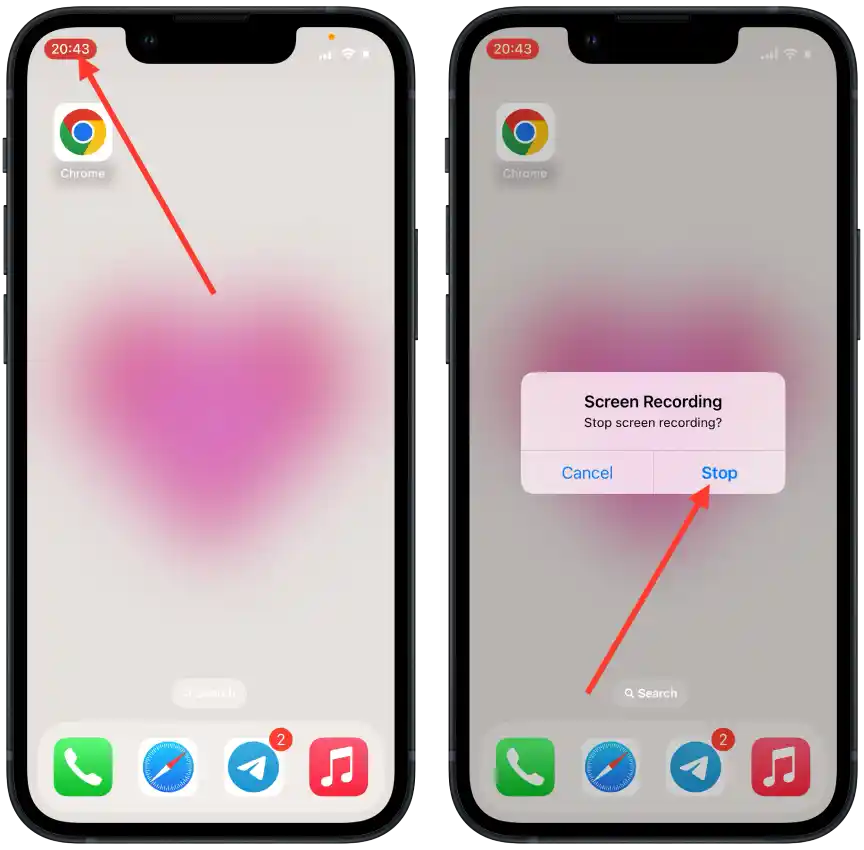
If you haven’t changed any settings, your video will be saved in Photos.
How to open and edit your screen recording on your iPhone?
To open and edit your screen recording on your iPhone, follow these steps:
- Open the Photos app on your iPhone.
- Select your screen recording video in the Recent folder.
- Tap the “Edit” button located in the upper-right corner of the screen.
- Drag the handles at the beginning and end of the video timeline to trim the video to your desired length.
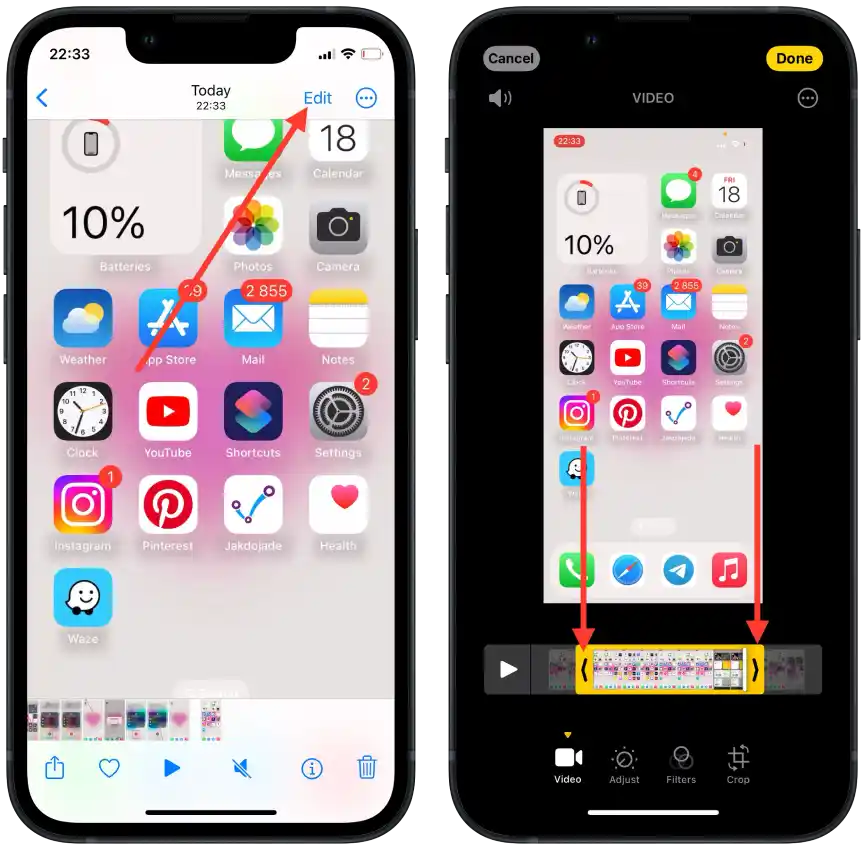
- Use other tools as needed: Adjust, Filters, and Crop.
- Then tap on “Done“.
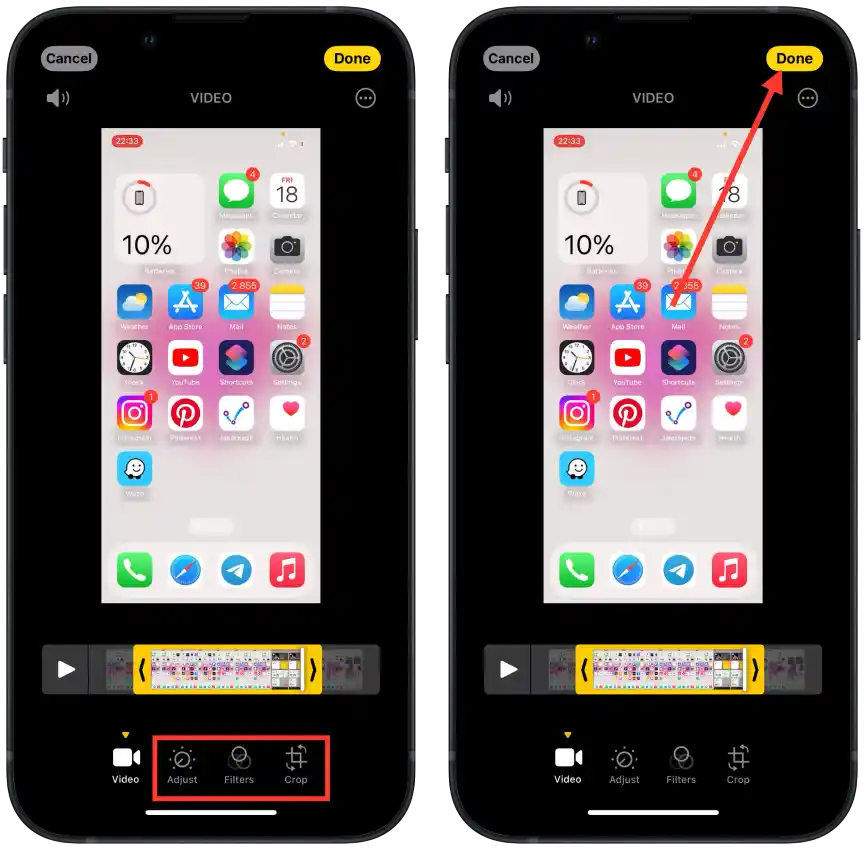
You’ll have the option to “Save as New Clip” or “Save Video.” Choose the appropriate option based on whether you want to keep the original or create a new edited copy.
How long can you screen record on iPhone?
The duration of screen recording on an iPhone has no set limits, and it is related to the available memory on your device.
The exact size of the screen recording file is difficult to estimate, as it is affected by many factors. The presence of sound, screen resolution, and what is happening on the screen.
On my iPhone it came out like this: a minute of non-moving screen recording without sound is 25MB. At the time, a minute of moving screen recording with sound is 120 MB.
If you average 70 MB per minute, that’s 4 GB in an hour.
Therefore, it is best to open the Storage section in the settings to see the amount of free space before recording a screen.
You can also record a minute to see the number of MB on your iPhone, and then understand how long you can record the screen.
I’ve read that some people have had situations where screen recording has stopped and yet it shows at the top that it’s still going on. Then it turned out that the free space on the iPhone had run out. To prevent this from happening, check it before recording the screen.


